跨交换机实现同一VLAN的主机通信
1、实验目的
掌握跨交换机同一VLAN中的计算机通信技术。
2、实训任务
- 根据拓扑图连接交换机和计算机,组建局域网。
- 配置交换机,创建VLAN。
- 配置交换机的端口为TRUNK模式。
- 测试跨交换机同一VLAN 中计算机的通信。
3、端口简介
1.Access端口
Access模式的端口只能属于一个vlan,是交换机端口的默认模式。在access端口的链路上传输标准的以太网帧,即IEEE802.3数据帧,不附加任何标记。

2.trunk端口
trunk模式的端口同时属于多个vlan,在两台交换机的trunk端口之间的链路上传输的是封装802.1q的数据帧,在发送端打上标记,接收端再拆去标记。

4、实验过程
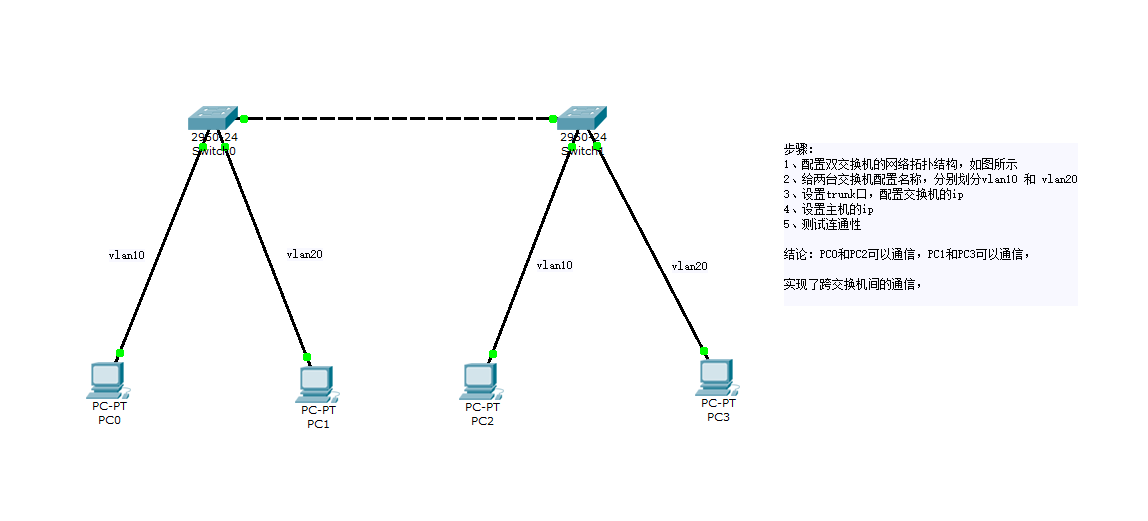
1、配置双交换机的网络拓扑结构,如图所示
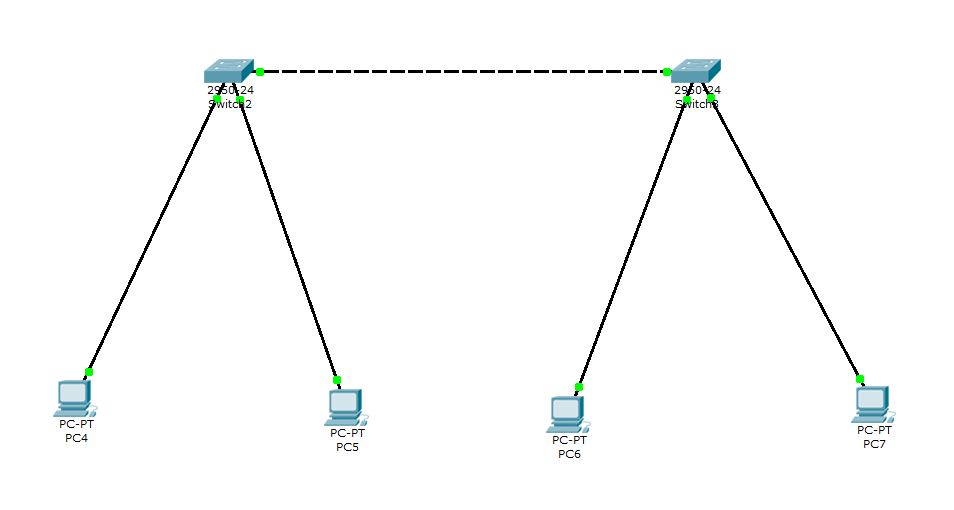
2、给两台交换机配置名称,分别划分vlan10 和 vlan20
这里只给出第一台交换机的配置步骤,第二台相同:
- 进入全局配置模式下,配置主机名称
Switch>enable
Switch#conf
Switch(config)#hostname nty000
- 划分vlan10和vlan20
nty000(config)#vlan 10
nty000(config-vlan)#exit
nty00(config)#vlan 20
nty000(config-vlan)#exit
nty000(config)#exit
# 查看vlan
nty000#show vlan
- 给vlan10分配端口1-10,vlan20分配端口11-20
# 进入配置模式
nty000#conf
# 进入接口配置模式
nty000(config)#interface range fastEtherent 0/1-10
# 分配vlan 10
nty000(config-if-range)#switchport access vlan 10
# 退出
nty000(config-if-range)#exit
nty000(config)#

# 进入接口配置模式
nty000(config)#interface range fastEtherent 0/11-20
# 分配vlan 10
nty000(config-if-range)#switchport access vlan 20
# 退出
nty000(config-if-range)#exit
- 配置trunk干道
# 进入24接口
nty000(config)# interface f0/24
# 改变接口模式,配置为trunk模式
nty000(config-if)#switchport trunk allowed vlan all
# 退出
nty000(config-if)#exit
nty000(config)#exit
nty000#
- 查看vlan
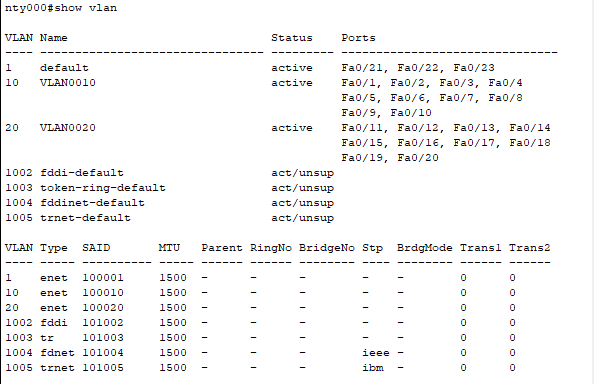
- 给每台主机配置主机ip和子网掩码
192.168.1.100 255.255.255.0
192.168.1.101 255.255.255.0
192.168.1.102 255.255.255.0
192.168.1.103 255.255.255.0
- 在命令行中ping同一vlan下的主机,验证连通性
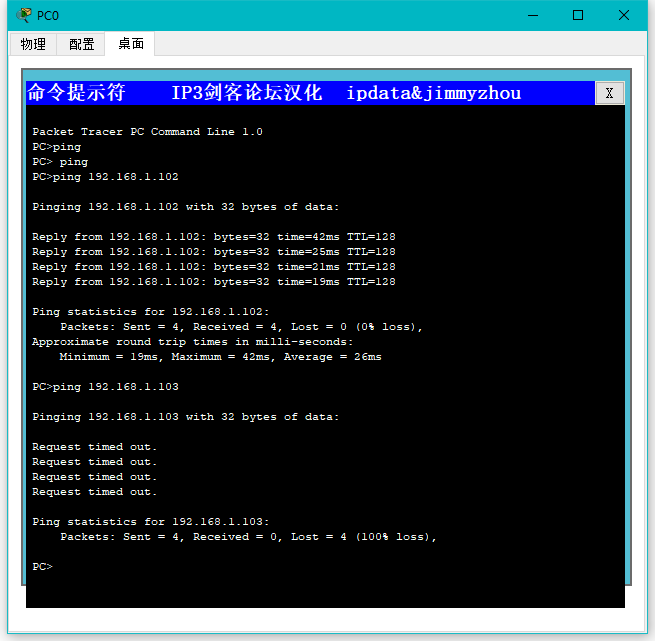
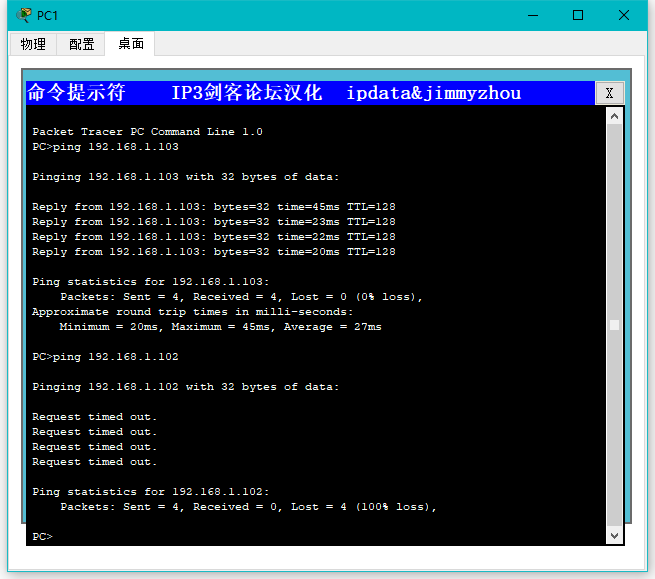
5、实验截图
最后分享一首自己很喜欢的诗(姑且算是吧)。我欲乘风向北行,雪落轩辕大如席,我欲借船向东游,绰约仙子迎风立,我欲踏云千万里,庙堂龙吟耐我何,昆仑之巅沐日光,沧海绝境见青山,长风万里燕归来,不见天涯人不回。
本文来自博客园,作者:NotYourferry,转载请注明原文链接:https://www.cnblogs.com/pinghuimolu/p/15369063.html

