
springboot 集成consul,实现服务注册案例
网上关于这方便的集成很多,实际自己搭建时候,可能会有一些问题,在这总结一下,容易出错的地方,我会加特殊标记
本集成使用springboot版本:2.3.3.RELEASE,spring cloud 版本:Hoxton.SR8,自己搭建环境时,注意去官网比对,springboot与 spring cloud版本是否匹配
整体目录结构:
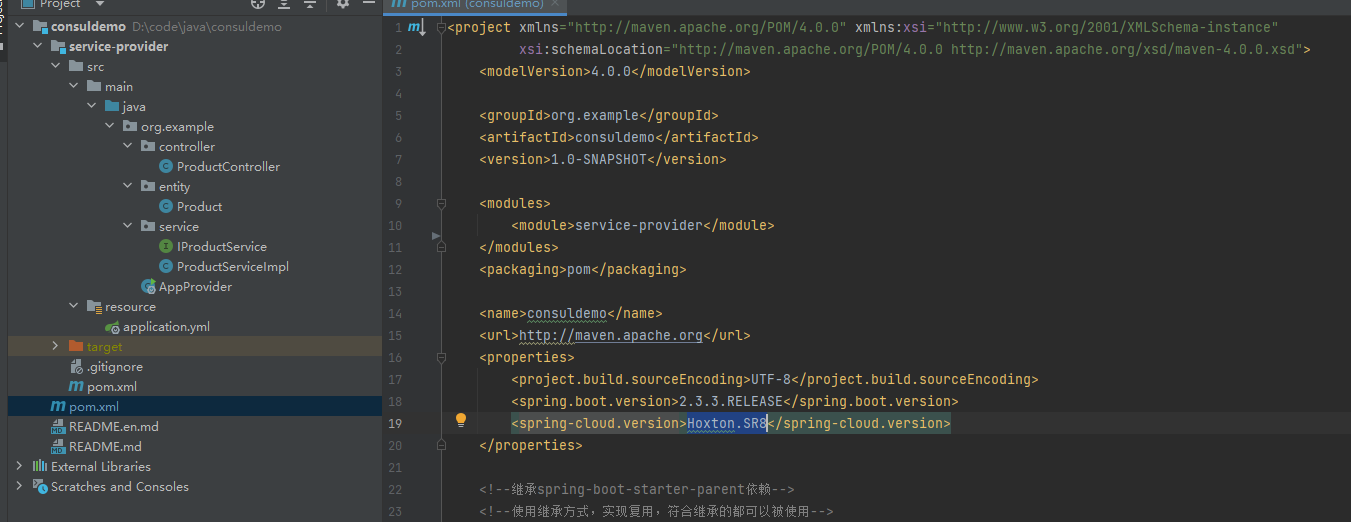
- 首先创建一个springboot项目,然后再创建一个子目录项目,在父级pom.xml文件添加相关引用


<project xmlns="http://maven.apache.org/POM/4.0.0" xmlns:xsi="http://www.w3.org/2001/XMLSchema-instance"
         xsi:schemaLocation="http://maven.apache.org/POM/4.0.0 http://maven.apache.org/xsd/maven-4.0.0.xsd">
    <modelVersion>4.0.0</modelVersion>

    <groupId>org.example</groupId>
    <artifactId>consuldemo</artifactId>
    <version>1.0-SNAPSHOT</version>

    <modules>
        <module>service-provider</module>
    </modules>
    <packaging>pom</packaging>

    <name>consuldemo</name>
    <url>http://maven.apache.org</url>
    <properties>
        <project.build.sourceEncoding>UTF-8</project.build.sourceEncoding>
        <spring.boot.version>2.3.3.RELEASE</spring.boot.version>
        <spring-cloud.version>Hoxton.SR8</spring-cloud.version>
    </properties>

    <!--继承spring-boot-starter-parent依赖-->
    <!--使用继承方式,实现复用,符合继承的都可以被使用-->
    <parent>
        <groupId>org.springframework.boot</groupId>
        <artifactId>spring-boot-starter-parent</artifactId>
        <version>2.3.3.RELEASE</version>
    </parent>

    <!--项目依赖管理 父项目只是声明依赖,不会实际引入jar,子项目需要写明需要的依赖(可以省略版本信息)-->
    <dependencyManagement>
        <dependencies>
            <!--spring-cloud依赖-->
            <dependency>
                <groupId>org.springframework.cloud</groupId>
                <artifactId>spring-cloud-dependencies</artifactId>
                <version>${spring-cloud.version}</version>
                <type>pom</type>
                <scope>import</scope>
            </dependency>

            <!--spring boot web依赖-->
            <dependency>
                <groupId>org.springframework.boot</groupId>
                <artifactId>spring-boot-starter-web</artifactId>
                <version>${spring.boot.version}</version>
            </dependency>

            <dependency>
                <groupId>junit</groupId>
                <artifactId>junit</artifactId>
                <version>3.8.1</version>
                <scope>test</scope>
            </dependency>
        </dependencies>

    </dependencyManagement>

</project>
- 在子项目service-provider的pom.xml中添加引用
<project xmlns="http://maven.apache.org/POM/4.0.0" xmlns:xsi="http://www.w3.org/2001/XMLSchema-instance"
         xsi:schemaLocation="http://maven.apache.org/POM/4.0.0 http://maven.apache.org/xsd/maven-4.0.0.xsd">
    <!--继承父类-->
    <parent>
        <artifactId>consuldemo</artifactId>
        <groupId>org.example</groupId>
        <version>1.0-SNAPSHOT</version>
    </parent>
    <modelVersion>4.0.0</modelVersion>

    <groupId>org.example</groupId>
    <artifactId>service-provider</artifactId>
    <version>1.0-SNAPSHOT</version>

    <packaging>jar</packaging>

    <name>service-provider</name>
    <url>http://maven.apache.org</url>

    <properties>
        <project.build.sourceEncoding>UTF-8</project.build.sourceEncoding>
        <maven.compiler.source>1.8</maven.compiler.source>
        <maven.compiler.target>1.8</maven.compiler.target>
    </properties>

    <dependencies>

        <!--Consul依赖,服务发现-->
        <dependency>
            <groupId>org.springframework.cloud</groupId>
            <artifactId>spring-cloud-starter-consul-discovery</artifactId>
        </dependency>

        <!--spring boot actuator依赖,健康监测-->
        <dependency>
            <groupId>org.springframework.boot</groupId>
            <artifactId>spring-boot-starter-actuator</artifactId>
        </dependency>

        <!--spring boot web依赖-->
        <dependency>
            <groupId>org.springframework.boot</groupId>
            <artifactId>spring-boot-starter-web</artifactId>
        </dependency>

        <!--lombok依赖,构建实体类-->
        <dependency>
            <groupId>org.projectlombok</groupId>
            <artifactId>lombok</artifactId>
            <scope>provided</scope>
        </dependency>

        <dependency>
            <groupId>junit</groupId>
            <artifactId>junit</artifactId>
            <version>3.8.1</version>
            <scope>test</scope>
        </dependency>

    </dependencies>

</project>
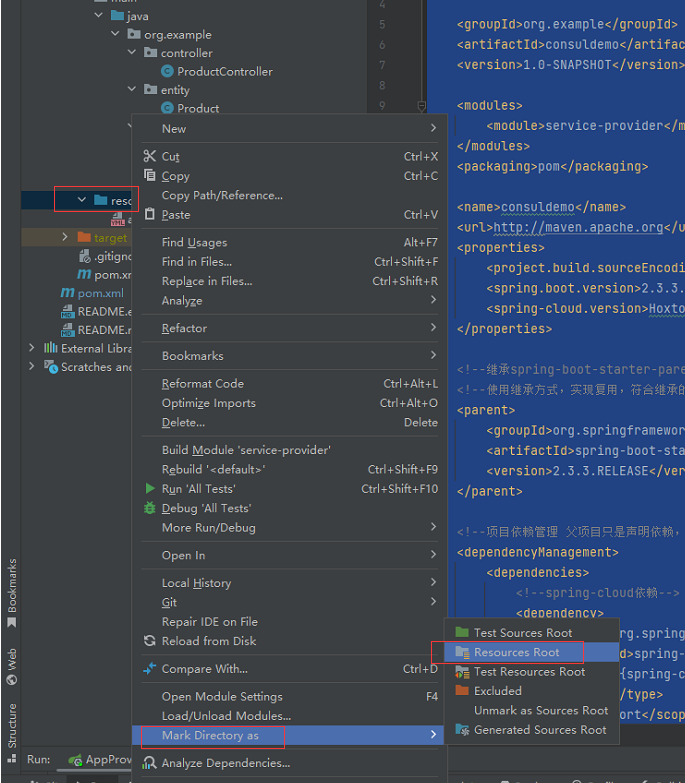
- 在子项目service-provider,创建resource文件夹,同时创建application.yml,注意名字默认不能修改并且标记resource目录为如图所标格式,否则报找不到配置文件里变更的,各种问题
server:
  port: 7070 # 端口
spring:
  application:
    name: service-provider # 应用名称
    # 配置Consul注册中心
  cloud:
    consul:
      # 注册中心的访问地址
      host: localhost
      port: 8500
      # 服务提供者信息
      discovery:
        register: true # 是否需要注册
        instance-id: ${spring.application.name}-01 # 注册实例id(必须唯一)
        service-name: ${spring.application.name} # 服务名称
        port: ${server.port} # 服务端口
        prefer-ip-address: true #是否使用ip地址注册
        ip-address: ${spring.cloud.client.ip-address} # 服务请求ip
- 服务层IProductService接口,关键代码:
package org.example.service;

import org.example.entity.Product;

import java.util.List;

public interface IProductService {
    /**
     * 查询商品列表
     * @return
     */
    List<Product> selectProductList();
}
- 服务层ProductServiceImpl接口,关键代码:
package org.example.service;

import org.example.entity.Product;
import org.springframework.stereotype.Service;

import java.util.Arrays;
import java.util.List;

@Service
public class ProductServiceImpl implements  IProductService {

    public List<Product> selectProductList() {

        return Arrays.asList(
                new Product(1,"华为手机",1,5800D),
                new Product(2,"联想笔记本",1,6888D),
                new Product(3,"小米平板",5,2020D)
        );
    }
}
- 基础层,实体类关键代码:
package org.example.entity;


import lombok.AllArgsConstructor;
import lombok.Data;
import lombok.NoArgsConstructor;
import org.springframework.context.annotation.Bean;

import java.io.Serializable;

@Data
@NoArgsConstructor
@AllArgsConstructor
public class Product implements Serializable {
    private Integer id;
    private String productName;
    private Integer productNum;
    private Double productPrice;
}
- 控制器,关键代码:
package org.example.controller;

import org.example.entity.Product;
import org.example.service.IProductService;
import org.example.service.ProductServiceImpl;
import org.springframework.beans.factory.annotation.Autowired;
import org.springframework.beans.factory.annotation.Value;
import org.springframework.web.bind.annotation.GetMapping;
import org.springframework.web.bind.annotation.RequestMapping;
import org.springframework.web.bind.annotation.RequestParam;
import org.springframework.web.bind.annotation.RestController;

import java.util.List;

@RestController
@RequestMapping("/prduct")
public class ProductController {
    @Autowired
    private IProductService IproductService;

    /**
     * 查询商品列表
     * @return
     */
    @GetMapping("/list")
    public List<Product> selectProductList(){
        return IproductService.selectProductList();
    }


}
- 启动类
package org.example;

import org.springframework.boot.SpringApplication;
import org.springframework.boot.autoconfigure.SpringBootApplication;
import org.springframework.cloud.client.discovery.EnableDiscoveryClient;

/**
 * Hello world!
 *
 */
@EnableDiscoveryClient
@SpringBootApplication
public class ServiceProviderApp
{
    public static void main( String[] args )
    {
        SpringApplication.run(ServiceProviderApp.class, args);

    }
}


【推荐】国内首个AI IDE,深度理解中文开发场景,立即下载体验Trae
【推荐】编程新体验,更懂你的AI,立即体验豆包MarsCode编程助手
【推荐】抖音旗下AI助手豆包,你的智能百科全书,全免费不限次数
【推荐】轻量又高性能的 SSH 工具 IShell:AI 加持,快人一步
· 震惊!C++程序真的从main开始吗?99%的程序员都答错了
· 【硬核科普】Trae如何「偷看」你的代码?零基础破解AI编程运行原理
· 单元测试从入门到精通
· 上周热点回顾(3.3-3.9)
· winform 绘制太阳,地球,月球 运作规律
2019-10-24 C# ling to sql 左表连接