


Android01-布局篇
在Android中,共有五种布局方式,分别是:LinearLayout(线性布局),FrameLayout(帧布局),AbsoluteLayout(绝对布局),RelativeLayout(相对布局),
TableLayout(表格布局);还有一种,是在Android4.0以后出现的新布局:GridLayout(网袋布局)。下面简单介绍一下每个布局的特点。
一.线性布局:简单来说,这个布局就像它的名字一样,里面所有的控件的摆放方式都是像直线一样的摆放方式。要么垂直,要么水平。垂直或水平可以通过设置
android:orientation="vertical"属性来确定控件的摆放方式;vertical代表垂直,horizontal代表水平。当垂直布局时,每一行就只有一个控件,多个控件依次垂直往下;
水平布局时,只有一行,每一个控件依次向右排列。
LinearLayout里面还有一个特别的属性:android:layout_weight="1",这是设置控件的权重。举个列子:
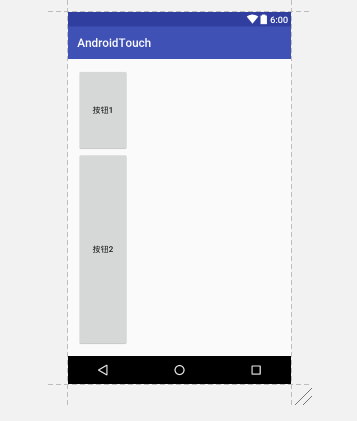
<?xml version="1.0" encoding="utf-8"?>
<LinearLayout xmlns:android="http://schemas.android.com/apk/res/android"
    xmlns:tools="http://schemas.android.com/tools" android:id="@+id/activity_main"
    android:layout_width="match_parent" android:layout_height="match_parent"
    android:paddingBottom="@dimen/activity_vertical_margin"
    android:paddingLeft="@dimen/activity_horizontal_margin"
    android:paddingRight="@dimen/activity_horizontal_margin"
    android:paddingTop="@dimen/activity_vertical_margin"
    android:orientation="vertical"
    tools:context="temp.com.androidtouch.MainActivity">


    <Button
        android:layout_width="wrap_content"
        android:layout_height="wrap_content"
        android:text="按钮1"/>
    <Button
        android:layout_width="wrap_content"
        android:layout_height="wrap_content"
        android:text="按钮2"/>

</LinearLayout>
这是一个线性布局,里面控件的属性还没有给上权重,效果图如下:

当我给控件设置了权重之后:
<?xml version="1.0" encoding="utf-8"?>
<LinearLayout xmlns:android="http://schemas.android.com/apk/res/android"
    xmlns:tools="http://schemas.android.com/tools" android:id="@+id/activity_main"
    android:layout_width="match_parent" android:layout_height="match_parent"
    android:paddingBottom="@dimen/activity_vertical_margin"
    android:paddingLeft="@dimen/activity_horizontal_margin"
    android:paddingRight="@dimen/activity_horizontal_margin"
    android:paddingTop="@dimen/activity_vertical_margin"
    android:orientation="vertical"
    tools:context="temp.com.androidtouch.MainActivity">


    <Button
        android:layout_width="wrap_content"
        android:layout_height="wrap_content"
        android:text="按钮1"
        android:layout_weight="1"/>
    <Button
        android:layout_width="wrap_content"
        android:layout_height="wrap_content"
        android:text="按钮2"
        android:layout_weight="3"/>

</LinearLayout>
效果图如下:
当我们设置了控件的权重之后,控件在整个布局里面所占的比例将会根据权重比来分配,权重是可以给小数的,但是我们基本上不会给。
权重是LinearLayout布局里的属性,其他的布局中不能使用。
二.帧布局:这是几个布局中最简单的一个布局,它会为每个添加进去的控件创建单独的帧,但是帧布局的摆放控件的方式是覆盖式的,就拿这段代码来说:
<?xml version="1.0" encoding="utf-8"?>
<FrameLayout xmlns:android="http://schemas.android.com/apk/res/android"
    xmlns:tools="http://schemas.android.com/tools" android:id="@+id/activity_main"
    android:layout_width="match_parent" android:layout_height="match_parent"
    android:paddingBottom="@dimen/activity_vertical_margin"
    android:paddingLeft="@dimen/activity_horizontal_margin"
    android:paddingRight="@dimen/activity_horizontal_margin"
    android:paddingTop="@dimen/activity_vertical_margin"
    android:orientation="vertical"
    tools:context="temp.com.androidtouch.MainActivity">


    <Button
        android:layout_width="wrap_content"
        android:layout_height="wrap_content"
        android:text="按钮1"
        android:layout_weight="1"/>
    <Button
        android:layout_width="wrap_content"
        android:layout_height="wrap_content"
        android:text="按钮2"
        android:layout_weight="3"/>

</FrameLayout>
当我把布局改为帧布局时
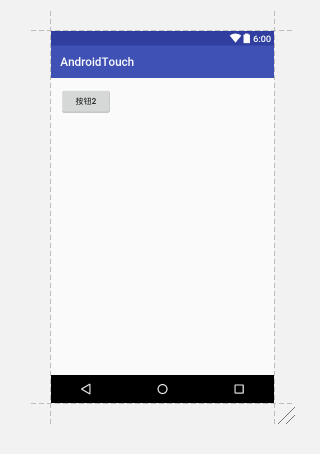
两个按钮就会重合在一起,第二个按钮会覆盖在第一个按钮之上。这就是帧布局唯一的特点。
三.绝对布局: AbsoluteLayout这个布局方式很简单,主要属性就两个: layout_x 和layout_y 控件依靠这两个属性来定义自己在布局中的X坐标和Y坐标。 以屏幕左上角为(0,0)的坐标轴的x,y值,当向下或向右移动时,坐标值将变大。AbsoluteLayout允许元素之间互相重叠。我们通常不推荐使用 AbsoluteLayout,因为AbsoluteLayout写出来的布局在不同的设备上使用时会变形,然后布局就会很丑。
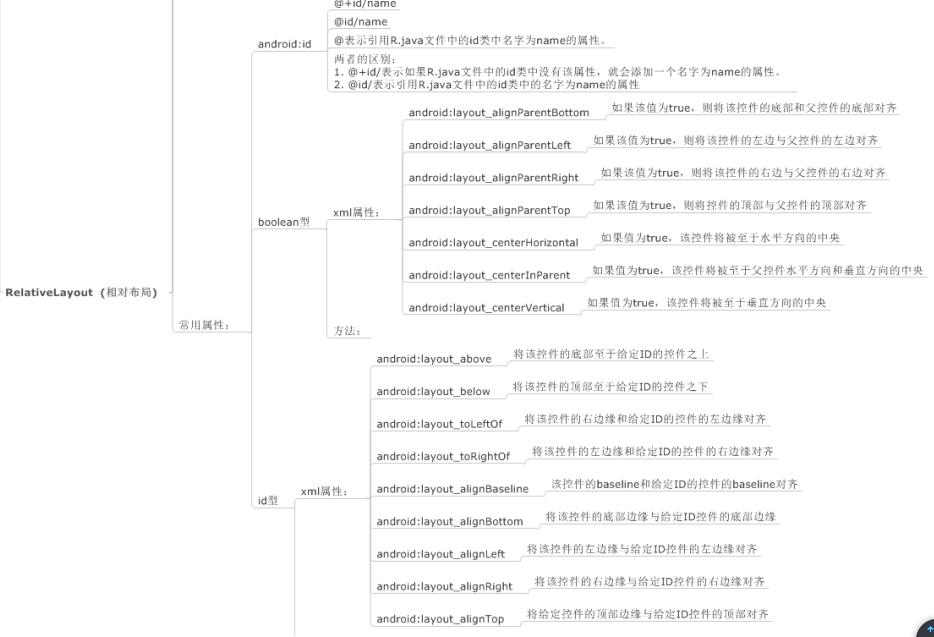
四.相对布局: RelativeLayout可以理解为某一个控件为参照物,来定位的布局方式,基本属性如下图:
五.表格布局:TableLayout类似Html里面的Table。每一个TableLayout里面有表格行TableRow,TableRow里面可以具体定义每一个控件。每个TableRow都会定义成一行。简单来说,TableLayout就是以一个<TableLayout></TableLayout>标签和多个<TableRow></TableRow>标签组成。布局里面有两个属性,一是 android:shrinkColumns="1"表示某列被收缩,另一个是android:stretchColumns="0"表示某列被拉伸,还有一个android:collapseColumns=""表示某列被隐藏。当然,在TableLayout里面可以合并行和和并列。
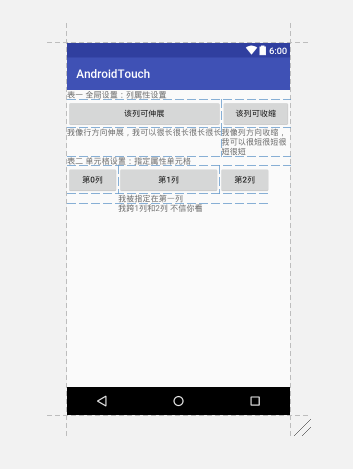
<?xml version="1.0" encoding="utf-8"?>
<LinearLayout xmlns:android="http://schemas.android.com/apk/res/android"
    android:layout_width="match_parent"
    android:layout_height="match_parent"
    android:orientation="vertical">

    <TextView
        android:layout_width="wrap_content"
        android:layout_height="wrap_content"
        android:text="表一 全局设置:列属性设置" />

    <TableLayout
        android:layout_width="wrap_content"
        android:layout_height="wrap_content"
        android:shrinkColumns="1"
        android:stretchColumns="0">

        <TableRow>

            <Button
                android:layout_width="wrap_content"
                android:layout_height="wrap_content"
                android:text="该列可伸展" />

            <Button
                android:layout_width="wrap_content"
                android:layout_height="wrap_content"
                android:text="该列可收缩" />
        </TableRow>

        <TableRow>

            <TextView
                android:layout_width="wrap_content"
                android:layout_height="wrap_content"
                android:text="我像行方向伸展,我可以很长很长很长很长" />

            <TextView
                android:layout_width="wrap_content"
                android:layout_height="wrap_content"
                android:text="我像列方向收缩,我可以很短很短很短很短" />
        </TableRow>
    </TableLayout>

    <TextView
        android:layout_width="wrap_content"
        android:layout_height="wrap_content"
        android:text="表二 单元格设置:指定属性单元格" />

    <TableLayout
        android:layout_width="350dp"
        android:layout_height="wrap_content"
        android:shrinkColumns="0,2"
        android:stretchColumns="1"
        >

        <TableRow>

            <Button
                android:layout_width="wrap_content"
                android:layout_height="wrap_content"
                android:text="第0列" />

            <Button
                android:layout_width="wrap_content"
                android:layout_height="wrap_content"
                android:text="第1列" />

            <Button
                android:layout_width="wrap_content"
                android:layout_height="wrap_content"
                android:text="第2列" />

        </TableRow>

        <TableRow>

            <TextView
                android:layout_width="wrap_content"
                android:layout_height="wrap_content"
                android:layout_column="1"
                android:text="我被指定在第一列" />
        </TableRow>

        <TableRow>

            <TextView
                android:layout_width="wrap_content"
                android:layout_height="wrap_content"
                android:layout_column="1"
                android:layout_span="2"
                android:text="我跨1列和2列 不信你看"
                />
        </TableRow>
    </TableLayout>


</LinearLayout>
这是一个包含TableLayout里基本的属性的列子,效果图如下:
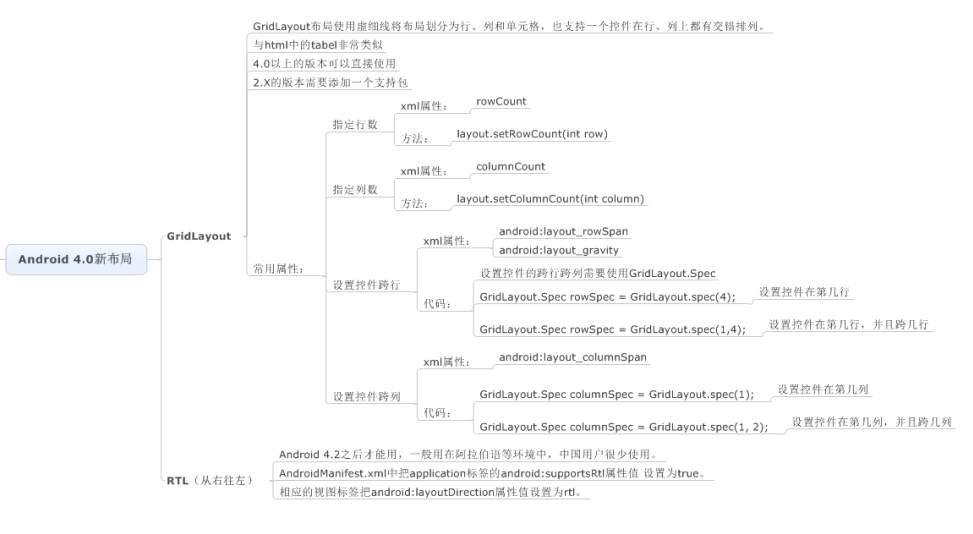
五个布局简单介绍完了,就只剩下最后一个,网袋布局。网袋布局较为灵活,基本属性如下图:
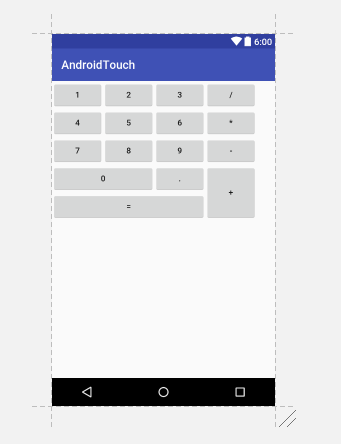
再举个用GridLayout写的比较简单的例子:
<?xml version="1.0" encoding="utf-8"?>
<GridLayout xmlns:android="http://schemas.android.com/apk/res/android"
    android:layout_width="match_parent"
    android:layout_height="match_parent"
    android:columnCount="4"
    android:orientation="horizontal"
    android:rowCount="6">
    <Button
        android:layout_width="wrap_content"
        android:layout_height="wrap_content"
        android:text="1" />

    <Button
        android:layout_width="wrap_content"
        android:layout_height="wrap_content"
        android:text="2" />

    <Button
        android:layout_width="wrap_content"
        android:layout_height="wrap_content"
        android:text="3" />

    <Button
        android:layout_width="wrap_content"
        android:layout_height="wrap_content"
        android:text="/" />

    <Button
        android:layout_width="wrap_content"
        android:layout_height="wrap_content"
        android:text="4" />

    <Button
        android:layout_width="wrap_content"
        android:layout_height="wrap_content"
        android:text="5" />
    <Button
        android:layout_width="wrap_content"
        android:layout_height="wrap_content"
        android:text="6" />

    <Button
        android:layout_width="wrap_content"
        android:layout_height="wrap_content"
        android:text="*" />

    <Button
        android:layout_width="wrap_content"
        android:layout_height="wrap_content"
        android:text="7" />

    <Button
        android:layout_width="wrap_content"
        android:layout_height="wrap_content"
        android:text="8" />


    <Button
        android:layout_width="wrap_content"
        android:layout_height="wrap_content"
        android:text="9" />

    <Button
        android:layout_width="wrap_content"
        android:layout_height="wrap_content"
        android:text="-" />

    <Button
        android:layout_width="wrap_content"
        android:layout_height="wrap_content"
        android:text="0"
        android:layout_columnSpan="2"
        android:layout_gravity="fill_horizontal"/>

    <Button
        android:layout_width="wrap_content"
        android:layout_height="wrap_content"
        android:text="." />

    <Button
        android:layout_width="wrap_content"
        android:layout_height="wrap_content"
        android:text="+"
        android:layout_rowSpan="2"
        android:layout_gravity="fill_vertical"/>

    <Button
        android:layout_width="wrap_content"
        android:layout_height="wrap_content"
        android:text="="
        android:layout_columnSpan="3"
        android:layout_gravity="fill_horizontal"/>


</GridLayout>
效果图如下:
布局就做了下简单的介绍,深入了解还是的靠自己。
第一次写博客,有很多考虑不周的地方,望各位博友多多指教。
