一次不太成功的内网部署视屏会议系统预研
Jitsi Meet
背景
接到一个任务,想在公司内网搭建一个视频会议系统,用于公司内部或与分公司交流,需要内网部署,最好是开源免费。
项目定位
查找了如下几个项目:
- tailchat-meeting - https://github.com/msgbyte/tailchat-meeting
- starrtc-server - https://github.com/starrtc/starrtc-server
- BigBlueButton - 开源在线教学软件
- nettu-meet - 一款开源视频会议web应用程序,用于交互式在线教学 https://github.com/fmeringdal/nettu-meet
- BuildYourOwnConferenceSystem - https://github.com/Yuchunchen/BuildYourOwnConferenceSystem
- jitsi-meet - https://github.com/jitsi/jitsi-meet
- docker-jitsi-meet - https://github.com/jitsi/docker-jitsi-meet
最后决定尝试 Jitsi Meet 这个开源免费的项目。github 中 Star 19k(20221209)
- Jitsi Meet - 安全、简单且可扩展的视频会议,您可以将其用作独立应用程序或嵌入到web应用程序中
- Jitsi Meet是一组开源项目,使用户能够使用和部署具有最先进视频质量和功能的视频会议平台。
Jitsi 是什么
Jitsi是一系列开源项目的集合,这些项目提供了最先进的视频会议功能,这些功能安全、易于使用且易于自托管。
本手册(https://jitsi.github.io/handbook/docs/intro)旨在成为所有Jitsi文档的一站式商店。
内容分为3个主要方面:
- 用户指南:旨在帮助服务用户更好地了解所有可用功能以及如何使用它们。
- 开发者指南:旨在帮助希望在其产品中集成Jitsi-Meet API/SDK或希望通过开发新功能或修复错误来改进Jitsi-Meet的开发者。
- 自托管指南:专为希望自托管的人、系统管理员或任何希望部署和操作自己的Jitsi Meet实例的人设计。
Jitsi由一系列项目组成:
- Jitsi Meet,与WebRTC兼容的JavaScript应用程序,使用Jitsi Videobridge提供高质量、可扩展的视频会议。基于React和React Native构建
- Jitsi Videobridge(JVB)-与WebRTC兼容的服务器,用于在会议参与者之间路由视频流。
- Jitsi Conference Focus (jicofo) -用于Jitsi会议的服务器端焦点组件,用于管理媒体会话,并充当每个参与者和视频桥之间的负载平衡器。
- Jitsi Gateway to SIP (jigasi) -允许常规SIP客户端加入Jitsi会议的服务器端应用程序
- Jitsi Broadcasting Infrastructure (jibri) -用于录制和/或流式传输Jitsi会议的一组工具,通过启动虚拟帧缓冲区中呈现的Chrome实例,并使用ffmpeg捕获和编码输出来工作
效果
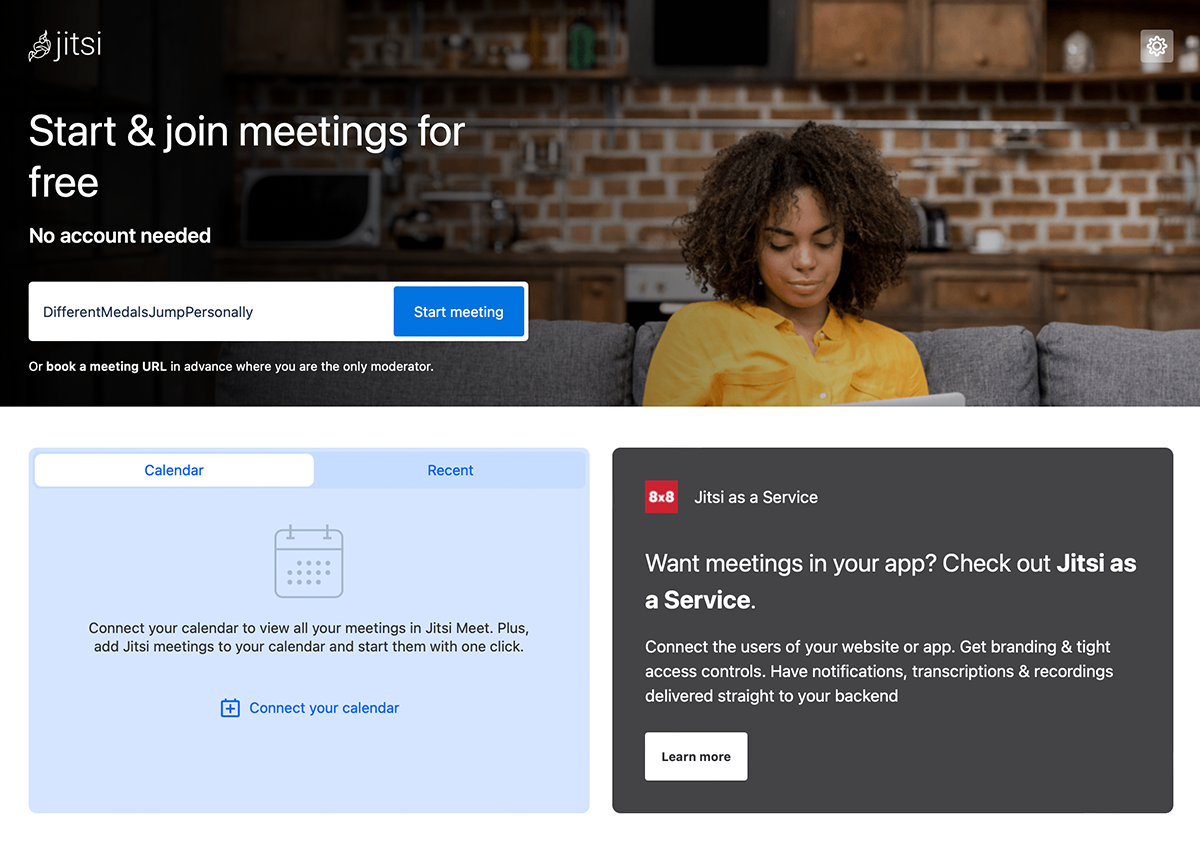
启动后,直接通过浏览器访问:


安装
直接通过项目 https://github.com/jitsi/docker-jitsi-meet docker 方式安装。
Tip: 笔者环境 ubuntu 20.04。
部分安装过程:
下载 docker-jitsi-meet-master 到本地并进入此目录:
root@pjl:/home/docker-jitsi-meet-master# docker-compose up -d
root@pjl:/home/docker-jitsi-meet-master# docker ps
CONTAINER ID   IMAGE                    COMMAND   CREATED       STATUS       PORTS                                                                            NAMES
f617d13cda50   jitsi/jvb:unstable       "/init"   4 hours ago   Up 4 hours   127.0.0.1:8080->8080/tcp, 0.0.0.0:10000->10000/udp, :::10000->10000/udp          docker-jitsi-meet-master_jvb_1
5af4885c996a   jitsi/jicofo:unstable    "/init"   4 hours ago   Up 4 hours                                                                                    docker-jitsi-meet-master_jicofo_1
35c4bd9da921   jitsi/prosody:unstable   "/init"   4 hours ago   Up 4 hours   5222/tcp, 5280/tcp, 5347/tcp                                                     docker-jitsi-meet-master_prosody_1
fe3d109c8be6   jitsi/web:unstable       "/init"   4 hours ago   Up 4 hours   0.0.0.0:8000->80/tcp, :::8000->80/tcp, 0.0.0.0:8443->443/tcp, :::8443->443/tcp   docker-jitsi-meet-master_web_1
安装过程参考:
- 官网:https://jitsi.github.io/handbook/docs/devops-guide/devops-guide-docker/
- 网友:https://blog.csdn.net/csdn_gcl/article/details/122104776
WebSocket connection failed
报错:WebSocket connection to 'wss://localhost:8443/xmpp-websocket?room=a' failed:
后来自己好了
jitsi meeting Screen sharing failed for 3 people
全屏分享时,如果第三个人进来,屏幕分享就失败了。解决过程非常曲折,大致过程如下:
sudo ufw allow 80/tcp
sudo ufw allow 443/tcp
sudo ufw allow 10000/udp
sudo ufw allow 22/tcp
sudo ufw allow 3478/udp
sudo ufw allow 5349/tcp
sudo ufw enable

root@pjl:/home/docker-jitsi-meet-master# sudo ufw enable
Command may disrupt existing ssh connections. Proceed with operation (y|n)? y
Firewall is active and enabled on system startup
root@pjl:/home/docker-jitsi-meet-master# sudo ufw status verbose
Status: active
Logging: on (low)
Default: deny (incoming), allow (outgoing), deny (routed)
New profiles: skip

To                         Action      From

--                         ------      ----

5911                       ALLOW IN    Anywhere
10000/udp                  ALLOW IN    Anywhere
80/tcp                     ALLOW IN    Anywhere
443/tcp                    ALLOW IN    Anywhere
22/tcp                     ALLOW IN    Anywhere
3478/udp                   ALLOW IN    Anywhere
5349/tcp                   ALLOW IN    Anywhere
5911 (v6)                  ALLOW IN    Anywhere (v6)
10000/udp (v6)             ALLOW IN    Anywhere (v6)
80/tcp (v6)                ALLOW IN    Anywhere (v6)
443/tcp (v6)               ALLOW IN    Anywhere (v6)
22/tcp (v6)                ALLOW IN    Anywhere (v6)
3478/udp (v6)              ALLOW IN    Anywhere (v6)
5349/tcp (v6)              ALLOW IN    Anywhere (v6)
失败。尝试另一方法:
docker cp f617d13cda50:/etc/jitsi/videobridge/sip-communicator.properties sip-communicator.properties

编辑 vim sip-communicator.properties,新增两条:
org.ice4j.ice.harvest.NAT_HARVESTER_LOCAL_ADDRESS=192.168.1.223
org.ice4j.ice.harvest.NAT_HARVESTER_PUBLIC_ADDRESS=192.168.1.223

docker cp sip-communicator.properties f617d13cda50:/etc/jitsi/videobridge/sip-communicator.properties

systemctl  restart docker
失败。尝试另一方法:
ENABLE_XMPP_WEBSOCKET=0
ENABLE_COLIBRI_WEBSOCKET=1
ENABLE_SCTP=1
JVB_PORT=10000
失败。报错如下:
Logger.js:154 2022-07-25T08:41:11.181Z [modules/RTC/BridgeChannel.js] <WebSocket.e.onclose>:  Channel closed: 1006

[modules/statistics/RTPStatsCollector.js] <nn._processAndEmitReport>:  No participant ID returned by LocalTrack[2,video]
[modules/statistics/AvgRTPStatsReporter.js] <Dd.addNext>:  bandwidth_upload - invalid value for idx: 1 undefined
在网上一通搜索和尝试,未果。
中途也发现了一些奇怪的问题:chrome 94 有视频分享的按钮,chrome 103 没有分享按钮,超过三人桌面分享消失,退出一人则又有效
firefox 102:
[ "audio", "video" ] TypeError: navigator.mediaDevices is undefined

chrome 103
TypeError: Cannot read properties of undefined (reading 'getUserMedia')
参考 https://blog.csdn.net/yunzhonghefei/article/details/120290541 解决。
最后修改两点:
- .env 文件时区:
TZ=Asia/Shanghai - docker-compose.yml 中 127.0.0.1 改成自己服务器的ip
jvb:
    image: jitsi/jvb:${JITSI_IMAGE_VERSION:-unstable}
    restart: ${RESTART_POLICY:-unless-stopped}
    ports:
        - '${JVB_PORT:-10000}:${JVB_PORT:-10000}/udp'
        // 127.0.0.1 改成自己服务器的ip
        - '127.0.0.1:${JVB_COLIBRI_PORT:-8080}:8080'
一切都好了。
Tip:真正使用应该还要许多其他问题,首先肯定会对内网造成非常大的压力。
Jitsi Meet 介绍
Keep it Casual. For Free.
- HD audio video
- Unlimited free meeting access for up to 100 participants at a time
- End-to-End encryption
- Multiple participants can share their screen simultaneously
- Remotely control other participants desktop
- Integrations (Google, Microsoft, Slack)

What is Jitsi?
Jitsi is a collection of Open Source projects which provide state-of-the-art video conferencing
capabilities that are secure, easy to use and easy to self-host.
Components
Jitsi comprises a collection of projects:
- Jitsi Meet - WebRTC compatible JavaScript application that uses Jitsi Videobridge to provide high quality, scalable video conferences. Build upon React and React Native.
- Jitsi Videobridge (JVB) - WebRTC compatible server designed to route video streams amongst participants in a conference.
- Jitsi Conference Focus (jicofo) - server-side focus component used in Jitsi Meet conferences that manages media sessions and acts as load balancer between each of the participants and the videobridge.
- Jitsi Gateway to SIP (jigasi) - server-side application that allows regular SIP clients to join Jitsi Meet conferences
- Jitsi Broadcasting Infrastructure (jibri) - set of tools for recording and/or streaming a Jitsi Meet conference that works by launching a Chrome instance rendered in a virtual framebuffer and capturing and encoding the output with ffmpeg.
External Software used by Jitsi:
- Prosody - XMPP server used for signalling
Desktop browsers
| Browser | Support | Versions | Notes |
|---|---|---|---|
| Chrome | ✅ | >= 72 | Best results with >= 96 |
| Firefox | ✅ | >= 68 | Best results with >= 101 |
| Safari | ✅ | >= 14 | Best results with >= 15, output device selection unsupported |
| Edge | ✅ | >= 79 | Edge Legacy is unsupported |
| Internet Explorer | ❌ |
Join by using a Jitsi link
People can invite each other to Jitsi meetings by simply sending a link.
- If you have received such an invite link from a trusted source,
copy it into your browser's address bar and press Enter / Return. - Your browser may first ask you to grant microphone and/or camera access.
If you trust the person who invited you, confirm this access request.
Please refer to the browser's documentation for details (e.g. Firefox、Chrome). - If prompted, enter a name, which will be visible to other participants in the Jitsi Meeting room.
- (Optional) Adjust the camera and/or microphone settings via the
vdropdown menu items. - Click on
Join meeting.
Desktop or Mobile Browser
- You need a browser (please note our separate information).
- Open the browser and in the address bar type, for example "https://meet.jit.si" (without "") and press Enter.
- The page opens as shown in the figure:

- Now enter a name for your conference (e.g. new meeting) in the "Start new meeting" field.
Note: Please do not use any special characters, spaces or umlauts, as this can lead to problems.
Note: Jitsi offers a functionality that automatically suggests names for the conferences. These can be overwritten. - Click the blue
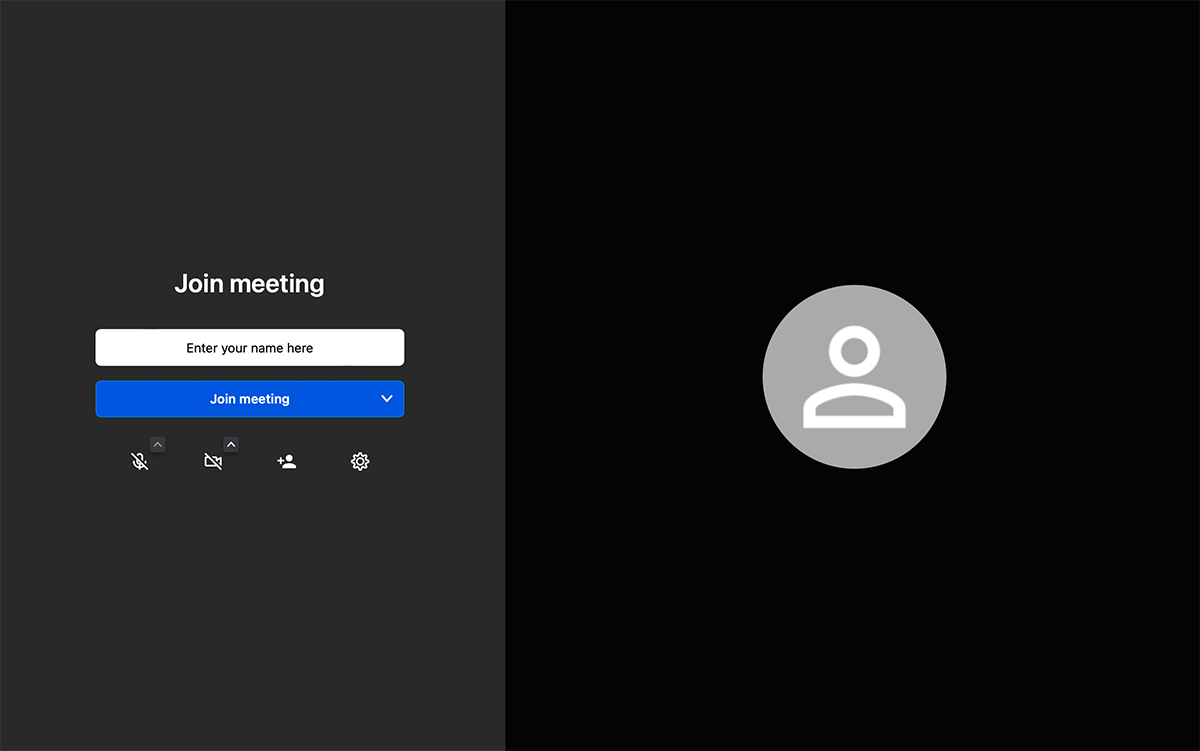
Gobutton. - The following window opens:

- It is possible that no picture of you will appear at first. To do this, the browser will ask you whether you want to allow camera access. Please confirm this by clicking on
alloworpermit. Sometimes you also have to click the camera button at the bottom of the screen first to activate the dialog for allowing camera access. Do the same with the microphone the first time you use Jitsi. - Now enter your display name in the "enter your name" field.
- Click the blue
Join meetingbutton. - Have fun in your first conference.
IFrame API
Embedding the Jitsi Meet API into your site or app enables you to host and provide secure video meetings with your colleagues, teams, and stakeholders. The Meet API provides a full complement of comprehensive meeting features.
Your Jitsi meetings can be hosted and attended using any device while keeping your data and privacy protected. You can reach your meeting participants anywhere in the world eliminating the need for travel and the associated inconvenience.
The IFrame API enables you to embed Jitsi Meet functionality into your meeting application so you can experience the full functionality of the globally distributed and highly available deployment available with meet.jit.si.
You can also embed and integrate the globally distributed and highly available deployment on the meet.jit.si platform itself.
Self-Hosting Guide
Welcome to the Self-Hosting guide!
note:
These guides help you to host your own Jitsi-Meet server.
If you want to have a video conference without setting up any infrastructure, use https://meet.jit.si instead.
The content is divided in 3 guides:
-
Debian/Ubuntu server guide: Describes the quick installation on Debian-based distributions.
-
Docker guide: Describes how to use the official Docker image of Jitsi-Meet.
-
Manual installation guide: Describes the manual installation of all components (adaptable for other distributions).
note: First, a bit of general advice
Jitsi Meet being based on WebRTC, an encrypted communication link (https) is necessary to get working multimedia, and the setup is not always trivial.
The best option is an Internet server with a certificate for a domain registered in the DNS.
While it's possible to setup a server on a private network and/or a self-signed certificate, it can be less straightforward and you can expect difficulties, first if you want access both from the private network and the public internet, and second when using phones as these clients often don't accept self-signed certificates.
In case of trouble with clients using phones, check your certificate.
Requirements
note:
Jitsi Meet is a real-time system.
Requirements are very different from a web server and depend on many factors.
Miscalculations can very easily destroy basic functionality rather than cause slow performance.
Avoid adding other functions to your Jitsi Meet setup as it can harm performance and complicate optimizations.
Note that Jitsi Meet design priorizes scalability by adding servers on using a huge server. Check Jitsi-videobridge documentation on adding several bridges to a Jitsi Meet server, and OCTO to go even beyond that (federation of Jitsi Meet servers). If you feel that you are a network and server administration newbie, don't even think of going there.
Jitsi Meet needs, by order of importance
- Network link: basic speed and reliability are essential. Check speed against the provider claims using any download tool (or ftp), and
verify latency using a tool such as iperf3.
Exact calculation is very complex and depend on many optimisations and tricks, but you should at least remember these numbers on resolution:
180 = 200 kbits/s
360 = 500 kbits/s
720 (HD) = 2500 kbits/s
4k = 10 Mbits/s
So don't expect to have 20 users using 4K on a server with 100Mbits/s upload and download.
For a friends/small organization server, 1 Gbits/s will often be enough but for a serious server 10 Gbits/s
is advisable. Several (or many...) bridges having each a 10 Gbits/s link are used by big deployments.
These requirements concern the videobridge. If there are only external videobridges (as can be the case on high end Jitsi Meet servers), network performance matters much less.
-
RAM: it's usually suggested to get 8 GB.
For small meetings you can get away with 4 GB, for test servers or very small meetings you can try to use 2 GB.
For big meetings it's suggested to go the scalable way over getting huge amounts of memory. -
CPU: very low processor performance can seriously harm a real time system, especially when using a shared server (where your CPU performance can be stolen by other customers of your hoster, check on 'dedicated CPU' if you are getting a VPS, rather than a physical server). However, a consideration is that a Jitsi Meet component, Prosody, can only use ONE (1) core. So getting a lot of cores, let's say more than 32, is not always useful. For a basic server, 4 dedicated cores can be enough.
-
Disk: unless you are doing heavy logging or have very specific needs, you can get away with 250 Gbytes of standard hard disk.
SSD are more a nice to have than a necessity.
If you want additional services, requirements can go up.
Recording
Jibri needs ONE system per recording.
One Jibri instance = one meeting. For 5 meetings recorded simultaneously, you need 5 Jibris.
There is no workaround to that.
If you are knowledgeable, you can setup Jibris in containers and use a big server to save a bit on resources but that's about it.
Jibri RAM and CPU needs are far higher than Jitsi Meet itself, as it does video encoding.
For 1080x720 you currently need at least 8 GB RAM, for 1280x1024 12 GB (this is for recording a single meeting).
If memory is not sufficient or CPU can't encode fast enough, recordings will fail.
While Jibri and Jitsi Meet can technically be hosted in a single server, it's not recommended because Jibri is a resource drain and it can harm Jitsi Meet performance, and can exhaust disk space and stop Jitsi Meet function altogether.
Docker
Quick start
In order to quickly run Jitsi Meet on a machine running Docker and Docker Compose,
follow these steps:
-
Download and extract the [latest release]. DO NOT clone the git repository. See below if you are interested in running test images.
-
Create a
.envfile by copying and adjustingenv.example:cp env.example .env -
Set strong passwords in the security section options of
.envfile by running the following bash script./gen-passwords.sh -
Create required
CONFIGdirectories- For linux:
mkdir -p ~/.jitsi-meet-cfg/{web,transcripts,prosody/config,prosody/prosody-plugins-custom,jicofo,jvb,jigasi,jibri}- For Windows:
echo web,transcripts,prosody/config,prosody/prosody-plugins-custom,jicofo,jvb,jigasi,jibri | % { mkdir "~/.jitsi-meet-cfg/$_" } -
Run
docker-compose up -d -
Access the web UI at
https://localhost:8443(or a different port, in case you edited the.envfile).
note:
HTTP (not HTTPS) is also available (on port 8000, by default), but that's e.g. for a reverse proxy setup;
direct access via HTTP instead HTTPS leads to WebRTC errors such as
Failed to access your microphone/camera: Cannot use microphone/camera for an unknown reason. Cannot read property 'getUserMedia' of undefined
or navigator.mediaDevices is undefined.
If you want to use jigasi too, first configure your env file with SIP credentials
and then run Docker Compose as follows:
docker-compose -f docker-compose.yml -f jigasi.yml up
If you want to enable document sharing via [Etherpad],
configure it and run Docker Compose as follows:
docker-compose -f docker-compose.yml -f etherpad.yml up
If you want to use jibri too, first configure a host as described in JItsi BRoadcasting Infrastructure configuration section
and then run Docker Compose as follows:
docker-compose -f docker-compose.yml -f jibri.yml up -d
or to use jigasi too:
docker-compose -f docker-compose.yml -f jigasi.yml -f jibri.yml up -d
Architecture
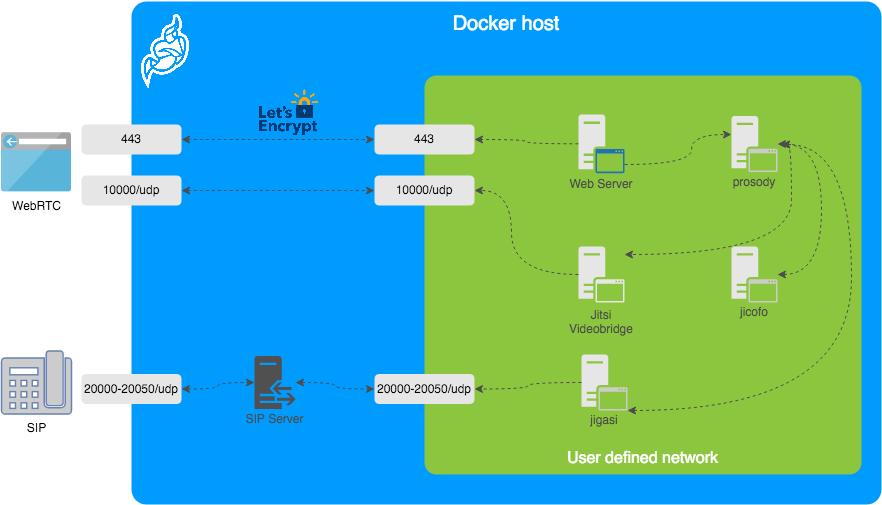
A Jitsi Meet installation can be broken down into the following components:
- A web interface
- An XMPP server
- A conference focus component
- A video router (could be more than one)
- A SIP gateway for audio calls
- A Broadcasting Infrastructure for recording or streaming a conference.

The diagram shows a typical deployment in a host running Docker. This project
separates each of the components above into interlinked containers. To this end,
several container images are provided.
External Ports
The following external ports must be opened on a firewall:
80/tcpfor Web UI HTTP (really just to redirect, after uncommentingENABLE_HTTP_REDIRECT=1in.env)443/tcpfor Web UI HTTPS4443/tcpfor RTP media over TCP10000/udpfor RTP media over UDP
Also 20000-20050/udp for jigasi, in case you choose to deploy that to facilitate SIP access.
E.g. on a CentOS/Fedora server this would be done like this (without SIP access):
sudo firewall-cmd --permanent --add-port=80/tcp
sudo firewall-cmd --permanent --add-port=443/tcp
sudo firewall-cmd --permanent --add-port=4443/tcp
sudo firewall-cmd --permanent --add-port=10000/udp
sudo firewall-cmd --reload
See the corresponding section in the manual setup guide.
Design considerations
Jitsi Meet uses XMPP for signaling, thus the need for the XMPP server.
The setup provided by these containers does not expose the XMPP server to the outside world.
Instead, it's kept completely sealed, and routing of XMPP traffic only happens on a user-defined network.
The XMPP server can be exposed to the outside world,
but that's out of the scope of this project.
结果
出于某些因素的考虑,最终相关部门决定定制采购。
出处:https://www.cnblogs.com/pengjiali/p/16969294.html
本文版权归作者和博客园共有,欢迎转载,但未经作者同意必须保留此段声明,且在文章页面明显位置给出原文连接。


