electron 基础
electron 基础
前文我们快速的用了一下 electron。本篇将进一步介绍其基础知识点,例如:生命周期、主进程和渲染进程通信、contextBridge、预加载(禁用node集成)、优雅的显示窗口、父子窗口、存储并恢复 electron 窗口、、右键上下文信息、右键菜单、菜单与主进程通信、选中文本执行 js 代码、托盘、nativeImage、截屏等等。
Tip:为图方便,继续之前的环境进行操作。
第一个程序
下面这段代码会打开一个原生窗口,窗口里面会加载 spug 的一个系统:
// main.js 主进程
const { app, BrowserWindow} = require('electron')

function createWindow() {
    const mainWindow = new BrowserWindow({
        width: 1000,
        height: 800,

    })
    mainWindow.loadURL('https://demo.spug.cc/')
    // 或本地
    // mainWindow.loadFile('article.html')
}

app.whenReady().then(createWindow)
这里用到两个模块:
app- 控制应用程序的事件生命周期BrowserWindow- 创建并控制浏览器窗口
whenReady - 返回 Promise。当 Electron 初始化完成。某些API只能在此事件发生后使用。
nodemon
前面我们用了 electron-reloader 来做热加载,需要在代码中写一段代码,感觉不是很好。我们可以使用 nodemon 来达到同样的效果。
npmjs 中有介绍:nodemon还可以用于执行和监视其他程序。
首先安装:npm i -D nodemon,然后在 package.json 中增加运行命令("start": "nodemon -e js,html --exec electron .",)即可。
注:如果是 "start": "nodemon --exec electron .",,当你修改 html 文件时,不会自动编译,因为默认情况下,nodemon查找扩展名为.js、.mjs、.coffee、.litcoffee和.json的文件。
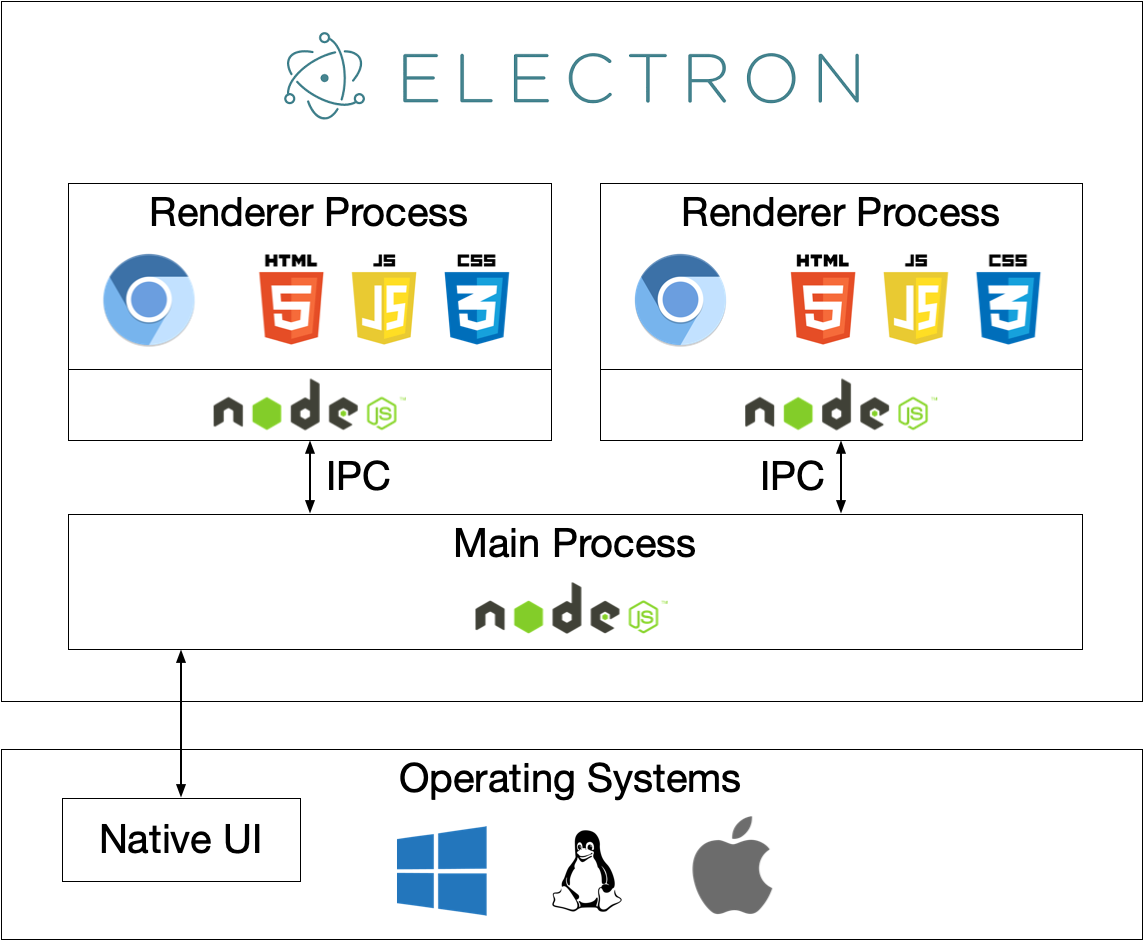
主进程和渲染进程

从这里我们可以看出:
- 主进程只有一个
- 主进程和渲染进程可通过
IPC方式通信。 - 主线程和渲染进程可以使用 node
- 主线程是核心。因为只有一个
Content-Security-Policy
上面我们在主进程中加载了本地 article.html。
mainWindow.loadFile('article.html')
// 打开调试
mainWindow.webContents.openDevTools()
运行后发现客户端控制台有如下信息:
// Electron安全警告(不安全的内容安全策略)
Electron Security Warning (Insecure Content-Security-Policy) This renderer process has either no Content Security
  Policy set or a policy with "unsafe-eval" enabled. This exposes users of
  this app to unnecessary security risks.

For more information and help, consult
https://electronjs.org/docs/tutorial/security.
This warning will not show up
once the app is packaged.
根据信息提示来到 https://electronjs.org/docs/tutorial/security,是一个关于安全的界面。截取其中一小段文案:
当使用 Electron 时,很重要的一点是要理解
Electron 不是一个 Web 浏览器。 它允许您使用熟悉的 Web 技术构建功能丰富的桌面应用程序,但是您的代码具有更强大的功能。 JavaScript 可以访问文件系统,用户 shell 等。 这允许您构建更高质量的本机应用程序,但是内在的安全风险会随着授予您的代码的额外权力而增加。考虑到这一点,请注意,展示任意来自不受信任源的内容都将会带来严重的安全风险,而
这种风险Electron也没打算处理。 事实上,最流行的 Electron 应用程序(Atom,Slack,Visual Studio Code 等) 主要显示本地内容(即使有远程内容也是无 Node 的、受信任的、安全的内容) - 如果您的应用程序要运行在线的源代码,那么您需要确保源代码不是恶意的。
页面罗列了 17 条安全建议,其中就有Content Security Policy(内容安全策略)。
给 article.html添加如下代码,警告消失了。
// default-src代表默认规则,'self'表示限制所有的外部资源,只允许当前域名加载资源。
<meta http-equiv="Content-Security-Policy" content="script-src 'self'">
倘若给 article.html 中写页内脚本,会报错如下,改为<script src="./article.js"></script>即可:
article.html:13 Refused to execute inline script because it violates the following Content Security Policy directive: "script-src 'self'". Either the 'unsafe-inline' keyword, a hash ('sha256-FUXSTb1xGfrsnwlIAuF8vFTVUW/HcyPHjQ+19tHS6/Q='), or a nonce ('nonce-...') is required to enable inline execution.
js脚本中使用node
article.html 中引入 article.js,其中使用 node 中的 process 模块:
// article.js
console.log('hello')
console.log(process)
客户端会报错:
Uncaught ReferenceError: process is not defined
    at article.js:2:13
前文我们已经知道,需要打开node集成(nodeIntegration),并且需要关闭上下文隔离(contextIsolation),然后就可以在渲染进程中使用 node。
const mainWindow = new BrowserWindow({
        width: 1000,
        height: 800,
        webPreferences: {
            nodeIntegration: true,
            contextIsolation: false,
        },
    })
现在控制台就不在报错:
hello
// 对象
>process
禁用Node.js集成
我们可以在前端 javascript 中使用 node,也就可以随意写文件到客户端。
例如在 article.js 中增加如下代码,每次运行,就会在当前目录下生成一个文件。
const fs = require('fs')
fs.writeFile('xss.txt', '我是一段恶意代码', (err) => {
  if (err) throw err;
  console.log('当前目录生成 xss.txt 文件');
});
挺可怕!
在 electron 安全 中不推荐使用 nodeIntegration,推荐使用 preload的方式(下文会讲到)。截取代码片段如下:
// main.js (Main Process)
// 不推荐
const mainWindow = new BrowserWindow({
  webPreferences: {
    contextIsolation: false,
    nodeIntegration: true,
    nodeIntegrationInWorker: true
  }
})

mainWindow.loadURL('https://example.com')
// main.js (Main Process)
// 推荐
const mainWindow = new BrowserWindow({
  webPreferences: {
    preload: path.join(app.getAppPath(), 'preload.js')
  }
})

mainWindow.loadURL('https://example.com')
<!-- 不推荐 -->
<webview nodeIntegration src="page.html"></webview>

<!-- 推荐 -->
<webview src="page.html"></webview>
当禁用Node.js集成时,你依然可以暴露API给你的站点以使用Node.js的模块功能或特性。 预加载脚本依然可以使用require等Node.js特性, 以使开发者可以通过contextBridge API向远程加载的内容公开自定义API。—— electron 安全
生命周期
ready当 Electron 完成初始化时,发出一次。dom-readydom准备好了,可以选择界面上的元素did-finish-load官网解释看不懂,只知道发生在 dom-ready 后面。window-all-closed所有窗口都关闭时触发。如果选择监听,需要自己决定是否退出应用。如果没有主动退出(app.quit()),则 before-quit/ will-quit/quit 事件不会发生。before-quit在程序关闭窗口前发信号。调用 event.preventDefault() 将阻止终止应用程序的默认行为。will-quit当所有窗口被关闭后触发,同时应用程序将退出。调用 event.preventDefault() 将阻止终止应用程序的默认行为。quit在应用程序退出时发出。close在窗口关闭时触发。当你接收到这个事件的时候, 你应当移除相应窗口的引用对象,避免再次使用它.
Tip:dom-ready 和 did-finish-load 在下文(webContents)有详细试验。
3个 quit 有些绕,可以简单认为 electron 将 quit 分成 3 步,而且如果监听了 window-all-closed 则会对这三个 quit 造成一些影响。
下面我们通过示例说明。main.js 代码如下:
const path = require('path')
const { app, BrowserWindow, ipcMain } = require('electron')

function createWindow() {
    let mainWindow = new BrowserWindow({
        width: 1000,
        height: 800,
        webPreferences: {
            preload: path.join(app.getAppPath(), './preload.js')
        },
    })
    mainWindow.loadFile('article.html')
    mainWindow.webContents.openDevTools()

    mainWindow.on('close', () => {
        console.log('close - 窗口关闭,回收窗口引用')
        mainWindow = null
    })
    // webContents - 渲染以及控制 web 页面
    mainWindow.webContents.on('did-finish-load', ()=>{
        console.log('did-finish-load - 导航完成时触发,即选项卡的旋转器将停止旋转,并指派onload事件后')
    })

    mainWindow.webContents.on('dom-ready', ()=>{
        console.log('dom-ready - dom准备好了,可以选择界面上的元素')
    })
}

app.on('window-all-closed', function () {
    console.log('window-all-closed')
    app.quit() // {1}
})

app.on('quit', function (event) {
    console.log('quit')
})
app.on('before-quit', function (event) {
    // event.preventDefault() {2}
    console.log('before-quit')
})
app.on('will-quit', function (event) {
    // event.preventDefault()
    console.log('will-quit')
})

app.on('ready', () => {
    console.log('ready - electron 初始化完成时触发')
    createWindow()
})
终端输入:
ready - electron 初始化完成时触发
dom-ready - dom准备好了,可以选择界面上的元素
did-finish-load - 导航完成时触发,即选项卡的旋转器将停止旋转,并指派onload事件后
close - 窗口关闭,回收窗口引用
window-all-closed
before-quit
will-quit
quit
发生顺序是:ready -> dom-ready -> did-finish-load。
如果开启 event.preventDefault()(行{2}),在本地运行时,关闭应用,will-quit 和 quit 将不会触发。
注:如果将app.quit()(行{1})注释,也就是监听 window-all-closed 但不主动关闭应用,则 quit 相关的事件不会触发。只会输入如下结果:
ready - electron 初始化完成时触发
dom-ready - dom准备好了,可以选择界面上的元素
did-finish-load - 导航完成时触发,即选项卡的旋转器将停止旋转,并指派onload事件后
close - 窗口关闭,回收窗口引用
window-all-closed
最后说一下 activate,当应用被激活时发出。 各种操作都可以触发此事件, 例如首次启动应用程序、尝试在应用程序已运行时或单击应用程序的坞站或任务栏图标时重新激活它。
注:activate 测试未达到预期。或许笔者的win7环境不对。
在electron-quick-start中有如下这段代码:
app.whenReady().then(() => {
  createWindow()

  app.on('activate', function () {
    // On macOS it's common to re-create a window in the app when the
    // dock icon is clicked and there are no other windows open.
    if (BrowserWindow.getAllWindows().length === 0) createWindow()
  })
})
这段代码意思是:在 macOs 中,没有其他窗口打开,点击 dock icon 则重新创建窗口。
参考示例,我们也加上:
app.whenReady().then(() => {
  createWindow()
    // 没有达到预期
  app.on('activate', function () {
    if (BrowserWindow.getAllWindows().length === 0) createWindow()
  })
})

app.on('window-all-closed', function () {
  if (process.platform !== 'darwin') app.quit()
})
预加载(preload)
前面提到,在 electron 安全 中不推荐使用 nodeIntegration,推荐使用 preload的方式。我们用一下:
在入口文件中配置 preload:
$ git diff main.js
+const path = require('path')
 const { app, BrowserWindow } = require('electron')

 function createWindow() {
         width: 1000,
         height: 800,
         webPreferences: {
-            nodeIntegration: true,
-            contextIsolation: false,
+            // nodeIntegration: true,
+            // contextIsolation: false,
+            // app.getAppPath() - 当前应用程序目录。
+            preload: path.join(app.getAppPath(), 'preload.js')
         },
     })
在项目根目录下新建 preload.js,写一句即可:console.log('process.platform', process.platform)
客户端则会输出:process.platform win32
现在我们就可以在 preload.js 中使用 node。
contextBridge
通过 preload 中我们可以在关闭node集成的情况下使用 node。
如果需要将 preload 中的属性或方法传给渲染进程,我们可以使用 contextBridge。
contextBridge - 在隔离的上下文中创建一个安全的、双向的、同步的桥梁。
需求:将 preload 中的一个数据传给渲染进程。
实现如下:
// preload.js
const { contextBridge, ipcRenderer } = require('electron')

/*
contextBridge.exposeInMainWorld(apiKey, api)
    - apiKey string - 将 API 注入到 窗口 的键。 API 将可通过 window[apiKey] 访问。
    - api any - 你的 API可以是什么样的以及它是如何工作的相关信息如下。
*/
contextBridge.exposeInMainWorld(
  'electron',
  {
      platform: process.platform
  }
)
// article.js
// render: platform = win32
console.log('render: platform =', window.electron.platform)
通过 contextBridge.exposeInMainWorld 将数据导出,然后在渲染进程中通过 window 来获取数据。客户端成功输出:render: platform = win32
主进程和渲染进程通信
前文我们已经学过主线程和渲染进程通信,其中主要使用 ipcMain 和 ipcRenderer,我们将其加入 preload 中。
主进程中注册事件:
// icp 通信
ipcMain.on('icp-eventA', (evt, ...args) => {
    // icp-eventA。args= [ 'pjl' ]
    console.log('icp-eventA。args=', args)
})
preload.js 中触发:
ipcRenderer.send('icp-eventA', 'pjl')
渲染进程如果需要传递数据给主线程,可以将上面示例改为点击时触发即可,如果需要取得主线程的返回数据,添加 return 即可。
Tip: 触发如果改用 invoke 触发,报错如下:
// Error occurred in handler for 'icp-eventA': No handler registered for 'icp-eventA'
ipcRenderer.invoke('icp-eventA', 'pjl2')
注:通过ipcMain.on 和 ipcRenderer.send的方式,比如 icp-eventA 事件返回数据,而在 preload 中需要接收这个数据,或许就有麻烦,比如不能正常接收该数据,只能拿到 undefined,本文 clipboard 中就遇到了。
handle
关于注册,除了 ipcMain.on 还有 ipcMain.handle,支持异步,触发的方法是 ipcRenderer.invoke。用法如下:
// Main Process
ipcMain.handle('my-invokable-ipc', async (event, ...args) => {
  const result = await somePromise(...args)
  return result
})
// Renderer Process
async () => {
  const result = await ipcRenderer.invoke('my-invokable-ipc', arg1, arg2)
  // ...
}
渲染进程注册
上面我们在主进程中注册事件,渲染进程触发。能否反过来,也就是渲染进程注册、主线程触发?
发现 ipcRenderer.on(channel, listener) 这个aip,说明可以在渲染进程中注册。但是 ipcMain 却没有触发的方法。
注:没有找到如何在主进程中触发,暂时先不管了。
优雅地显示窗口
electron 打开应用后,由于请求的网页比较慢,会明显白屏几秒钟,感觉很不好。
let mainWindow = new BrowserWindow({
    width: 1000,
    height: 800,
})
mainWindow.loadURL('https://github.com')
关于优雅地显示窗口,官网提供两种方式:
// 使用 ready-to-show 事件
const { BrowserWindow } = require('electron')
const win = new BrowserWindow({ show: false })
win.once('ready-to-show', () => {
  win.show()
})
// 设置 backgroundColor 属性
const { BrowserWindow } = require('electron')

const win = new BrowserWindow({ backgroundColor: '#2e2c29' })
win.loadURL('https://github.com')
Tip:对于一个复杂的应用,ready-to-show 可能发出的太晚,会让应用感觉缓慢。 在这种情况下,建议立刻显示窗口,并使用接近应用程序背景的 backgroundColor
笔者使用 ready-to-show 优化一下:
let mainWindow = new BrowserWindow({
    width: 1000,
    height: 800,
    show: false,
})
mainWindow.loadURL('https://github.com')
mainWindow.once('ready-to-show', () => {
    mainWindow.show()
})
笔者等了5秒,应用啪的一下就出来了,github 也已经准备完毕。
如果让我点击应用,需要过5秒以上应用才打开,肯定认为应用是否哪里出错了!
BrowserWindow
父子窗口
前面我们只是打开了一个窗口,其实可以打开多个。比如下面代码就打开了两个窗口,他们互不相干,可以各自拖动:
let mainWindow = new BrowserWindow({
    width: 1000,
    height: 800,
    webPreferences: {
        preload: path.join(app.getAppPath(), './preload.js')
    },
})
mainWindow.loadFile('article.html')
// 第二个窗口
let secondWindow = new BrowserWindow({
    width: 600,
    height: 400,
})
secondWindow.loadURL('https://www.baidu.com')
可以通过 parent 属性让两个窗口建立父子关系:
let secondWindow = new BrowserWindow({
    width: 600,
    height: 400,
  + parent: mainWindow,
})
再次运行,两个窗口好似没有关系,拖动父窗口子窗口也不会跟随,在笔者机器(win7)最大的不同是之前屏幕底部栏有两个应用图标,现在变成了一个。
增加一个模态属性:
let secondWindow = new BrowserWindow({
    width: 600,
    height: 400,
    parent: mainWindow,
  + modal: true
})
现在子窗口可以拖动,而且只有关闭子窗口,才能触碰到父窗口。
frame
前文已经使用过 frame,尽管不能再拖动,但仍旧可以通过鼠标调整窗口打下
titleBarStyle
let mainWindow = new BrowserWindow({
    width: 1000,
    height: 800,
    // frame: false,
    titleBarStyle: 'hidden',
    titleBarOverlay: true,
})
titleBarStyle 配合 titleBarOverlay 在 windows 下会在应用右上方显示三个系统按钮:最小、最大、关闭。
electron-win-state
使用 electron-win-state 可以存储并恢复 electron 窗口的大小和位置。下面我们尝试一下:
首先安装:
$ npm install electron-win-state
npm WARN electron-demo@1.0.0 No description
npm WARN electron-demo@1.0.0 No repository field.
npm WARN optional SKIPPING OPTIONAL DEPENDENCY: fsevents@2.3.2 (node_modules\fsevents):
npm WARN notsup SKIPPING OPTIONAL DEPENDENCY: Unsupported platform for fsevents@2.3.2: wanted {"os":"darwin","arch":"any"} (current: {"os":"win32","arch":"x64"})

+ electron-win-state@1.1.22
added 28 packages from 10 contributors and audited 325 packages in 23.356s

37 packages are looking for funding
  run `npm fund` for details

found 1 moderate severity vulnerability
  run `npm audit fix` to fix them, or `npm audit` for details
修改入口文件,核心代码如下:
// main.js
const WinState = require('electron-win-state').default
function createWindow() {
  const winState = new WinState({
      defaultWidth: 1000,
      defaultHeight: 800,
      // other winState options, see below
  })
  let mainWindow = new BrowserWindow({
      ...winState.winOptions,
      // 取消 width 和 height 的注释会导致 electron-win-state 失效
      // width: 1000,
      // height: 800,
      webPreferences: {
          preload: path.join(app.getAppPath(), './preload.js')
      },
  })

  winState.manage(mainWindow)
  ...
}
现在我们尝试调整 electron 的窗口大小以及位置,然后关闭,再次打开应用,发现窗口位置和大小仍旧是关闭之前的状态。
Tip:npmjs 中引入方式是 import,笔者这里得使用 require,通过打印 require('electron-win-state') 输出 { default: [class WinState] },于是知道得这么写:require('electron-win-state').default
注:不要在 BrowserWindow 中配置 width、height,否则 electron-win-state 会失效。
webContents
webContents 是 BrowserWindow 对象的一个属性,可以对窗口中的网页做一些事情。
did-finish-load&dom-ready
比如在主进程中监听窗口中网页内容是否加载完毕。
我们通过主进程加载 article.html,在该 html 页面加载一个较大(2000*2000)的图片资源。再次启动应用发现 did-finish-load 在终端很快输出,但需要在过一段时间,发现图片显示的时候 did-finish-load 同时在终端输出。
// main.js
mainWindow.loadFile('article.html')
mainWindow.webContents.on('did-finish-load', () => {
    console.log('did-finish-load')
})
mainWindow.webContents.on('dom-ready', () => {
    console.log('dom-ready - dom准备好了,可以选择界面上的元素')
})
// article.html
<img src='http://placekitten.com/2000/2000'/>
Tip: PlaceKitten 是一个快速而简单的服务,用于获取小猫的照片,以便在设计或代码中用作占位符。只要把你的图片大小(宽度和高度)放在我们的URL之后,你就会得到一个占位符。
右键上下文信息
当你在页面中右键时会触发 context-menu 事件,并传入两个参数 event 和 params。
比如我们添加如下代码:
// main.js
mainWindow.webContents.on('context-menu', (event, params) => {
    console.log('event', event)
    console.log('params', params)
})
当我们点击图片,其中 params.srcURL 就是图片的资源路劲,我们可以在此基础上实现右键保存图片到本地。
params {
  x: 284,
  y: 237,
  linkURL: '',
  linkText: '',
  pageURL: 'file:///E:/lirufen/small%20project/electron/electron-demo/article.html',
  frameURL: '',
  srcURL: 'http://placekitten.com/2000/2000',
  ...
}
Tip: 你自己通过浏览器访问百度(https://www.baidu.com/),右键该网页中的图片可以保存,但如果通过 electron 方式打开却不能右键保存图片。就像这样:
// main.js
let secondWindow = new BrowserWindow({
    width: 600,
    height: 400,
})
secondWindow.loadURL('https://www.baidu.com')
右键里面中的图片,却不能保存图片到本地,需要自己去实现:
secondWindow.loadURL('https://www.baidu.com')
secondWindow.webContents.on('context-menu', (event, params) => {
    console.log('保存图片...')
})
executeJavaScript
可以通过 webContents.executeJavaScript 执行 js 代码。
需求:选中文本,右键后,alert 弹出选中的文本。
实现如下:
// main.js
mainWindow.webContents.on('context-menu', (event, params) => {
    mainWindow.webContents.executeJavaScript(`alert('【选中的文本】:${params.selectionText}')`)
})
dialog
dialog - 显示用于打开和保存文件、警报等的本机系统对话框。
上文我们已经使用 dialog 创建打开和保存文件,这里在稍微补充一下。
例如 showOpenDialogSync 中的 defaultPath 可以指定打开文件的默认路劲,比如指定到桌面:
dialog.showOpenDialogSync({ defaultPath: app.getPath('desktop') })
Tip: app.getPath 中还有许多其他的名字,比如 temp(临时文件夹)、downloads(用户下载目录的路径)、pictures(用户图片目录的路径)等等。
比如显示一个显示错误消息的模态对话框。可以这样:
dialog.showErrorBox('title', 'content')
File
File 对象 - 在文件系统中,使用HTML5 File 原生API操作文件
示例:获取拖拽到app上的文件的真实路径
// from 官网
<div id="holder">
  Drag your file here
</div>

<script>
  document.addEventListener('drop', (e) => {
    e.preventDefault();
    e.stopPropagation();

    for (const f of e.dataTransfer.files) {
      console.log('File(s) you dragged here: ', f.path)
    }
  });
  document.addEventListener('dragover', (e) => {
    e.preventDefault();
    e.stopPropagation();
  });
</script>
菜单
上文我们已经初步使用过菜单。这里进一步展开。
菜单快捷键
需求:点击某菜单触发一动作,注册一快捷键也同样触发该动作。
使用 accelerator 直接定义快捷键即可。就像这样:
const template = [
    {
        id: '1', label: 'one',
        submenu: [
            {
                label: '新开窗口',
                click: () => {
                    ...
                    ArticlePage.loadFile('article.html')
                },
             +  accelerator: 'CommandOrControl+E+D'
            },

        ]
    },
]
const menu = Menu.buildFromTemplate(template)
当按下 CommandOrControl+E+D 就会打开新窗口。
菜单与主进程通信
菜单如果很多,我们会将其抽取成一个单独文件。这种情况,如果让菜单与主进程通信?
需求:菜单中的数据来自主进程,触发菜单点击事件后将信息传给主进程。
核心就是将 menu 改造成一个方法,主进程调用时传递数据和一个回调。实现如下:
// main.js
const CreateMenu = require('./custom-menu')
Menu.setApplicationMenu(CreateMenu('新开窗口', (msg) => {
    console.log('主进程接收菜单信息:', msg)
}))
// custom-menu.js
const { Menu, BrowserWindow } = require('electron')
const CreateMenu = (title, cb) => {
    const template = [
        {
            id: '1', label: 'one',
            submenu: [
                {
                    label: title,
                    click: () => {
                        const ArticlePage = new BrowserWindow({
                            width: 500,
                            height: 500,
                        })
                        ArticlePage.loadFile('article.html')
                        cb('窗口已打开')
                    },
                    accelerator: 'Alt+A'
                },
            ]
        },
        { id: '2', label: 'two' },
    ]
    return Menu.buildFromTemplate(template)
}
module.exports = CreateMenu
右键菜单
需求:右键时显示菜单
右键时显示菜单和创建主菜单类似,首先创建一个菜单,然后右键时将菜单显示出来即可。实现如下:
const template = [
    { id: '1', label: 'one' },
    { id: '2', label: 'two' },
]
const contextMenu = Menu.buildFromTemplate(template)
mainWindow.webContents.on('context-menu', (event, params) => {
    contextMenu.popup()
})
托盘
Tray(系统托盘) - 添加图标和上下文菜单到系统通知区。
Tip:系统托盘是个特殊区域,通常在桌面的底部,在那里,用户可以随时访问正在运行中的那些程序
// mian.js
const createTray = require('./tray')
function createWindow() {
    createTray()
    ...
}
// tray.js
const { Tray } = require('electron')

let tray = null
const createTray = () => {
    // 注:路径有问题则应用出不来
    tray = new Tray('./images/cat.jpg')
    tray.setToolTip('This is my application.')
}

module.exports = createTray
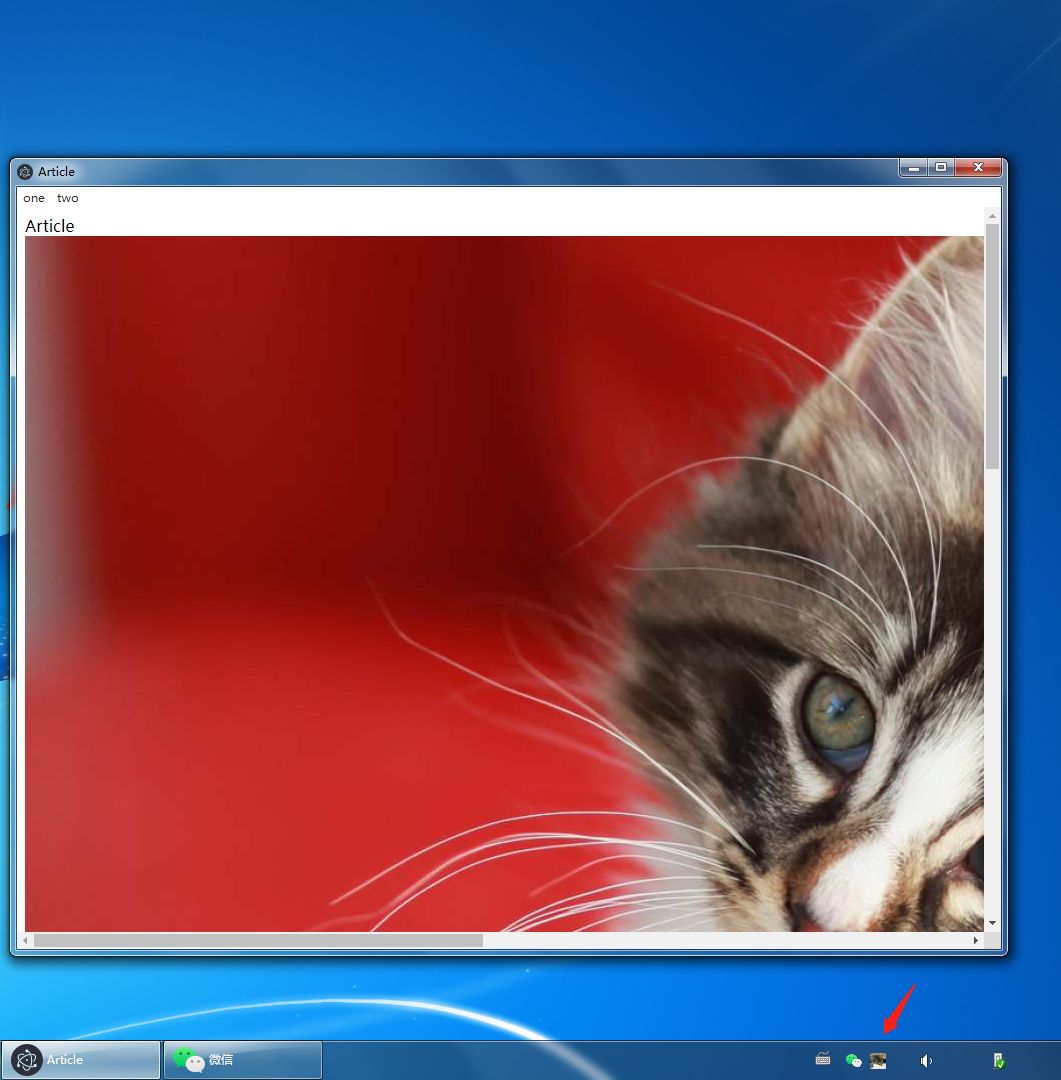
效果如下图所示:

需求:点击托盘显示或隐藏应用
// tray.js
const createTray = (win) => {
  tray = new Tray('./images/cat.jpg')
  tray.setToolTip('This is my application.')
  tray.on('click', () => {
    win.isVisible() ? win.hide() : win.show();
  })
}
// main.js
let mainWindow = new BrowserWindow({
    ...
})

createTray(mainWindow)
注:测试发现有时不那么灵敏。比如桌面微信,点击托盘,只会显示,也将我们的改为总是显示,测试通过。
邮件托盘还可以使用菜单,就像这样:
// tray.js
const contextMenu = Menu.buildFromTemplate([
{ label: '显示', click: () => {}},
{ label: '隐藏',},
])

tray.setContextMenu(contextMenu)
具体做什么就按照 Menu 来实现即可,这里不展开。
nativeImage
托盘构造函数(new Tray(image, [guid]))的第一个参数:image (NativeImage | string)
nativeImage - 使用 PNG 或 JPG 文件创建托盘、dock和应用程序图标。
在 nativeImage 中提到高分辨率,说:在具有高 DPI 支持的平台 (如 Apple 视网膜显示器) 上, 可以在图像的基本文件名之后追加 @ 2x 以将其标记为高分辨率图像。
简单来说我可以定义1倍图、2倍图、3倍图,就像这样:
images/
├── cat.jpg
├── cat@2x.jpg
└── cat@3x.jpg
用户根据自己的 DPR 来自动选择对应的图片。
const createTray = () => {
  tray = new Tray('./images/cat.jpg')
}
可以在浏览器控制台输入 devicePixelRatio 查看本地的 DPR,笔者win7 这里是1,所以托盘图标会选择1倍图,如果你DPR 是 2,则会匹配2倍图。
Tip: Window 接口的 devicePixelRatio 返回当前显示设备的物理像素分辨率与CSS 像素分辨率之比。 此值也可以解释为像素大小的比率:一个 CSS 像素的大小与一个物理像素的大小。 简单来说,它告诉浏览器应使用多少屏幕实际像素来绘制单个 CSS 像素。
clipboard
clipboard - 在系统剪贴板上执行复制和粘贴操作。
注:官网说这个 api 属于主进程和渲染进程,但笔者在 preload.js 中根本就引入不到 clipboard,直接打印 require('electron') 确实没有这个 api。
const {clipboard} = require('electron')
console.log('clipboard:', clipboard)
// require('electron') 输出:
Object
    contextBridge: (...)
    crashReporter: (...)
    ipcRenderer: (...)
    nativeImage: (...)
    webFrame: (...)
    deprecate: (...)
暂不深究,现在就在主进程中使用一下。
需求:主进程中通过 clipboard 向剪切板写入文案并从剪切板读取文案并返回给前端 js。
主进程定义方法:
// main.js
const {clipboard} = require('electron')
ipcMain.handle('clipboardWriteAndRead', (evt, ...args) => {
    clipboard.writeText('hello i am a bit of text2!')
    const text = clipboard.readText()
    console.log('text main:', text)
    return text
})
在 preload.js 中将主进程的方法导出给前端js:
// preload.js
contextBridge.exposeInMainWorld(
  'electron',
  {
    platform: process.platform,
    clipboardWriteAndRead: async () => {
      const text = await ipcRenderer.invoke('clipboardWriteAndRead')
      console.log('text pre:', text)
      return text
    }
  }
)
前端调用:
setTimeout(async () => {
    const text = await window.electron.clipboardWriteAndRead()
    console.log('article.js :', text)
}, 1000)
达到预期。测试结果如下:
// 终端:
text main: hello i am a bit of text!

// 浏览器:
text pre: hello i am a bit of text!
article.js : hello i am a bit of text!
注:如果通过 ipcMain.on 注册,ipcRenderer.send 触发,就像下面这么写,结果却是主进程中的方法正确执行了,但是 preload 和 article 中的 text 都是 undefined。
// main.js
const {clipboard} = require('electron')
ipcMain.on('clipboardWriteAndRead', (evt, ...args) => {
    clipboard.writeText('hello i am a bit of text!')
    const text = clipboard.readText()
    console.log('text main:', text)
    return text
})
// preload.js
contextBridge.exposeInMainWorld(
  'electron',
  {
    clipboardWriteAndRead: () => {
      const text = ipcRenderer.send('clipboardWriteAndRead')
      console.log('text pre:', text)
      return text
    }
  }
)

ipcRenderer.send('icp-eventA', 'pjl')
// article.js
setTimeout( () => {
    const text = window.electron.clipboardWriteAndRead()
    console.log('article.js :', text)
}, 1000)
上面我们使用了clipboard 的 readText 和 writeText 读取文本和写入文本,还有其他方法读取HTML、图片等,请自行查阅。
desktopCapturer
desktopCapturer(桌面捕获者) - 访问关于使用navigator.mediaDevices.getUserMedia API 获取的可以用来从桌面捕获音频和视频的媒体源的信息。
直接从官网来看一下这个东西到底是什么:
// 官网示例
const { desktopCapturer } = require('electron')

desktopCapturer.getSources({ types: ['window', 'screen'] }).then(async sources => {
  // 看一下 sources 到底是什么
})
Tip:官网提到在 preload 脚本中使用,然而 preload(console.log(require('electron'))) 中根本没有 desktopCapturer。
直接将其放在主线程中会导致应用起不来,就像这样:
function testDesktopCapturer(){
    desktopCapturer.getSources({ types: ['window', 'screen'] }).then(async sources => {
        console.log('sources', sources)
    })
}
testDesktopCapturer()
如果把方法放入 setTimeout 中等一秒执行却可以。但是终端看起来不方便,笔者决定在 preload 中调用,直接在客户端中看。
setTimeout(() => {
    testDesktopCapturer()
}, 1000)
代码如下:
在主进程中注册方法:
// main.js
function testDesktopCapturer(){
    desktopCapturer.getSources({ types: ['window', 'screen'] }).then(async sources => {
        console.log('sources', sources)
    })
}

ipcMain.handle('testDesktopCapturer',  async (evt, ...args) => {
    const sources = await desktopCapturer.getSources({ types: ['window', 'screen'] }).then(async sources => {
        return sources
    })
    return sources
})
通过 preload.js 将方法暴露给前端js:
// preload.js
contextBridge.exposeInMainWorld(
  'electron',
  {
    platform: process.platform,
    testDesktopCapturer: async () => {
      const sources = await ipcRenderer.invoke('testDesktopCapturer')
      console.log('sources:', sources)
      return sources
    }
  }
)
前端 js 直接调用:
// article.js
setTimeout(async () => {
    window.electron.testDesktopCapturer()
}, 1000)
于是在客户端很清晰的看到 sources 是一个数组,笔者这里有5个对象:
0: {name: '整个屏幕', id: 'screen:0:0', thumbnail: NativeImage, display_id: '', appIcon: null}
1: {name: 'main.js - electron-demo - Visual Studio Code [Administrator]', id: 'window:3343882:0', thumbnail: NativeImage, display_id: '', appIcon: null}
2: {name: 'electron3.md - Typora', id: 'window:1311574:0', thumbnail: NativeImage, display_id: '', appIcon: null}
3: {name: 'draft.txt - 写字板', id: 'window:1245766:0', thumbnail: NativeImage, display_id: '', appIcon: null}
4: {name: 'MINGW64:/e/xx/small project/electron/electron-demo', id: 'window:1311282:0', thumbnail: NativeImage, display_id: '', appIcon: null}
我们看一下 name 属性。第一个的整个屏幕,第二个应该是 vscode,第三个是 Typora(看markdown的软件),第四个是写字板。于是我们知道 sources 是一些应用。
其中第一个的thumbnail属性是本地图片(NativeImage),我们尝试将整个屏幕显示出来。请看代码:
// main.js 返回`整个屏幕`对象
ipcMain.handle('testDesktopCapturer',  async (evt, ...args) => {
    const sources = await desktopCapturer.getSources({ types: ['window', 'screen'] }).then(async sources => {
        if(sources[0].name === '整个屏幕'){
            return sources[0]
        }
    })
    return sources
})
// article.js - 过5秒调用,可以用点击事件模拟,比如:全屏按钮
setTimeout(async () => {
    window.electron.testDesktopCapturer()
}, 5000)
// article.html - 最开始有一张图片,过5秒会被替换成截屏图片
<body>
    Article
    <img src='http://placekitten.com/800/600' style="width:800px;height:600px;"/>
    <script src="./article.js"></script>
</body>
// preload.js - 转为 url 并赋值给 <img> 元素
contextBridge.exposeInMainWorld(
  'electron',
  {
    testDesktopCapturer: async () => {
      const screen = await ipcRenderer.invoke('testDesktopCapturer')
      const imgUrl = screen.thumbnail.toDataURL()
      console.log('imgUrl:', imgUrl)
      document.querySelector('img').src = imgUrl
    }
  }
)
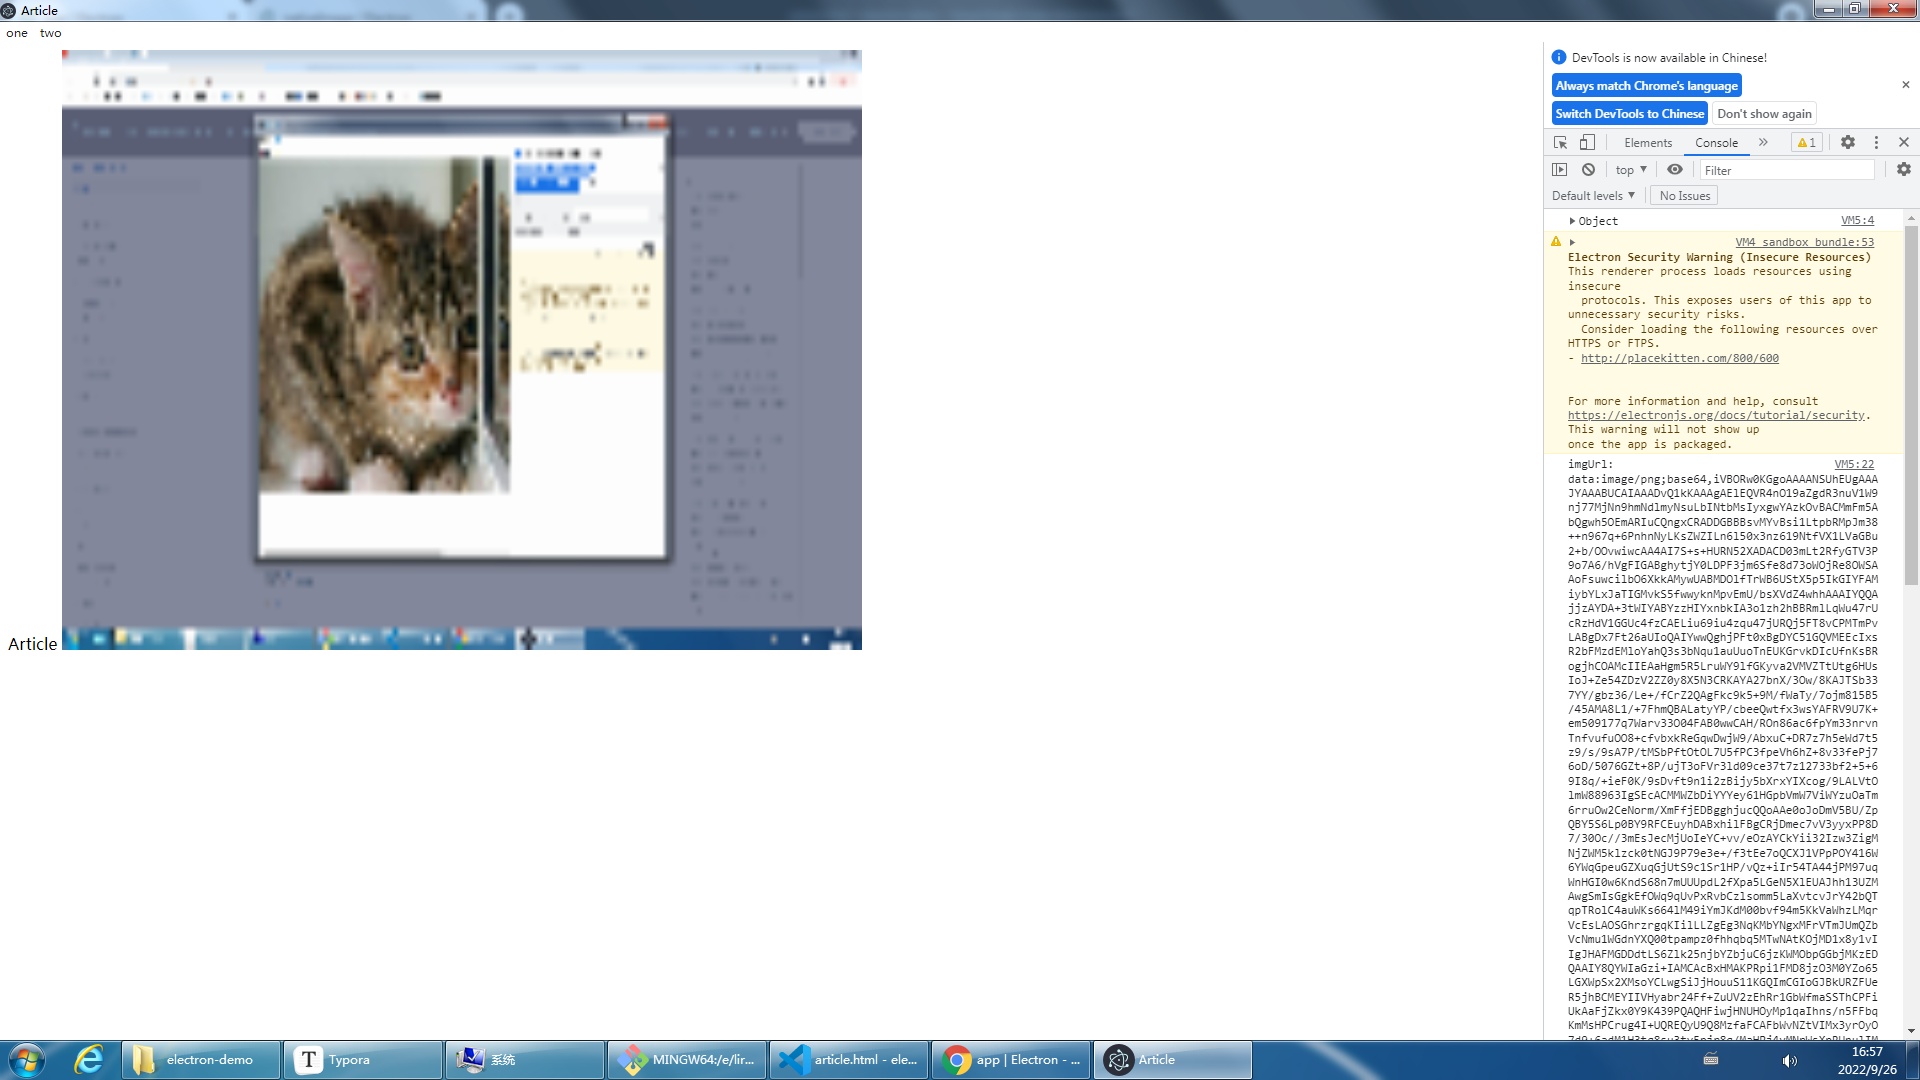
过5秒,截屏后会替换页面原先图片,不是很清晰。效果如下图所示:

electron 小试
笔者刚好前段时间做了一个网页版的 svn 搜索工具给公司内部用,用来快速搜索 svn 中的文档。打算将其做成 electron,该工具是内部系统的一个网页,基于 react。
方案有很多,比需要解决的问题也不相同。比如将项目放入 electron,那么之前资源的引用得处理,就像这样:
const {override, addDecoratorsLegacy, addLessLoader} = require('customize-cra');
const ModuleScopePlugin = require('react-dev-utils/ModuleScopePlugin');

const addCustomize = () => config => {
  // config.env.NODE_ENV
  if(process.env.NODE_ENV === 'production'){
    config.output.publicPath = 'http://192.168.xx.xx:8080/'
  }
  return config
}
最简单的方法就是直接通过 url 放入 electron 中。
打包出现了不少情况。例如:
- 用 electron-packager 打包非常慢,7kb的速度约2小时,结果还失败了。
- 改用 electron-builder 打包出现
cannot find module fs/promises,网上说是 nodejs 版本太低。 - 回家, 23:00 点用笔记本(win10 + electron-packager)打包,没有配置镜像源(有说配置淘宝源能提高打包速度)约2分钟就打包成功,压缩后是71M,解压后212M,非常大。
Tip: electron-builder 本来是支持在windows下开发,然后一条命令打包到不同平台的,但此命令需要使用远程服务器来完成打包,然后此服务器已经停止很长时间了,而且从官方文档可感知后续不会开启。所以要打linux包必须到linux平台下打包。
win7 中 Node 13.14 不能构建
笔者工作机器是 win7,只能安装 node 13.14,不能打包electron。
根据网友介绍可以通过如下方法解决:
- 安装 node-v14.17.6-win-x64.zip
- 设置环境变量。node.exe 上一层目录即可
node -v 提示 至少得 win8 才能安装:
$ node -v
Node.js is only supported on Windows 8.1, Windows Server 2012 R2, or higher.Setting the NODE_SKIP_PLATFORM_CHECK environment variable to 1 skips this check, but Node.js might not execute correctly. Any issues encountered on unsupported platforms will not be fixed.
- 在配置系统变量
NODE_SKIP_PLATFORM_CHECK值为 1 即可。
网易云音乐 API
NeteaseCloudMusicApi - 网易云音乐 Node.js API service
可以通过这个开源项目实现自己的听歌软件。
出处:https://www.cnblogs.com/pengjiali/p/16732090.html
本文版权归作者和博客园共有,欢迎转载,但未经作者同意必须保留此段声明,且在文章页面明显位置给出原文连接。


