对三维医学图像进行拼接,调整窗宽窗位。
窗宽指CT图像所显示的CT 值范围,在此CT值范围内的组织和病变均以不同的模拟灰度显示
窗位(窗中心)指窗宽范围内均值或中心值,如果窗宽为100Hu,当窗位为中心 0Hu,则CT值的范围为-50Hu ~ +50Hu;当窗位为中心 +35Hu,则CT值的范围为-15Hu ~ +85Hu;
def infer_tumorandliver(model, ct_array_nor, cube_shape=(129, 512, 512)):
    patch_size = cube_shape  # 送入网络时的patch大小
    patch_stride = [60, 256, 256] # 重叠部位大小

    locations, image_shape = generate_test_locations(ct_array_nor, patch_size, patch_stride)  # 生成步长与图像shape
    print('location', locations, image_shape)

    image = np.zeros((1,) + (ct_array_nor.shape)).astype(np.float32) # 生成与原图对应大小的全0体积图像,用于保存预测结果图
    seg = np.zeros((ct_array_nor.shape)).astype(np.float32)# 生成与原图对应大小的全0体积图像,用于除去重叠部位


    print('image shape', image.shape)

    for z in range(0, locations[0]):
        zs = min(patch_stride[0] * z, image_shape[0] - patch_size[0])
        for x in range(0, locations[1]):
            xs = min(patch_stride[1] * x, image_shape[1] - patch_size[1])
            for y in range(0, locations[2]):
                ys = min(patch_stride[2] * y, image_shape[2] - patch_size[2])

                patch = ct_array_nor[zs:zs + patch_size[0],
                        xs:xs + patch_size[1],
                        ys:ys + patch_size[2]]
                # print('patch',patch)
                patch = np.expand_dims(np.expand_dims(patch, axis=0), axis=0).astype(np.float32)

                # 适用于深度学习预测
                # patch_tensor = torch.from_numpy(patch).cuda()
                # output = model(patch_tensor)
                # output = output.cpu().data.numpy()

                # 适用于正常拼接
                patch_tensor = torch.from_numpy(patch).cuda()
                output = patch_tensor.cpu().data.numpy()

                image[:, zs:zs + patch_size[0], xs:xs + patch_size[1], ys:ys + patch_size[2]] \
                    = image[:, zs:zs + patch_size[0], xs:xs + patch_size[1], ys:ys + patch_size[2]] + output[0, 0,
                                                                                                          :, :, :]

                seg[zs:zs + patch_size[0], xs:xs + patch_size[1], ys:ys + patch_size[2]] \
                    = seg[zs:zs + patch_size[0], xs:xs + patch_size[1], ys:ys + patch_size[2]] + 1


    image = image / np.expand_dims(seg, axis=0)


    image = np.squeeze(image)

    # 可以对图像进行窗宽窗位调整
    image[image<50] = 0
    image[image>400] =400
    mask_pred_containers = image

    # 弄回pad前大小
    return mask_pred_containers
因为我做了图像强度变化,所以前后存在一些不一致,但是不影响拼接结果。
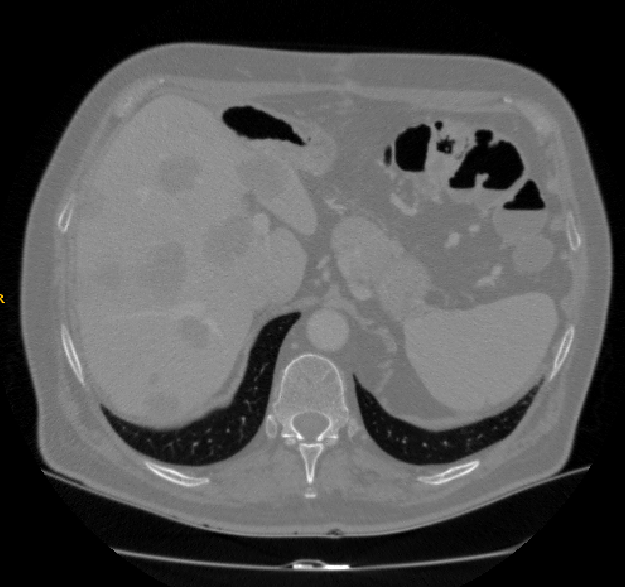
图像拼接前:
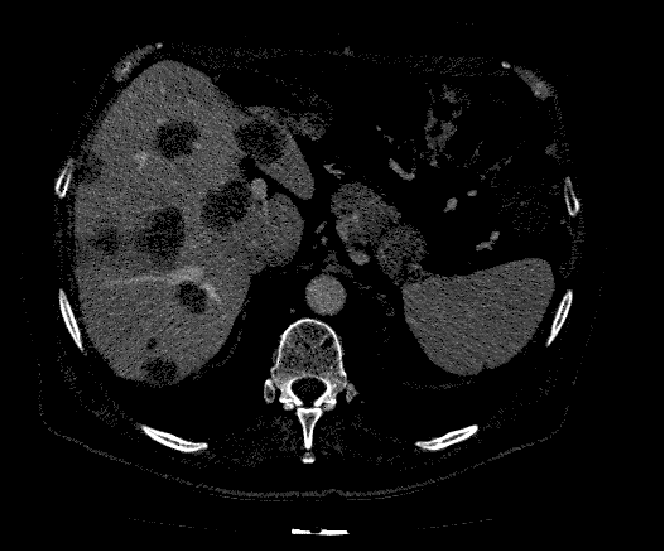
拼接后:
具体代码,请看我的:github

 浙公网安备 33010602011771号