pytest 11 allure2生成html报告,自定义allure 的logo+样式
allure是一个report框架,支持java的Junit/testng等框架,当然也可以支持python的pytest框架,也可以集成到Jenkins上展示高大上的报告界面。
环境准备
-
1.python3.6
-
2.mac环境 、windows
-
3.pycharm
-
4.pytest-allure-adaptor
-
5.allure-pytest 2.8.0
-
6.java1.8或者1.8以上
Allure Pytest Adaptor是Pytest的一个插件,通过它我们可以生成Allure所需要的用于生成测试报告的数据。安装pytest-allure-adaptor插件方法
1.下载和安装命令:
pip3 install pytest-allure-adaptor
首先需要安装命令行工具,如果是Mac电脑,推荐使用Homebrew安装。
$ brew install allure windows:下载解压 配置路径 D:\allure-2.13.7\bin
验证: allure --version
问题:dos可以验证,pycharm验证不了。 那么就重新启动pycharm
2.如何生成:
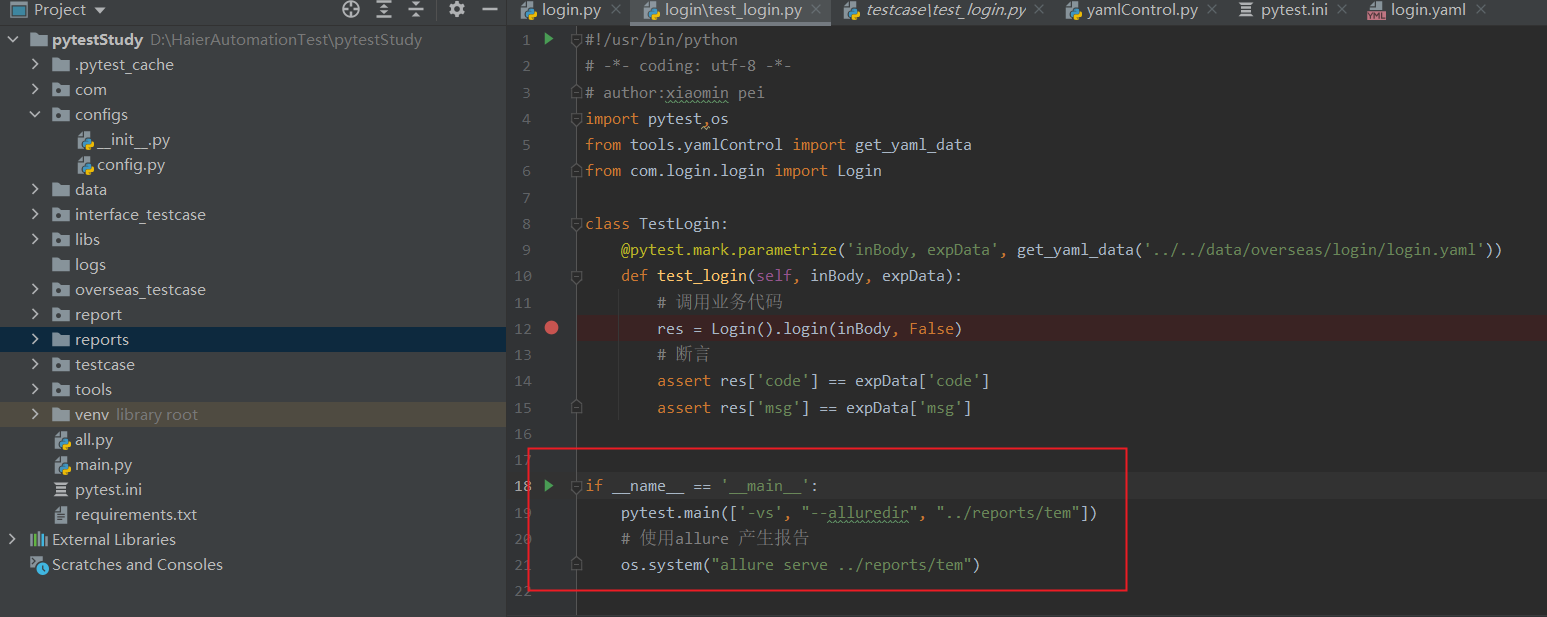
1).可以在全局pytest.ini文件里面的命令配置:生成json格式的临时报告:--alluredir ./temp
2.)生成allure报告 : os.system('allure generate ./temp -o ./report --clean') allure generate:生成报告,固定写法 ./temp 找到临时的json目录,-o 输出 ./report:在那个文件下输出报告 --clean:清空在输出
[pytest]
#addopts = -vs  --html ../report/report.html
addopts = -vs --alluredir ../reports/temp    #生成临时目录
#testpaths = ./testcase
#python_files = test_api.py
python_classes = Test*
python_functions = test
markers =
    smoke:冒烟用例
    usermanage:用户管理模块
    productmanage:商品管理模块
if __name__ == '__main__':
    pytest.main(['-vs', './interface_testcase'])
    os.system('allure generate ./temp -o ./report --clean')
2.生成xml报告:
pytest -s -q --alluredir report
如果不指定路径,默认在当前目录下新建一个report目录,当然也可以指定路径 ($ pytest -s -1q --alluredir ./result/)
pytest -s -q --alluredir 指定report路径
执行完之后打开report文件夹,会自动生成xml格式的报告
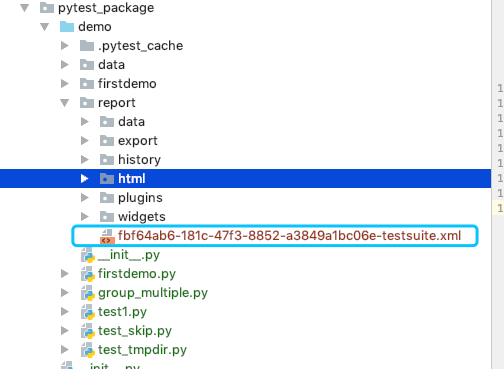
我的在 /Users/newcomer/gitByMyself/python_work_apple/pytest_package/demo 目录下执行的
首先:
cd /Users/newcomer/gitByMyself/python_work_apple/pytest_package/demo
然后:
pytest -s -q --alluredir report
这一步已经生产了xml格式的报告,放到了report目录下:
3.运行allure2
按照这样的格式:allure generate directory-with-results/ -o directory-with-report。directory-with-results是alluredir生成的xml目录,directory-with-report是最终生成html的目录(allure generate ./result/ -o ./report/ --clean),可以用相对路径去生成html报告
$ allure generate report/ -o report/html --clean

这样在./report/目录下就生成了Allure的测试报告了。–clean目的是先清空测试报告目录,再生成新的测试报告。打开的时候在pycharm里面打开,这样的页面就不会是空的了
第一个report(因为设置的目录名字叫report)是alluredir生成的xml目录,第二个report是最终生成html的目录


还可以通过下面的命令打开测试报告:
--------------------------------------------------------------------------------------------------------
$ allure open -h 127.0.0.1 -p 8083 ./report/
------------------------------------------------------------------------------------------------------------------------
![]()


自定义allure报告: 内容+ logo
1.找到以下目录,放置想替换的图片logo
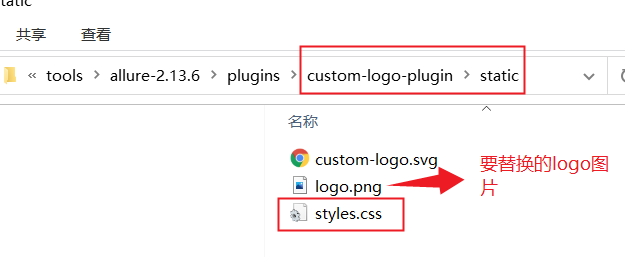
2.打开style.css,输入以下样式
/*.side-nav__brand {
  background: url('custom-logo.svg') no-repeat left center !important;
  margin-left: 10px;
}*/

.side-nav__brand {
  background: url('logo.png') no-repeat left center !important;
  margin-left: 0  !important;
  height: 100px;
  background-size: contain !important;
  background-color: white !important;
}
.side-nav__head {
    margin: 0  !important;
    padding-bottom: 0  !important;
    border-bottom: 1px solid #4d4d4d;
}
.side-nav__brand-text {
  display: none;
}
.side-nav__brand {
    color: #fff;
    text-decoration: none;
    display: block;
    font-size: 26px;
    line-height: 40px;
    font-weight: 700;
    padding-left: 40px;
    margin-bottom: 0px !important;
    margin-left: 0px !important;
    transition: all .3s;
    background-size: auto auto;
}
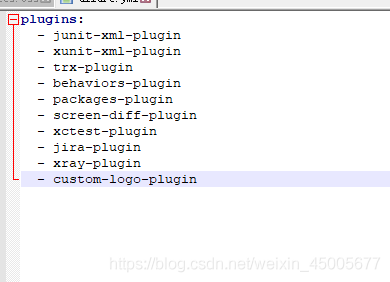
3.修改allure-2.10.0\config\allure.yml 追加custom-logo-plugin重新生成报告即可生效
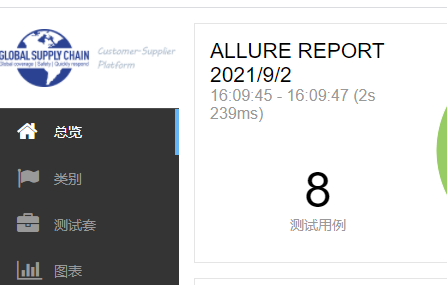
4.效果预览图:
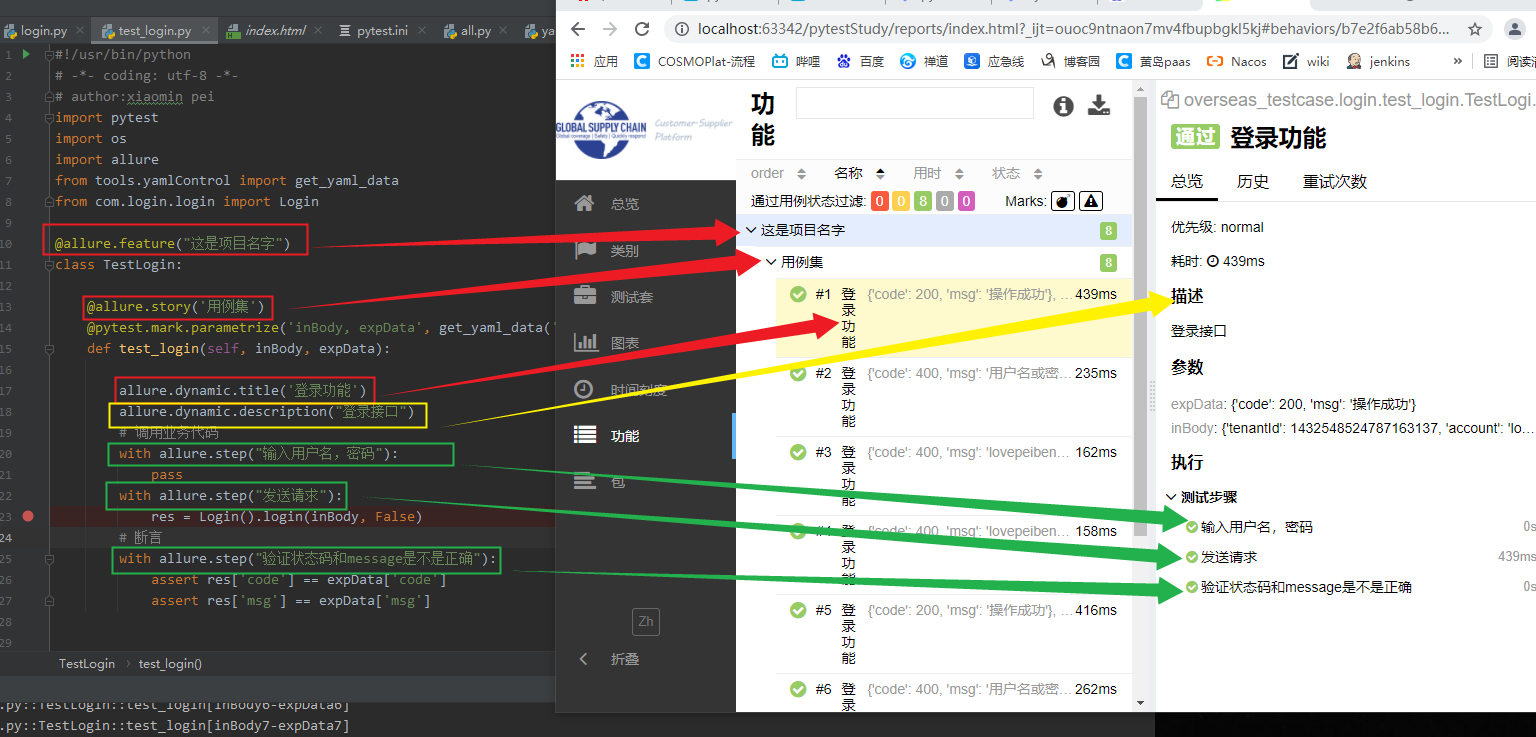
5.如何修改里面的内容:(功能模块),导入allure模块,然后去设置以下内容

 浙公网安备 33010602011771号