
企业级仓库Harbor高可用方案【转】
一、Harbor产品介绍
Harbor 是 VMware公司开源的企业级 Docker Registry 项目,其日标是帮助用户迅速搭建一个企业级的 Docker Registry 仓库服务。它以Docker公司开源的Registr为基础,提供了管理UI。基于角色的访问控制(Role Based AcessControl、AD/LDAP集成、以及审计日志(Audtloging)等企业用户需求的功能。通过添加一些企业必需的功能特性,例如安全、标识和管理等,扩展了开源DockerDistrbution。作为一个企业级私有Registry服务器,Harbor提供了更好的性能和安全,以提升用户使用 Regstry 构建和运行环境传输镜像的效率。
二、高可用环境规划
主机规划
|
操作系统 |
主机名 |
IP地址 |
软件 |
|
CentOS7.x |
master |
192.168.200.10 |
docker-ce docker-compose、Harbor-offine |
|
CentOS7.x |
slave |
192.168.200.20 |
docker-ce、docker-compose、Harbor-offine |
|
CentOS7.x |
ldns-nfs |
192.168.200.30 |
docker-ce、mysql、redis、postgres、nfs、bind |
docker-compose:主要作用同时管理多个容器
Harbor-offine:其实是有n多个容器运行来推出的平台,说白了harbor其实就是由n多个容器来组成的
数据库:harbor需要来调用mysql、Redis、Postgres,在第三台以容器的方式运行,Harbor仓库能不能用在第三台测试(也相当于docker的客户端)
nfs:共享存储,也就是说咱们镜像的存储其实是存储在nfs里边的,然后他也是个dns服务(对域名做一个统一的解析)
拓扑图
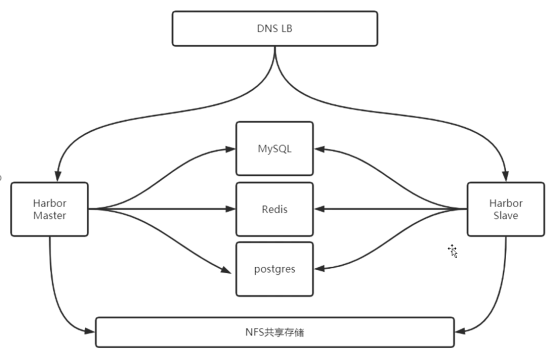
说白了:有咱们的master和slave两台机器,两台Harbor用的数据库(MySQL、Redis、postgres)啊共享存储(NFS)啊都是在一台机器上,都是去连接公共的资源。
然后的话那,用户在访问的时候都是以域名的方式来访问的,那么以域名的方式来访问话呢咱们的这个DNS,DNS是不是可以做轮询,对吧比如说:一个www域名对应的两个ip可不可以,可以。所以说咱们可以在DNS这块做轮询,那这样的话用户既可以访问master或slave
三、高可用环境部署
3.1、基础配置
所有机器执行
- 关闭iptables防火墙并清空规则
- 关闭selinux
- 关闭firewalld防火墙
- 并修改相应的hostname
3.2、部署docker环境
安装docker-ce(所有主机)
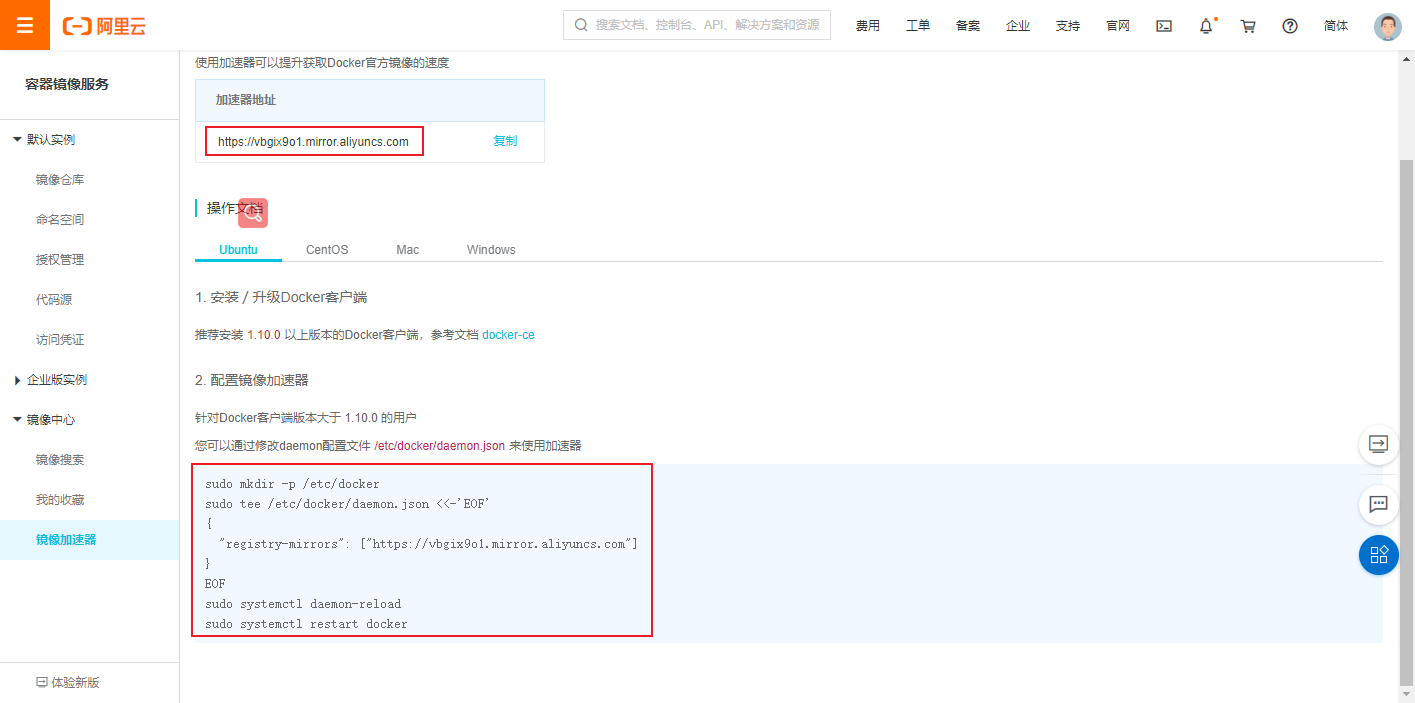
阿里云官方
阿里云镜像jia su器(需自行注册阿里云账户)
查看docker信息
docker version3.3、部署Compose
Harbor准备都进行如下操作
GitHub自行下载
curl -L https://github.com/docker/compose/releases/download/1.21.2/docker-compose-`uname -s`-`uname -m` -o /usr/local/bin/docker-compose
chmod +x /usr/local/bin/docker-compose
[root@master ~]# docker-compose version
docker-compose version 1.21.1, build 5a3f1a3
docker-py version: 3.3.0
CPython version: 3.6.5
OpenSSL version: OpenSSL 1.0.1t  3 May 2016
搭建nfs服务端
[root@ldns-nfs ~]# mkdir -p /data/nfs
[root@ldns-nfs ~]# yum -y install nfs-utils rpcbind
[root@ldns-nfs ~]# echo "/data/nfs 192.168.200.0/24(rw,no_root_squash)" > /etc/exports  //目录200网段拥有读写权限以root身份
[root@ldns-nfs ~]# systemctl start rpcbind nfs		//nfs依赖rpcbind(远程过程调用),先启动rpcbind
[root@ldns-nfs ~]# systemctl enable rpcbind nfs
在Harbor主和备上创建挂载目录,并安装nfs节点nfs节点支持包,Harbor主备都进行如下操作
[root@master ~]# yum -y install nfs-utils rpcbind
[root@master ~]# mkdir -p /data/storage
[root@master ~]# mount 192.168.200.30:/data/nfs /data/storage/
[root@master ~]# echo "192.168.200.30:/data/nfs /data/storage/  nfs4   defaults,_netdev 0 0" >> /etc/fstab   //通常会写,_netdev表示网路设备
查看挂载状态
[root@master ~]# df -Th | grep /data/nfs
192.168.200.30:/data/nfs nfs4       97G  2.2G   95G    3% /data/storage

[root@slave ~]# df -Th |grep /data/nfs
192.168.200.30:/data/nfs nfs4 97G 2.2G 95G 3% /data/storage3.5、准备公用容器
在docker-client(NFS服务器端)下载一个Redis镜像(alpine系统目前docker领域很火,因为它容量很小,比Centos小很多)
[root@ldns-nfs ~]# docker pull redis:alpine启动Redis镜像,映射端口
[root@ldns-nfs ~]# docker run -dit --name redis_test -p 6379:6379 redis:alpine启动一个postgreSQL数据库容器
[root@ldns-nfs ~]# docker pull postgres
[root@ldns-nfs ~]# docker run -itd --name postgres_test -p 5432:5432 -e POSTGRES_PASSWORD=123123 postgres
启动一个MySQL数据库容器
[root@ldns-nfs ~]# docker pull mysql:5.6启动MySQL容器,并映射端口
[root@ldns-nfs ~]# docker run -dit --name mysql_test -p 3306:3306 -e MYSQL_ROOT_PASSWORD=123123 mysql:5.6 --character-set-server=utf8 //指定字符集为utf-8最后按照用途,我们分别给数据库改一下名称
[root@ldns-nfs ~]# docker rename postgres_test clair_db  //修改容器的名字
[root@ldns-nfs ~]# docker rename mysql_test harbor_db
[root@ldns-nfs ~]# docker rename redis_test session

[root@ldns-nfs ~]#  docker ps -a
CONTAINER ID   IMAGE          COMMAND                  CREATED       STATUS       PORTS                    NAMES
95d0a67ea086   mysql:5.6      "docker-entrypoint.s…"   4 hours ago   Up 4 hours   0.0.0.0:3306->3306/tcp   harbor_db
c97449392439   redis:alpine   "docker-entrypoint.s…"   7 hours ago   Up 6 hours   0.0.0.0:6379->6379/tcp   session
ad0e03f16ec9   postgres       "docker-entrypoint.s…"   7 hours ago   Up 6 hours   0.0.0.0:5432->5432/tcp   clair_db
四、Harbor配置
4.1、导入数据
向mysql_db容器里导入数据表(192.168.200.30),在解压后的harbor目录里的ha子目录下的registry.sql表(高版本没有这个文件了)导入到我们之前在NFS服务端上创建的MySQL容器里。
[root@master ~]# tar xf harbor-offline-installer-v1.5.0.tgz
[root@master ~]# cd harbor
[root@master harbor]# tree ha
ha
├── docker-compose.clair.tpl
├── docker-compose.clair.yml
├── docker-compose.tpl
├── docker-compose.yml		#需要修改的配置文件
├── registry.sql			#需要导入的mysql表格
└── sample
    ├── active_active
    │   ├── check.sh
    │   └── keepalived_active_active.conf
    └── active_standby
        ├── check_harbor.sh
        └── keepalived_active_standby.conf

3 directories, 9 files
Harbor-master本地安装mysql客户端连接程序
[root@master harbor]# yum -y install mysql //其实就是mariadb远程连接到192.168.200.30(NFS服务器端)的3306端口,导入表registry.sql
[root@master harbor]# mysql -uroot -p123123 -h 192.168.200.30 -P3306
Welcome to the MariaDB monitor.  Commands end with ; or \g.
Your MySQL connection id is 1
Server version: 5.6.50 MySQL Community Server (GPL)

Copyright (c) 2000, 2018, Oracle, MariaDB Corporation Ab and others.

Type 'help;' or '\h' for help. Type '\c' to clear the current input statement.

MySQL [(none)]> SHOW DATABASES;
+--------------------+
| Database           |
+--------------------+
| information_schema |
| mysql              |
| performance_schema |
+--------------------+
3 rows in set (0.01 sec)

MySQL [(none)]> SOURCE ha/registry.sql;
特别提示:如果导入表格出现如下错误
ERROR 1071 (42000) at line 284 in file: 'ha/registry.sql': Specified key was too long; max key length is 767 bytes
这是因为导入的表格建立的索引超过mysql默认上线767bytes >=254,因为我们需要修改导入的表。
[root@master ~]# vim harbor/ha/registry.sql
220  repository varchar(256) NOT NULL, #将256修改为254
291  resource_name varchar(256), #将256修改为254
改完之后再进行表格导入就不会报错了。
[root@master ~]# mysql -uroot -p123123 -h 192.168.200.30 -P3306 < harbor/ha/registry.sql

MySQL [(none)]> SHOW DATABASES;
+--------------------+
| Database           |
+--------------------+
| information_schema |
| mysql              |
| performance_schema |
| registry           |
+--------------------+
4 rows in set (0.00 sec)
MySQL [(none)]> USE registry;
Reading table information for completion of table and column names
You can turn off this feature to get a quicker startup with -A

Database changed
MySQL [registry]> SHOW TABLES;
+-------------------------------+
| Tables_in_registry            |
+-------------------------------+
| access                        |
| access_log                    |
| alembic_version               |
| clair_vuln_timestamp          |
| harbor_label                  |
| harbor_resource_label         |
| img_scan_job                  |
| img_scan_overview             |
| project                       |
| project_member                |
| project_metadata              |
| properties                    |
| replication_immediate_trigger |
| replication_job               |
| replication_policy            |
| replication_target            |
| repository                    |
| role                          |
| user                          |
| user_group                    |
+-------------------------------+
20 rows in set (0.00 sec)
修改ha/docker-compose.yml
[root@master harbor]# vim ha/docker-compose.yml
 19       - /data/storage:/storage:z		#修改为的NFS共享目录,使数据跑到NFS里面去
修改harbor.cfg主配置文件
[root@master harbor]# vim harbor.cfg
  7 hostname = www.ultralinux.com  #域名
 11 ui_url_protocol = https  #使用https协议
  23 ssl_cert = /etc/ssl/harbor/www.ultralinux.com.crt  #指定证书的位置
 24 ssl_cert_key = /etc/ssl/harbor/www.ultralinux.com.key  #指定证书的位置
 68 harbor_admin_password = Harbor12345  #harbor默认的密码
130 db_host = 192.168.200.30  #指定mysql数据库
133 db_password = 123123  #数据库的密码
136 db_port = 3306
139 db_user = root
145 redis_url = 192.168.200.30:6379  #指定Redis
150 clair_db_host = 192.168.200.30  #指定postgres
154 clair_db_password = 123123  #postgres密码
157 clair_db_port = 5432
160 clair_db_username = postgres
163 clair_db = postgres4.2、为Harbor配置https
创建(申请)自己的CA证书(需要用到OpenSSL工具)
[root@master ~]# yum -y install openssl
[root@master ~]# mkdir -p /data/ssl
[root@master ~]# cd /data/ssl
[root@master ssl]# openssl req -newkey rsa:4096 -nodes -sha256 -keyout ca.key -x509 -days 365 -out ca.crt
Generating a 4096 bit RSA private key
.....................++
............................................................................................................................................................................................................................++
writing new private key to 'ca.key'
-----
You are about to be asked to enter information that will be incorporated
into your certificate request.
What you are about to enter is what is called a Distinguished Name or a DN.
There are quite a few fields but you can leave some blank
For some fields there will be a default value,
If you enter '.', the field will be left blank.
-----
Country Name (2 letter code) [XX]:CN
State or Province Name (full name) []:beijing
Locality Name (eg, city) [Default City]:beijing
Organization Name (eg, company) [Default Company Ltd]:ultralinux
Organizational Unit Name (eg, section) []:ultralinux  //组织
Common Name (eg, your name or your server's hostname) []:www.ultralinux.com  //域名
Email Address []:回车(邮箱这里略)
(基于证书)生成证书签名请求
[root@master ssl]# openssl req -newkey rsa:4096 -nodes -sha256 -keyout www.ultralinux.com.key -out www.ultralinux.com.csr
Generating a 4096 bit RSA private key
....................................................++
.........................................++
writing new private key to 'www.ultra.com.key'
-----
You are about to be asked to enter information that will be incorporated
into your certificate request.
What you are about to enter is what is called a Distinguished Name or a DN.
There are quite a few fields but you can leave some blank
For some fields there will be a default value,
If you enter '.', the field will be left blank.
-----
Country Name (2 letter code) [XX]:CN
State or Province Name (full name) []:beijing
Locality Name (eg, city) [Default City]:beijing
Organization Name (eg, company) [Default Company Ltd]:ultralinux
Organizational Unit Name (eg, section) []:ultralinux
Common Name (eg, your name or your server's hostname) []:www.ultralinux.com
Email Address []:回车

Please enter the following 'extra' attributes
to be sent with your certificate request
A challenge password []:回车(密码这里为空)
An optional company name []:回车 (公司名称)
生成注册表主机的证书
[root@master ssl]# openssl x509 -req -days 365 -in www.ultralinux.com.csr -CA ca.crt -CAkey ca.key -CAcreateserial -out www.ultralinux.com.crt
Signature ok
subject=/C=CN/ST=beijing/L=beijing/O=ultralinux/OU=ultralinux/CN=www.ultralinux.com
Getting CA Private Key
查看证书情况
[root@master ssl]# ll
总用量 20
-rw-r--r-- 1 root root 2057 12月 23 14:58 ca.crt
-rw-r--r-- 1 root root 3272 12月 23 14:58 ca.key
-rw-r--r-- 1 root root   17 12月 23 15:23 ca.srl
-rw-r--r-- 1 root root 1939 12月 23 15:23 www.ultralinux.com.crt
-rw-r--r-- 1 root root 1720 12月 23 15:23 www.ultralinux.com.csr
-rw-r--r-- 1 root root 0 12月 23 15:23 www.ultralinux.com.key4.3、信任自签发的域名证书
由于CA证书是我们自己签发的,Linux操作系统是不信任的,因此我们需要把证书加入到系统的信任证书里。
将自签CA证书添加到系统信任(首先让自己的系统信任证书)
[root@master ssl]# cp www.ultralinux.com.crt /etc/pki/ca-trust/source/anchors/ //复制到系统所在的位置让系统CA信任设置立刻生效
[root@master ssl]# update-ca-trust extract   //让系统加载一下
[root@master ssl]# update-ca-trust enable  //至此,给自己签发完成
创建harbor的证书目录,并复制
[root@master ssl]# mkdir -p /etc/ssl/harbor
[root@master ssl]# cp /data/ssl/www.ultralinux.com.key /etc/ssl/harbor/
[root@master ssl]# cp /data/ssl/www.ultralinux.com.crt /etc/ssl/harbor/
[root@master ssl]# ll /etc/ssl/harbor/
总用量 4
-rw-r--r-- 1 root root 1939 12月 23 15:44 www.ultralinux.com.crt  //harbor需要用到
-rw-r--r-- 1 root root    0 12月 23 15:44 www.ultralinux.com.key  //harbor需要用到
需要跟刚才修改/root/harbor/harbor.cfg的在相同路径下
  23 ssl_cert = /etc/ssl/harbor/www.ultralinux.com.crt  #指定证书的位置
24 ssl_cert_key = /etc/ssl/harbor/www.ultralinux.com.key #指定证书的位置4.4、部署并启动Harbor
[root@master ssl]# cd /root/harbor
[root@master harbor]# ./install.sh --with-clair --ha  //安装比较慢,由很多容器组成需要拉取一些镜像

#因为使用了自定义存储路径,安装中途需要yes确认
Is the Harbor Docker Registry configured to use shared storage (e.g. NFS, Ceph etc.)? [yes/no]:yes
Generated and saved secret to file: /data/secretkey
Generated configuration file: ./common/config/nginx/nginx.conf
Generated configuration file: ./common/config/adminserver/env
Generated configuration file: ./common/config/ui/env
Generated configuration file: ./common/config/registry/config.yml
Generated configuration file: ./common/config/db/env
Generated configuration file: ./common/config/jobservice/env
Generated configuration file: ./common/config/jobservice/config.yml
Generated configuration file: ./common/config/log/logrotate.conf
Generated configuration file: ./common/config/jobservice/config.yml
Generated configuration file: ./common/config/ui/app.conf
Generated certificate, key file: ./common/config/ui/private_key.pem, cert file: ./common/config/registry/root.crt
Generated configuration file: ./common/config/clair/postgres_env
Generated configuration file: ./common/config/clair/config.yaml
Generated configuration file: ./common/config/clair/clair_env
The configuration files are ready, please use docker-compose to start the service.


[Step 3]: checking existing instance of Harbor ...


[Step 4]: starting Harbor ...
Creating network "harbor_harbor" with the default driver
Creating network "harbor_harbor-clair" with the default driver
Creating harbor-log ... done
Creating harbor-adminserver ... done
Creating clair              ... done
Creating registry           ... done
Creating harbor-ui          ... done
Creating nginx              ... done
Creating harbor-jobservice  ... done

✔ ----Harbor has been installed and started successfully.----

Now you should be able to visit the admin portal at https://www.ultralinux.com.
For more details, please visit https://github.com/vmware/harbor .
[root@master harbor]# docker-compose ps
Name Command State Ports
---------------------------------------------------------------------------------------------------------
harbor-adminserver /harbor/start.sh Up (healthy)
harbor-jobservice /harbor/start.sh Up
harbor-log /bin/sh -c /usr/local/bin/ ... Up (healthy) 127.0.0.1:1514->10514/tcp
harbor-ui /harbor/start.sh Up (healthy)
nginx nginx -g daemon off; Up (healthy) 0.0.0.0:443->443/tcp,
0.0.0.0:4443->4443/tcp,
0.0.0.0:80->80/tcp
registry /entrypoint.sh serve /etc/ ... Up (healthy) 5000/tcp
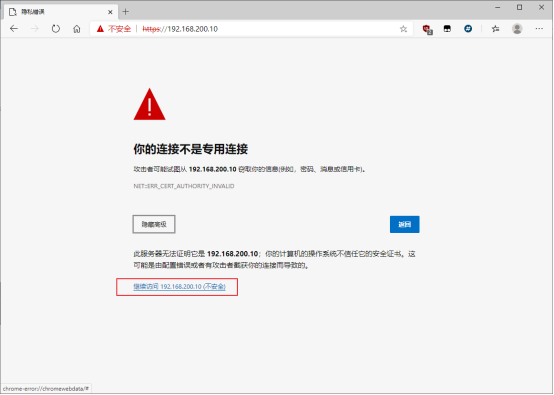
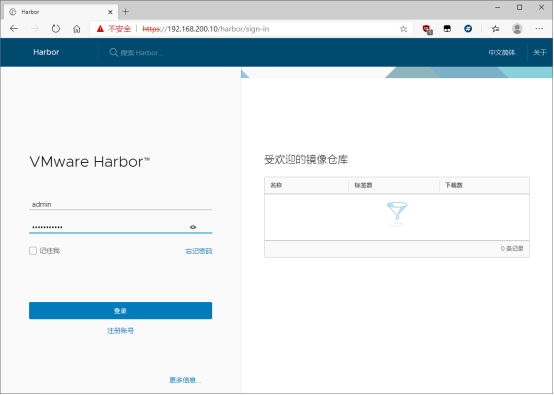
# 在NFS上还有三个公用的容器,如果没有NFS的话,都会在你的本地,也就是说在当前下还会再多三个。浏览器进行访问测试:admin/Harbor12345
4.5、客户端连接测试
如果说的客户端想要链接测试的话,因为咱们的证书啊什么的全是按照域名来申请的,所以在没有DNS之前我们可以先配置它的hosts文件
[root@ldns-nfs ~]# echo "192.168.200.10 www.ultralinux.com" >> /etc/hosts为了docker客户端下发域名(在master执行操作) 把证书文件给客户端签发一下,其实和在本机上签发是一个道理
将harbor上自签发的域名www.ultralinux.com.crt复制到客户端对应目录下
[root@master ~]# cd /data/ssl/
[root@master ssl]# scp www.ultralinux.com.crt 192.168.200.30:/etc/pki/ca-trust/source/anchors/
在docker客户端上执行操作,让证书立刻生效
[root@ldns-nfs ~]# update-ca-trust enable
[root@ldns-nfs ~]# update-ca-trust extract
[root@ldns-nfs ~]# systemctl restart docker
docker重新启动服务后容器全部停了 所以在启动时加上--restart=always随docker服务自动启动
[root@ldns-nfs ~]# docker start $(docker ps -aq)
[root@ldns-nfs ~]# docker login www.ultralinux.com
Username: admin
Password: Harbor12345
WARNING! Your password will be stored unencrypted in /root/.docker/config.json.
Configure a credential helper to remove this warning. See
https://docs.docker.com/engine/reference/commandline/login/#credentials-store
Login Succeeded
#401用户验证失败(可能是密码错误)
#403你的地址被拒绝
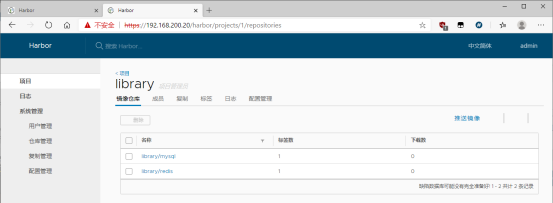
#503容器未启动在docker-client(NFS共享存储服务器端)进行镜像上传测试; 仓库地址/项目/镜像的名字
[root@ldns-nfs ~]# docker tag redis:alpine www.ultralinux.com/library/redis  //修改镜像名字
[root@ldns-nfs ~]# docker push www.ultralinux.com/library/redis  //上传镜像
Using default tag: latest
The push refers to repository [www.ultralinux.com/library/redis]
e943c2cabaac: Pushed
744c670930f0: Pushed
be0117672de8: Pushed
d47a16a2e9cb: Pushed
10ce09ccc048: Pushed
777b2c648970: Pushed
latest: digest: sha256:aa31e6d2afc72d2222ed3953587197c324f615861771637a64053f9d99ba4b74 size: 1571
Redis镜像上传成功,也就是说现在单个的仓库使用是没有什么问题的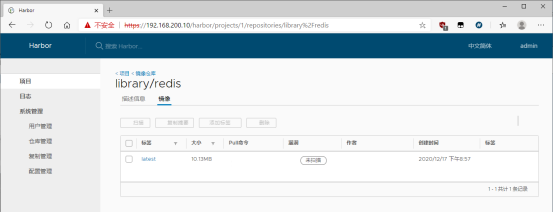
[root@ldns-nfs ~]# tree /data/nfs/		#查看NFS服务器共享目录,有一些文件的相关信息(不用太去深究)
/data/nfs/
└── docker
    └── registry
        └── v2
            ├── blobs
            │?? └── sha256
            │??     ├── 0a
            │??     │?? └── 0aacff13b8d72c393a20ccf266db96a471de3572871fe273ececd1607175b0a4
            │??     │??     └── data
            │??     ├── 51
            │??     │?? └── 51a20dbe2f6a64d3e18fe4d93b5d721cfc0819ed7cbbbd7b20f04de82fb52cfb
            │??     │??     └── data
            │??     ├── 80
            │??     │?? └── 801bfaa63ef2094d770c809815b9e2b9c1194728e5e754ef7bc764030e140cea
            │??     │??     └── data
            │??     ├── 8a
            │??     │?? └── 8a3f5c4e0176ac6c0887cb55795f7ffd12376b33d546a11bb4f5c306133e7606
            │??     │??     └── data
            │??     ├── 9a
            │??     │?? └── 9a8d0188e48174d9e60f943c4e463c23268b864ed4f146041bee8d79710cc359
            │??     │??     └── data
            │??     ├── aa
            │??     │?? └── aa31e6d2afc72d2222ed3953587197c324f615861771637a64053f9d99ba4b74
            │??     │??     └── data
            │??     ├── ad
            │??     │?? └── adc9264cf1338a3d0f3cd930237322d1ca9e664ed444d9e9bd3bdc087fa667ec
            │??     │??     └── data
            │??     └── c6
            │??         └── c678242f9116148617f225c247be7fb10490d772b3a666d68b2930590d3d25a8
            │??             └── data
            └── repositories
                └── library
                    └── redis
                        ├── _layers
                        │?? └── sha256
                        │??     ├── 0aacff13b8d72c393a20ccf266db96a471de3572871fe273ececd1607175b0a4
                        │??     │?? └── link
                        │??     ├── 51a20dbe2f6a64d3e18fe4d93b5d721cfc0819ed7cbbbd7b20f04de82fb52cfb
                        │??     │?? └── link
                        │??     ├── 801bfaa63ef2094d770c809815b9e2b9c1194728e5e754ef7bc764030e140cea
                        │??     │?? └── link
                        │??     ├── 8a3f5c4e0176ac6c0887cb55795f7ffd12376b33d546a11bb4f5c306133e7606
                        │??     │?? └── link
                        │??     ├── 9a8d0188e48174d9e60f943c4e463c23268b864ed4f146041bee8d79710cc359
                        │??     │?? └── link
                        │??     ├── adc9264cf1338a3d0f3cd930237322d1ca9e664ed444d9e9bd3bdc087fa667ec
                        │??     │?? └── link
                        │??     └── c678242f9116148617f225c247be7fb10490d772b3a666d68b2930590d3d25a8
                        │??         └── link
                        ├── _manifests
                        │?? ├── revisions
                        │?? │?? └── sha256
                        │?? │??     └── aa31e6d2afc72d2222ed3953587197c324f615861771637a64053f9d99ba4b74
                        │?? │??         └── link
                        │?? └── tags
                        │??     └── latest
                        │??         ├── current
                        │??         │?? └── link
                        │??         └── index
                        │??             └── sha256
                        │??                 └── aa31e6d2afc72d2222ed3953587197c324f615861771637a64053f9d99ba4b74
                        │??                     └── link
                        └── _uploads

44 directories, 18 files4.6、部署Harbor Slave备库(如果你要是去做高可用的话,就还要有个备库)
还是和之前一样先去解压它,解压完之后还是需要改文件的。但是太不需要去导数据库的数据了,因为他俩用的是一份,所以说他不需要导这个
修改ha/docker-compose.yml配置文件
[root@slave ~]# tar xf harbor-offline-installer-v1.5.0.tgz
[root@slave ~]# cd harbor
[root@slave harbor]# vim ha/docker-compose.yml
 19       - /data/storage:/storage:z		#修改成我们的nfs共享目录
修改harbor.cfg文件
[root@slave harbor]# vim harbor.cfg
  7 hostname = www.ultralinux.com  # 域名还是一样的,这样的话呢咱们用户再去访问的时候会有一个统一的入口
 11 ui_url_protocol = https  # https协议
 23 ssl_cert = /etc/ssl/harbor/www.ultralinux.com.crt  #对还是那些证书的事
 24 ssl_cert_key = /etc/ssl/harbor/www.ultralinux.com.key
 68 harbor_admin_password = Harbor12345
130 db_host = 192.168.200.30  # 咱们的数据库
133 db_password = 123123  # 他的密码
136 db_port = 3306
139 db_user = root
145 redis_url = 192.168.200.30:6379  # 这是咱们的Redis
150 clair_db_host = 192.168.200.30  #  postgres地址
154 clair_db_password = 123123 # postgres密码
157 clair_db_port = 5432
160 clair_db_username = postgres
163 clair_db = postgres
公用同一个证书(主备使用同一个目录,准备目录)
[root@slave harbor]# mkdir -p /etc/ssl/harbor
[root@slave harbor]# scp 192.168.200.10:/etc/ssl/harbor/www.ultralinux.com.* /etc/ssl/harbor/
[root@slave harbor]# ll /etc/ssl/harbor/
总用量 8
-rw-r--r-- 1 root root 1939 12月 23 19:11 www.ultralinux.com.crt
-rw-r--r-- 1 root root 3272 12月 23 19:11 www.ultralinux.com.key
将自签ca证书添加到系统信任
[root@slave harbor]# cp /etc/ssl/harbor/www.ultralinux.com.crt /etc/pki/ca-trust/source/anchors/
[root@slave harbor]# update-ca-trust extract  //给自己的系统做一个信任
[root@slave harbor]# update-ca-trust enable
[root@slave ~]# cd harbor
[root@slave harbor]# ./install.sh --with-clair --ha
[root@slave harbor]# docker-compose ps
Name Command State Ports
-------------------------------------------------------------------------------------------------------
harbor-adminserver /harbor/start.sh Up (health: starting)
harbor-jobservice /harbor/start.sh Up
harbor-log /bin/sh -c /usr/local/bin/ Up (health: starting) 127.0.0.1:1514->10514/tcp
...
harbor-ui /harbor/start.sh Up (health: starting)
nginx nginx -g daemon off; Up (health: starting) 0.0.0.0:443->443/tcp,
0.0.0.0:4443->4443/tcp,
0.0.0.0:80->80/tcp
registry /entrypoint.sh serve /etc/ Up (health: starting) 5000/tcp
... 在harbor下部署harbor,其实这个装完之后高可用自然而然就出来了。因为咱们的数据库啊包括赛神呐对吧咱们都是统一管理的。
然后咱们的这个镜像的话呢都是统一的放在NFS上的,所以说他们共用的是一个数据,所以说它本身就是一个高可用的东西了。
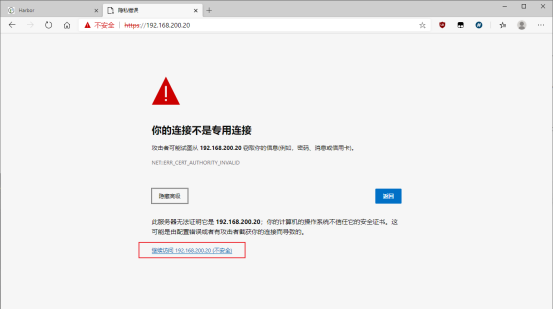
浏览器访问备份节点harbor仓库

客户端提交新的测试镜像
[root@ldns-nfs ~]# docker tag mysql:5.6 www.ultralinux.com/library/mysql
[root@ldns-nfs ~]# docker push www.ultralinux.com/library/mysql
Using default tag: latest
The push refers to repository [www.ultralinux.com/library/mysql]
c9bfde51a801: Pushed
eb96fb789194: Pushed
f155be038399: Pushed
f023cbaefb02: Pushed
b69c459b550f: Pushed
35952880c4d4: Pushed
68597053a6cc: Pushed
ca16a5eba6c8: Pushed
82d1dc4d21b6: Pushed
72e61ceaf5fc: Pushed
e4b1e8d0745b: Pushed
latest: digest: sha256:574b626bb89112cc406c23471ab968de7be5e598eecb5ecc3eecaaf0610d8050 size: 2621
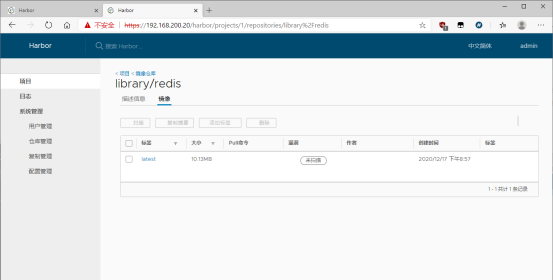
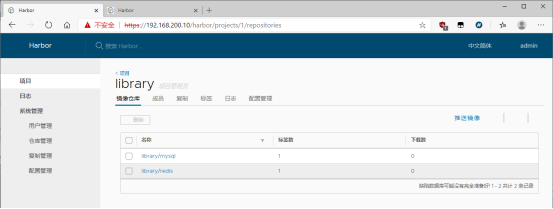
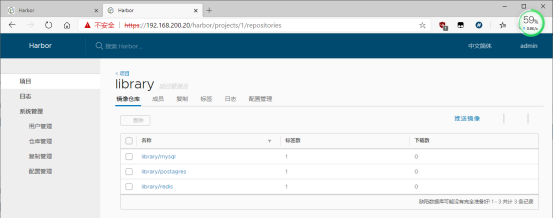
验证两台Harbor仓库数据(推送完成后,主备harbor仓库可以看到新上传的这个测试镜像)
所以说他们的数据都来自同一个地方(nfs)
客户端更换仓库(你想继续验证,可以修改hosts指向为备harbor仓库,然后继续上传测试镜像)
[root@ldns-nfs ~]# sed -i '/ultra/ s/10/20/g' /etc/hosts
[root@ldns-nfs ~]# docker login www.ultralinux.com
Authenticating with existing credentials...
WARNING! Your password will be stored unencrypted in /root/.docker/config.json.
Configure a credential helper to remove this warning. See
https://docs.docker.com/engine/reference/commandline/login/#credentials-store

Login Succeeded
[root@ldns-nfs ~]# docker tag postgres www.ultralinux.com/library/postagres
[root@ldns-nfs ~]# docker push www.ultralinux.com/library/postagres
Using default tag: latest
The push refers to repository [www.ultralinux.com/library/postagres]
d300f37cc3a6: Pushed
161fd0c67322: Pushed
aa8207e5bc6c: Pushed
5796a6662853: Pushed
725e23b6689a: Pushed
70e263450d12: Pushed
9cd7c4e12078: Pushed
73cf3adf6112: Pushed
065d45f80eac: Pushed
3aac10e9b066: Pushed
117725f5c702: Pushed
a01778662164: Pushed
883d24bc9ae1: Pushed
f5600c6330da: Pushed
latest: digest: sha256:87826486f735951c5453841f59dd966b46e69d2faf2c36045c1cdf85d694a695 size: 3245
可以看到主备harbor仓库都可以看到刚上传的测试镜像

五、部署DNS服务
一个www的解析记录,两个主备harbor仓库的地址本身就是轮询的
[root@ldns-nfs ~]# yum -y install bind bind-utils bind-libs
[root@ldns-nfs ~]# cat /etc/named.conf
options {
	directory 	"/var/named";
};

zone "ultralinux.com" IN {
	type master;
	file "ultralinux.zheng";
};

[root@ldns-nfs ~]# cat /var/named/ultralinux.zheng
$TTL 86400
@	SOA	ultralinux.com.	root.ultralinux.com. (
		2020122301
		3H
		15M
		1W
		1D
)
	IN	NS	ns.ultralinux.com.
ns	IN	A	192.168.200.30
www	IN	A	192.168.200.10
www	IN	A	192.168.200.20
[root@ldns-nfs ~]# chgrp named /var/named/ultralinux.zheng
[root@ldns-nfs ~]# systemctl restart named
删除客户端hosts文件添加的www.ultralinux.com解析记录
[root@ldns-nfs ~]# cat /etc/hosts
127.0.0.1   localhost localhost.localdomain localhost4 localhost4.localdomain4
::1         localhost localhost.localdomain localhost6 localhost6.localdomain6
配置客户端DNS服务器(修改resolv.conf修改测试)
[root@ldns-nfs ~]# cat /etc/resolv.conf
# Generated by NetworkManager
nameserver 192.168.200.30
解析测试(可以看到解析的IP地址是在切换的)
[root@ldns-nfs ~]# cat /etc/hosts^C
[root@ldns-nfs ~]# nslookup www.ultralinux.com
Server:		192.168.200.30
Address:	192.168.200.30#53

Name:	www.ultralinux.com
Address: 192.168.200.10
Name:	www.ultralinux.com
Address: 192.168.200.20

[root@ldns-nfs ~]# nslookup www.ultralinux.com
Server:		192.168.200.30
Address:	192.168.200.30#53

Name:	www.ultralinux.com
Address: 192.168.200.20
Name:	www.ultralinux.com
Address: 192.168.200.10
连接Harbor测试(使用docker login加域名登陆)
[root@ldns-nfs ~]# docker logout www.ultralinux.com
Removing login credentials for www.ultralinux.com
[root@ldns-nfs ~]# docker login www.ultralinux.com
Username: admin
Password:
WARNING! Your password will be stored unencrypted in /root/.docker/config.json.
Configure a credential helper to remove this warning. See
https://docs.docker.com/engine/reference/commandline/login/#credentials-store

Login Succeeded
NFS单点问题(有很大的一个坑NFS单点)
1、Harbor主主复制-镜像是存储在两台Harbor主机本地,在镜像数量少,占用少量存储空间时适用
2、Harbor+存储方案-镜像是存储在存储服务器上,可以是大量的镜像
NFS
1、NFS+DRBD+Heartbeat
2、NFS+DRBD+Keepalived
GlusterFS
1、复制卷
2、分布式复制卷(性能最好,他的读写性能特别好,而且也有可靠性,就是机器数量多)
GlusterFS 分布式复制卷 一个NFS变成了四台机器,也就是说我们要先拿四台机器做GlusterFS分部式复制卷
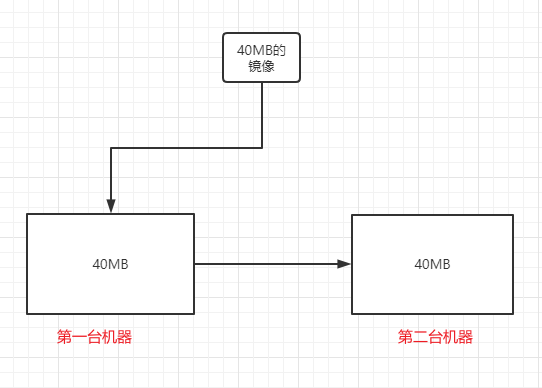
为什么要用分布式复制卷:
GlusterFS 的复制卷呢其实两台就搞定了,说白了他就是Reid1只不过是跨主机而已。每个主机提供了一个磁盘,假如有一个40M的镜像存储到第一台,那么第二台也会有40M,这两台是一模一样完全复制的状态
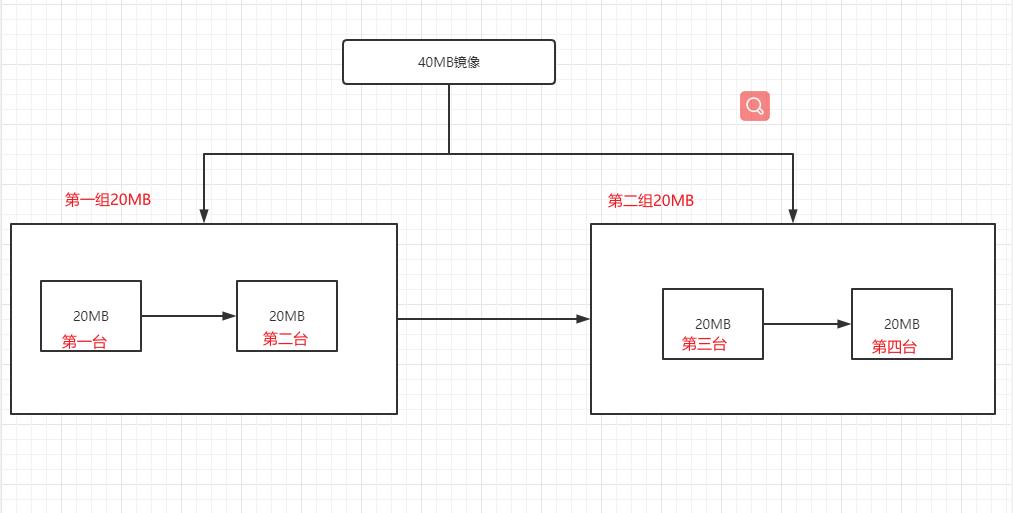
GlusterFS的分布式复制卷它相当于至少四台,然后你可以理解为两个两个是一组。比如还是40MB的镜像,他会从中间切开各20M存储到两组机器中,然后每台去复制20M文件
类似于Reid10
所以说你用复制卷也行,用分布式分布式复制卷也行,都可以
复制卷:将NFS换成两台做一个复制卷就完事了
Harbor本身也可以玩
harbor本身是可以做复制的,就类似于MySQL主从复制的感觉
两台主备harbor互相信任,就是互相当成对方的客户端然后传证书互相信任
两套证书(两台证书是不一的),然后主备harbor就可以互相登陆了
在Harbor的webUI界面 仓库管理 新建一个连接目标比如:h主连接h备,反过来还要再做一遍
连接成功之后,在Harbor的webUI界面 复制管理 新建一个复制规则 你的项目 触发的模式是 即刻 同步
完。以后,其中一个库里有东西,另一个库就会同步过去,而且同步速度还挺快的。(相当于主从同步的那种感觉,那就不需要NFS了)
所以你到底是用共享存储,还是用它自己本身的这个同步,主要是取决咱们镜像的量
若镜像的量特别大需要大量的存储空间,那么需要去考虑Harbor主机的存储空间是多少
比如你的Harbor是两台云主机各40G的硬盘,在harbor主机本身存储不多个情况下咱们不能使用主主复制
因为主主复制是相当于是咱俩身上各存一份。
如果咱们公司之前已经有准备好的分布式存储的方案的话,那我还不如把这个存储的位置放在分布式存储的上
那这样的话我自己本身这两个harbor的空间就不需要太大了(只要保证能系统和这个服务正常运行就行了)
转自
企业级仓库Harbor高可用方案丶Java教程网-IT开发者们的技术天堂
https://www.liangzl.com/get-article-detail-226892.html


【推荐】国内首个AI IDE,深度理解中文开发场景,立即下载体验Trae
【推荐】编程新体验,更懂你的AI,立即体验豆包MarsCode编程助手
【推荐】抖音旗下AI助手豆包,你的智能百科全书,全免费不限次数
【推荐】轻量又高性能的 SSH 工具 IShell:AI 加持,快人一步
· DeepSeek 开源周回顾「GitHub 热点速览」
· 物流快递公司核心技术能力-地址解析分单基础技术分享
· .NET 10首个预览版发布:重大改进与新特性概览!
· AI与.NET技术实操系列(二):开始使用ML.NET
· 单线程的Redis速度为什么快?
2017-07-20 Linux-Load Average解析(转)
2017-07-20 Linux 查看网卡流量【转】