Apached+resin服务搭建
一、前言
Resin是CAUCHO公司的产品,是一个非常流行的支持servlets 和jsp的引擎,速度非常快。对servlet和JSP提供了良好的支持,性能也比较优良,resin自身采用JAVA语言开发。Resin本身包含了一个支持HTTP/1.1的WEB服务器。虽然它可以显示动态内容,但是它显示静态内容的能力也非常强,速度直逼APACHE SERVER。许多站点都是使用该WEB服务器构建的。但是,resin3.09后分为了opensource的和pro的两种版本:
1.opensource的resin是基于GPL开源的,如果需要将开发产品作为商业产品发布是需要收费的。
2.pro的是收费的,比opensource的部分多了性能优化和集群,技术支持等
实验环境
两台服务器:
httpd-server 192.168.0.11
resin-server 192.168.0.12
二、安装java环境
[root@resin-server ~]# rpm -ivh jdk-8u25-x64.rpm
Preparing...                ########################################### [100%]
   1:jdk1.8.0_131           ########################################### [100%]
Unpacking JAR files...
    tools.jar...
    plugin.jar...
    javaws.jar...
    deploy.jar...
    rt.jar...
    jsse.jar...
    charsets.jar...
    localedata.jar...
[root@resin-server ~]# cat /etc/profile.d/java.sh
export JAVA_HOME=/usr/java/latest
export CLASSPATH=$JAVA_HOME/lib/tools.jar
export PATH=$JAVA_HOME/bin:$PATH
[root@resin-server ~]# . /etc/profile.d/java.sh
[root@resin-server ~]# java -version
java version "1.8.0_131"
Java(TM) SE Runtime Environment (build 1.8.0_131-b11)
Java HotSpot(TM) 64-Bit Server VM (build 25.131-b11, mixed mode)
三、安装resin #如果不和httpd配合生成模块,无需编译
浏览器打开resin下载地址http://caucho.com/products/resin/download,选择对应的版本

[root@resin-server ~]# wget http://www.caucho.com/download/resin-3.1.13.tar.gz #下载软件
[root@resin-server ~]# tar xf resin-3.1.13.tar.gz -C /usr/local/ #不和httpd生成模块,则无需编译
[root@resin-server local]# ln -sv resin-3.1.13 resin
"resin" -> "resin-3.1.13"
[root@resin-server local]# sed -n '88,100p' /usr/local/resin/conf/resin.conf #修改配置文件,删除默认配置文件88-146行,添加如下内容
     <!-- resin configure by 2017-12-21 -->
  <server id='panwenbin' address='192.168.0.11' port='8888' watchdog-port='8889'>
        <http address="*" port="8080" />
        <jvm-arg>-Xmx128m</jvm-arg>
        <jvm-arg>-Xms128m</jvm-arg>
        <jvm-arg>-Xdebug</jvm-arg>
        <jvm-arg>-Dcom.sun.management.jmxremote</jvm-arg>
        <memory-free-min>1M</memory-free-min>
        <thread-max>128</thread-max>
        <socket-timeout>60s</socket-timeout>
        <keepalive-max>128</keepalive-max>
        <keepalive-timeout>15s</keepalive-timeout>
 </server>

注:resin4.0之后几点JDK参数移到resin.xml配置文件中,因为4.0之后watchdog会启动resin服务实例,并且使得配置更可维护
[root@resin-server ~]# httpd.sh -server panwenbin start  #启动服务器
Resin/3.1.13 started -server 'panwenbin' for watchdog at 127.0.0.1:8889
[root@resin-server ~]#  netstat -tnlp|egrep  "8888|8889|8080"  #查看端口是否启动
tcp        0      0 127.0.0.1:6012              0.0.0.0:*                   LISTEN      28889/sshd
tcp        0      0 :::8080                     :::*                        LISTEN      57101/java   #resin web server端口
tcp        0      0 ::ffff:192.168.0.11:8888    :::*                        LISTEN      57101/java   #Apache的请求转发端口
tcp        0      0 ::ffff:127.0.0.1:8889       :::*                        LISTEN      57074/java   #watchdog端口
tcp        0      0 ::1:6012                    :::*                        LISTEN      28889/sshd
[root@resin-server ~]#  echo "99+1=<%=99+1%>" > /usr/local/resin/webapps/ROOT/test.jsp #添加测试页
[root@resin-server ~]# curl http://192.168.0.11:8080/test.jsp #显示100则服务正常
99+1=100
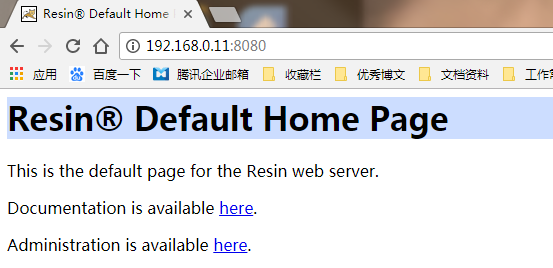
浏览器访问,测试一下,主要端口

添加系统服务脚本,按需添加
[root@resin-server ~]#  cp /usr/local/resin/contrib/init.resin.in  /etc/init.d/resin
[root@resin-server ~]# vim /etc/init.d/resin
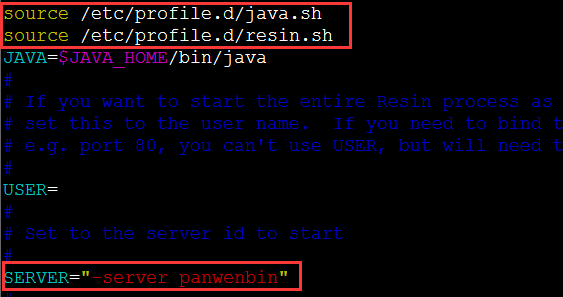
修改前:

修改后:

注:引入java变量和指定sever名称
[root@resin-server ~]# chmod +x /etc/init.d/resin
[root@resin-server ~]# killall java
[root@resin-server ~]# /etc/init.d/resin start
四、安装httpd
[root@httpd-server ~]#yum install -y zlib libmxl libjpeg freetype libpng gd curl libiconv zlib-devel libxml2-devel libjpeg-devel freetype-devel ng-devel gd-devel curl-devel
[root@httpd-server~]#wget http://mirrors.hust.edu.cn/apache//httpd/httpd-2.2.34.tar.gz
[root@httpd-server ~]#tar xf httpd-2.2.34.tar.gz
[root@httpd-server ~]#cd httpd-2.2.34
[root@httpd-server httpd-2.2.34]#./configure --prefix=/usr/local/httpd --enable-deflate --enable-headers --enable-modules=so --enable-so --with-mpm=worker --enable-rewrite
[root@httpd-server httpd-2.2.34]#make &&make install
编译生成resin的httpd模块
[root@httpd-server ~]# wget http://www.caucho.com/download/resin-3.1.13.tar.gz
[root@httpd-server ~]# tar xf resin-3.1.13.tar.gz
[root@httpd-server ~]# cd resin-3.1.13
[root@httpd-server resin-3.1.13]# ./configure --with-apxs=/usr/local/httpd/bin/apxs
[root@httpd-server resin-3.1.13]# cd modules/c/src/
[root@httpd-server src]# make&&make install
[root@httpd-serverr src]# ll /usr/local/httpd/modules/  #查看模块是否生成
总用量 180
-rw-r--r-- 1 root root   9291 1月   2 20:00 httpd.exp
-rwxr-xr-x 1 root root 170915 1月   2 20:16 mod_caucho.so
[root@httpd-server src]# tail /usr/local/httpd/conf/httpd.conf  #查看httpd配置文件是否生成resin配置命令
</IfModule>
#
# mod_caucho Resin Configuration
#

LoadModule caucho_module /usr/local/httpd/modules/mod_caucho.so

ResinConfigServer localhost 6800
CauchoConfigCacheDirectory /tmp
CauchoStatus yes
编辑httpd配置文件,使其可以将请求转发至resin服务器
[root@httpd-server src]# tail /usr/local/httpd/conf/httpd.conf
#
# mod_caucho Resin Configuration
#

LoadModule caucho_module /usr/local/httpd/modules/mod_caucho.so

ResinConfigServer 192.168.0.11 8888
CauchoConfigCacheDirectory /tmp
CauchoStatus yes
SetHandler cacucho-request #加上SetHandler caucho-request是全部将请求转发到resin,不加仅有PHP jsp类型转发
[root@httpd-server src]# /usr/local/httpd/bin/apachectl start #启动httpd服务
httpd: apr_sockaddr_info_get() failed for httpd-server #错误提示原因:这个问题是没有在 /etc/httpd/conf/httpd.conf 中设定 ServerName
httpd: Could not reliably determine the server's fully qualified domain name, using 127.0.0.1 for ServerName
[root@httpd-server src]# netstat -tnlp #检查端口是否启动
测试
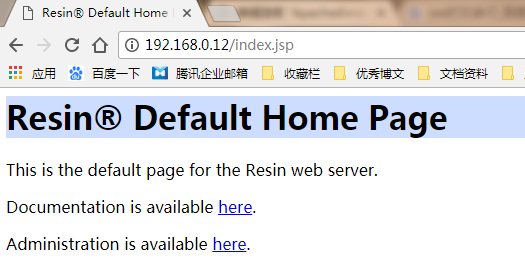
浏览器访问 http://192.168.0.12/index.jsp

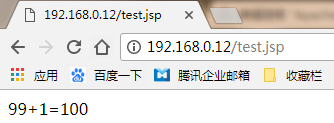
浏览器访问 http://192.168.0.12/test.jsp

最终结果看,配置成功了!
"一劳永逸" 的话,有是有的,而 "一劳永逸" 的事却极少


【推荐】国内首个AI IDE,深度理解中文开发场景,立即下载体验Trae
【推荐】编程新体验,更懂你的AI,立即体验豆包MarsCode编程助手
【推荐】抖音旗下AI助手豆包,你的智能百科全书,全免费不限次数
【推荐】轻量又高性能的 SSH 工具 IShell:AI 加持,快人一步
· 从 HTTP 原因短语缺失研究 HTTP/2 和 HTTP/3 的设计差异
· AI与.NET技术实操系列:向量存储与相似性搜索在 .NET 中的实现
· 基于Microsoft.Extensions.AI核心库实现RAG应用
· Linux系列:如何用heaptrack跟踪.NET程序的非托管内存泄露
· 开发者必知的日志记录最佳实践
· winform 绘制太阳,地球,月球 运作规律
· TypeScript + Deepseek 打造卜卦网站:技术与玄学的结合
· AI 智能体引爆开源社区「GitHub 热点速览」
· Manus的开源复刻OpenManus初探
· 写一个简单的SQL生成工具