K8S集群集成harbor(1.9.3)服务并配置HTTPS
一、简介
简介请参考:https://www.cnblogs.com/panwenbin-logs/p/10218099.html
二、安装Harbor主机环境及安装要求
主机环境:
OS: CentOS Linux release 7.3.1611 (Core)
kernel:3.10.0-862
mem: 4GB
python:2.7.5
Base&EPEL:aliyun
harbor组件:
| 组件 | 版本 |
|---|---|
| Postgresql | 9.6.10-1.ph2 |
| Redis | 4.0.10-1.ph2 |
| Clair | 2.0.8 |
| Beego | 1.9.0 |
| Chartmuseum | 0.9.0 |
| Docker/distribution | 2.7.1 |
| Docker/notary | 0.6.1 |
| Helm | 2.9.1 |
| Swagger-ui | 3.22.1 |
硬件要求:
| 资源 | 最低要求 | 推荐配置 |
|---|---|---|
| CPU | 2 CPU | 4 CPU |
| Mem | 4 GB | 8 GB |
| Disk | 40 GB | 160 GB |
软件要求:
| 软件 | 版本 | 描述 |
|---|---|---|
| Docker engine | 17.06.0-ce +或更高版本 | 有关安装说明,请参阅docker engine doc |
| Docker Compose | 版本1.18.0或更高 | 有关安装说明,请参阅docker compose doc |
| Openssl | 最好是最新的 | 用于生成Harbor的证书和密钥 |
使用的网络端口:
| 端口 | 协议 | 描述 |
|---|---|---|
| 443 | HTTPS | Harbor门户和核心API在此端口上接受HTTPS请求。您可以在配置文件中更改此端口。 |
| 4443 | HTTPS | 与Harbor的Docker内容信任服务的连接。仅在启用公证人的情况下才需要。您可以在配置文件中更改此端口。 |
| 80 | HTTP | Harbor门户和核心API在此端口上接受HTTP请求。您可以在配置文件中更改此端口。 |
三、安装配置Harbor
1.安装docker
[root@nginx-keepalived-155-227 ~]#wget https://mirrors.aliyun.com/docker-ce/linux/centos/docker-ce.repo -P /etc/yum.repos.d/
[root@nginx-keepalived-155-227 ~]#yum clean all  && yum makecache fast
[root@nginx-keepalived-155-227 ~]#yum install docker-ce -y
[root@nginx-keepalived-155-227 ~]#systemctl enable docker && systemctl restart docker
2.安装Docker-compose
Docker-compose有两种安装方式,分别为下载源码和pip安装,这里我们使用源码下载,pip安装请参考简介中的链接
[root@nginx-keepalived-155-227 ~]# curl -L https://github.com/docker/compose/releases/download/1.25.0/docker-compose-`uname -s`-`uname -m` -o /usr/local/bin/docker-compose #注意安装的版本要大于要求的版本
[root@nginx-keepalived-155-227 ~]# chmod +x /usr/local/bin/docker-compose
[root@nginx-keepalived-155-227 ~]# docker-compose --version
docker-compose version 1.25.0, build 0a186604
3.安装harbor
harbor有两个版本,分别为offline(离线)和online(在线),离线的安装包比较大,后续安装会相对快一点,在线的安装包比较下,但是后续安装会比较慢,这里我们选择离线安装
[root@nginx-keepalived-155-227 ~]# wget https://github.com/goharbor/harbor/releases/download/v1.9.3/harbor-offline-installer-v1.9.3.tgz
[root@nginx-keepalived-155-227 ~]# tar xf harbor-offline-installer-v1.9.3.tgz -C /usr/local/
[root@nginx-keepalived-155-227 ~]# cd /usr/local/harbor/
4.配置Harbor
解压缩之后,目录下回生成harbor.yml文件,该文件就是Harbor的配置文件,编辑该文件:
[root@nginx-keepalived-155-227 harbor]# egrep -v '#|^$' harbor.yml
hostname: mydocker.register.com   #访问的地址,可以使用IP。由于后面使用HTTPS协议,这里直接使用域名避免后面再修改
http:                             #使用的协议
  port: 80                        #使用协议的端口
harbor_admin_password: Harbor12345  #harbor管理员的密码 管理账号为 admin
database:  #数据相关配置
  password: root123
  max_idle_conns: 50
  max_open_conns: 100
data_volume: /data  #harbor仓库镜像存储的路径
clair:  #设置Clair更新的时间间隔(以小时为单位)。设置为0以禁用更新。默认值为12小时。
  updaters_interval: 12
jobservice:
  max_job_workers: 10 #作业服务中复制工作者的最大数量。
notification:
  webhook_job_max_retry: 10  #设置Web挂钩作业的最大重试次数。预设值为10
chart:
  absolute_url: disabled  #设置enabled Chart使用绝对URL。设置disabled Chart以使用相对URL
log:  #配置日志记录
  level: info  #设置日志级别debug,info,warning,error,或fatal。默认值为info。
  local:  #设置日志保留参数
    rotate_count: 50  #切割保留的日志个数
    rotate_size: 200M  #日志大于该值后切割一个新日志文件
    location: /var/log/harbor
_version: 1.9.0
proxy:  #配置Clair,复制作业服务和Harbor使用的代理。如果不需要代理,请保留空白。
  http_proxy:
  https_proxy:
  no_proxy: 127.0.0.1,localhost,.local,.internal,log,db,redis,nginx,core,portal,postgresql,jobservice,registry,registryctl,clair
  components:
    - core
    - jobservice
    - clair
#这里我们暂时先只配置hostname参数,其他暂时保持默认:具体配置请参考:https://github.com/goharbor/harbor/blob/master/docs/installation_guide.md
修改完配置文件后,在的当前目录执行./install.sh,Harbor服务就会根据当期目录下的docker-compose.yml开始下载依赖的镜像,检测并按照顺序依次启动各个服务,确保都正常
[root@nginx-keepalived-155-227 harbor]# ./prepare # 如果安装后变更了配置,需要执行此操作,如果第一次可以忽略或执行都可以
[root@nginx-keepalived-155-227 harbor]# ./install.sh

[Step 0]: checking installation environment ...

Note: docker version: 19.03.5

Note: docker-compose version: 1.25.0

......

[Step 3]: starting Harbor ...
Creating network "harbor_harbor" with the default driver
Creating harbor-log ... done
Creating registryctl   ... done
Creating registry      ... done
Creating redis         ... done
Creating harbor-portal     ... done
Creating harbor-db     ... done
Creating harbor-core   ... done
Creating harbor-jobservice ... done
Creating nginx             ... done

✔ ----Harbor has been installed and started successfully.----

Now you should be able to visit the admin portal at http://mydocker.register.com.   #提示我们访问的URL地址,注意访问配置好hosts或者DNS服务
For more details, please visit https://github.com/goharbor/harbor .
可以使用docker-compose命令查看所有组件是否都工作正常:
[root@nginx-keepalived-155-227 harbor]# docker-compose ps
      Name                     Command                  State                 Ports
---------------------------------------------------------------------------------------------
harbor-core         /harbor/harbor_core              Up (healthy)
harbor-db           /docker-entrypoint.sh            Up (healthy)   5432/tcp
harbor-jobservice   /harbor/harbor_jobservice  ...   Up (healthy)
harbor-log          /bin/sh -c /usr/local/bin/ ...   Up (healthy)   127.0.0.1:1514->10514/tcp
harbor-portal       nginx -g daemon off;             Up (healthy)   8080/tcp
nginx               nginx -g daemon off;             Up (healthy)   0.0.0.0:80->8080/tcp
redis               redis-server /etc/redis.conf     Up (healthy)   6379/tcp
registry            /entrypoint.sh /etc/regist ...   Up (healthy)   5000/tcp
registryctl         /harbor/start.sh                 Up (healthy)
#后续可以使用docker-compose [start|stop] 命令在docker-compose.yml文件所在目录下来关闭和启动harbor
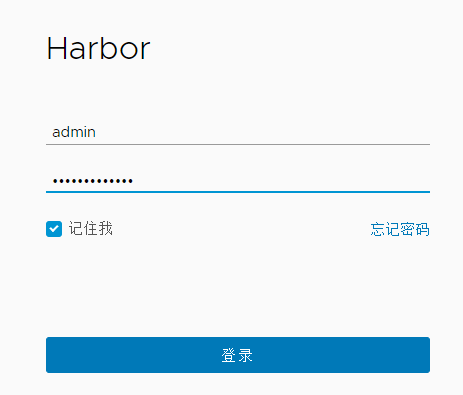
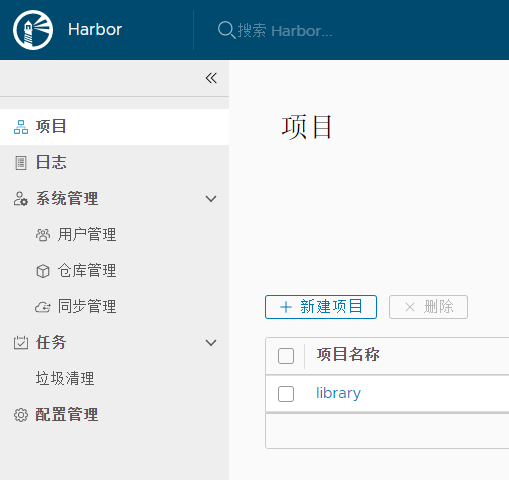
访问harbor服务,使用 admin/Harbor12345账号密码登录,访问前前配置好hsots或域名(域名可能无法登录,可以直接使用IP地址方式)
客户端配置hosts

访问URL,填写账号密码

点击登录

四、配置harbor HTTPS
1.创建 harbor 证书签名请求(注意我主机名称,现在我在k8s master上,各位根据具体环境调整):
[root@k8s-master-155-221 cert]#cat > harbor-csr.json <<EOF
{
  "CN": "harbor",
  "hosts": [
    "127.0.0.1",
    "172.16.155.227",   #227是我们harbor master服务器
    "172.16.155.228",   #228是我们以后准备创建的harbor slave服务器,现在没有,但是提前写入证书避免后面重新生成
    "mydocker.register.com"  #指定harbor的域名
  ],
  "key": {
    "algo": "rsa",
    "size": 2048
  },
  "names": [
    {
      "C": "CN",
      "ST": "BeiJing",
      "L": "BeiJing",
      "O": "k8s",
      "OU": "4Paradigm"
    }
  ]
}
EOF
2.使用k8s集群CA证书签署证书请求(我使用的是cfssl工具进行签署的,如果使用OpenSSL请参考:https://www.cnblogs.com/panwenbin-logs/p/11850737.html)
 1 cat > ca-config.json <<EOF
 2 {
 3     "signing": {
 4         "default": {
 5             "expiry": "87600h"
 6         },
 7         "profiles": {
 8             "kubernetes": {
 9                 "usages": ["signing", "key encipherment", "server auth", "client auth"],
10                 "expiry": "87600h"
11             }
12         }
13     }
14 }
15 EOF
[root@k8s-master-155-221 cert]# cfssl gencert -ca=/mnt/k8s/cert/ca.pem -ca-key=/mnt/k8s/cert/ca-key.pem -config=/mnt/k8s/cert/ca-config.json -profile=kubernetes harbor-csr.json  | cfssljson -bare harbor   #签署证书
[root@k8s-master-155-221 cert]# ls harbor*
harbor.csr harbor-csr.json harbor-key.pem harbor.pem
[root@k8s-master-155-221 cert]# scp harbor*.pem 172.16.155.227:/usr/local/harbor  #拷贝证书到harbor服务器
harbor服务器(227)上做如下操作:
[root@nginx-keepalived-155-227 harbor]#docker-compose down -v  #关闭harbor服务
[root@nginx-keepalived-155-227 harbor]# mkdir ssl
[root@nginx-keepalived-155-227 harbor]# mv harbor-key.pem harbor.pem ssl/
[root@nginx-keepalived-155-227 harbor]# vim harbor.yml
......
#http:  #注释HTTP协议
  # port for http, d efault is 80. If https enabled, this port will redirect to https port
#  port: 80 #注释HTTP端口

# https related config
https:  #启用HTTPS协议,注意行首不可以有空格,否则报错
#   # https port for harbor, default is 443
   port: 443  #HTTPS端口
#   # The path of cert and key files for nginx
   certificate: /usr/local/harbor/ssl/harbor.pem  #证书
   private_key: /usr/local/harbor/ssl/harbor-key.pem #私钥
......
[root@nginx-keepalived-155-227 harbor]# ./prepare
[root@nginx-keepalived-155-227 harbor]# docker-compose up -d
[root@nginx-keepalived-155-227 harbor]# docker-compose ps
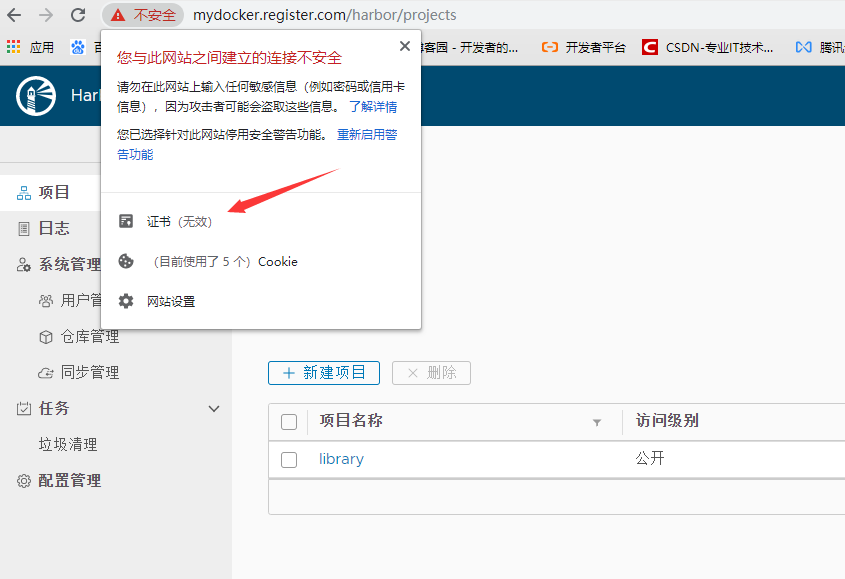
访问harbor

登录harbor,可以看到已经使用证书了,由于证书是我们私有CA签发的,该报错是正常的

4.配置k8s集群通过证书登录harbor服务,在所有需要使用docker命令行登录harbor的服务器进行如下操作,包括所有的work节点及可能的CI/CD服务器上,如Jenkins等
创建证书目录,目录名称为harbor服务名称
mkdir /etc/docker/certs.d/mydocker.register.com
拷贝CA证书到各服务器上
scp ca.pem ca-key.pem 172.16.155.xxx:/etc/docker/certs.d/mydocker.register.com/
配置insecure-registries,其他配置按需或者也可以不配置
vim /etc/docker/daemon.json  #除insecure-registries配置外,其他可以不配置
{
    "registry-mirrors": ["https://rljaavx7.mirror.aliyuncs.com","https://docker.mirrors.ustc.edu.cn","https://hub-mirror.c.163.com/"],
    "insecure-registries": ["mydocker.register.com"],  #设置insecure-registries,注意填写的值
    "max-concurrent-downloads": 20,
    "live-restore": true,
    "max-concurrent-uploads": 10,
    "debug": true,
    "data-root": "/Data/k8s/docker/data",
    "exec-root": "/Data/k8s/docker/exec",
    "log-opts": {
      "max-size": "100m",
      "max-file": "5"
    }
}
重载配置、重启docker服务
systemctl daemon-reload && systemctl enable docker && systemctl restart docker
添加hosts,后续建议配置集群DNS服务
vim /etc/hosts
172.16.155.227  mydocker.register.com
命令行登录harbor(确保出现 Login Succeeded提示)
[root@k8s-master-155-221 cert]# docker  login  -u  admin  -p  Harbor12345 mydocker.register.com
WARNING! Using --password via the CLI is insecure. Use --password-stdin.
WARNING! Your password will be stored unencrypted in /root/.docker/config.json.
Configure a credential helper to remove this warning. See
https://docs.docker.com/engine/reference/commandline/login/#credentials-store

Login Succeeded
验证harbor上传/下载
[root@k8s-master-155-221 mydocker.register.com]# docker pull busybox
[root@k8s-master-155-221 mydocker.register.com]# docker images
REPOSITORY TAG IMAGE ID CREATED SIZE
busybox latest 6858809bf669 2 weeks ago 1.23MB
[root@k8s-master-155-221 mydocker.register.com]#  docker tag 6858809bf669  mydocker.register.com/library/busybox:v1
[root@k8s-master-155-221 mydocker.register.com]# docker images
REPOSITORY                                  TAG                 IMAGE ID            CREATED             SIZE
busybox                                     latest              6858809bf669        2 weeks ago         1.23MB
 mydocker.register.com/library/busybox   v1                  6858809bf669        2 weeks ago         1.23MB
[root@k8s-master-155-221 mydocker.register.com]# docker push  mydocker.register.com/library/busybox:v1
The push refers to repository [ mydocker.register.com/library/busybox]
be8b8b42328a: Pushed
v1: digest: sha256:2ca5e69e244d2da7368f7088ea3ad0653c3ce7aaccd0b8823d11b0d5de956002 size: 527
#至此,k8s集成harbor配置完成


【推荐】国内首个AI IDE,深度理解中文开发场景,立即下载体验Trae
【推荐】编程新体验,更懂你的AI,立即体验豆包MarsCode编程助手
【推荐】抖音旗下AI助手豆包,你的智能百科全书,全免费不限次数
【推荐】轻量又高性能的 SSH 工具 IShell:AI 加持,快人一步
· 从 HTTP 原因短语缺失研究 HTTP/2 和 HTTP/3 的设计差异
· AI与.NET技术实操系列:向量存储与相似性搜索在 .NET 中的实现
· 基于Microsoft.Extensions.AI核心库实现RAG应用
· Linux系列:如何用heaptrack跟踪.NET程序的非托管内存泄露
· 开发者必知的日志记录最佳实践
· winform 绘制太阳,地球,月球 运作规律
· TypeScript + Deepseek 打造卜卦网站:技术与玄学的结合
· AI 智能体引爆开源社区「GitHub 热点速览」
· Manus的开源复刻OpenManus初探
· 写一个简单的SQL生成工具