lldb调试C++总结(1)
Note
好记性不如烂笔头。时间一长,lldb的基本功快忘本了。
- 本文将介绍使用
lldb调试 C++程序的基本用法。 - 演示基于
Ubuntu + lldb
lldb + clang(++) 版本
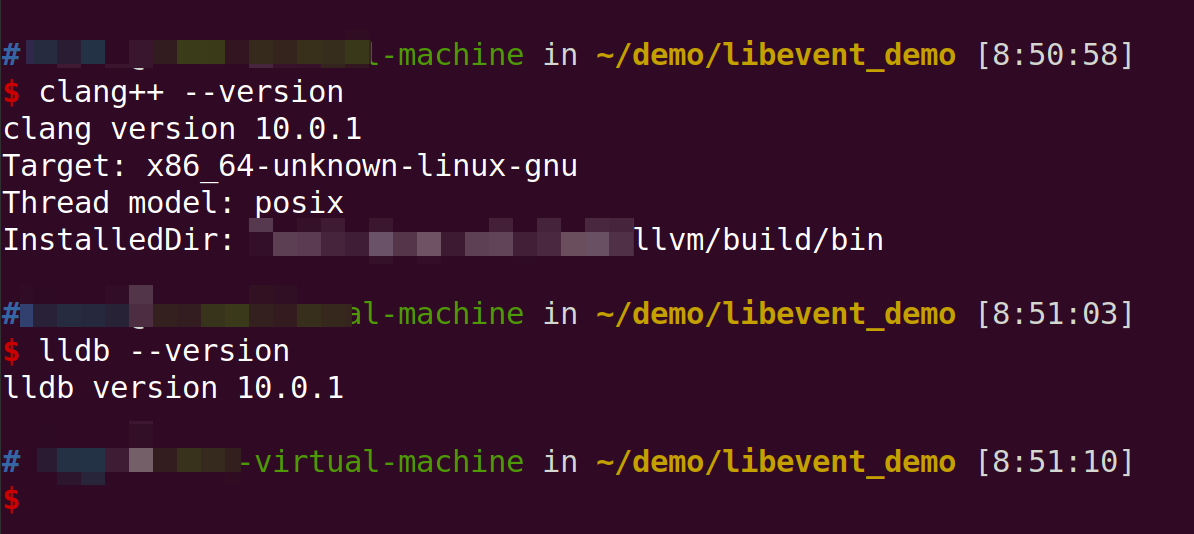
源码编译,可能和你使用的不一样,but, lldb的语法差不多的。
lldb help
USAGE: lldb [options]

ATTACHING:
  --attach-name <name> Tells the debugger to attach to a process with the given name.
  --attach-pid <pid>   Tells the debugger to attach to a process with the given pid.
  -n <value>           Alias for --attach-name
  -p <value>           Alias for --attach-pid
  --wait-for           Tells the debugger to wait for a process with the given pid or name to launch before attaching.
  -w                   Alias for --wait-for

COMMANDS:
  --batch              Tells the debugger to run the commands from -s, -S, -o & -O, and then quit.
  -b                   Alias for --batch
  -K <value>           Alias for --source-on-crash
  -k <value>           Alias for --one-line-on-crash
  --local-lldbinit     Allow the debugger to parse the .lldbinit files in the current working directory, unless --no-lldbinit is passed.
  --no-lldbinit        Do not automatically parse any '.lldbinit' files.
  --one-line-before-file <command>
                       Tells the debugger to execute this one-line lldb command before any file provided on the command line has been loaded.
  --one-line-on-crash <command>
                       When in batch mode, tells the debugger to run this one-line lldb command if the target crashes.
  --one-line <command> Tells the debugger to execute this one-line lldb command after any file provided on the command line has been loaded.
  -O <value>           Alias for --one-line-before-file
  -o <value>           Alias for --one-line
  -Q                   Alias for --source-quietly
  --source-before-file <file>
                       Tells the debugger to read in and execute the lldb commands in the given file, before any file has been loaded.
  --source-on-crash <file>
                       When in batch mode, tells the debugger to source this file of lldb commands if the target crashes.
  --source-quietly     Tells the debugger to execute this one-line lldb command before any file has been loaded.
  --source <file>      Tells the debugger to read in and execute the lldb commands in the given file, after any file has been loaded.
  -S <value>           Alias for --source-before-file
  -s <value>           Alias for --source
  -x                   Alias for --no-lldbinit

OPTIONS:
  --arch <architecture> Tells the debugger to use the specified architecture when starting and running the program.
  -a <value>            Alias for --arch
  --capture-path <filename>
                        Tells the debugger to use the given filename for the reproducer.
  --capture             Tells the debugger to capture a reproducer.
  --core <filename>     Tells the debugger to use the full path to <filename> as the core file.
  -c <value>            Alias for --core
  --debug               Tells the debugger to print out extra information for debugging itself.
  -d                    Alias for --debug
  --editor              Tells the debugger to open source files using the host's "external editor" mechanism.
  -e                    Alias for --editor
  --file <filename>     Tells the debugger to use the file <filename> as the program to be debugged.
  -f <value>            Alias for --file
  --help                Prints out the usage information for the LLDB debugger.
  -h                    Alias for --help
  --no-use-colors       Do not use colors.
  --replay <filename>   Tells the debugger to replay a reproducer from <filename>.
  --reproducer-skip-version-check
                        Skip the reproducer version check.
  --version             Prints out the current version number of the LLDB debugger.
  -v                    Alias for --version
  -X                    Alias for --no-use-color

REPL:
  -r=<flags>     Alias for --repl=<flags>
  --repl-language <language>
                 Chooses the language for the REPL.
  --repl=<flags> Runs lldb in REPL mode with a stub process with the given flags.
  --repl         Runs lldb in REPL mode with a stub process.
  -R <value>     Alias for --repl-language
  -r             Alias for --repl

SCRIPTING:
  -l <value>    Alias for --script-language
  --python-path Prints out the path to the lldb.py file for this version of lldb.
  -P            Alias for --python-path
  --script-language <language>
                Tells the debugger to use the specified scripting language for user-defined scripts.

EXAMPLES:
  The debugger can be started in several modes.

  Passing an executable as a positional argument prepares lldb to debug the
  given executable. Arguments passed after -- are considered arguments to the
  debugged executable.

    lldb --arch x86_64 /path/to/program -- --arch arvm7

  Passing one of the attach options causes lldb to immediately attach to the
  given process.

    lldb -p <pid>
    lldb -n <process-name>

  Passing --repl starts lldb in REPL mode.

    lldb -r

  Passing --core causes lldb to debug the core file.

    lldb -c /path/to/core

  Command options can be combined with these modes and cause lldb to run the
  specified commands before or after events, like loading the file or crashing,
  in the order provided on the command line.

    lldb -O 'settings set stop-disassembly-count 20' -o 'run' -o 'bt'
    lldb -S /source/before/file -s /source/after/file
    lldb -K /source/before/crash -k /source/after/crash

  Note: In REPL mode no file is loaded, so commands specified to run after
  loading the file (via -o or -s) will be ignored.
下面进入正题。
c++代码demo
准备了一份C++代码,用作演示。
提示: clang++编译需要使用
-g参数,生成调试信息。
#include <iostream>

int print(const char *parr)
{
    if (nullptr != parr)
        std::cout << parr << "\n\n";

    return 0;
}

int main(int argc, char* argv[], char* env[])
{
    int var_a = 1;
    char arr[] = {"ABCDEF"};

    int ret = print("hello world");

    std::cout << arr << "\n\n";
    std::cout << "var_a=" << var_a << "\n\n";
    std::cout << "ret=" << ret << "\n\n";

    return 0;
}
已使用clang++将其编译为demo。
lldb启动与退出
启动
启动有两种方式。
方式1
语法: lldb [程序名]。 例如, lldb demo。 其中,demo为程序名。执行命令后,lldb将启动demo程序,并暂停。

如果你的程序需要传递参数到
main,可以使用lldb demo [参数1] [参数2]....
方式2
上面是直接一步到位。接着这个方法可能有点慢: 先启动lldb,再用file启动程序。
- 首先键入
lldb可直接启动lldb. - 其次键入
file demo启动目标程序.

对比可知,都可以打达到同样的效果。
退出
退出也有两种方式
方式1
使用quit命令。
方式2
使用exit命令

可见,键入命令后,已经返回current directory了。
list 查看源码
查看文件代码
- 使用
listorl可以查看当前设置的文件代码. 语法: list 行号。 例如: list 10. 这里将跳转到第10行,从此往下显示10行 - 使用
list [文件名]可查看其他文件。
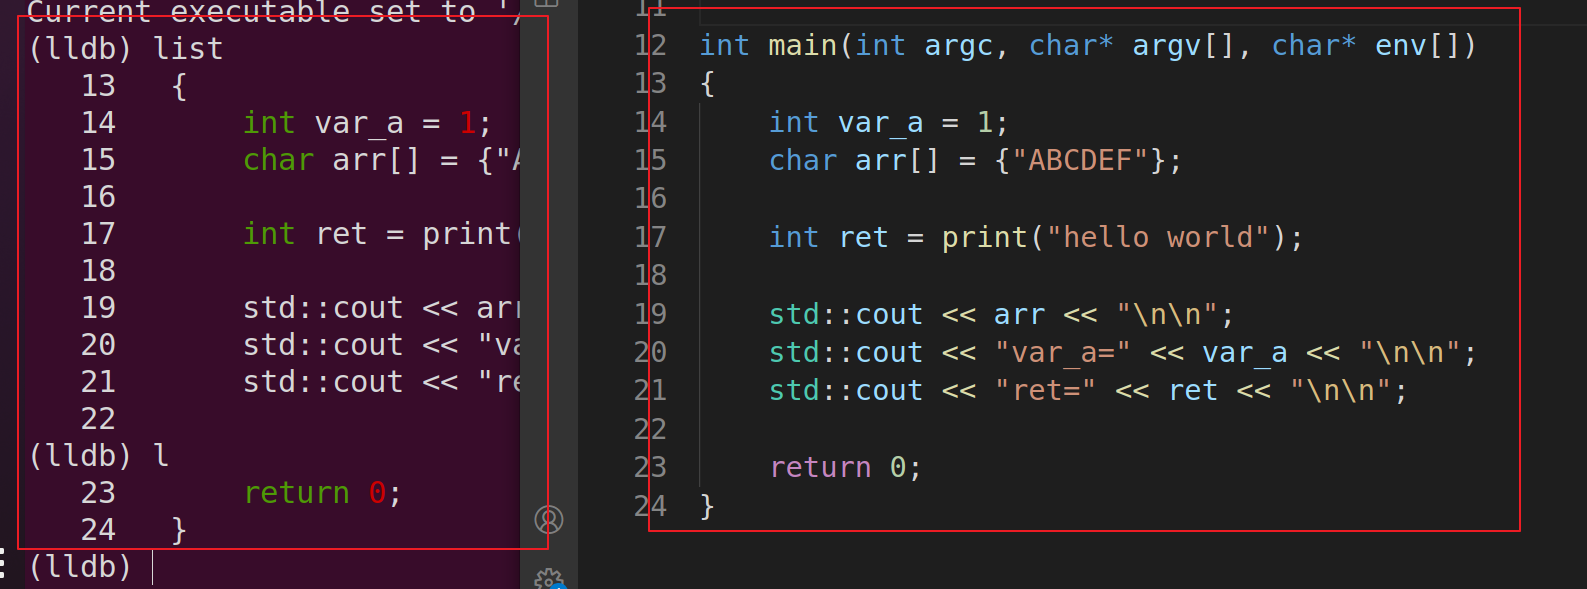
图中没有添加行号,直接键入命令listorl, 默认显示10行代码。
下面演示代码行跳转。
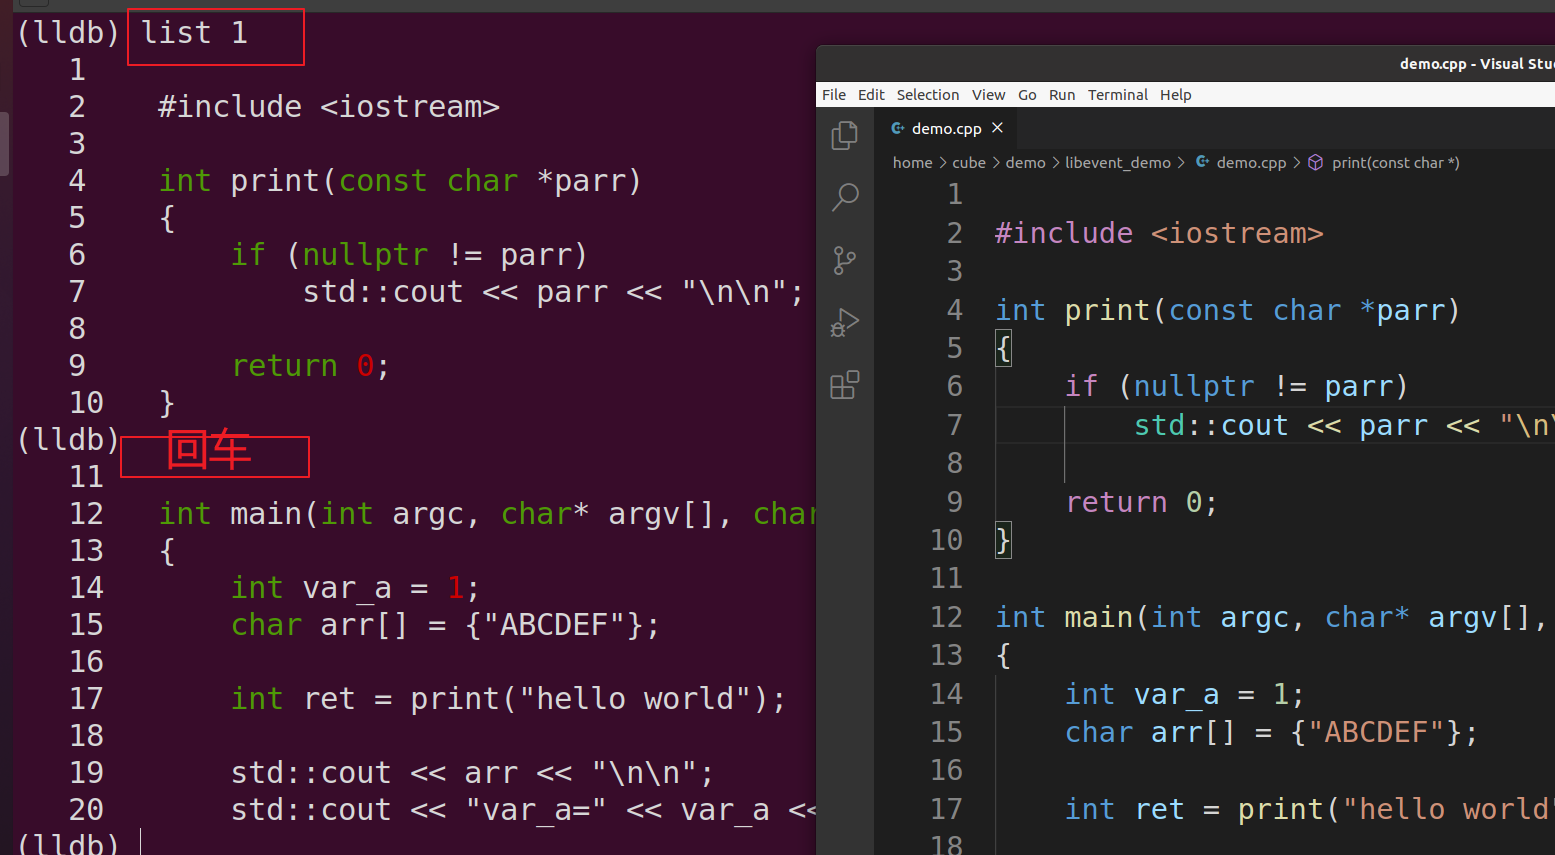
上面的list 1将从第一行显示10行代码。下面接着按下回车,默认显示10行代码。
查看函数
使用命令list [函数名]可查看函数代码。

breakpoint 断点
函数名设置断点
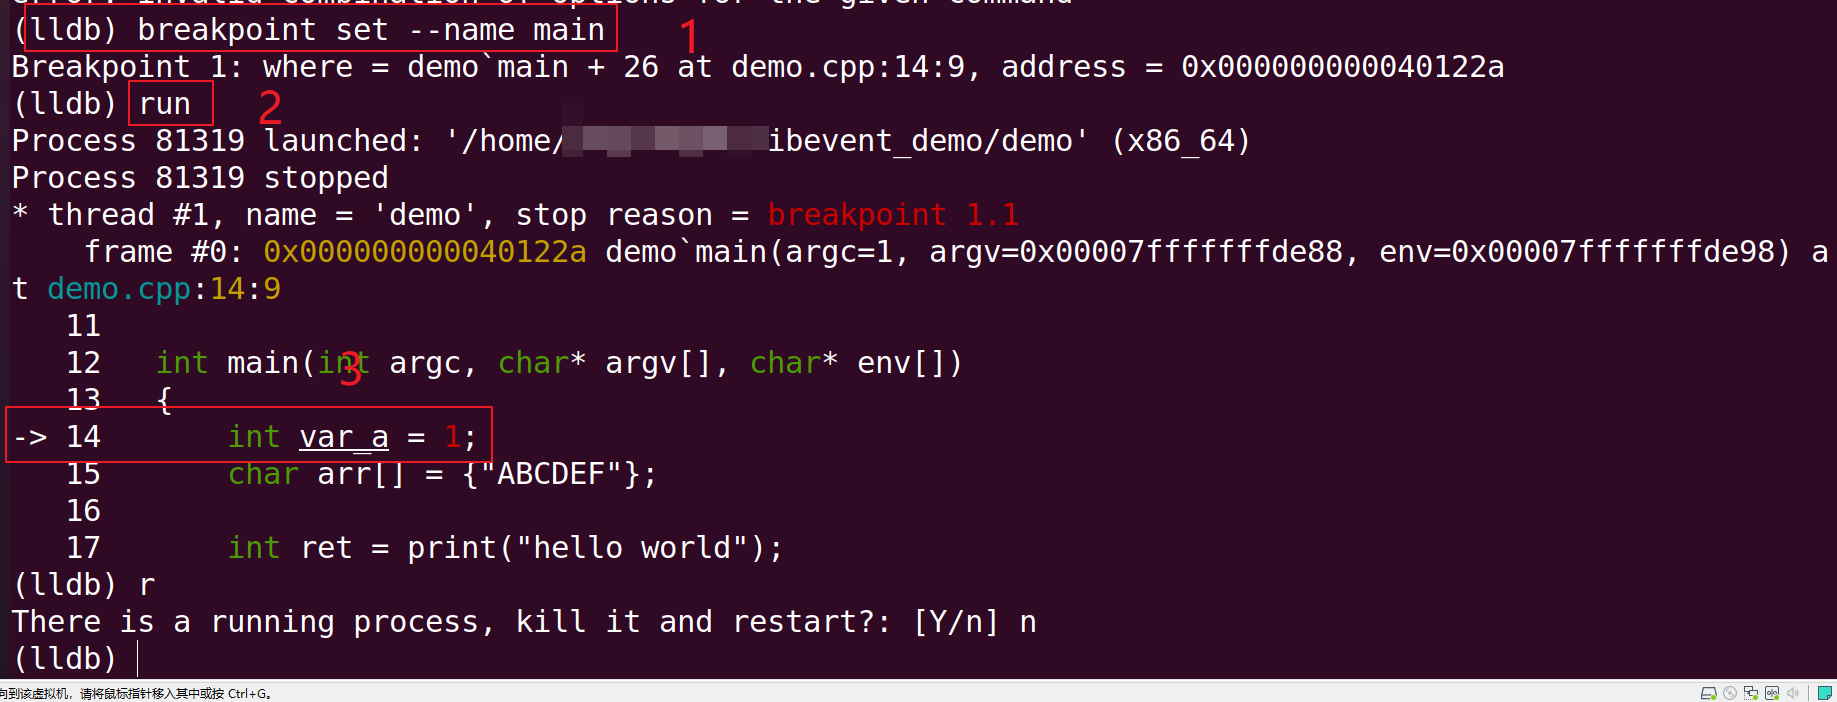
breakpoint set --name [函数名] 可设置断点。 如下图,设置了main函数断点。

设置断点后,再执行run,可见程序已经停在了函数的入口处。
行号设置断点
breakpoint set --line [行号] s设置断点. 下面演示了在当前文件的第8行设置断点。且断点序号为3
(lldb) breakpoint set --line 8
Breakpoint 3: where = demo`main + 33 at demo.cpp:8:10, address = 0x0000000000401201
根据文件名设置断点
breakpoint set --file [文件名] --line [行号]。 下面演示 将断点设置在文件car.hpp中的第17行
(lldb) breakpoint set --file car.hpp --line 17
Breakpoint 1: where = demo`car::print_name() + 12 at car.hpp:18:19, address = 0x00000000004012ec
删除所有断点
breakpoint delete可删除所有断点,并提示确认 。
(lldb) breakpoint delete
About to delete all breakpoints, do you want to do that?: [Y/n]
删除某个断点
断点列表
(lldb) breakpoint list
Current breakpoints:
2: name = 'main', locations = 1
  2.1: where = demo`main + 26 at demo.cpp:7:9, address = demo[0x00000000004011fa], unresolved, hit count = 0

3: file = '/home/xxx/demo/libevent_demo/demo.cpp', line = 8, exact_match = 0, locations = 1
  3.1: where = demo`main + 33 at demo.cpp:8:10, address = demo[0x0000000000401201], unresolved, hit count = 0

4: file = '/home/xxx/demo/libevent_demo/demo.cpp', line = 10, exact_match = 0, locations = 1
  4.1: where = demo`main + 47 at demo.cpp:10:15, address = demo[0x000000000040120f], unresolved, hit count = 0
- 使用
breakpoint delete [断点序号]可删除指定断点。 下面删除序号为2的断点和删除后的断点列表
(lldb) breakpoint delete 2
1 breakpoints deleted; 0 breakpoint locations disabled.
(lldb) breakpoint list
Current breakpoints:
3: file = '/home/cube/demo/libevent_demo/demo.cpp', line = 8, exact_match = 0, locations = 1
  3.1: where = demo`main + 33 at demo.cpp:8:10, address = demo[0x0000000000401201], unresolved, hit count = 0

4: file = '/home/cube/demo/libevent_demo/demo.cpp', line = 10, exact_match = 0, locations = 1
  4.1: where = demo`main + 47 at demo.cpp:10:15, address = demo[0x000000000040120f], unresolved, hit count = 0
- 使用
breakpoint delete [n-m]可删除从序号n到序号m之间的断点。一个例子
(lldb) breakpoint delete 3-4
2 breakpoints deleted; 0 breakpoint locations disabled.
(lldb) breakpoint list
No breakpoints currently set.
- 删除多个不连续断点
使用breakpoint delete [序号1] [序号2] [序号3].....可删除多个断点。
(lldb) breakpoint delete 5 7 8
3 breakpoints deleted; 0 breakpoint locations disabled.
(lldb) breakpoint list
Current breakpoints:
6: file = '/home/cube/demo/libevent_demo/demo.cpp', line = 9, exact_match = 0, locations = 1
  6.1: where = demo`main + 47 at demo.cpp:10:15, address = demo[0x000000000040120f], unresolved, hit count = 0
查看断点列表
-
使用
breakpoint list可以查看所有断点。

圈出来的是序号,可设置多个断点,用这个序号作为唯一标识。 -
禁用断点:
breakpoint disable [序号], 例如,breakpoint disable 1 -
启动断点:
breakpoint enable [序号],例如:breakpoint enable 1

run 运行
run命令可以让程序运行起来。

next 下一步
使用 next or n 可以单步执行
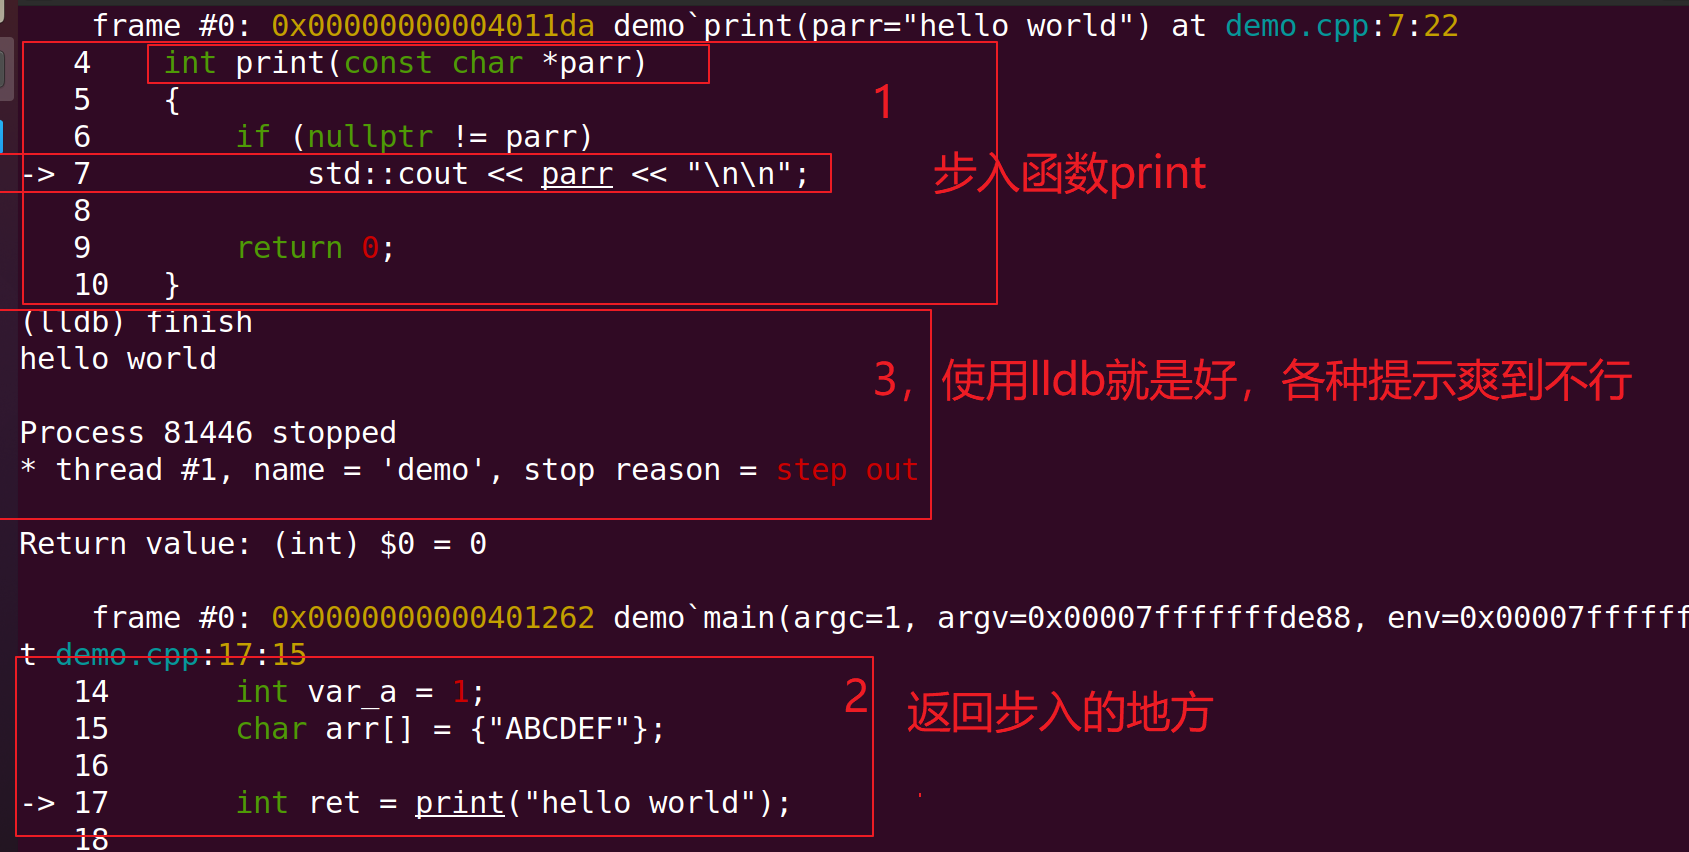
step 步入
使用 step or s 步入 函数。
finish 跳出
使用 finish 跳出,返回步入的地方,
p和po输出变量
p
使用p [变量名] 可以查看变量的值。

po
使用 po [指针变量名] 可以查看其值

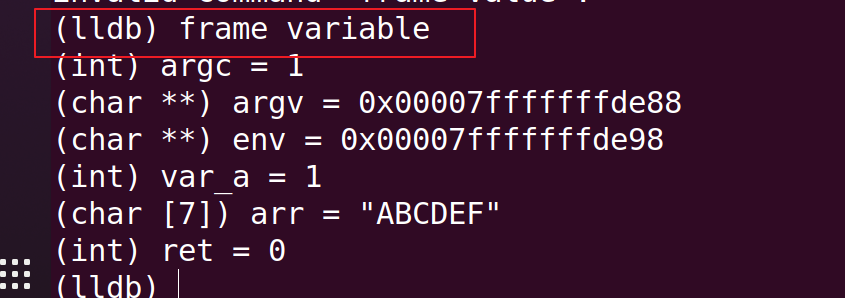
frame查看变量值
使用frame variable 可以查看当前frame中的所有value
expression 修改变量值
使用expression [变量名]=[value]可以修改变量的值。(做ios tweak 分析时,这招就挺好使)。
例如: expression ret=10.
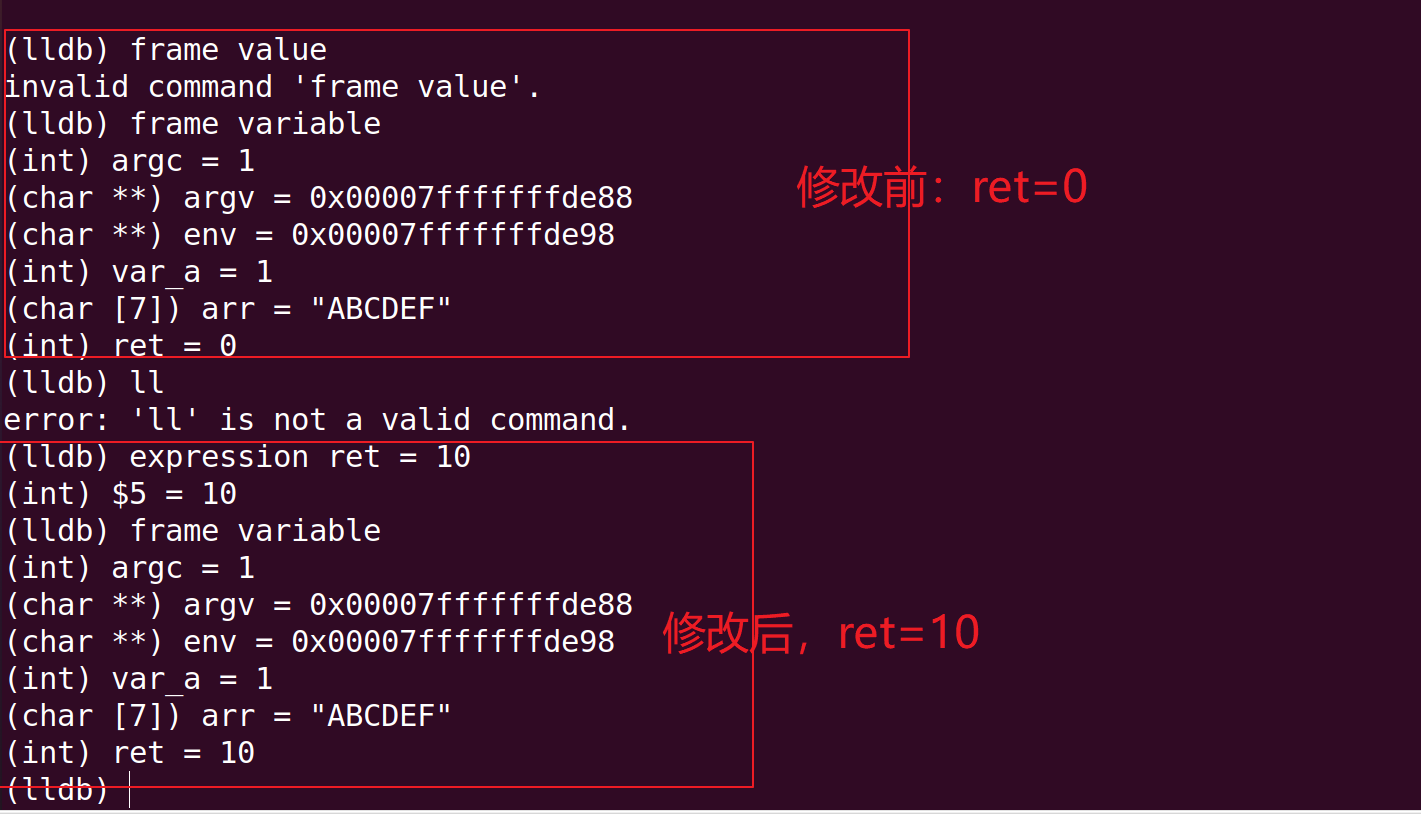
程序继续执行,发现输出的ret由0变为10.


 浙公网安备 33010602011771号