SpringBoot对消息队列(MQ)的支持
1.异步消息的定义
异步消息的主要目的是为了系统与系统之间的通信,所谓异步消息即消息发送者无需等待消息接收者的处理以及返回,甚至无需关心消息是否发送成功
在异步消息中有两个很重要的概念,即消息代理和目的地,当消息发送者发送消息之后,消息将由消息代理接管,消息代理保证消息传递到指定目的地。
异步消息主要有两种目的地形式,队列(queue)和主题(topic),队列用于点对点形式的消息通信,主题用于发布订阅式的消息通信。
1.1目的地形式分类
1.1.1点对点式
当消息发送者发送消息,消息代理将消息后将消息放进一个队列里,当有消息接收者来接收消息的时候,消息将从队列中取出传递给消息接收者,这时候队列里就没有了这条消息。点对点式确保每一条消息只有唯一的发送者和接收者,但这并不能说明只有一个接收者能够从队列中接收消息,因为队列中有多个消息,点对点式只保证每一条消息只有唯一的发送者和接收者
1.1.2发布/订阅式
发布订阅式是消息发送者发送消息到主题,而多个消息接收者监听这个主题,此时的消息发送者和接收者分别叫做发布者和订阅者
1.2 企业级消息代理
JMS即JAVA消息服务,是基于JVM的消息代理规范,ActiveMQ是一个JMS的实现
AMQP也是一个消息代理的规范,他不仅兼容JMS,还支持跨语言和平台,AMQP的主要实现是RabbitMQ
1.3 Spring以及SpringBoot的支持
Spring针对JMS和RabbitMQ分别提供了JmsTemplete和RabbitTemplete来发送消息。为我们提供了@JmsListener,@RabbitListener注解来监听消息代理发送的消息。我们分别需要通过@EnableJms和@EnableRabbit来开启支持
SpringBoot自动配置了上述@EnableJms,@EnableRabbit,JmsTemplete,RabbitTemplete的支持,同时我们可以在application.properties文件中分别以spring.activemq和spring.rabbitmq来分别配置所需的属性。
2.SpringBoot对JMS(ActiveMQ)的支持
下载安装
ActiveMQ的官方下载地址:http://activemq.apache.org/download.html,下载安装完成后
进入bin目录,发现有win32和win64两个文件夹,这2个文件夹分别对应windows32位和windows64位操作系统的启动脚本。进入对应的文件夹中双击activemq.bat。即可正常启动
访问http://localhost:8161/admin。输入默认的用户名和密码:admin/admin即可进入ActiveMQ的控制台
2.2 配置
SpringBoot提供了针对ActiveMQ的支持,只需要在pom.xml文件中引入即可:
        <dependency>
            <groupId>org.springframework.boot</groupId>
            <artifactId>spring-boot-starter-activemq</artifactId>
        </dependency>
在application.properties配置ActiveMQ的消息代理地址:
spring.activemq.broker-url=tcp://localhost:61616
注意,此处配置的消息代理必须让ActiveMQ启动时才有作用,否则无效
在实际情况下,消息的发布者和接受者一般都是分开的,而这里,我们仅作测试,将消息发送者和接收者放在一个程序中
2.3代码文件
2.3.1消息定义
public class Msg implements MessageCreator {
    @Override
    public Message createMessage(Session session) throws JMSException {
        return session.createTextMessage("测试消息");
    }
}
2.3.2消息发送及目的地定义
@SpringBootApplication
public class SpringBootMqApplication implements CommandLineRunner{

    @Autowired
    JmsTemplate  jmsTemplate;
    public static void main(String[] args) {
        SpringApplication.run(SpringBootMqApplication.class, args);
    }

    @Override
    public void run(String... args) throws Exception {
            jmsTemplate.send("my-destination",new Msg());
    }
}
CommandLineRunner接口中的run方法,是在程序启动后就会执行的代码。JmsTemplate 是用来操作JMS消息的操作类。
2.3.3消息监听
@Component
public class Receiver {
    @JmsListener(destination = "my-destination")
    public void  receivedMessage(String message){
        System.out.println("接受到"+message);
    }
}
@JmsListener显示的定义了指定要监听的目的地。
2.3.4运行结果
运行结果显示监听收到了消息

ActiveMQ的控制台中显示我们发送的消息

3.SpringBoot对AMQP(RabbitMQ)的支持
3.1RabbitMQ的安装配置
RabbitMQ是基于Erlang语言开发的。所以安装RabbitMQ之前需要先下载安装配置Erlang,下载地址:http://www.erlang.org/downloads
并将安装后的D:\Program Files\erl9.0\bin的bin目录配置到path环境变量中。然后下载安装RabbitMQ。下载地址:http://www.rabbitmq.com/download.html
安装完成之后在开始菜单中找到RabbitMQ Command Promt,打开控制台,输入命令
rabbitmq-plugins enable rabbitmq_management
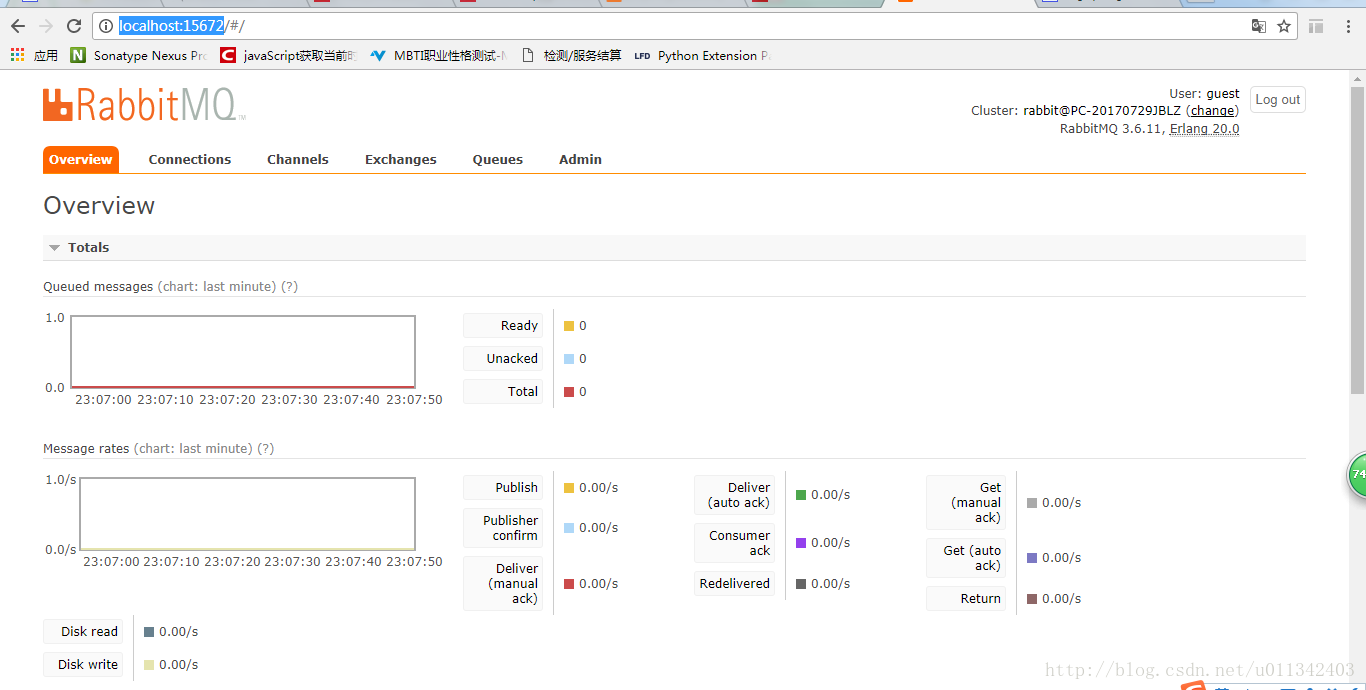
控制台无错误之后,访问http://localhost:15672。使用默认的用户名/密码:guest/guest进行登录
即可见到如图所示界面:

3.2 RabbitMQ测试代码文件
SpringBoot默认Rabbit的主机为localhost,端口号为5672,所以我们无需为RabbitMQ配置其他信息。
入口文件
import org.springframework.amqp.core.Queue;
import org.springframework.amqp.rabbit.core.RabbitTemplate;
import org.springframework.beans.factory.annotation.Autowired;
import org.springframework.boot.CommandLineRunner;
import org.springframework.boot.SpringApplication;
import org.springframework.boot.autoconfigure.SpringBootApplication;
import org.springframework.context.annotation.Bean;

import java.lang.annotation.Annotation;

@SpringBootApplication
public class SpringBootAmqpApplication implements CommandLineRunner {
    @Autowired
     RabbitTemplate rabbitTemplate;
    public static void main(String[] args) {
        SpringApplication.run(SpringBootAmqpApplication.class, args);
    }

    @Bean //2
    public Queue wiselyQueue(){
        return new Queue("my-queue");
    }

    @Override
    public void run(String... strings) throws Exception {
        rabbitTemplate.convertAndSend("my-queue","来自RabbitMQ的问候");
    }
}
接收类
@Component
public class Receiver {
    @RabbitListener(queues = "my-queue")
    public  void  ReceiveMesaage(String  message){
        System.out.println("接受到"+message);
    }
}
3.3 测试结果

在RabbitMQ控制台中额可以看到

4 小结
这里主要是对ActiveMQ和RabbitMQ进行了简单的尝试,了解了异步消息的通信。有兴趣的同学可以进行深入研究。
————————————————
原文链接:https://blog.csdn.net/u011342403/article/details/77940765


