nexus maven 使用案例
使用nexus本地maven配置
全局配置下载依赖(即项目pom无需配置)
在maven的setting.xml文件中配置私服配置,这种方式配置后所有本地使用该配置的maven项目的pom文件都无需配置私服下载相关配置
|
1
2
3
4
5
6
7
8
9
10
11
12
13
14
15
16
17
18
19
20
21
22
23
24
25
26
27
28
29
30
|
<profiles>
<profile>
<id>mycof</id>
<repositories>
<!-- 私有库地址-->
<repository>
<id>nexus</id>
<url>http://192.168.16.30:8081/repository/maven-public/</url>
<releases>
<enabled>true</enabled>
</releases>
<snapshots>
<enabled>true</enabled>
</snapshots>
</repository>
</repositories>
<pluginRepositories>
<!--插件库地址-->
<pluginRepository>
<id>nexus</id>
<url>http://192.168.16.30:8081/repository/maven-public/</url>
<releases>
<enabled>true</enabled>
</releases>
<snapshots>
<enabled>true</enabled>
</snapshots>
</pluginRepository>
</pluginRepositories>
</profile>
|
激活使用上面的配置
|
1
2
3
4
|
<!--激活profile-->
<activeProfiles>
<activeProfile>mycof</activeProfile>
</activeProfiles>
|
指定镜像代理为我们的私服
|
1
2
3
4
5
6
7
|
<mirror>
<id>nexus-myself</id>
<!--*指的是访问任何仓库都使用我们的私服-->
<mirrorOf>*</mirrorOf>
<name>Nexus myself</name>
<url>http://192.168.16.30:8081/repository/maven-public/</url>
</mirror>
|
单独项目下载依赖(即项目pom文件中配置)
这种配置是修改单个项目的pom文件,无需修改maven的setting配置
|
1
2
3
4
5
6
7
8
9
10
11
12
|
<repositories>
<repository>
<id>nexus</id>
<url>http://192.168.16.30:8081/repository/maven-public/</url>
<releases>
<enabled>true</enabled>
</releases>
<snapshots>
<enabled>true</enabled>
</snapshots>
</repository>
</repositories>
|
建议使用全局的setting配置,一个项目组共用一个maven的setting配置,项目中就无需配置下载相关的私服仓库配置
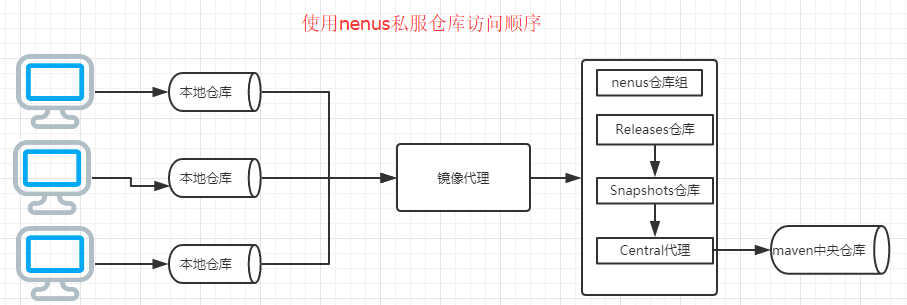
使用私服后仓库访问顺序
上传jar包配置
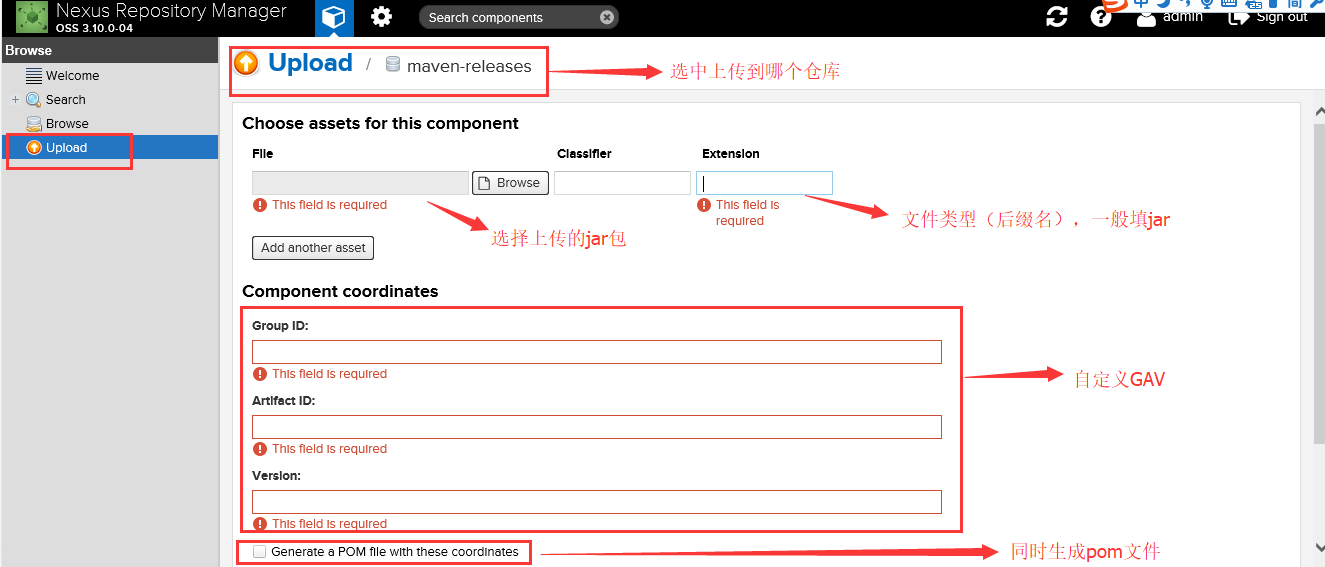
对于中央仓库没有的jar包,需要我们自己将jar包发布到私服中去,其中jar包主要分为两类,一类是本地自己开发供给项目组其余同事使用,这种直接配置项目的pom文件和maven的setting文件,之后deploy发布即可发布到,另一类是第三方jar包,可以直接使用web页面上传并设置对应GAV即可
本地maaven开发的项目上传配置
-
maven的setting文件配置
这里要配置配置上传用户及仓库信息,我这里直接使用了admin用户,在nenus2.x中还内置了一个deployment/deployment123用户,在3.x该用户被移除了,这里可以自己配置角色和用户,我就直接使用admin用户了123456789101112<servers><server><id>nexus-releases</id><username>admin</username><password>admin123</password></server><server><id>nexus-snapshots</id><username>admin</username><password>admin123</password></server></servers> -
项目中的pom文件配置
123456789101112<distributionManagement><repository><id>nexus-releases</id><name>Nexus Release Repository</name><url>http://192.168.16.30:8081/repository/maven-releases/</url></repository><snapshotRepository><id>nexus-snapshots</id><name>Nexus Snapshot Repository</name><url>http://192.168.16.30:8081/repository/maven-snapshots/</url></snapshotRepository></distributionManagement> -
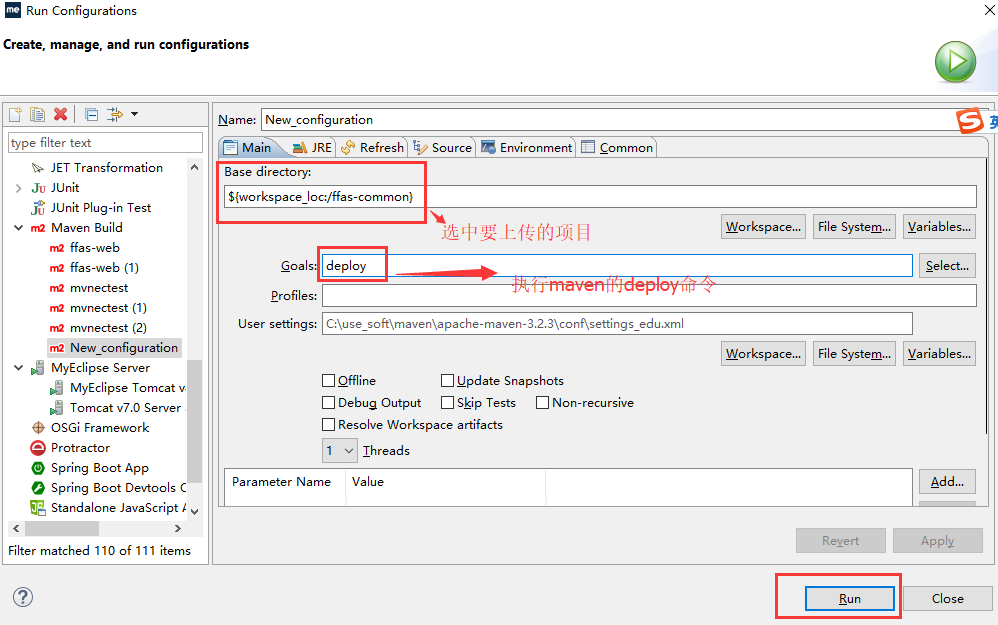
执行maven的deploy命令
这是myeclipse中上传本地项目jar到私服,IDEA中更为简单直接点击maven周期中的deploy即可
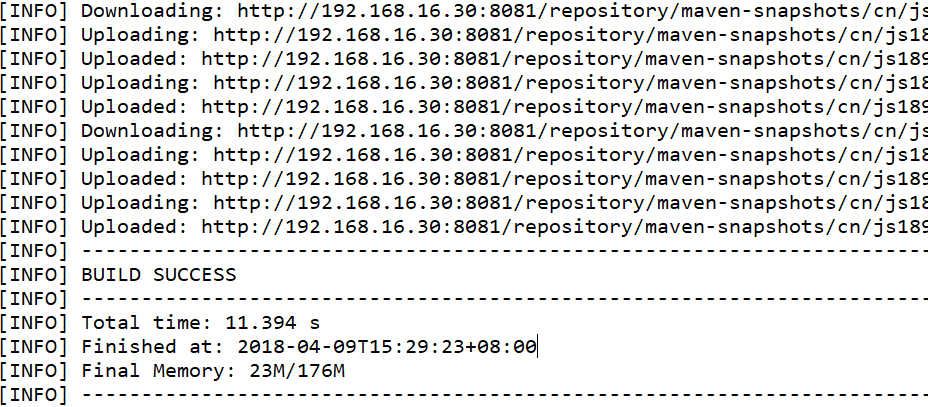
出现uploading信息并且没报错说明上传成功
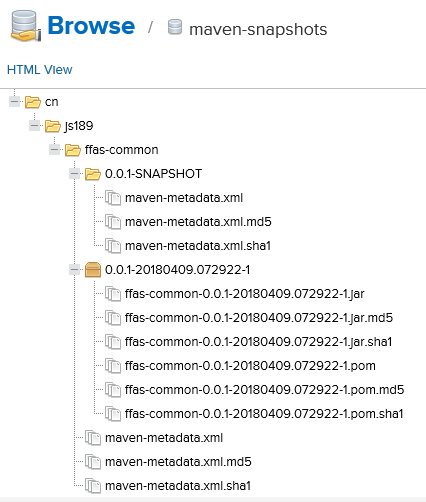
到对应仓库查看
注意:
-
这里只有Snapshot的仓库上传成功,Release仓库并没有上传成功,这是因为版本号名称结尾有SNAPSHOT,默认以这个结尾是不会上传到Release仓库去的,去除就会上传到Release仓库且不会上传到快照仓库
-
Release仓库默认不支持重复发布,可配置
-
注意setting中server标签下的id要和pom文件中仓库配置的id相同,即指定上传到哪个仓库
第三方jar包上传
对于第三方jar包的上传采用nenus提供的web界面上传,上传成功后需要使用该jar包的话,依赖中填写自定义的GAV即可


