


apache zookeeper的安装
original article:http://zookeeper.praveendeshmane.co.in/zookeeper/zookeeper-3-4-6-single-server-setup-on-ubuntu-14-04.jsp
---------------------------------------------------------
Apache ZooKeeper is a software project of the Apache Software Foundation. It is essentially a distributed hierarchical key-value store, which is used to provide a distributed configuration service, synchronization service, and naming registry for large distributed systems. ZooKeeper was a sub-project of Hadoop but is now a top-level project in its own right.
ZooKeeper's architecture supports high availability through redundant services. The clients can thus ask another ZooKeeper leader if the first fails to answer. ZooKeeper nodes store their data in a hierarchical name space, much like a file system or a tree data structure. Clients can read from and write to the nodes and in this way have a shared configuration service. Updates are totally ordered.
Pre Requirements
1) A machine with Ubuntu 14.04 LTS operating system
2) Apache Hadoop 2.6.4 pre installed (How to install Hadoop on Ubuntu 14.04)
3) Apache ZooKeeper 3.4.6 software (Download Here)
ZooKeeper 3.4.6 Single Server setup on Ubuntu
Installation Steps
Step 1 - Update. Open a terminal (CTRL + ALT + T) and type the following sudo command. It is advisable to run this before installing any package, and necessary to run it to install the latest updates, even if you have not added or removed any Software Sources.
$ sudo apt-get update
Step 2 - Installing Java 7.
$ sudo apt-get install openjdk-7-jdk
Step 3 - Edit $HOME/.bashrc file by adding the java path.
$ sudo gedit $HOME/.bashrc
$HOME/.bashrc file. Add the following lines
export JAVA_HOME=/usr/lib/jvm/java-7-openjdk-amd64
Step 4 - Reload your changed $HOME/.bashrc settings
$ source $HOME/.bashrc
Step 5 - Creating zookeeper directory.
$ sudo mkdir /usr/local/zookeeper
Step 6 - Change the ownership and permissions of the directory /usr/local/zookeeper. Here 'hduser' is an Ubuntu username.
$ sudo chown -R hduser /usr/local/zookeeper
$ sudo chmod -R 755 /usr/local/zookeeper
Step 7 - Creating /zookeeper/data directory.
$ sudo mkdir /usr/local/zookeeper/data
Step 8 - Change the ownership and permissions of the directory /usr/local/zookeeper/data. Here 'hduser' is an Ubuntu username.
$ sudo chown -R hduser /usr/local/zookeeper/data
$ sudo chmod -R 755 /usr/local/zookeeper/data
Step 9 - Creating /zookeeper/log directory.
$ sudo mkdir /usr/local/zookeeper/log
Step 10 - Change the ownership and permissions of the directory /usr/local/zookeeper/log. Here 'hduser' is an Ubuntu username.
$ sudo chown -R hduser /usr/local/zookeeper/log
$ sudo chmod -R 755 /usr/local/zookeeper/log
Step 11 - Change the directory to /home/hduser/Desktop , In my case the downloaded zookeeper-3.4.6.tar.gz file is in /home/hduser/Desktop folder. For you it might be in /downloads folder check it.
$ cd /home/hduser/Desktop/
Step 12 - Untar the zookeeper-3.4.6.tar.gz file.
$ tar xzf zookeeper-3.4.6.tar.gz
Step 13 - Move the contents of zookeeper-3.4.6 folder to /usr/local/zookeeper
$ mv zookeeper-3.4.6/* /usr/local/zookeeper
Step 14 - Change the directory to /usr/local/zookeeper/conf
$ cd /usr/local/zookeeper/conf
Step 15 - Edit zoo.cfg file. If this file doesn't exists it will create one for you and it ll open for you to edit.
$ gedit zoo.cfg
Step 16 - Add following lines to zoo.cfg file. Save and close.
tickTime=2000
dataDir=/usr/local/zookeeper/data
dataLogDir=/usr/local/zookeeper/log
clientPort=2181
initLimit=5
syncLimit=2
Step 17 - Change the directory to /usr/local/zookeeper/bin
$ cd /usr/local/zookeeper/bin
Step 18 - Start zookeeper server
$ ./zkServer.sh start

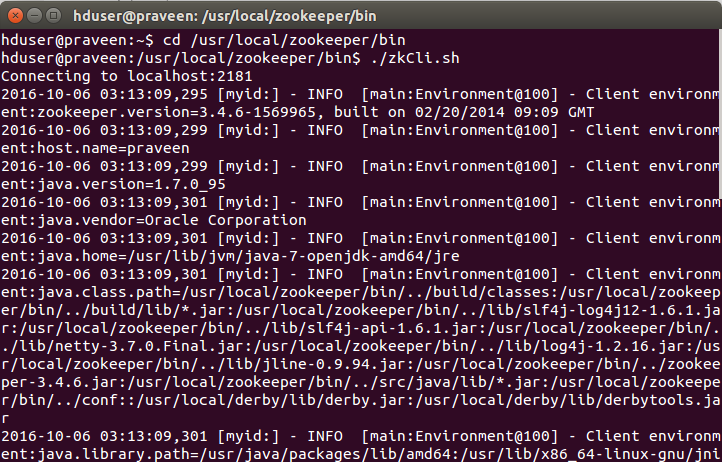
Step 19 - Start client
$ ./zkCli.sh -server 127.0.0.1:2181
Step 20 - Stop zookeeper server
$ ./zkServer.sh stop

Please share this blog post and follow me for latest updates on


【推荐】国内首个AI IDE,深度理解中文开发场景,立即下载体验Trae
【推荐】编程新体验,更懂你的AI,立即体验豆包MarsCode编程助手
【推荐】抖音旗下AI助手豆包,你的智能百科全书,全免费不限次数
【推荐】轻量又高性能的 SSH 工具 IShell:AI 加持,快人一步
· AI与.NET技术实操系列:基于图像分类模型对图像进行分类
· go语言实现终端里的倒计时
· 如何编写易于单元测试的代码
· 10年+ .NET Coder 心语,封装的思维:从隐藏、稳定开始理解其本质意义
· .NET Core 中如何实现缓存的预热?
· 分享一个免费、快速、无限量使用的满血 DeepSeek R1 模型,支持深度思考和联网搜索!
· 基于 Docker 搭建 FRP 内网穿透开源项目(很简单哒)
· 25岁的心里话
· ollama系列01:轻松3步本地部署deepseek,普通电脑可用
· 按钮权限的设计及实现
2016-08-12 php 安装php5-mysql 拓展
2016-08-12 ubuntu 14.04安装mysql
2016-08-12 x86_64是什么意思