基于AOP的事务管理
使用转账的例子来说明基于AOP的事务管理
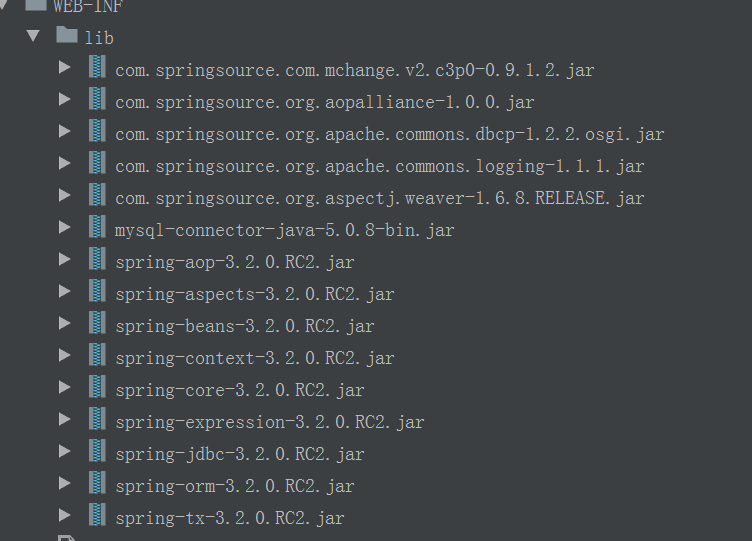
1.导入jar包
2.创建数据库
/*
Navicat MySQL Data Transfer

Source Server         : localhost
Source Server Version : 50725
Source Host           : localhost:3306
Source Database       : springtx

Target Server Type    : MYSQL
Target Server Version : 50725
File Encoding         : 65001

Date: 2019-03-28 16:54:21
*/

SET FOREIGN_KEY_CHECKS=0;

-- ----------------------------
-- Table structure for account
-- ----------------------------
DROP TABLE IF EXISTS `account`;
CREATE TABLE `account` (
  `id` int(11) NOT NULL AUTO_INCREMENT,
  `username` varchar(50) DEFAULT NULL,
  `money` int(11) DEFAULT NULL,
  PRIMARY KEY (`id`)
) ENGINE=InnoDB AUTO_INCREMENT=3 DEFAULT CHARSET=latin1;

-- ----------------------------
-- Records of account
-- ----------------------------
INSERT INTO `account` VALUES ('1', 'xiaoming', '10000');
INSERT INTO `account` VALUES ('2', 'xiaohong', '10000');
3.编写dao层的代码
package oyb.dao;

public interface IAccountDao {

    public void out(String outer, Integer money);
    public void in(String inner, Integer money);
}
package oyb.dao.impl;

import org.springframework.jdbc.core.support.JdbcDaoSupport;
import oyb.dao.IAccountDao;

public class AccountDaoImpl extends JdbcDaoSupport implements IAccountDao {
    @Override
    public void out(String outer, Integer money) {
        String sql = "update account set money = money - ? where username = ?";
        this.getJdbcTemplate().update(sql,money,outer);
    }

    @Override
    public void in(String inner, Integer money) {
        String sql = "update account set money = money + ? where username = ?";
        this.getJdbcTemplate().update(sql,money,inner);


    }
}
4.编写业务层的代码
package oyb.service;

public interface IAccountService {
    public  void transfer(String outer, String in, Integer money);
}
package oyb.service.impl;

import oyb.dao.IAccountDao;
import oyb.service.IAccountService;

public class AccountServiceImpl implements IAccountService {

    //提供set方法,由spring注入
    private IAccountDao accountDao;
    public void setAccountDao(IAccountDao accountDao) {
        this.accountDao = accountDao;
    }

    @Override
    public void transfer(String outer, String inner, Integer money) {
        accountDao.out(outer,money);
        accountDao.in(inner,money);
    }
}
添加db.properties文件
driverClass=com.mysql.jdbc.Driver
jdbcUrl=jdbc:mysql:///springtx
user=root
password=123456
配置beans.xml文件
<?xml version="1.0" encoding="UTF-8"?>
<beans xmlns="http://www.springframework.org/schema/beans"
       xmlns:xsi="http://www.w3.org/2001/XMLSchema-instance"
       xmlns:p="http://www.springframework.org/schema/p"
       xmlns:context="http://www.springframework.org/schema/context"
       xmlns:aop="http://www.springframework.org/schema/aop"
       xmlns:tx="http://www.springframework.org/schema/tx"
       xsi:schemaLocation="http://www.springframework.org/schema/beans
                            http://www.springframework.org/schema/beans/spring-beans.xsd
                            http://www.springframework.org/schema/context
                            http://www.springframework.org/schema/context/spring-context.xsd
                            http://www.springframework.org/schema/aop
                            http://www.springframework.org/schema/aop/spring-aop.xsd
                            http://www.springframework.org/schema/tx
                            http://www.springframework.org/schema/tx/spring-tx.xsd">
    <!--读取db.properties数据-->
    <context:property-placeholder location="classpath:db.properties"></context:property-placeholder>
    <bean id="dataSource" class="com.mchange.v2.c3p0.ComboPooledDataSource">
        <property name="driverClass" value="${driverClass}"/>
        <property name="jdbcUrl" value="${jdbcUrl}"/>
        <property name="user" value="${user}"/>
        <property name="password" value="${password}"/>
    </bean>
    <!--配置dao-->
    <bean id="accountDao" class="oyb.dao.impl.AccountDaoImpl">
        <!--注入属性-->
        <property name="dataSource" ref="dataSource"></property>
    </bean>

    <!--配置service-->
    <bean id="accountService" class="oyb.service.impl.AccountServiceImpl">
        <property name="accountDao" ref="accountDao"></property>
    </bean>
</beans>
测试转账功能是否完好
import org.junit.Test;
import org.springframework.context.ApplicationContext;
import org.springframework.context.support.ClassPathXmlApplicationContext;
import oyb.dao.IAccountDao;
import oyb.service.IAccountService;

public class test {

    @Test
    public  void test(){
        ApplicationContext context = new ClassPathXmlApplicationContext("beans.xml");
        IAccountService accountService = (IAccountService) context.getBean("accountService");
        accountService.transfer("xiaoming","xiaohong",100);
    }
}
测试的结果

基本的条件搭建好了之后,下面来讲基于AOP的事务配置,除了AOP的自动代理,还有工厂代理以及手动管理事务,后两者可作为了解,这里不涉及,主要还是掌握基于AOP的事务管理。
在配置事务管理前,我们可以看下如果业务类中的transfer方法出现了异常,数据库的结果会是怎样的。
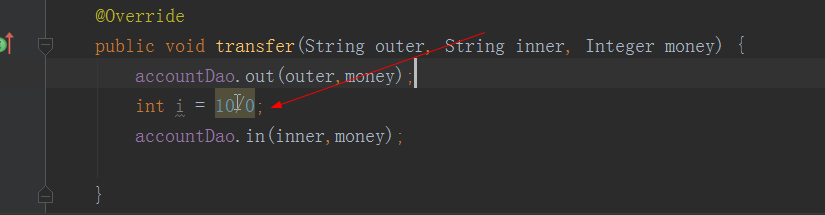
我在转账的方法中加了一句int i = 10/0 这段会抛出异常的代码
可执行完测试的代码之后可以发现,xiaoming的钱虽然减少了,但是并未转入xiaohong的账户中,根据事务管理可知,如果出现了异常,应该回滚。
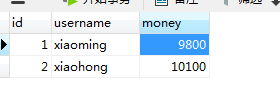
以上便是没有配置事务管理所会出现的结果
我们让xiaoming的账户恢复到之前的余额
修改beans.xml这个配置文件
<?xml version="1.0" encoding="UTF-8"?>
<beans xmlns="http://www.springframework.org/schema/beans"
       xmlns:xsi="http://www.w3.org/2001/XMLSchema-instance"
       xmlns:p="http://www.springframework.org/schema/p"
       xmlns:context="http://www.springframework.org/schema/context"
       xmlns:aop="http://www.springframework.org/schema/aop"
       xmlns:tx="http://www.springframework.org/schema/tx"
       xsi:schemaLocation="http://www.springframework.org/schema/beans
                            http://www.springframework.org/schema/beans/spring-beans.xsd
                            http://www.springframework.org/schema/context
                            http://www.springframework.org/schema/context/spring-context.xsd
                            http://www.springframework.org/schema/aop
                            http://www.springframework.org/schema/aop/spring-aop.xsd
                            http://www.springframework.org/schema/tx
                            http://www.springframework.org/schema/tx/spring-tx.xsd">
    <!--读取db.properties数据-->
    <context:property-placeholder location="classpath:db.properties"></context:property-placeholder>
    <bean id="dataSource" class="com.mchange.v2.c3p0.ComboPooledDataSource">
        <property name="driverClass" value="${driverClass}"/>
        <property name="jdbcUrl" value="${jdbcUrl}"/>
        <property name="user" value="${user}"/>
        <property name="password" value="${password}"/>
    </bean>
    <!--配置dao-->
    <bean id="accountDao" class="oyb.dao.impl.AccountDaoImpl">
        <!--注入属性-->
        <property name="dataSource" ref="dataSource"></property>
    </bean>

    <!--配置service-->
    <bean id="accountService" class="oyb.service.impl.AccountServiceImpl">
        <property name="accountDao" ref="accountDao"></property>
    </bean>
    <!--配置jdbc事务管理器-->
    <bean id="txManager" class="org.springframework.jdbc.datasource.DataSourceTransactionManager">
        <property name="dataSource" ref="dataSource"></property>
    </bean>
    <!--AOP的事务配置-->
    <!--1.配置通知
        tx:attributes:配置事务的传播行为以及隔离级别
      隔离级别配置成默认的即可,传播行为也使用默认的required
     -->
    <tx:advice id="txAdvice" transaction-manager="txManager">
        <tx:attributes>
            <tx:method name="transfer" isolation="DEFAULT" propagation="REQUIRED"/>
        </tx:attributes>
    </tx:advice>

    <!--配置切面-->
    <aop:config>
        <aop:advisor advice-ref="txAdvice" pointcut="execution(* oyb.service..*.*(..))"></aop:advisor>
    </aop:config>
</beans>
此时在transfer方法中还有int 10/0 这段代码,所以仍存在异常,运行完测试类后,我们查看下数据库
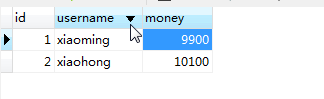
可知事务确实是回滚了。
我们把int i =10/0这句代码删除,在运行测试方法查看下数据库

以上便是基于AOP的事务配置的例子

 浙公网安备 33010602011771号