新手的spring的学习笔记
1.简单的步骤:
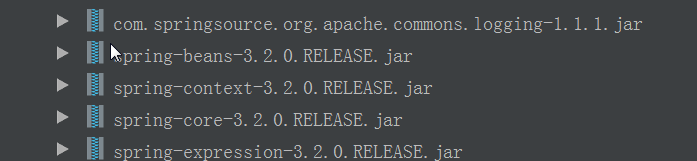
创建web项目,导入spring的包
- 导入4个核心的包(core、beans、context、expression)和1个依赖包(common-logging.jar)
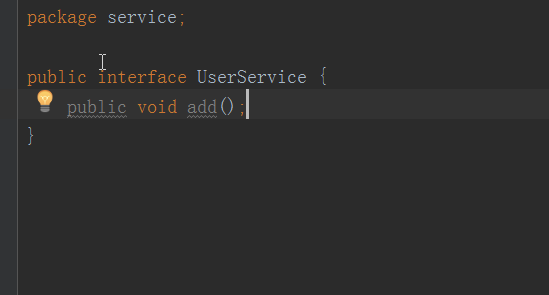
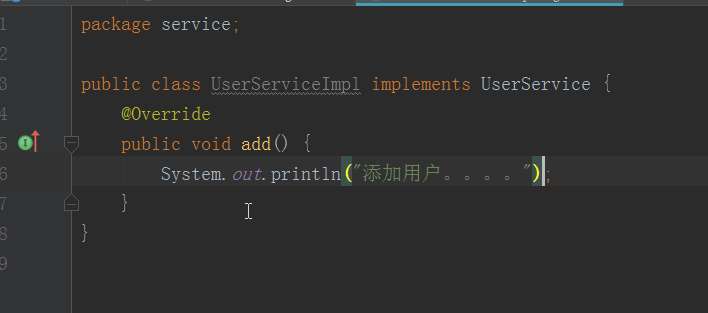
- 写个简单的service
- 配置Beans.xml文件(在src目录下)
<?xml version="1.0" encoding="UTF-8"?>
<beans xmlns="http://www.springframework.org/schema/beans"
       xmlns:xsi="http://www.w3.org/2001/XMLSchema-instance"
       xsi:schemaLocation="
http://www.springframework.org/schema/beans http://www.springframework.org/schema/beans/spring-beans.xsd">


    <!-- 配置一个bean-->
    <bean id="userService" class="service.UserServiceImpl">
    </bean>
</beans>
- 创建一个test的类:
package test;

import org.junit.Test;
import org.springframework.context.ApplicationContext;
import org.springframework.context.support.ClassPathXmlApplicationContext;
import service.UserService;

public class Demo01 {
    @Test
    public void test1(){
        ApplicationContext context = new ClassPathXmlApplicationContext("beans.xml");
        UserService userService = (UserService) context.getBean("userService");
        userService.add();
    }
}
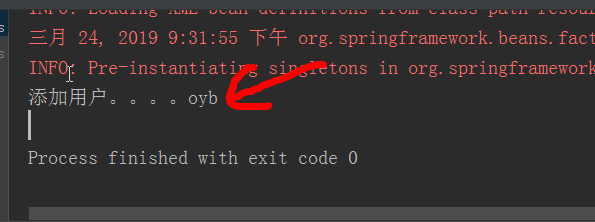
运行结果
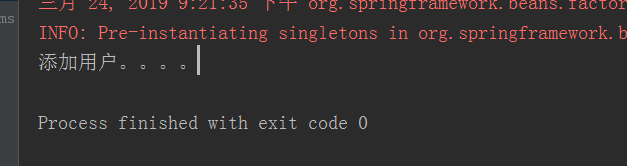
在之前的学习中,我们可能在test类里面实例化一个UserService,然后调用add()方法,这里涉及到了IoC(Inverse of Control)反转控制的概念,也就是说原先在程序中手动创建Userservice的控制权,这里交由Spring框架管理,也就是创建UserService对象控制权被反转到了Spring框架
2.依赖注入(Dependency Injection):在Spring框架负责创建Bean对象时,动态的将依赖对象注入到Bean组件。
例子:
package service;

public class UserServiceImpl implements UserService {
    //提供一个属性,要有get/set方法
    private String name;

    public String getName() {
        return name;
    }

    public void setName(String name) {
        this.name = name;
    }

    @Override
    public void add() {
        System.out.println("添加用户。。。。");
    }
}
<?xml version="1.0" encoding="UTF-8"?>
<beans xmlns="http://www.springframework.org/schema/beans"
       xmlns:xsi="http://www.w3.org/2001/XMLSchema-instance"
       xsi:schemaLocation="
http://www.springframework.org/schema/beans http://www.springframework.org/schema/beans/spring-beans.xsd">


    <!-- 配置一个bean-->
    <bean id="userService" class="service.UserServiceImpl">
        <property name="name" value="oyb"></property>
    </bean>
</beans>
测试结果:
3.Bean的作用域
|
类别 |
说明 |
|
singleton |
在Spring IoC容器中仅存在一个Bean实例,Bean以单例方式存在,默认值 |
|
prototype |
每次从容器中调用Bean时,都返回一个新的实例,即每次调用getBean()时 ,相当于执行new XxxBean() |
|
request |
每次HTTP请求都会创建一个新的Bean,该作用域仅适用于WebApplicationContext环境 |
|
session |
同一个HTTP Session 共享一个Bean,不同Session使用不同Bean,仅适用于WebApplicationContext 环境 |
|
globalSession |
一般用于Portlet应用环境,该作用域仅适用于WebApplicationContext 环境 |
4.Bean的生命周期
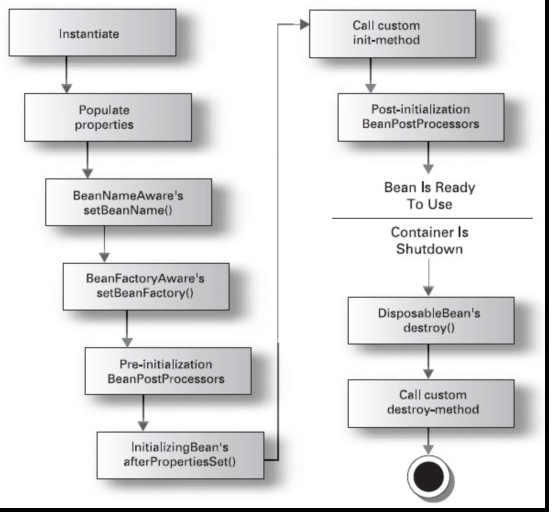
1.instantiate bean对象实例化
2.populate properties 封装属性
3.如果Bean实现BeanNameAware 执行 setBeanName
4.如果Bean实现BeanFactoryAware 执行setBeanFactory ,获取Spring容器
5.如果存在类实现 BeanPostProcessor(后处理Bean) ,执行postProcessBeforeInitialization
6.如果Bean实现InitializingBean 执行 afterPropertiesSet
7.调用<bean init-method="init"> 指定初始化方法 init
8.如果存在类实现 BeanPostProcessor(处理Bean) ,执行postProcessAfterInitialization
执行业务处理
9.如果Bean实现 DisposableBean 执行 destroy
101.调用<bean destroy-method="customerDestroy"> 指定销毁方法 customerDestroy
5.依赖注入Bean属性:
5.1构造方法注入
创建实体类:
package domain;

public class User {
    private String username;
    private String password;
    private Integer age;

    public User(String username, String password, Integer age) {
        this.username = username;
        this.password = password;
        this.age = age;
    }

    public User() {

    }

    public String getUsername() {
        return username;
    }

    public void setUsername(String username) {
        this.username = username;
    }

    public String getPassword() {
        return password;
    }

    public void setPassword(String password) {
        this.password = password;
    }

    public Integer getAge() {
        return age;
    }

    public void setAge(Integer age) {
        this.age = age;
    }

    @Override
    public String toString() {
        return "User{" +
                "username='" + username + '\'' +
                ", password='" + password + '\'' +
                ", age=" + age +
                '}';
    }
}
配置一个bean
<bean id="user" class="domain.User">
        <property name="username" value="oyb"></property>
        <property name="password" value="123456"></property>
        <property name="age" value="18"></property>
</bean>
还有一种时候通过set方法注入,上面已经讲到了,这里就不讲了。
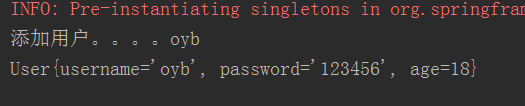
测试结果

5.2集合注入
集合的注入都是给<property>添加子标签
数组:<array>
List:<list>
Set:<set>
Map:<map> ,map存放k/v 键值对,使用<entry>描述
Properties:<props> <prop key=""></prop> 【】
普通数据:<value>
引用数据:<ref>
例子:
在User这个类中添加一条集合属性course,同样的我们要提供set方法,才能够在bean文件中注入

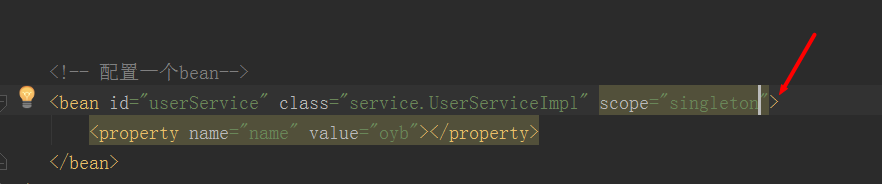
<?xml version="1.0" encoding="UTF-8"?>
<beans xmlns="http://www.springframework.org/schema/beans"
       xmlns:xsi="http://www.w3.org/2001/XMLSchema-instance"
       xsi:schemaLocation="
http://www.springframework.org/schema/beans http://www.springframework.org/schema/beans/spring-beans.xsd">


    <!-- 配置一个bean-->
    <bean id="userService" class="service.UserServiceImpl" scope="singleton">
        <property name="name" value="oyb"></property>
    </bean>

    <bean id="user" class="domain.User">
        <property name="username" value="oyb"></property>
        <property name="password" value="123456"></property>
        <property name="age" value="18"></property>
        <property name="course">
                <list>
                    <value>语文</value>
                    <value>数学</value>
                    <value>英语</value>
                </list>
        </property>
    </bean>
</beans>
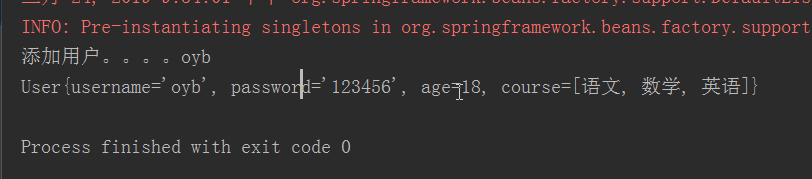
测试结果:
关于注解的内容下一篇博文将会介绍

 浙公网安备 33010602011771号