一、原生JS中使用Graphql
- 准备工作:
需要下载的包:
- express
用于搭建web服务器
- graphql
用于创建数据模板
- express-graphql
用于创建express中间件
- 构建查询数据的案例
引入要使用的库
const express = require('express')
//构建轮廓的方法
const { buildSchema } = require('graphql')
//连接器
const { graphqlHTTP } = require('express-graphql')
构建一个查询模板
//构建轮廓
const Schema = buildSchema(`
type Query{
    hello:String
}`)
创建与模板对应的数据源
const root = {
    hello: () => {

        return "hello gtaphql"
    },
}
使用express创建一个app应用
const app = express()使用中间件链接数据与模板,并监听3000端口
app.use('/graphql', graphqlHTTP(
    {
        schema: Schema,
        rootValue: root,
        //开启调试器
        graphiql: true
    }
))

app.listen(3000)
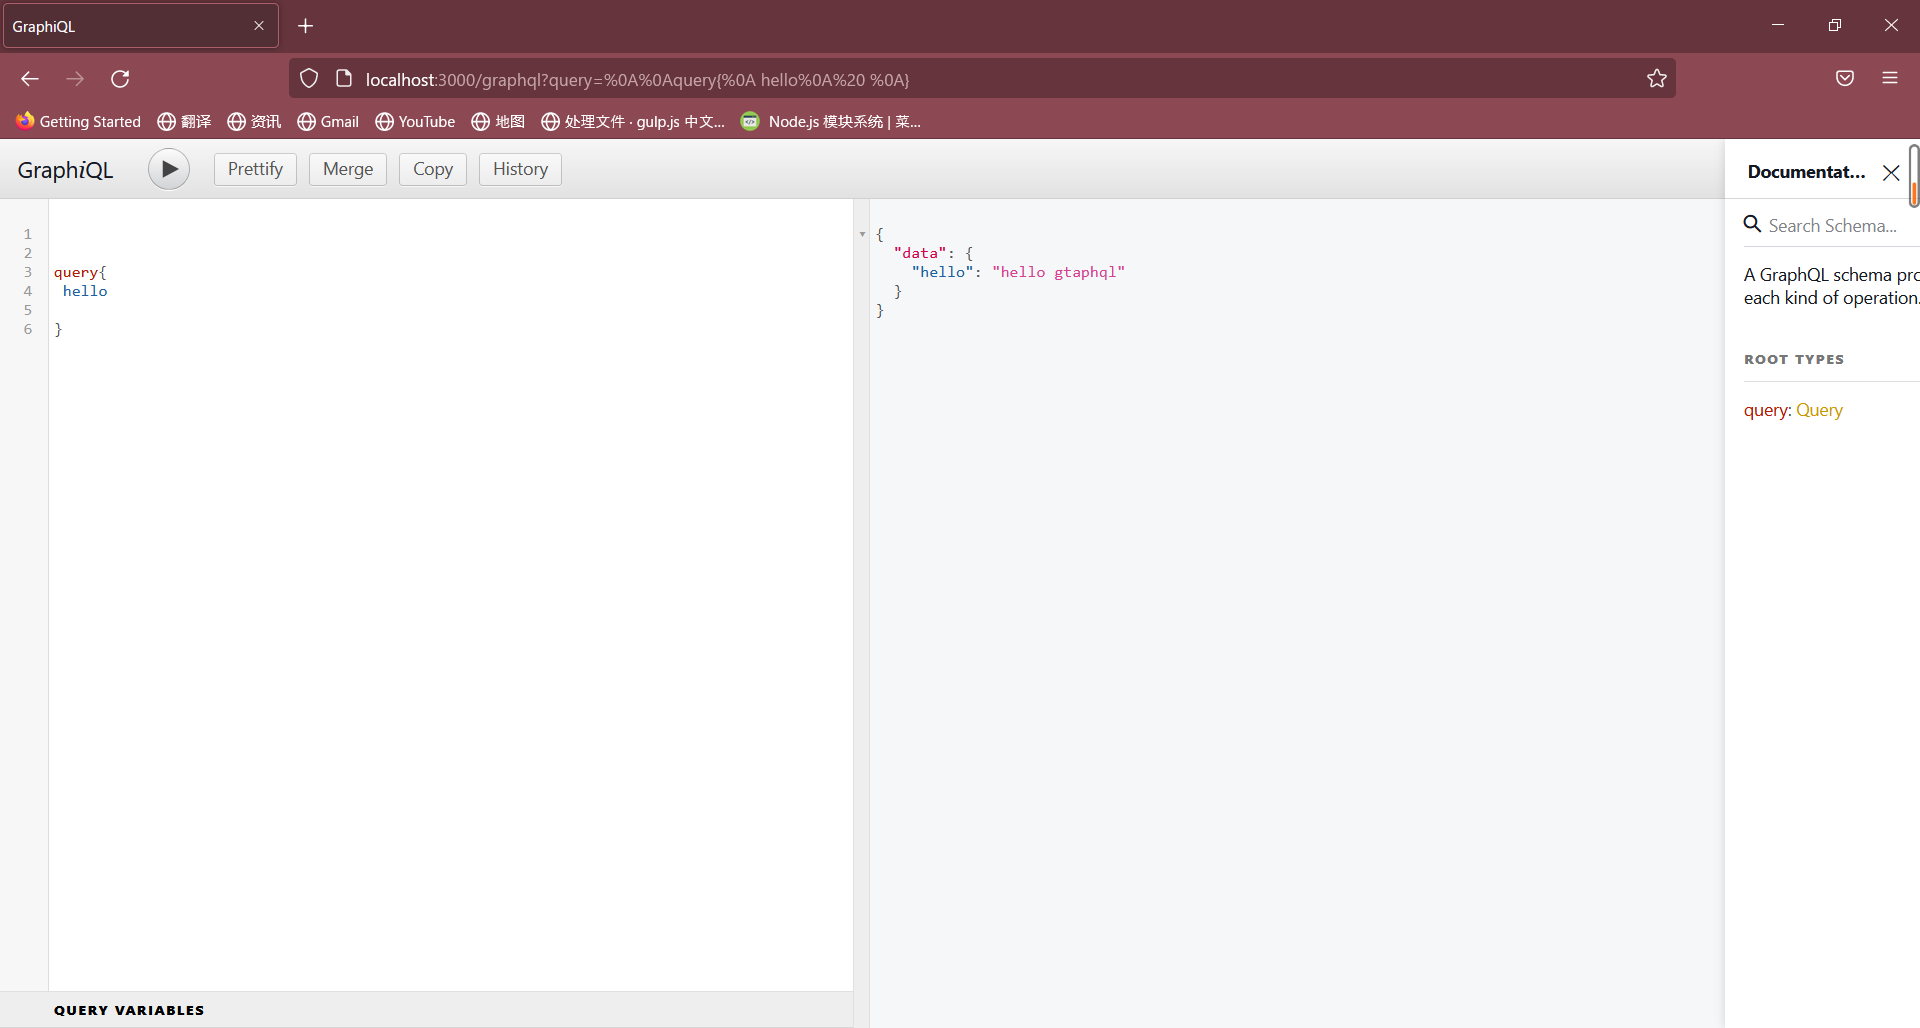
在浏览器中输入【http://localhost:3000/graphql】,按回车就会出现如下界面

清空左侧界面,输入【query{hello}】,点击左上角运行按钮,出现以下界面,右侧出现查询结果

完整代码
代码
const express = require('express')
//构建轮廓的方法
const { buildSchema } = require('graphql')
//连接器
const { graphqlHTTP } = require('express-graphql')


var app = express()
//构建轮廓
var Schema = buildSchema(`
type Query{
    hello:String
}`)

//与轮廓对应
const root = {
    hello: () => {

        return "hello gtaphql"
    },
}
// app.use(bodyParser.json()); // application/json

// app.use('/home', function (req, res) {
//     res.send('home')
// })
// app.use('/list', function (req, res) {
//     res.send('list')
// })


app.use('/graphql', graphqlHTTP(
    {
        schema: Schema,
        rootValue: root,
        //开启调试器
        graphiql: true
    }
))

app.listen(3000)
3.构建可以修改数据的案例
创建新的模板
//query只能查询,要用mutation来进行增删改
var Schema = buildSchema(`
    type Account{
        name:String,
        age:Int,
        address:String
    }
    type Film{
        id:Int,
        name:String,
        grade:Float,
        price:Int
    }
    input FilmInput{

        name:String,
        grade:Float,
        price:Int
    }
    type Query{
        hello:String,
        getAllNames:[String],
        getAccount:Account,
        getFilms:[Film],
        getFilmDetail(id:Int!):Film
    }
    type Mutation {
        createFilm(input:FilmInput):Film,
        updateFilm(id:Int!,input:FilmInput):Film,
        deleteFilm(id:Int!):String
    }
`)
创建模板对应的数据
//对应数据
var data = [
    {
        id: 1,
        name: 'kongfu',
        grade: 9,
        price: 39

    },
    {
        id: 2,
        name: '大话西游',
        grade: 9.7,
        price: 27

    }, {
        id: 3,
        name: '喜羊羊与灰太狼',
        grade: 9,
        price: 48

    }
]
var root = {
    hello: () => { return 'hello world' },
    getAllNames: () => {
        return ['赵', '钱', '孙', '李']
    },
    getAccount: () => {
        return {
            name: 'wang',
            age: 3,
            address: 'cq'
        }
    },
    getFilms: () => {
        return data

    },
    getFilmDetail({ id }) {
        return data.filter((item) => item.id === id)[0]
    },
    createFilm({ input }) {
        var obj = { id: data.length + 1, ...input }
        data.push(obj)
        return obj
    },
    updateFilm({ id, input }) {
        console.log(id, input)
        data.map(item => {
            if (item.id === id) {
                console.log('map', item.id)
                item.name = input.name
                item.grade = input.grade
                item.price = input.price
            }

        })
        var obj = data.filter(item => item.id === id)[0]
        return obj
    },
    deleteFilm({ id }) {
        console.log(data)
        let flag = true
        const newdata = data.filter(item => {
            if (item.id === id) {
                flag = false
                return
            }
            return item
        })
        data = [...newdata]
        return flag ? '未找到该数据' : '删除成功'
    }
}
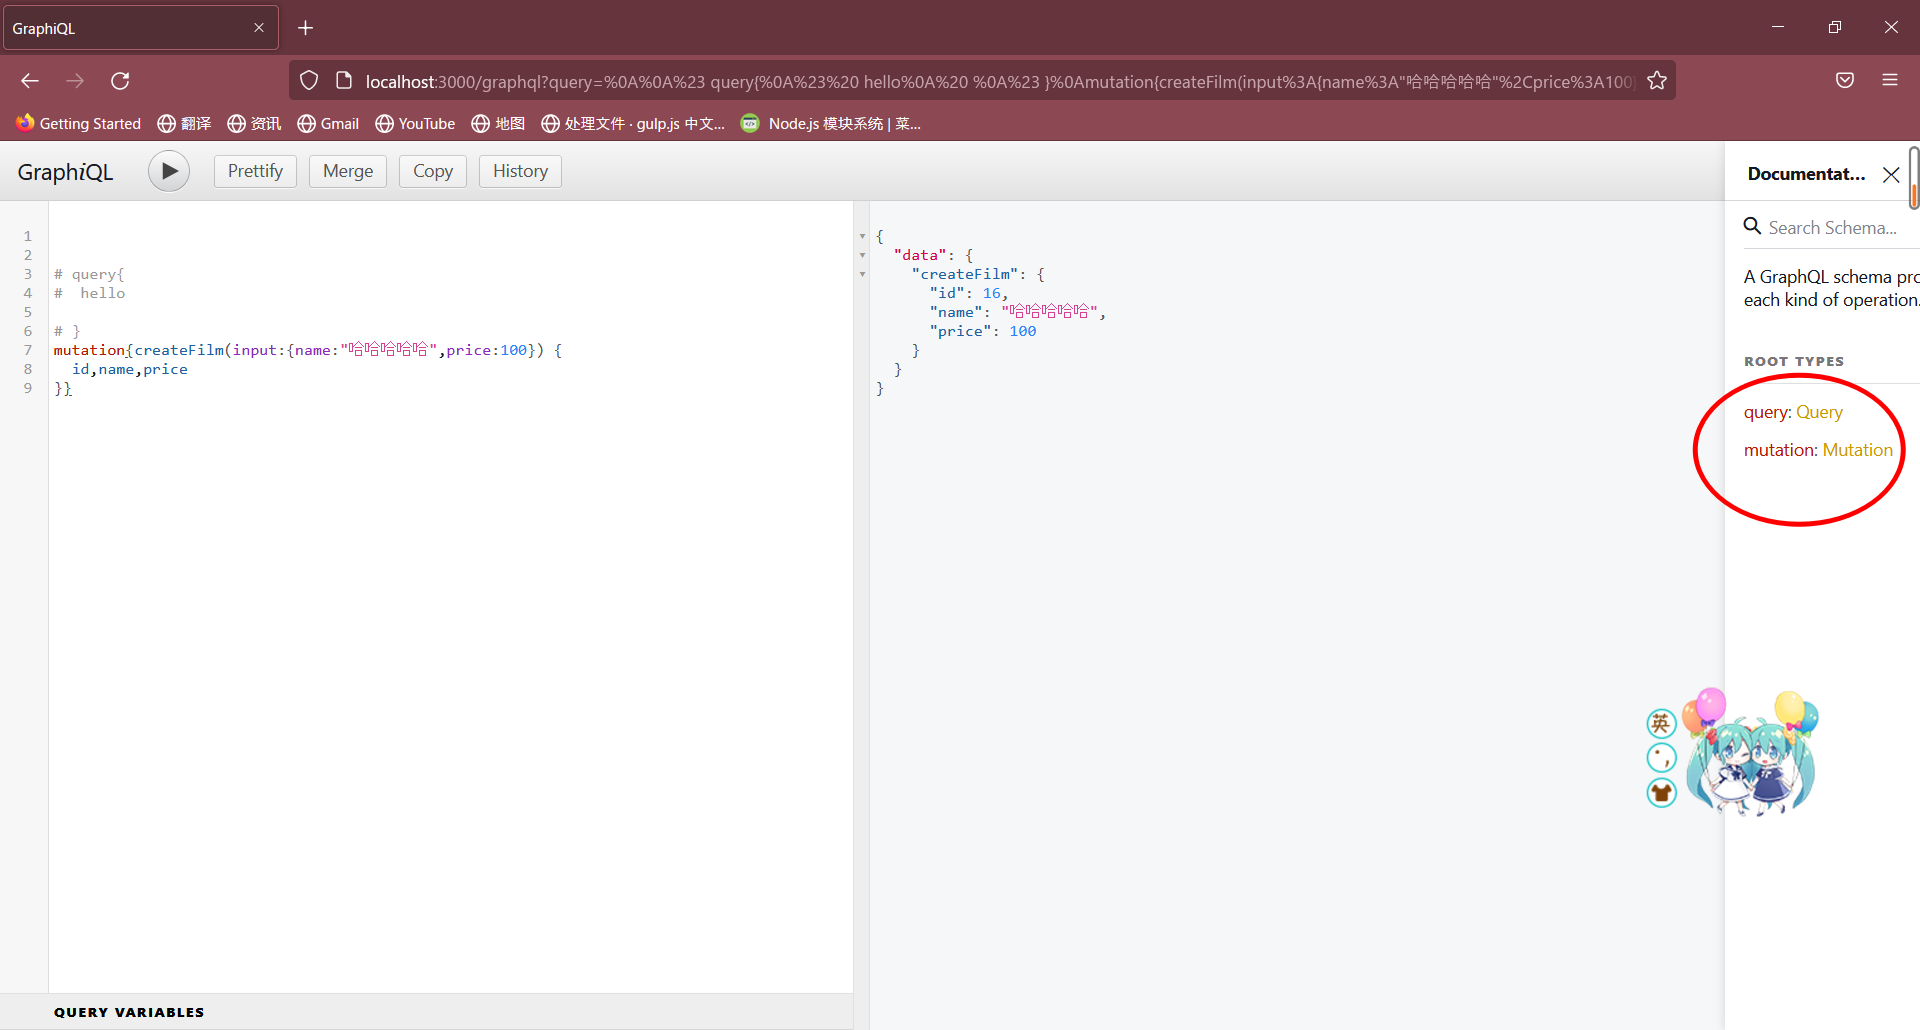
运行后界面如下,可以发现左边较之先前多了mutation一项,在左侧输入【mutation{createFilm(input:{name:"哈哈哈哈哈",price:100}) {
id,name,price}}】,点击运行,右侧返回添加的结果(注意:query和mutation操作不能同时进行)


