WebGPU[2] 颜色与缓存
代码见:https://github.com/onsummer/my-dev-notes/tree/master/webgpu-Notes/02-buffer%26color

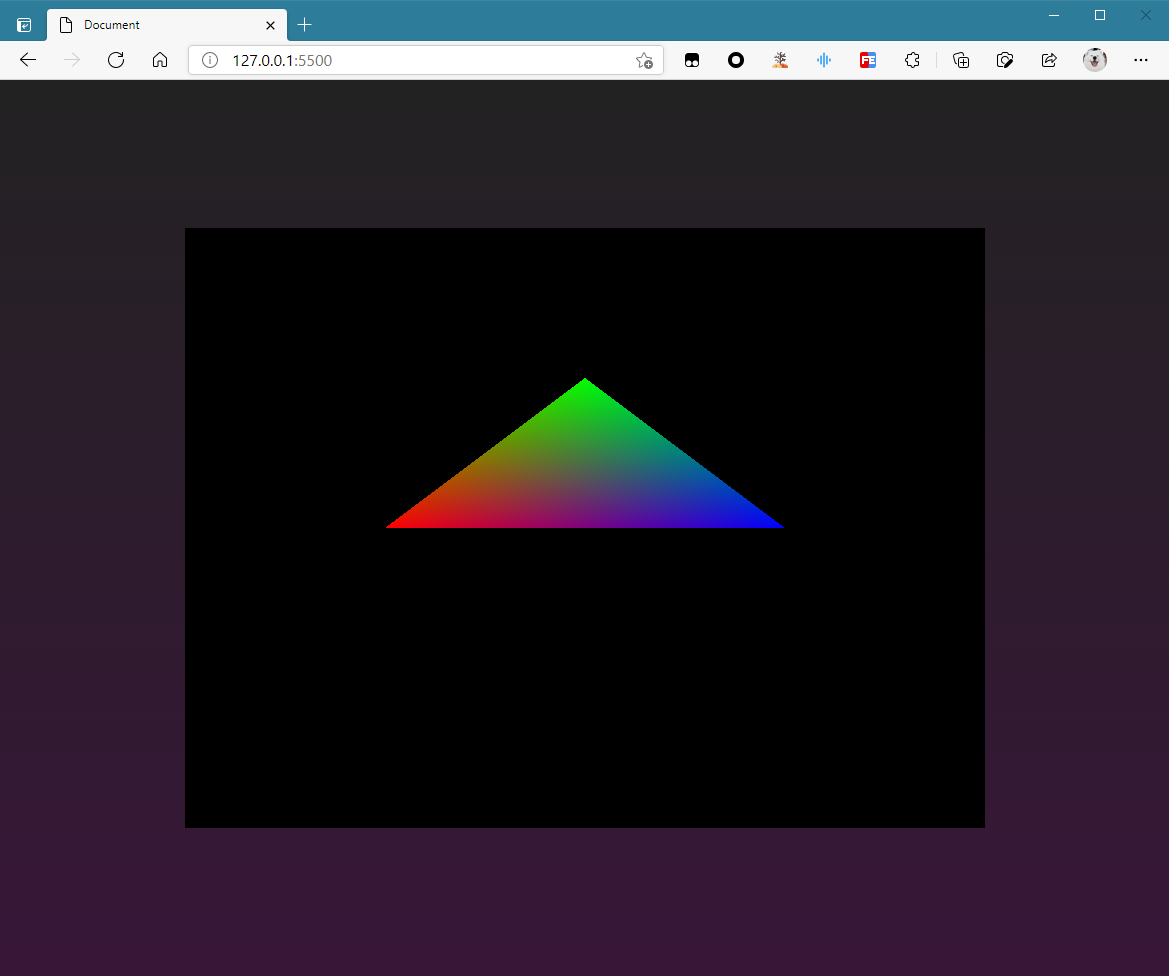
创建buffer
与 WebGL 的 gl.createBuffer() 几乎一样。
const vbodata = new Float32Array([
  -0.5, 0.0, 1.0, 0.0, 0.0, 1.0,
  0.0, 0.5, 0.0, 1.0, 0.0, 1.0,
  0.5, 0.0, 0.0, 0.0, 1.0, 1.0
])
const vbo = device.createBuffer({
  size: vbodata.byteLength,
  usage: GPUBufferUsage.VERTEX,
  mappedAtCreation: true
})
与 Float32Array 的绑定,跟 WebGL 就完全不同了:
new Float32Array(buffer.getMappedRange()).set(vbodata)
vbo.unmap()
创建一个坐标缓存,一个颜色缓存。
顶点着色器
[[builtin(position)]] var<out> out_position: vec4<f32>;
[[location(0)]] var<out> out_color: vec4<f32>;
[[location(0)]] var<in> in_position_2d: vec2<f32>;
[[location(1)]] var<in> in_color_rgba: vec4<f32>;

[[stage(vertex)]]
fn main() -> void {
  out_position = vec4<f32>(in_position_2d, 0.0, 1.0);
  out_color = in_color_rgba;
  return;
}
与 glsl 有几分相似,但是多了一个出口。
片元着色器
顶点着色器的输出,在片元着色器里就要输入。
[[location(0)]] var<out> fragColor: vec4<f32>;
[[location(0)]] var<in> in_color: vec4<f32>;

[[stage(fragment)]]
fn main() -> void {
  fragColor = in_color;
  return;
}
管线组装
两端都准备完成后,就要在管线里拼接他们了。
const pipeline = device.createRenderPipeline({
  vertex: {
    ... // 其他参数同 01 的
    buffers: [{
      arrayStride: 6 * vbodata.BYTES_PER_ELEMENT,
      attributes: [{
        shaderLocation: 0,
        offset: 0,
        format: 'float32x2'
      }, {
        shaderLocation: 1,
        offset: 2 * vbodata.BYTES_PER_ELEMENT,
        format: 'float32x4'
      }]
    }]
  },
  fragment: , // 略
  primitive: , // 略
})
最后,在通道编码器指定坐标缓存、颜色缓存。
passEncoder.setVertexBuffer(0, vbo)
数据交错
将两个缓存合并成一个。vertexState 中的 vertexBuffer 下的 arrayStride 要改动,若为二维坐标+rgba颜色,那么就要改为 6x4 了;offset 属性也要改动,即从 buffer 的第几个字节开始是它自己第一个数据。
或者合并 vertexBuffer 对象下的 attributes 属性。


 浙公网安备 33010602011771号