zabbix service安装配置
1.安装时间同步
yum -y install ntpdate
systemctl start ntpdate.service
systemctl enable ntpdate.service
2.安装zabbix3.2
(1)安装zabbix Server
# rpm -ivh http://repo.zabbix.com/zabbix/3.2/rhel/7/x86_64/zabbix-release-3.2-1.el7.noarch.rpm
(2)install Zabbix server 和 MySQL
# yum install zabbix-server-mysql zabbix-web-mysql
2.1安装mysql
下载Yum Repository
curl -O https://repo.mysql.com//mysql57-community-release-el7-11.noarch.rpm
安装Yum Repository。
yum -y localinstall mysql57-community-release-el7-11.noarch.rpm
查看可用的repo。
yum repolist enabled|grep "mysql.*-community.*"
安装MySQL-Server。
yum -y install mysql-community-server
网慢,可以改一下DNS
启动MySQL
systemctl start mysqld systemctl enable mysqld
设置密码
查找初始密码
grep 'temporary password' /var/log/mysqld.log mysql -uroot -p4/lVUUv9Y0p:
重置密码:
set password=password('123456');
2.2创建数据库、授权并导入数据
1.连接远程数据库
mysql -uroot -p123456;
2.创建zabbix数据库
create database zabbix character set utf8 collate utf8_bin;
3.对zabbix server授权访问 (数据库和zabbix在同一台机器localhost,如果不在一台机器上可根据实际机器ip授权)
grant all privileges on zabbix.* to zabbix@'localhost' identified by 'hello'; flush privileges;
4.导入数据
# rpm -ql zabbix-server-mysql
# zcat /usr/share/doc/zabbix-server-mysql-3.2.11/create.sql.gz |mysql -uzabbix -phello zabbix
3.配置zabbix_server.conf服务
3.1修改http配置文件
# vim /etc/httpd/conf/httpd.conf
# 修改servername
ServerName 127.0.0.1:80
#systemctl start httpd #启动httpd服务器 #systemctl status httpd #查看httpd服务器状态 #systemctl enable httpd #设置httpd开机启动服务
3.2.配置zabbix_server.conf服务
# vim /etc/zabbix/zabbix_server.conf
DBHost=localhost //数据库主机
DBName=zabbix //数据库名
DBUser=zabbix //登陆数据库的用户名
DBPassword=123.Com //登陆数据库的密码
ListenIP=127.0.0.1
3.3配置zabbix前端的PHP配置,修改时区
# vim /etc/httpd/conf.d/zabbix.conf
#.修改时区
php_value date.timezone Asia/Shanghai
# systemctl start zabbix-server #启动zabbix-server服务
# systemctl status zabbix-server #查看zabbix-server的服务状态
# systemctl enable zabbix-server #设置开机启动服务
4.zabbix的web安装
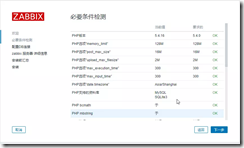
在浏览器中输入:http://192.168.93.150/zabbix/进入到安装页面,下一步安装就可以了
配置DB连接
默认的用户是Admin,密码为zabbix,该用户是超级用户,输入登录信息后,点击Sign In按钮,进行登录


![clipboard[1] clipboard[1]](https://img2018.cnblogs.com/blog/1325247/201812/1325247-20181206164745090-44951297.png)
![clipboard[2] clipboard[2]](https://img2018.cnblogs.com/blog/1325247/201812/1325247-20181206164746477-419174215.png)
