ssh密码登录+ Google Authenticator 实现双向认证
通常我们直接通过ssh输入密码连接服务器,但这样很容易出现暴力破解情况,所以我们可以结合google的动态认证+ssh密码,这样能够大大的提升登陆的安全。
简单来说,就是当用户通过ssh登陆系统时,先输入google的随机验证码,然后在输入服务器的ssh密码
1.安装依赖包,环境属于centos7,centos6请自行查阅网上资料
[root@bgx ~]# yum -y install wget gcc make pam-devel libpng-devel pam-devel
2.安装Google Authenticator PAM插件安装
[root@bgx ~]# wget https://github.com/google/google-authenticator-libpam/archive/1.04.tar.gz
[root@bgx ~]# tar xf 1.04.tar.gz
[root@bgx ~]# cd google-authenticator-libpam-1.04/
[root@bgx google-authenticator-libpam-1.04]# ./bootstrap.sh
[root@bgx google-authenticator-libpam-1.04]# ./configure
[root@bgx google-authenticator-libpam-1.04]# make && make install
[root@bgx google-authenticator-libpam-1.04]# cp /usr/local/lib/security/pam_google_authenticator.so /lib64/security/
3.初始配置 Google Authenticator
[root@bgx google-authenticator-libpam-1.04]# google-authenticator
是否基于时间的认证,为了防止不同跨时区的问题,这里选择n
Do you want authentication tokens to be time-based (y/n) n
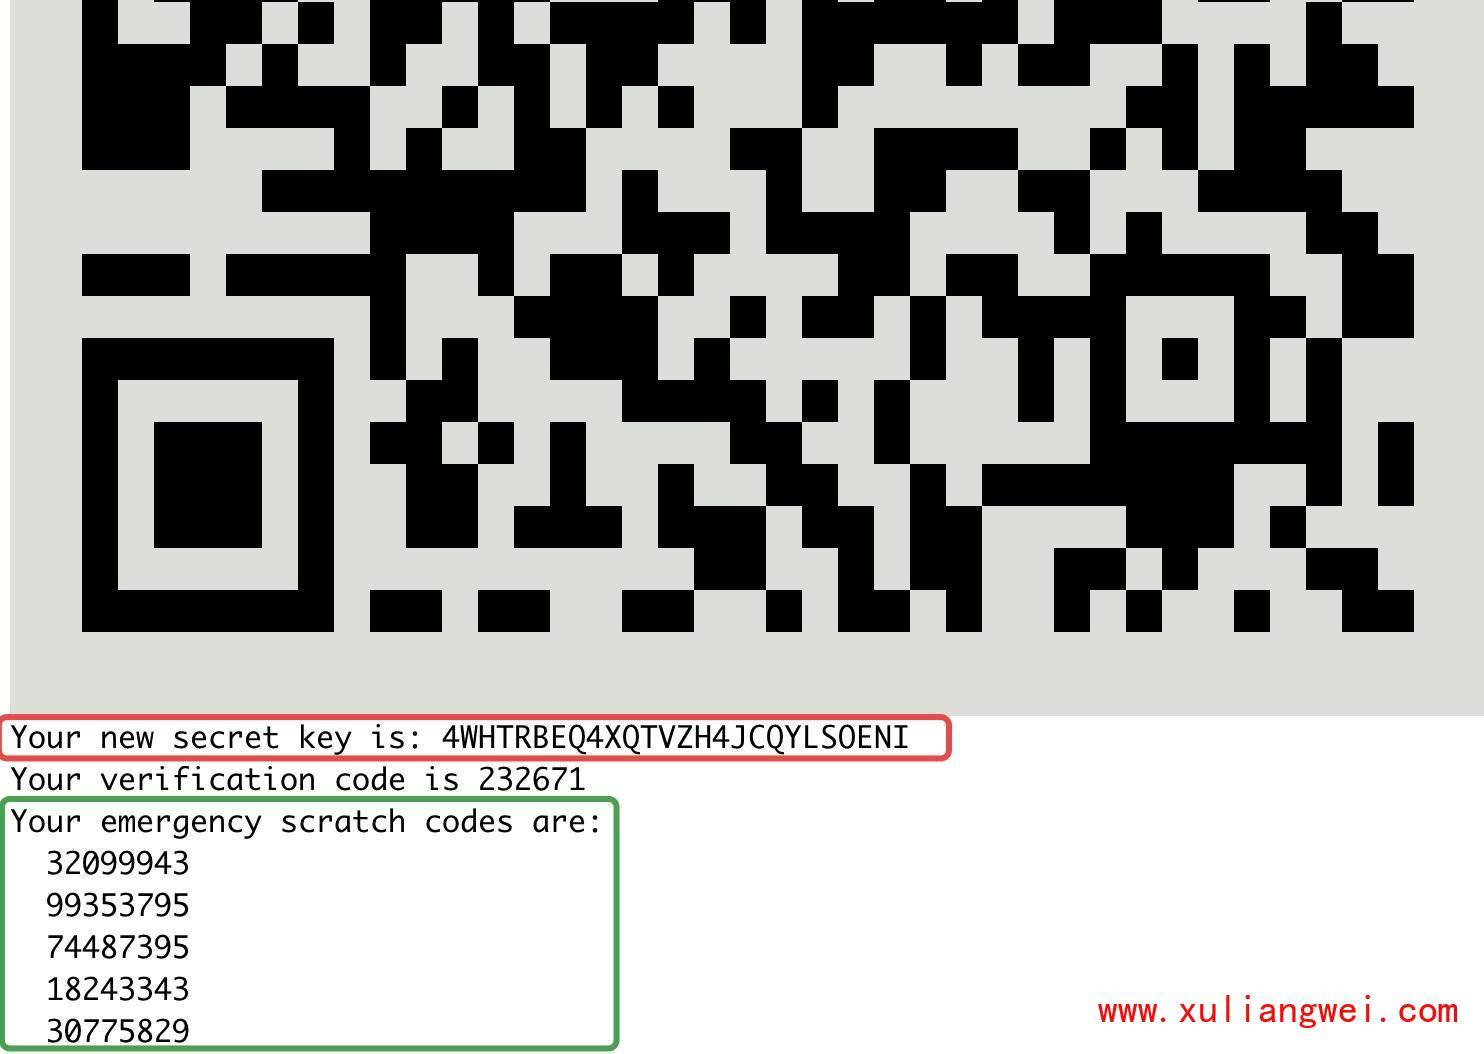
然后会跳出一个google的二维码
红色框框是: 生成的密钥
绿色框框是: 生成的5个一次性紧急验证码,用于紧急情况下,使用过一次后该验证码即失效了。

是否更新用户的 Google Authenticator 配置文件,选择 y 才能使上面操作对当前 root 用户生效,其实就是在对应用户的 Home 目录下生成了一个 .google_authenticator 文件,如果你想停用这个用户的 Google Authenticator 验证,只需要删除这个用户 Home 目录下的 .google_authenticator 文件就可以了。
Do you want me to update your "/root/.google_authenticator" file? (y/n) y
每次生成的认证码是否同时只允许一个人使用?这里选择 y。
Do you want to disallow multiple uses of the same authentication
token? This restricts you to one login about every 30s, but it increases
your chances to notice or even prevent man-in-the-middle attacks (y/n) y
每次生成的令牌30s生成一次,最高允许存在误差4分钟。
By default, a new token is generated every 30 seconds by the mobile app.
In order to compensate for possible time-skew between the client and the server,
we allow an extra token before and after the current time. This allows for a
time skew of up to 30 seconds between authentication server and client. If you
experience problems with poor time synchronization, you can increase the window
from its default size of 3 permitted codes (one previous code, the current
code, the next code) to 17 permitted codes (the 8 previous codes, the current
code, and the 8 next codes). This will permit for a time skew of up to 4 minutes
between client and server.
Do you want to do so? (y/n) y
4.SSH调用及客户端配置,添加pam认证,在第一行添加
[root@bgx ~]# vim  /etc/pam.d/sshd  #添加如下行
auth       required     pam_google_authenticator.so
5.修改sshd配置,关联google认证
[root@bgx ~]# vim /etc/ssh/sshd_config
ChallengeResponseAuthentication yes     #修改为yes
[root@bgx ~]# systemctl restart sshd    #重启sshd服务
6.客户端通过ssh连接服务器测试

需要输入动态密码,动态密码通过手机获取如下图所示

7.查看服务端的安全日志文件,可以看到是先进程google动态密码认证

8.注意事项:
1.用password + google authenticator,如果使用公钥登录的话,会跳过google authenticator验证直接登录服务器的。
2.如果是内网测试使用,建议安装google authenticator 浏览器插件实践。如果是公网服务器建议安装手机版的Authenticator
9.安装Google authenticator
Andorid版: “自行百度”
iOS版: 下载 “Authenticator”
chrome浏览器有google authenticator的插件


