上节回顾:

1.前情回顾

    1. BOM
        window
            location.href = "https://www.sogo.com"
            location.reload()  // 重新加载当前页
            location.href
        DOM
            document

                1. 节点分为:
                    文档节点 document
                    文本节点 标签的文本
                    属性节点 id, class ...
                    标签节点 div,span, h1 ...

                2. 寻找节点
                    1. 基本查找
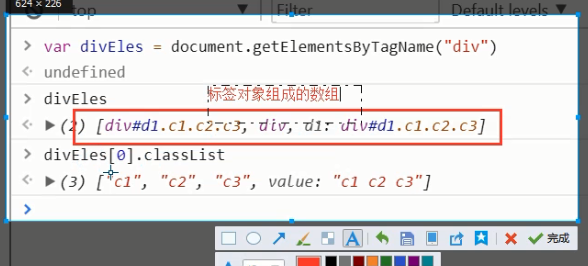
                        标签名:document.getElementsByTagName
                        ID:    document.getElementByID
                        class名: document.getElementsByClassName
                    2. 间接查找
                        我的上一个标签: previousElementSibling
                        我的下一个标签: nextElementSibling
                        我的父标签:     parentElement
                        我的子标签:     children
                        我的第一个子标签:firstElementChild
                        我的最后一个子标签:lastElementChild

                2. 修改标签属性或样式

                    1. 修改文本信息
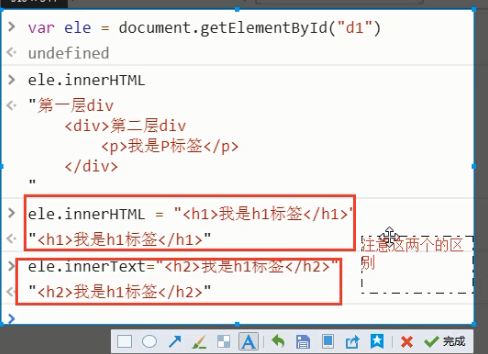
                        ele.innerText               获取文本节点的内容(包括子标签的文本)
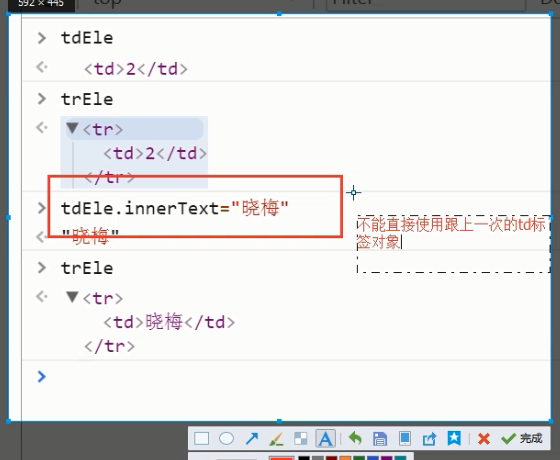
                        ele.innerText="字符串"      修改标签的文本信息
                    2. 文档内容(HTML内容)
                        ele.innerHTML               获取文档内容
                        ele.innerHTML=“<h1>好</h1>” 赋值HTML内容
                    3. 修改样式
                        1. classList
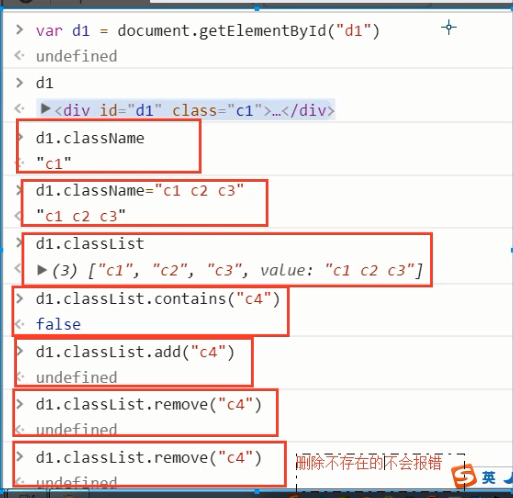
                            ele.className               获取所有的class类名(字符串类型)
                            ele.classList               获取所有的class类名
                            ele.classList.contains(cls) 判断有没有某个class
                            ele.classList.add(cls)      添加一个class类名
                            ele.classList.remove(cls)   删除class类名
                            ele.classList.toggle(cls)   切换(有就删除,没有就添加)
                        2. ele.style.样式=""
                            注意:有中横线的CSS样式要转成驼峰形式
                            ele.style.backgroundColor="red"

                    4. 属性
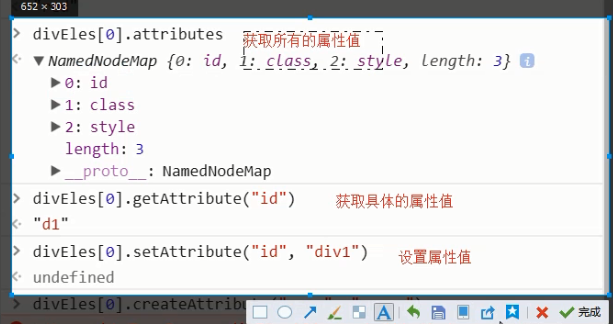
                        ele.attributes  获取所有的属性信息

2. RegExp(正则) 求学要严谨

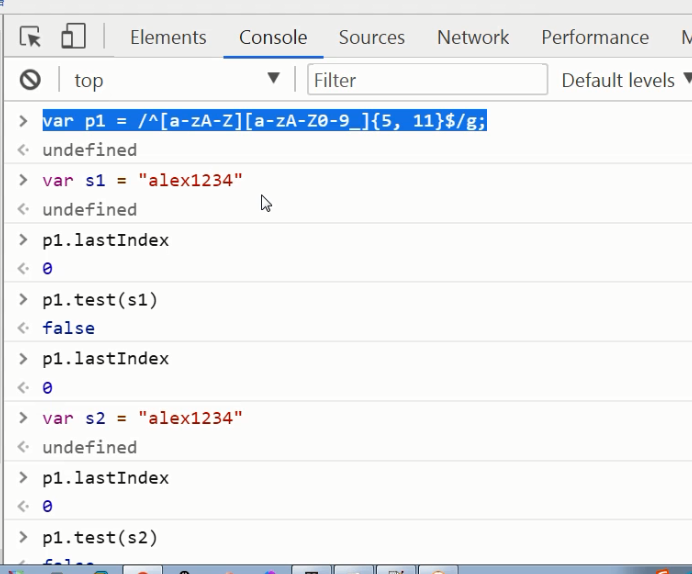
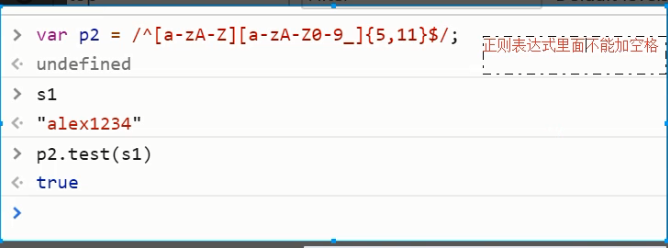
    1. 正则表达式不能加空格
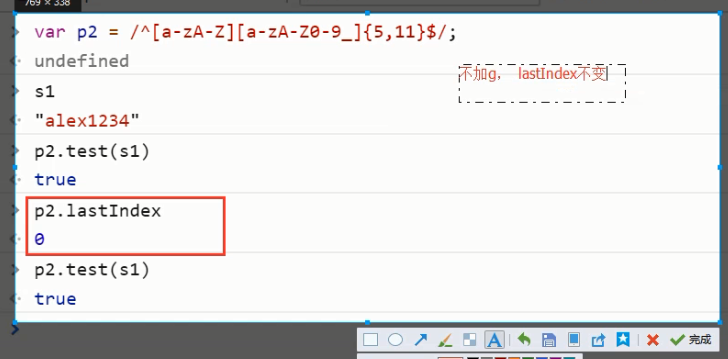
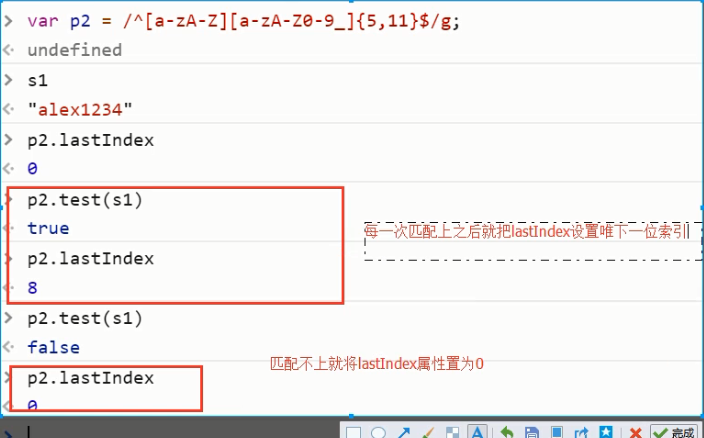
    2. 当你设置了全局的g标志位,需要注意lastIndex  --> 每一次匹配上之后会把lastIndex设置为下一位索引值
    3. undefined他帮你转成"undefined"来做正则校验
今日内容:

3. 今日内容
    1. 作业讲解+自定义模态框练习
    2. 事件
        常用事件:
            onfocus()
            onblur()
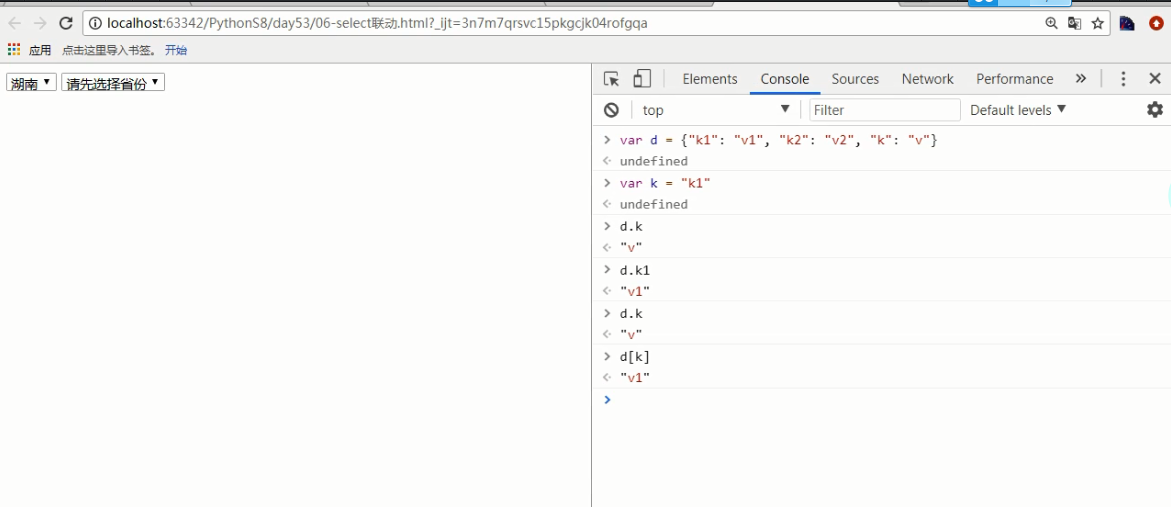
            onchange()事件 --> select联动的例子
                                        1. selectEle.selectedIndex       --> 获取当前选中的option的索引值
                                        2. selectEle.options             --> 获取所有的option选项
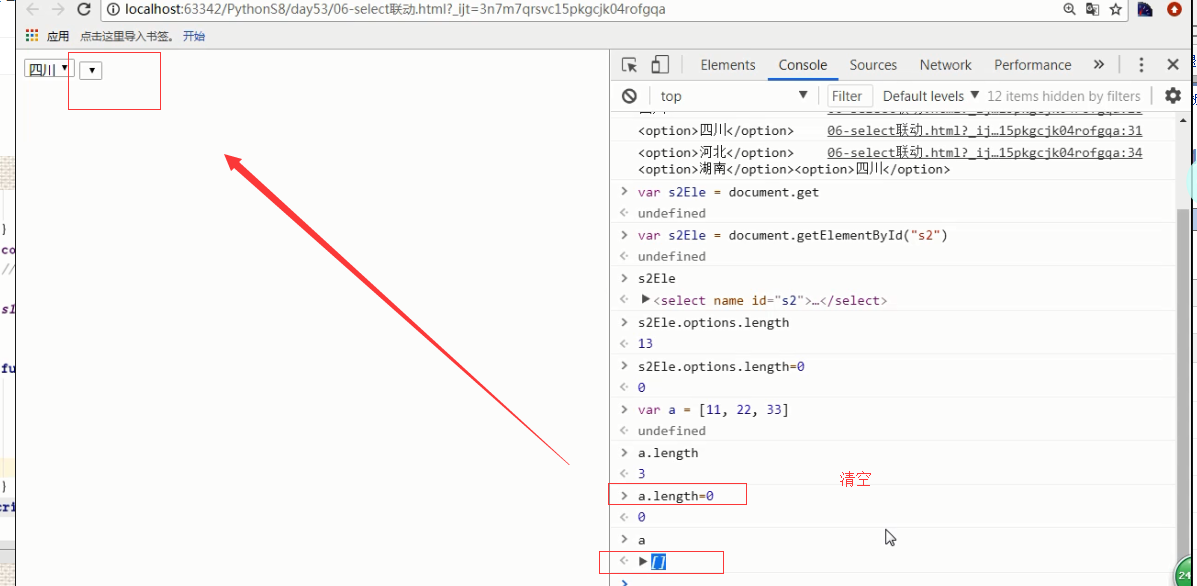
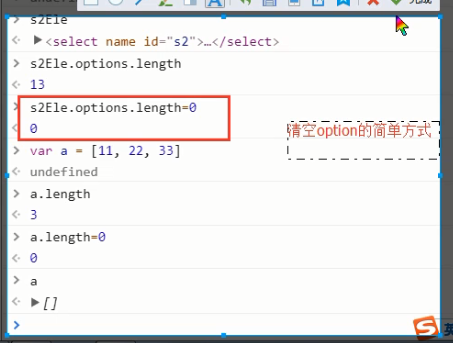
                                        3. selectEle.options.length=0    --> 清空所有的option选项

            键盘事件 --> jQuery讲个示例


        绑定事件的方式:  *****
            1. 在标签里面直接写on动作=func();
            2. 通过JS代码绑定事件 ele.click=function(){alert(123);}
            3. 基于已经存在的父标签来给子标签绑定事件,  --> 事件委托的方式


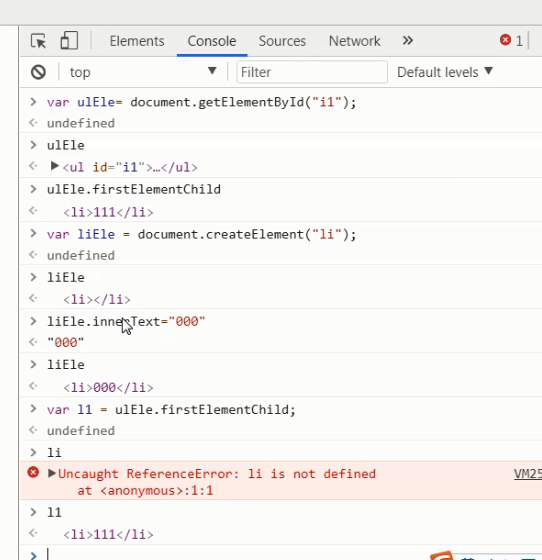
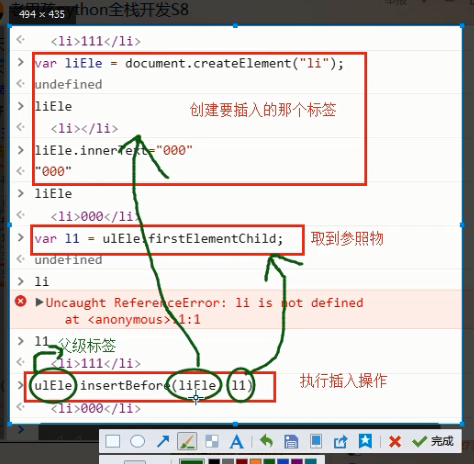
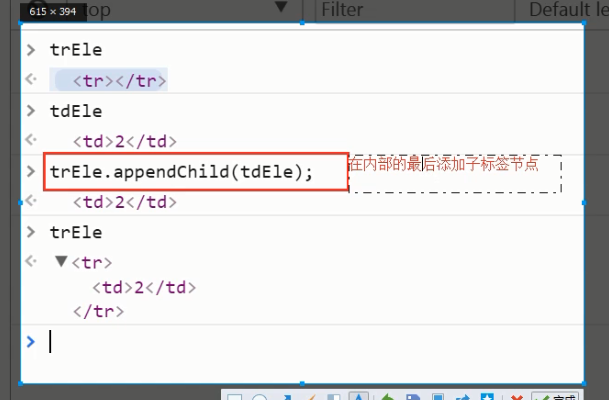
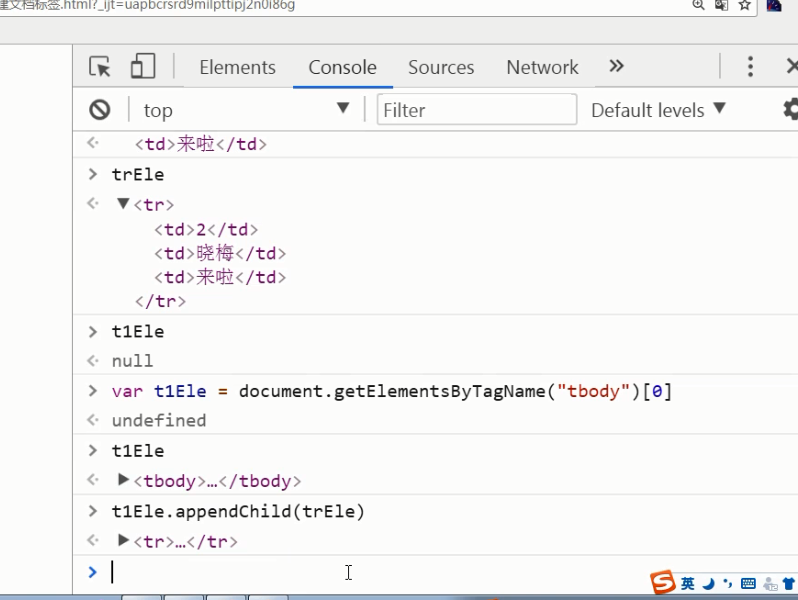
    3. 文档标签的创建

        引申出来的:
            script标签一般写在body标签的最下面,除非是文档加载之前就要运行的代码要放在head标签里 *****

4. 今日作业


    1. 模态框里面的提交按钮要绑定事件
        1. 取值(通过 input标签.value 就能取值)
        2。 拿到值之后 拼接处一个tr标签
        3. tbody.appendChild(上面创建的tr标签)
    2. 删除按钮的事件
        1. 根据删除按钮找到当前行的tr
        2. 从tbody里面删掉这个tr (removeChild())

抽屉作业
上节课的复习:

<!DOCTYPE html>
<html lang="zh-CN">
<head>
    <meta charset="UTF-8">
    <meta http-equiv="x-ua-compatible" content="IE=edge">
    <title>复习</title>
</head>
<body>
<div id="d1" class="c1 c2 c3"> 第一层div
    <div>第二层Div
        <p>我是p标签</p>
    </div>
</div>
</body>
</html>

<!DOCTYPE html>
<html lang="en">
<head>
    <meta charset="UTF-8">
    <title>昨天作业</title>
    <script>
        // 全选
        function checkAll() {
            // 找到所有的checkbox,全部选中
            // 1. 经过技术选型,决定使用.class方式查找标签
            var checkboxEles = document.getElementsByClassName("c1");
            // 2. 修改  eleObj.checked = true;
            for (var i=0;i<checkboxEles.length;i++) {
                checkboxEles[i].checked=true;
            }
        }

        // 反选
        function reverse() {
            // 找标签,判断
            // 1. 找标签(和上面一样)
            var checkboxEles = document.getElementsByClassName("c1");
            // 2. 判断 eleObj.checked 属性是true还是false
            // 如果是true; 则改为false;
            // 如果是false,则改为true;
//            for (var i=0;i<checkboxEles.length;i++) {
//                if (checkboxEles[i].checked){  // 已经选中的
//                    checkboxEles[i].checked=false;
//                }else {  // 没有选中的
//                    checkboxEles[i].checked=true;
//                }
//            }

            // 取反   !(先按照上面的方式实现,再尝试一下使用取反的操作)
            for (var i=0;i<checkboxEles.length;i++) {
                checkboxEles[i].checked=!checkboxEles[i].checked;
            }
        }
        // 取消
        function cancleAll() {
            // 找到所有的checkbox,全部取消选中
            // 1. 经过技术选型,决定使用.class方式查找标签
            var checkboxEles = document.getElementsByClassName("c1");
            // 2. 修改  eleObj.checked = false;
             for (var i=0;i<checkboxEles.length;i++) {
                checkboxEles[i].checked=false;
            }
        }
    </script>
</head>
<body>
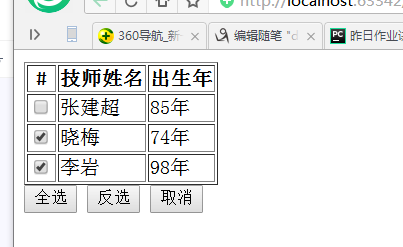
<table border="1">
    <thead>
    <tr>
        <th>#</th>
        <th>技师姓名</th>
        <th>出生年</th>
    </tr>
    </thead>
    <tbody>
        <tr>
            <td><input class="c1" type="checkbox"></td>
            <td>张建超</td>
            <td>85年</td>
        </tr>
         <tr>
            <td><input class="c1" type="checkbox"></td>
            <td>晓梅</td>
            <td>74年</td>
        </tr>
          <tr>
            <td><input class="c1" type="checkbox"></td>
            <td>李岩</td>
            <td>98年</td>
        </tr>
    </tbody>
</table>

<!--<label for="i1">技师1号</label>-->
<!--<input id="i1" type="checkbox" checked="checked">-->
<!--<label for="i2">技师2号</label>-->
<!--<input id="i2" type="checkbox">-->

<input type="button" value="全选" onclick="checkAll();">
<input type="button" value="反选" onclick="reverse();">
<input type="button" value="取消" onclick="cancleAll();">
</body>
</html>
正则的补充:

var p2=/^[a-zA-Z][a-zA-Z0-9_]{5,11}$/;
undefined
s1
VM100:1 Uncaught ReferenceError: s1 is not defined
    at <anonymous>:1:1
(anonymous) @ VM100:1
var s1="alex1234"
undefined
s1
"alex1234"
p2.lastIndex
0
p2.test(s1)
true
p2.lastIndex
0
var p2=/^[a-zA-Z][a-zA-Z0-9_]{5,11}$/g;
undefined
s1
"alex1234"
p2.lastIndex
0
p2.test(s1)
true
p2.lastIndex
8
p2.test(s1)
false
p2.lastIndex
0

一、自定义模态框

<!DOCTYPE html>
<html lang="en">
<head>
    <meta charset="UTF-8">
    <title>自定义模态框</title>
    <style>
        .cover {
            /* 灰色的哪个背景 */
            position: fixed;
            top: 0;
            right: 0;
            bottom: 0;
            left:0;
            background-color: rgba(0, 0, 0, 0.3);
            z-index: 999;
        }
        .modal {
            position: fixed;
            top: 50%;
            left: 50%;
            background-color: white;
            height: 400px;
            width: 600px;
            z-index: 1000;
            margin-left: -300px;
            margin-top: -200px;
        }
        .hide {
            display: none;
        }
    </style>
    <script>
        function showModal() {
            // 把.cover和.modal这两个div标签显示出来
            //  具体来说就是去掉这个两个标签的.hide 样式类
            // 1.找标签
//            var coverEles = document.getElementsByClassName("hide");
//            var coverEle = coverEles[0];
//            coverEle.classList.remove("hide");

            var coverEle = document.getElementsByClassName("cover")[0];
            coverEle.classList.remove("hide");

            // 显示白色筐
              var modalEle = document.getElementsByClassName("modal")[0];
            modalEle.classList.remove("hide");
        }
        function cancel() {
            var coverEle = document.getElementsByClassName("cover")[0];
            coverEle.classList.add("hide");

            // 隐藏白色筐
              var modalEle = document.getElementsByClassName("modal")[0];
            modalEle.classList.add("hide");
        }
    </script>
</head>
<body>

<input type="button" id="btn" onclick="showModal();" value="显示模态框">
<div class="cover hide"></div>
<div class="modal hide">
    <input type="text" placeholder="技师姓名">
    <input type="text" placeholder="出生年">

    <input type="button" value="提交">
    <input type="button" value="取消" onclick="cancel();">
</div>
</body>
</html>
二、常用事件示例

onclick        当用户点击某个对象时调用的事件句柄。
ondblclick     当用户双击某个对象时调用的事件句柄。

onfocus        元素获得焦点。               // 练习:输入框
onblur         元素失去焦点。               应用场景:用于表单验证,用户离开某个输入框时,代表已经输入完了,我们可以对它进行验证.
onchange       域的内容被改变。             应用场景:通常用于表单元素,当元素内容被改变时触发.(select联动)

onkeydown      某个键盘按键被按下。          应用场景: 当用户在最后一个输入框按下回车按键时,表单提交.
onkeypress     某个键盘按键被按下并松开。
onkeyup        某个键盘按键被松开。
onload         一张页面或一幅图像完成加载。
onmousedown    鼠标按钮被按下。
onmousemove    鼠标被移动。
onmouseout     鼠标从某元素移开。
onmouseover    鼠标移到某元素之上。

onselect      在文本框中的文本被选中时发生。
onsubmit      确认按钮被点击,使用的对象是form。

<!DOCTYPE html>
<html lang="zh-CN">
<head>
    <meta charset="UTF-8">
    <meta http-equiv="x-ua-compatible" content="IE=edge">
    <title>事件示例</title>
    <style>
        .c1{
            height: 300px;
            width: 300px;
            background-color: yellow;
        }
    </style>
    <script>
        function dbClick() {
            alert(123);
        }
        function f1(ths) {
            console.log(ths);
            ths.setAttribute("placeholder","");
        }
        function f2(ths) {
            ths.setAttribute("placeholder","霸王洗发水");
        }
    </script>
</head>
<body>
<div class="c1" ondblclick="dbClick();"></div>
<input type="text" placeholder="霸王洗发水" onfocus="f1(this);" onblur="f2(this);">
</body>
</html>
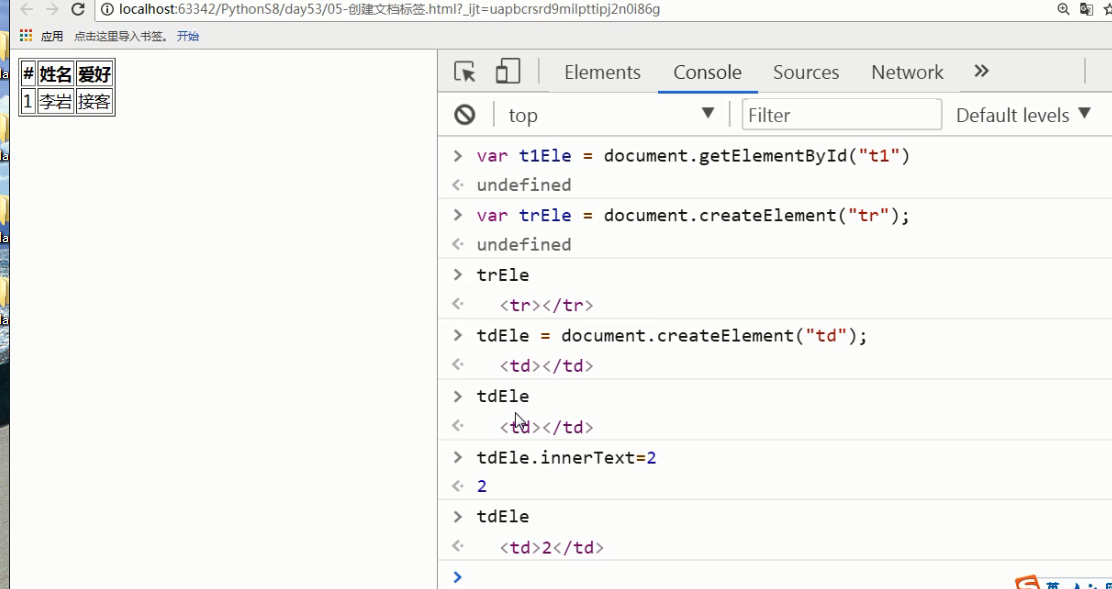
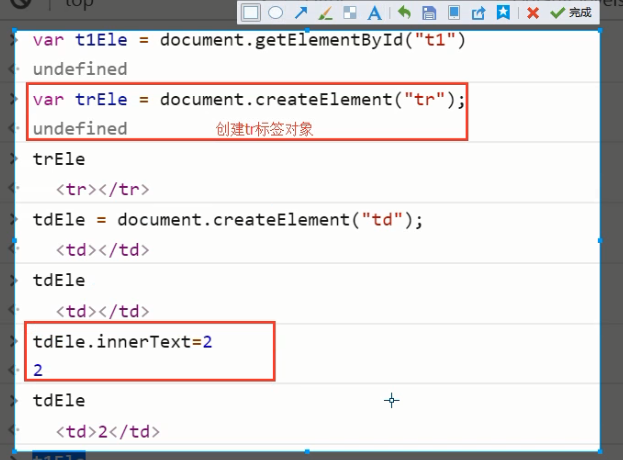
三、创建文档标签

<!DOCTYPE html>
<html lang="zh-CN">
<head>
    <meta charset="UTF-8">
    <meta http-equiv="x-ua-compatible" content="IE=edge">
    <title>创建文档标签</title>
</head>
<body>
<div id="d1">

</div>
<table border="1">
    <thead>
    <tr>
        <th>#</th>
        <th>姓名</th>
        <th>爱好</th>
    </tr>
    </thead>
    <tbody id="t1">
    <tr>
        <td>1</td>
        <td>李</td>
        <td>客人</td>
    </tr>
    </tbody>
</table>
</body>
</html>
1、
2、
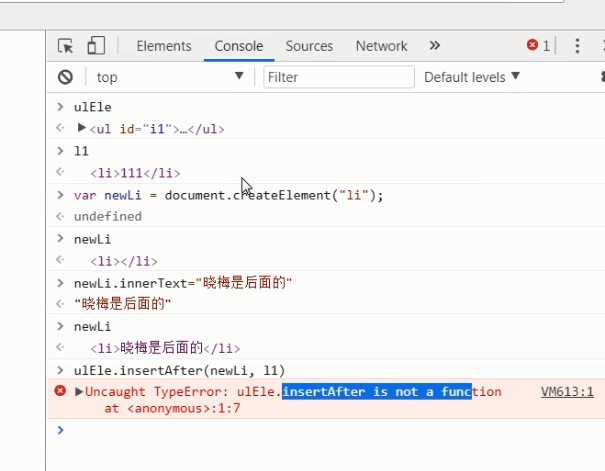
3、
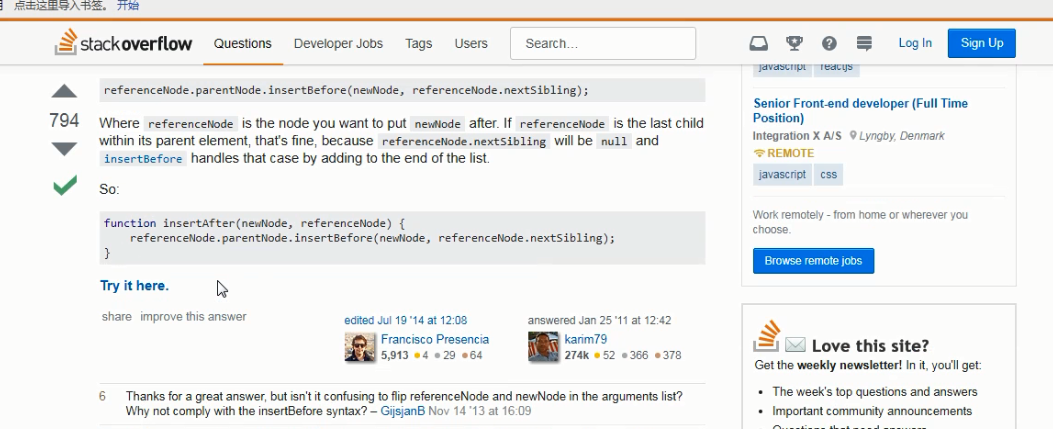
4、
四、select联动

<!DOCTYPE html>
<html lang="en">
<head>
    <meta charset="UTF-8">
    <title>select联动</title>

</head>
<body>


<select name="" id="s1" onchange="loadData();">
    <option value="">请选择省份</option>

</select>

<select name="" id="s2">
    <option value="">请先选择省份</option>
</select>

    <script>
        var s1Ele = document.getElementById("s1");
        var data = {"河北": ["石家庄", "保定", "邯郸"], "湖南": ["长沙", "岳阳", "张家界"], "四川": ["成都", "绵阳", "攀枝花"]}
        // 把data里面的key都拿出来,生成option标签, 添加到s1这个select
        // 1.
        var str = "";
        for (var key in data) {
            console.log(key);
            // 2.
            var s = "<option>" + key + "</option>";
            console.log(s);
            str += s;
        }
        console.log(str);
        // 找到s1 select标签

        s1Ele.innerHTML=str;


        function loadData() {
            var s2Ele = document.getElementById("s2");
            s2Ele.options.length=0;  // 清空select下面的option
            // 自己用removeChild()练习一下

            // 把data里面的key都拿出来,生成option标签, 添加到s1这个select
            var indexValue= s1Ele.selectedIndex;
            var optionELes = s1Ele.options;
            var key = optionELes[indexValue].innerText;
            var data2 = data[key];

            for (var i=0; i<data2.length;i++) {
                var optionEle = document.createElement("option");
                optionEle.innerText = data2[i];
                s2Ele.appendChild(optionEle);
            }
        }
    </script>
</body>
</html>
五、

<!DOCTYPE html>
<html lang="zh-CN">
<head>
    <meta charset="UTF-8">
    <meta http-equiv="x-ua-compatible" content="IE=edge">
    <title>键盘事件</title>
</head>
<body onkeydown="fl(event);">
<script>
    function fl(evl) {
        alert(evl.keyCode);//按下某个键时,先试一下按键的代码、
    }
</script>
</body>
</html>
六、

<!DOCTYPE html>
<html lang="zh-CN">
<head>
    <meta charset="UTF-8">
    <meta http-equiv="x-ua-compatible" content="IE=edge">
    <title>onload事件</title>
</head>
<body onload="f();">
<input type="text" value="haha" id="il">
<script>
    function f() {
        var ilEle=document.getElementById("il");
        alert(ilEle);
    }
</script>

</body>
</html>
七、

<!DOCTYPE html>
<html lang="zh-CN">
<head>
    <meta charset="UTF-8">
    <meta http-equiv="x-ua-compatible" content="IE=edge">
    <title>鼠标事件</title>
    <style>
        .c1{
            height: 300px;
            width: 200px;
            background-color: red;
        }
    </style>
</head>
<body>
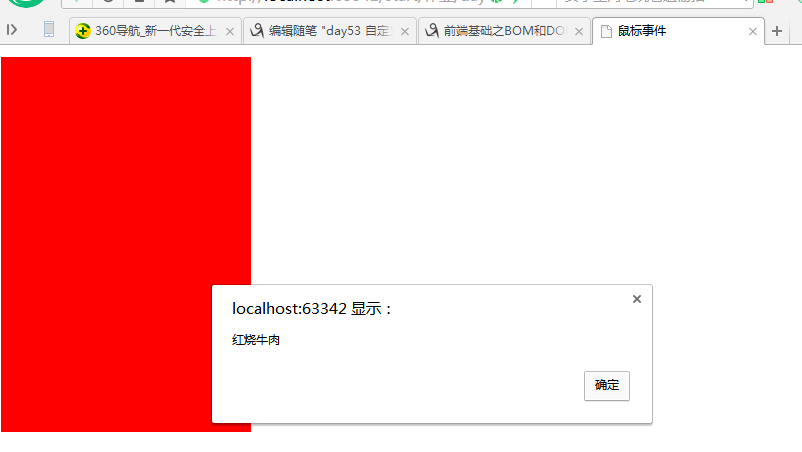
<div class="c1" onmouseover="f();"></div>
<script>
    function f() {
        alert("红烧牛肉");
    }
</script>
</body>
</html>
八、

<!DOCTYPE html>
<html lang="zh-CN">
<head>
    <meta charset="UTF-8">
    <!--<meta http-equiv="x-ua-compatible" content="IE=edge">-->
    <title>onselect事件</title>
</head>
<body>
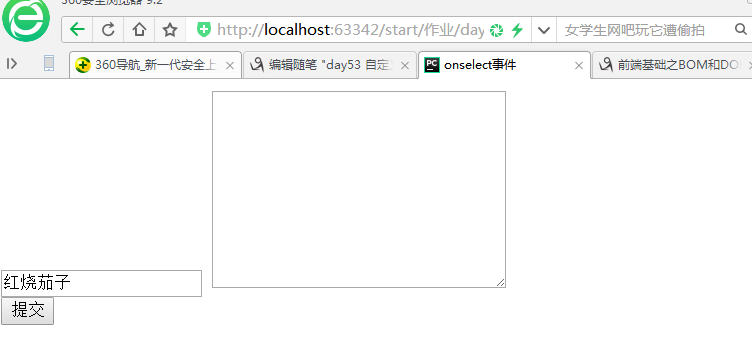
<input type="text" value="红烧茄子" id="il">
<textarea name="" id="" cols="30" rows="10" onselect="f2();">

</textarea>

<form action="" onsubmit="f3();">
    <input type="submit" value="提交">
</form>
<script>
    function f1(){
        alter("真香啊!");
    }
    function f2() {
        alter("再来一盘");
    }
    function f3() {
        alter("我一点都不饿");
    }
</script>
<script src="10.js"></script>
</body>
</html>

/**
 * Created by Administrator on 2017/12/29.
 */

    // 找标签
var i1Ele = document.getElementById("i1");
i1Ele.onselect = function () {
    alert("真香啊!");
}
九、事件绑定示例

<!DOCTYPE html>
<html lang="en">
<head>
    <meta charset="UTF-8">
    <title>事件绑定示例</title>
</head>
<body>

<ul id="i1">
    <li>1</li>
    <li>2</li>
    <li>3</li>
    <li>4</li>
    <li>5</li>
    <li>6</li>
    <li>7</li>
    <li>8</li>
    <li>9</li>
    <li>10</li>
    <li>11</li>
    <li>12</li>
    <li>13</li>
    <li>14</li>
    <li>15</li>
    <li>16</li>
    <li>17</li>
    <li>18</li>
    <li>19</li>
    <li>20</li>
    <li>21</li>
    <li>22</li>
    <li>23</li>
    <li>24</li>
    <li>25</li>
    <li>26</li>
    <li>27</li>
    <li>28</li>
    <li>29</li>
    <li>30</li>
    <li>31</li>
    <li>32</li>
    <li>33</li>
    <li>34</li>
    <li>35</li>
    <li>36</li>
    <li>37</li>
    <li>38</li>
    <li>39</li>
    <li>40</li>
    <li>41</li>
    <li>42</li>
    <li>43</li>
    <li>44</li>
    <li>45</li>
    <li>46</li>
    <li>47</li>
    <li>48</li>
    <li>49</li>
    <li>50</li>
    <li>51</li>
    <li>52</li>
    <li>53</li>
    <li>54</li>
    <li>55</li>
    <li>56</li>
    <li>57</li>
    <li>58</li>
    <li>59</li>
    <li>60</li>
    <li>61</li>
    <li>62</li>
    <li>63</li>
    <li>64</li>
    <li>65</li>
    <li>66</li>
    <li>67</li>
    <li>68</li>
    <li>69</li>
    <li>70</li>
    <li>71</li>
    <li>72</li>
    <li>73</li>
    <li>74</li>
    <li>75</li>
    <li>76</li>
    <li>77</li>
    <li>78</li>
    <li>79</li>
    <li>80</li>
    <li>81</li>
    <li>82</li>
    <li>83</li>
    <li>84</li>
    <li>85</li>
    <li>86</li>
    <li>87</li>
    <li>88</li>
    <li>89</li>
    <li>90</li>
    <li>91</li>
    <li>92</li>
    <li>93</li>
    <li>94</li>
    <li>95</li>
    <li>96</li>
    <li>97</li>
    <li>98</li>
    <li>99</li>
    <li>100</li>
</ul>

<script>
    // 传统写法
//    var liEles = document.getElementsByTagName("li");
//    for (var i=0;i<liEles.length;i++) {
//        liEles[i].onclick=function () {
//            // this 哪个标签触发的这个事件,this就指的谁哪个标签
//            alert(this.innerText);
//        }
//    }

    // 更好的方式
    var ulEle = document.getElementById("i1");
    ulEle.onclick=function (e) {  // 把事件本身当成参数传进来
        // event.target  // 点击的目标是谁
        console.log(e.target);
        var targetEle = e.target;
        alert(targetEle.innerText);
    }
</script>
</body>
</html>
十、

<!DOCTYPE html>
<html lang="zh-CN">
<head>
    <meta charset="UTF-8">
    <meta http-equiv="x-ua-compatible" content="IE=edge">
    <title>12 文档节点对象插入和删除</title>
</head>
<body>
<ul id="il">
    <li>111</li>
    <li>22</li>
</ul>
</body>
</html>
