Redxu(RTK) 基础 性能与数据范式化 6.2 添加通知
添加通知
如果不能弹出通知告诉我们有人发布了消息、留下了评论或者对我们的帖子做出了回应,那么任何社交媒体应用都是不完整的。
在一个真实的应用中,我们的客户端和后端服务器进行持续的通信,当发生某些事情时,服务器都会向客户端推送通知。由于我们这是一个小型应用,我们将通过添加一个按钮从虚假的 API 中获取一些通知来模拟该过程。我们也没有任何用来发送消息或对帖子做出反应的真实用户,因此虚假 API 会在我们每次发出请求时创建一些随机通知条目。(请记住,这里的目标是了解如何使用 Redux 本身。)
文档项目要求我们开始一个新功能,就是现在常见的新动态推送功能,这个功能依然用到了server.js提供的服务。
通知 slice
由于这是一个船新的功能,那么我们在feature下组织一个新的slice来管理其数据,在其中创建thunk用于向服务器发起拉取新动态。另外,为了创建一些真实的通知,我们将在 state 中的保存最新通知的时间戳。这将使模拟服务器生成比该时间戳更新的通知:
//这是注释,显示文件路径捏:/src/features/notifications/notificationSlice.tsx
import { createSlice, createAsyncThunk } from "@reduxjs/toolkit";

import { client } from "../../api/client";
import { RootState } from "../../app/store";

export const fetchNotifications = createAsyncThunk<
  // Return type of the payload creator
  any,
  // First argument to the payload creator
  undefined,
  // Optional fields for defining thunkApi field types
  { state: RootState }
>("notifications/fetchNotifications", async (_, { getState }) => {
  const allNotifications = selectAllNotifications(getState());
  const [latestNotification] = allNotifications;
  const latestTimestamp = latestNotification ? latestNotification.date : "";
  const response = await client.get(
    `/fakeApi/notifications?since=${latestTimestamp}`
  );
  return response.data;
});
//这里我还不知道notification的具体类型,先放个空的在这占位置
interface IState {}
let initialState: any[] = [];
const notificationsSlice = createSlice({
  name: "notifications",
  initialState: initialState,
  reducers: {},
  extraReducers: (builder) => {
    builder.addCase(fetchNotifications.fulfilled, (state, action) => {
      state.push(...action.payload);
      // 以最新的优先排序
      state.sort((a, b) => b.date.localeCompare(a.date));
    });
  },
});

export default notificationsSlice.reducer;

export const selectAllNotifications = (state: RootState) => state.notifications;
If you need to modify the types of the thunkApi parameter, such as supplying the type of the state returned by getState(), you must supply the first two generic arguments for return type and payload argument, plus whicher "thunkApi argument fields" are relevant in an object:
关于为什么给creatAsyncThunk提供泛型标注,请看这里Typing createAsyncThunk
和其他的 slice 一样,将 notificationsReducer 引入 store.js, 并将其添加到 configureStore() 的调用中。
fetchNotifications 能帮助我们从服务端拉取最新的通知。从服务端返回的数据被放入notifications这个slice,并且总是以新的在前旧的在后的顺序排列。
Thunk参数
我们之前说过,thunk可以被直接dispatch,这里文档用了个挺形象的说法,把dispatch一个thunk的时候dispatch内部的thunk叫做 thunk action。
dispatch(addPost(newPost))比如说这里的addPost是个thunk,在他被dispatch的时候,把他形象地说成是一个thunk action。
这个thunk的action会是createAsyncThunk的第二个参数(payload creator)的第一个参数,有点绕哈。
export const incrementAsync = createAsyncThunk(
  "counter/fetchCount",
// 下面这个函数就是payload creator,因为他的返回值就会被包装成一个action的payload捏!
  async (amount: number, thunkAPI) => {
    const response = await fetchCount(amount);
    // The value we return becomes the `fulfilled` action payload
    return response.data;
  }
);
我们之前稍微讲过createAsyncThunk的payload creator第二个参数(是个函数),它就是一个'thunk API'对象,上面有必要的函数/信息什么的:
- dispatch 和 getState:dispatch 和 getState 方法由 Redux store 提供。你可以在 thunk 中使用这些来发起 action,或者从最新的 Redux store 中获取 state (例如在发起 另一个 action 后获取更新后的值)。
- extra:当创建 store 时,用于传递给 thunk 中间件的“额外参数”。这通常时某种 API 的包装器,比如一组知道如何对应用程序的服务器进行 API 调用并返回数据的函数,这样你的 thunk 就不必直接包含所有的 URL 和查询逻辑。
- requestId:该 thunk 调用的唯一随机 ID ,用于跟踪单个请求的状态。
- signal:一个AbortController.signal 函数,可用于取消正在进行的请求。
- rejectWithValue:一个用于当 thunk 收到一个错误时帮助自定义 rejected action 内容的工具。
当然这是createAsyncThunk api提供的,你要头铁手写thunk,那形式是thunk 函数将获取 (dispatch, getState)作为单独的参数。
这里用到thunkAPI就是因为notifications存在store里,所以从thunkAPI中结构到getState,读取对应数据。
添加通知列表
创建slice之后,我们可以添加一个
//这是注释,显示文件路径捏:/src/features/notifications/NotificationList.tsx
import React from "react";
import { useSelector } from "react-redux";
import { formatDistanceToNow, parseISO } from "date-fns";

import { selectAllUsers } from "../users/usersSlice";

import { selectAllNotifications } from "./notificationSlice";

export const NotificationsList = () => {
  const notifications = useSelector(selectAllNotifications);
  const users = useSelector(selectAllUsers);

  const renderedNotifications = notifications.map((notification) => {
    const date = parseISO(notification.date);
    const timeAgo = formatDistanceToNow(date);
    const user = users.find((user) => user.id === notification.user) || {
      name: "Unknown User",
    };

    return (
      <div key={notification.id} className="notification">
        <div>
          <b>{user.name}</b> {notification.message}
        </div>
        <div title={notification.date}>
          <i>{timeAgo} ago</i>
        </div>
      </div>
    );
  });

  return (
    <section className="notificationsList">
      <h2>Notifications</h2>
      {renderedNotifications}
    </section>
  );
};
这是个UI组件,就是显示从后端拉取的notification。
继续,在
//这是注释,显示文件路径捏:/src/components/Navbar.tsx
import React from "react";

import { Link } from "react-router-dom";
import { useAppDispatch } from "../app/hooks";
import { fetchNotifications } from "../features/notifications/notificationSlice";

export const Navbar = () => {
  const dispatch = useAppDispatch();

  const fetchNewNotifications = () => {
    dispatch(fetchNotifications());
  };
  return (
    <nav>
      <section>
        <h1>Redux 基础教程示例</h1>

        <div className="navContent">
          <div className="navLinks">
            <Link to="/">文章列表</Link>
            <Link to="/users">用户列表</Link>
            <Link to="/notifications">动态</Link>
          </div>
          <button className="button" onClick={fetchNewNotifications}>
            刷了个新 动态
          </button>
        </div>
      </section>
    </nav>
  );
};
最后肯定还是给显示notification的页面配置路由捏,这个咱就不详细写了,就写配置路由的一行就可以了(注意我的和文档有点区别,还是因为react-router版本不同捏!)
 <Route
            path="/notifications"
            element={<NotificationsList></NotificationsList>}
          ></Route>
然后页面大概这样:
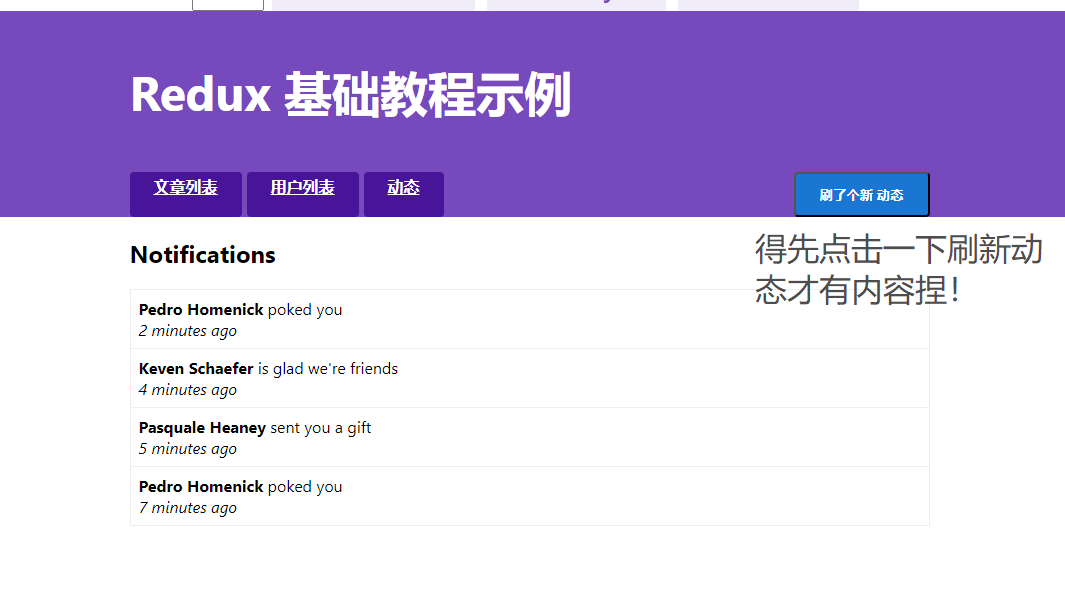
显示新通知
文档示例给的这个后端服务,挺酷的,每次我们点击刷新动态,都会返回一些新的“通知”,越刷越多,现在我们添加一些逻辑,方便查看哪些新的“通知”是已读的,哪些是未读的。
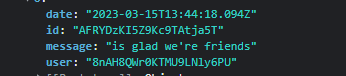
因为fakeApi提供的数据没有 用于区分到底是已读还是未读的字段(也没有对应的逻辑捏),所以我们得自己加上去额。
下面是fakeApi提供的Notification数据。
现在我们每次点击“刷了个新动态”都能从后端拉取新的数据,从而在页面上显示新的通知。现在我们添加一些新逻辑,
在NotificationList中首先给所有notification数据加入isRead的字段,并设置为布尔值真,
并在向后端继续发送请求拉取“新的动态”后,遍历所有notification数据,给每个数据加入isNew字段,并对已经设置isRead的数据,对应设置isNew为布尔值假。
技术逻辑上,这里用了useLayoutEffect,也就是每次拉取数据,每次重新渲染,上一次渲染的内容都会被useLayoutEffect钩子里边 dispatch的allNotificationsRead更新为isRead,那么拉取后端数据的时候,只要是isRead为真的数据,其isNew就是假,就用这个isNew来在页面上差异化显示。
不过说实话,实际情况和这个肯定不同,这段的核心在于提供一个思路,告诉读者,每次拉取后端数据的时候,可以根据客户端已有操作来遍历所有数据,标记和差异化渲染页面。
//这是注释,显示文件路径捏:/src/features/notifications/notificationSlice.tsx
import { createSlice, createAsyncThunk } from "@reduxjs/toolkit";

import { client } from "../../api/client";
import { RootState } from "../../app/store";

export const fetchNotifications = createAsyncThunk<
  // Return type of the payload creator
  any,
  // First argument to the payload creator
  undefined,
  // Optional fields for defining thunkApi field types
  { state: RootState }
>("notifications/fetchNotifications", async (_, { getState }) => {
  const allNotifications = selectAllNotifications(getState());
  const [latestNotification] = allNotifications;
  const latestTimestamp = latestNotification ? latestNotification.date : "";
  const response = await client.get(
    `/fakeApi/notifications?since=${latestTimestamp}`
  );

  return response.data;
});
//这里我还不知道notification的具体类型,先放个空的在这占位置
interface IState {
  status: "idle" | "pending" | "success" | "failed";
  error: null | any;
  notifications: any[];
}
let initialState: any[] = [];
const notificationsSlice = createSlice({
  name: "notifications",
  initialState: initialState,
  reducers: {
    allNotificationsRead(state, action) {
      state.forEach((notification) => {
        notification.read = true;
      });
    },
  },
  extraReducers: (builder) => {
    builder
      .addCase(fetchNotifications.pending, (state, action) => {})
      .addCase(fetchNotifications.fulfilled, (state, action) => {
        state.forEach((notification) => {
          // Any notifications we've read are no longer new
          notification.isNew = !notification.read;
        });
        state.push(...action.payload);
        // 以最新的优先排序
        state.sort((a, b) => b.date.localeCompare(a.date));
      });
  },
});

export default notificationsSlice.reducer;
export const {allNotificationsRead} =notificationsSlice.actions
export const selectAllNotifications = (state: RootState) => state.notifications;
下面是可以差异化渲染‘新、旧’notification的变动后的页面,注意,使用了classNames这个库。
//这是注释,显示文件路径捏:/src/features/notifications/NotificationList.tsx
import React from "react";
import { formatDistanceToNow, parseISO } from "date-fns";

import { selectAllUsers } from "../users/usersSlice";

import {
  selectAllNotifications,
  allNotificationsRead,
} from "./notificationSlice";
import classnames from "classnames";
import { useAppSelector, useAppDispatch } from "../../app/hooks";
export const NotificationsList = () => {
  const dispatch = useAppDispatch();
  const notifications = useAppSelector(selectAllNotifications);
  const users = useAppSelector(selectAllUsers);
  //在下次渲染之前 read 所有已有的notification呢!
  React.useLayoutEffect(() => {
    dispatch(allNotificationsRead());
  });

  const renderedNotifications = notifications.map((notification) => {
    const date = parseISO(notification.date);
    const timeAgo = formatDistanceToNow(date);
    const user = users.find((user) => user.id === notification.user) || {
      name: "Unknown User",
    };
    const shouldBeNew = notification.isNew ===undefined
    const notificationClassname = classnames("notification", {
      new: shouldBeNew,
    });
    return (
      <div key={notification.id} className={notificationClassname}>
        <div>
          <b>{user.name}</b> {notification.message}
        </div>
        <div title={notification.date}>
          <i>{timeAgo} ago</i>
        </div>
      </div>
    );
  });

  return (
    <section className="notificationsList">
      <h2>Notifications</h2>
      {renderedNotifications}
    </section>
  );
};
这一小节最后内容:我们需要在导航栏中的“通知” tab 上添加“徽章”。当我们在其他 tab 中时,这将向我们展示“未读”通知的条数:
//这是注释,显示文件路径捏:/src/components/Navbar.tsx
import React from "react";

import { Link } from "react-router-dom";
import { useAppDispatch, useAppSelector } from "../app/hooks";
import {
  fetchNotifications,
  selectAllNotifications,
} from "../features/notifications/notificationSlice";

export const Navbar = () => {
  const dispatch = useAppDispatch();
  const notifications = useAppSelector(selectAllNotifications);
  const numUnreadNotifications = notifications.filter((n) => !n.read).length;

  const fetchNewNotifications = () => {
    dispatch(fetchNotifications());
  };

  let unreadNotificationsBadge;
  //只是读取notification的read属性并进行一些判断
  if (numUnreadNotifications > 0) {
    unreadNotificationsBadge = (
      <span className="badge">{numUnreadNotifications}</span>
    );
  }
  return (
    <nav>
      <section>
        <h1>Redux 基础教程示例</h1>

        <div className="navContent">
          <div className="navLinks">
            <Link to="/">文章列表</Link>
            <Link to="/users">用户列表</Link>
            <Link to="/notifications">动态 {unreadNotificationsBadge}</Link>
          </div>
          <button className="button" onClick={fetchNewNotifications}>
            刷了个新 动态
          </button>
        </div>
      </section>
    </nav>
  );
};

 浙公网安备 33010602011771号