hive配置Tez引擎,并安装Tez-ui
一、下载Tez
1、下载 apache-tez-0.9.2-bin.tar.gz 包
二、hive配置tez引擎
1、解压 apache-tez-0.9.2-bin.tar.gz
复制tar -zxvf apache-tez-0.9.2-bin.tar.gz -C /home/hadoop/model/
2、进入 tez 目录,上传tez目录下的 share/tez.tar.gz 到 hdfs 上
复制hadoop fs -put tez.tar.gz /tez/
3、tez目录不用做任何修改,直接分发到其他集群节点上
复制scp -r apache-tez-0.9.2-bin/ root@hadoop002:$PWD
scp -r apache-tez-0.9.2-bin/ root@hadoop003:$PWD
4、在 hadoop-env.sh 配置
复制vi $HADOOP_HOME/etc/hadoop/hadoop-env.sh
在 hadoop-env.sh 加入以下配置,可能也需要配置一下tez系统环境变量
复制export TEZ_HOME=/home/hadoop/model/apache-tez-0.9.2-bin
for jar in `ls $TEZ_HOME |grep jar`; do
    export HADOOP_CLASSPATH=$HADOOP_CLASSPATH:$TEZ_HOME/$jar
done
for jar in `ls $TEZ_HOME/lib`; do
    export HADOOP_CLASSPATH=$HADOOP_CLASSPATH:$TEZ_HOME/lib/$jar
done
5、重启hadoop,启动hive
复制stop-all.sh
start-all.sh
hive
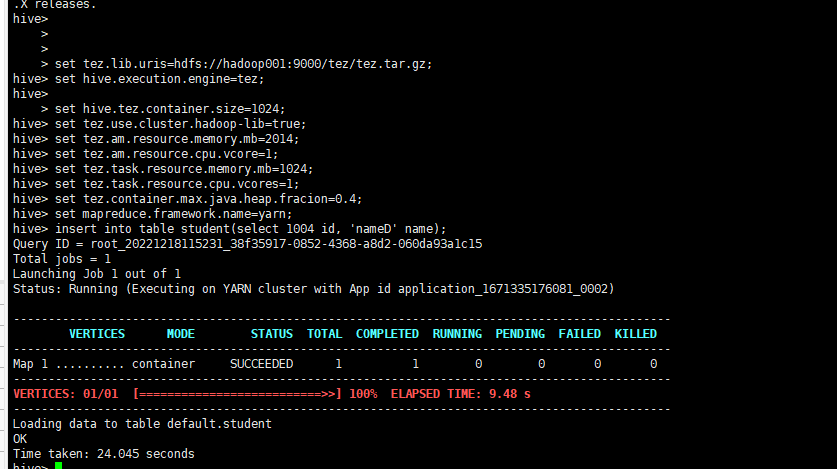
在hive中运行如下参数,不建议把参数配置在hive或yarn配置文件中
复制set tez.lib.uris=hdfs://hadoop001:9000/tez/tez.tar.gz;
set hive.execution.engine=tez;

set hive.tez.container.size=1024;
set tez.use.cluster.hadoop-lib=true;
set tez.am.resource.memory.mb=2014;
set tez.am.resource.cpu.vcore=1;
set tez.task.resource.memory.mb=1024;
set tez.task.resource.cpu.vcores=1;
set tez.container.max.java.heap.fracion=0.4;
set mapreduce.framework.name=yarn;
执行insert语句
复制insert into table student(select 1004 id, 'nameD' name);

三、配置tez-ui
1、下载tomcat
tomcat官网:https://tomcat.apache.org/download-90.cgi
2、解压tomcat
复制tar -zxvf apache-tomcat-9.0.70.tar.gz -C /home/hadoop/model/
在 webapp下创建 tez-ui 目录
复制mkdir /home/hadoop/model/apache-tomcat-9.0.70/webapps/tez-ui
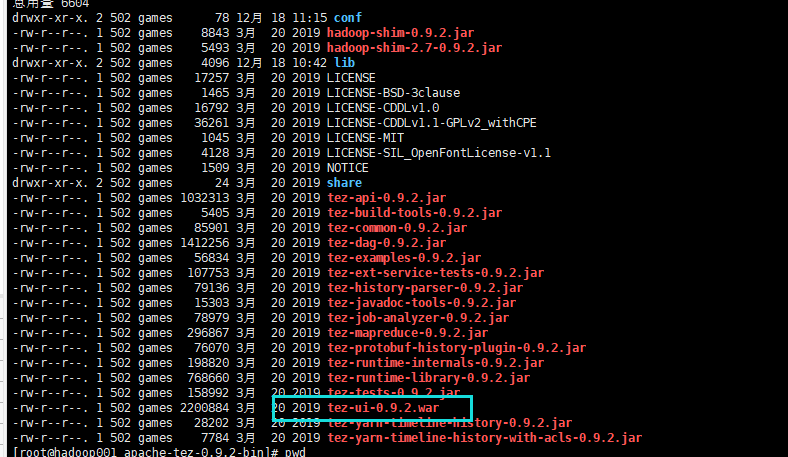
3、在 tez 目录下找到 tez-ui-0.9.2.war,放到tomcat下

复制cp tez-ui-0.9.2.war /home/hadoop/model/apache-tomcat-9.0.70/webapps/tez-ui/
在 apache-tomcat-9.0.70/webapps/tez-ui/ 下解压 tez-ui-0.9.2.war
复制java -xvf tez-ui-0.9.2.war
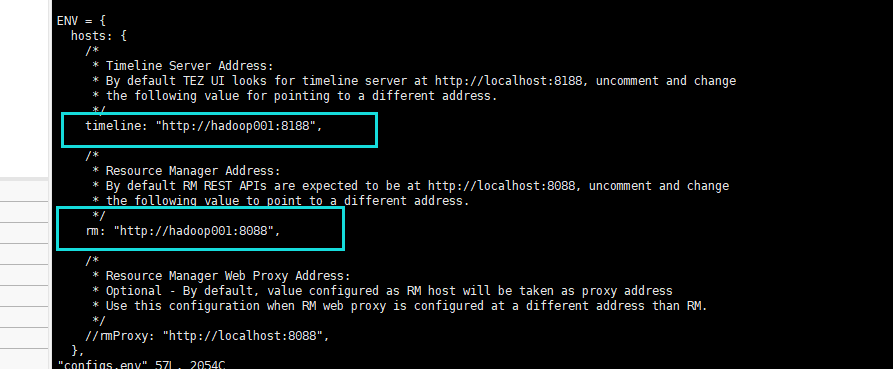
修改解压后的config/configs.env 文件,配置读取yarn的timeline的端口

4、配置yarn-site文件,并启动timelineserver
在 yarn-site.xml 中添加如下参数(记得修改主机名),分发节点后重启yarn
复制 <!-- conf timeline server -->
    <property>
        <name>yarn.timeline-service.enabled</name>
	<value>true</value>
   </property>
   <property>
	<name>yarn.timeline-service.hostname</name>
        <value>tmaster</value>
   </property>
   <property>
        <name>yarn.timeline-service.http-cross-origin.enabled</name>
        <value>true</value>
   </property>
   <property>
        <name> yarn.resourcemanager.system-metrics-publisher.enabled</name>
        <value>true</value>
   </property>
   <property>
	<name>yarn.timeline-service.generic-application-history.enabled</name>
	<value>true</value>
   </property>
   <property>
        <description>Address for the Timeline server to start the RPC server.</description>
        <name>yarn.timeline-service.address</name>
        <value>hadoop001:10201</value>
   </property>
   <property>
        <description>The http address of the Timeline service web application.</description>
        <name>yarn.timeline-service.webapp.address</name>
        <value>hadoop001:8188</value>
   </property>
   <property>
        <description>The https address of the Timeline service web application.</description>
        <name>yarn.timeline-service.webapp.https.address</name>
        <value>hadoop001:2191</value>
   </property>
   <property>
        <name>yarn.timeline-service.handler-thread-count</name>
        <value>24</value>
   </property>
启动 timelineserver
复制yarn timelineserver
5、在 $HADOOP_HOME/etc/hadoop 目录下,创建 tez-site.xml
在 $HADOOP_HOME/etc/hadoop 目录下,创建 tez-site.xml,添加如下配置(记得分发节点),tez-ui地址对应tomcat下的tez-ui路径
复制<configuration>

<property>
        <name>tez.history.logging.service.class</name>
        <value>org.apache.tez.dag.history.logging.ats.ATSHistoryLoggingService</value>
    </property>
    <property>
        <name>tez.tez-ui.history-url.base</name>
        <value>http://hadoop001:8080/tez-ui/</value>
    </property>

</configuration>
6、在hive-site.xml文件下添加如下参数,不配置的话,tez-ui中的 All Queries 不会显示数据
复制<property>
	<name>hive.exec.pre.hooks</name>
	<value>org.apache.hadoop.hive.ql.hooks.ATSHook</value>
</property>

<property>
	<name>hive.exec.post.hooks</name>
	<value>org.apache.hadoop.hive.ql.hooks.ATSHook</value>
</property>

<property>
	<name>hive.exec.failure.hooks</name>
	<value>org.apache.hadoop.hive.ql.hooks.ATSHook</value>
</property>
7、启动 tomcat ,访问 tez-ui 界面
进入tomcat/bin目录下,启动tomcat
复制sh startup.sh
tez-ui界面地址(tomcat地址加/tez-ui后缀):http://hadoop001:8080/tez-ui


作者:落花桂
本文版权归作者和博客园共有,欢迎转载,但未经作者同意必须保留此段声明,且在文章页面明显位置给出原文连接,否则保留追究法律责任的权利。


【推荐】国内首个AI IDE,深度理解中文开发场景,立即下载体验Trae
【推荐】编程新体验,更懂你的AI,立即体验豆包MarsCode编程助手
【推荐】抖音旗下AI助手豆包,你的智能百科全书,全免费不限次数
【推荐】轻量又高性能的 SSH 工具 IShell:AI 加持,快人一步
· 25岁的心里话
· 闲置电脑爆改个人服务器(超详细) #公网映射 #Vmware虚拟网络编辑器
· 基于 Docker 搭建 FRP 内网穿透开源项目(很简单哒)
· 零经验选手,Compose 一天开发一款小游戏!
· 一起来玩mcp_server_sqlite,让AI帮你做增删改查!!