小白如何在博客园上创建一个自己的超美化博客
目录
一、前言
没有这么好看的博客,我都懒得写文章
二、账号注册与申请我的博客
这里我使用的是博客园平台。
-
1、注册账号
-
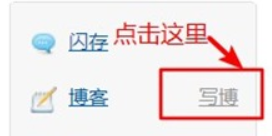
2、在自己博客园的主页中点击写博
- 3、点击写博客后,需要申请写博,你就如实填写写博理由,提交后一般等待一两个小时就能通过了。
三、设置我的博客中的板式
我的博客背景代码是参考另一个博主的博客,原博主连接:https://www.cnblogs.com/themysteryofhackers/p/11902072.html
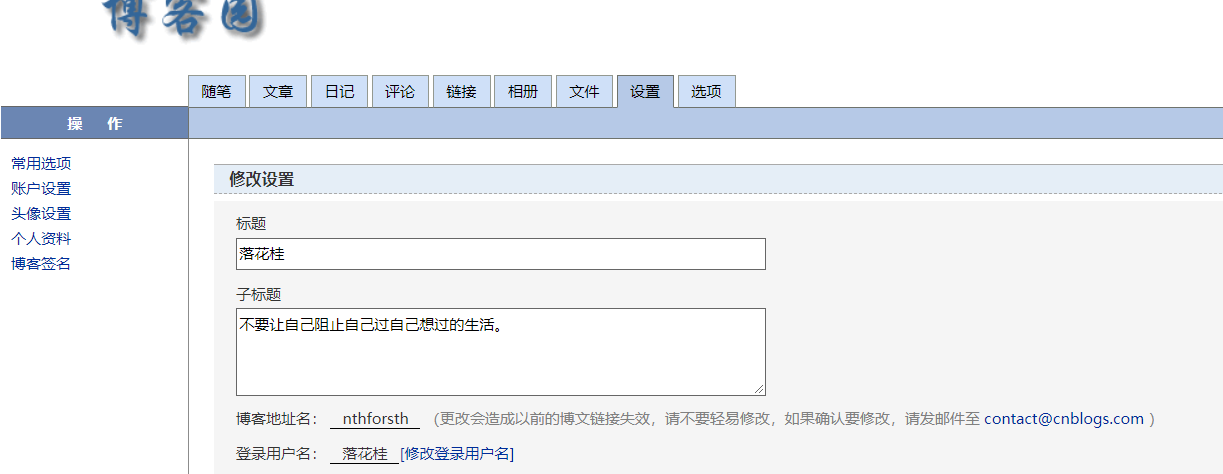
- 1、博客申请完成时候进入我的博客主页,点击设置选项。有标题、子标题等我就不一一细说了。
- 2、在设置中选择博客皮肤是darkgreentrip(也可以点击最新皮肤选择其他板式,不过一下代码预计会有所改动)。
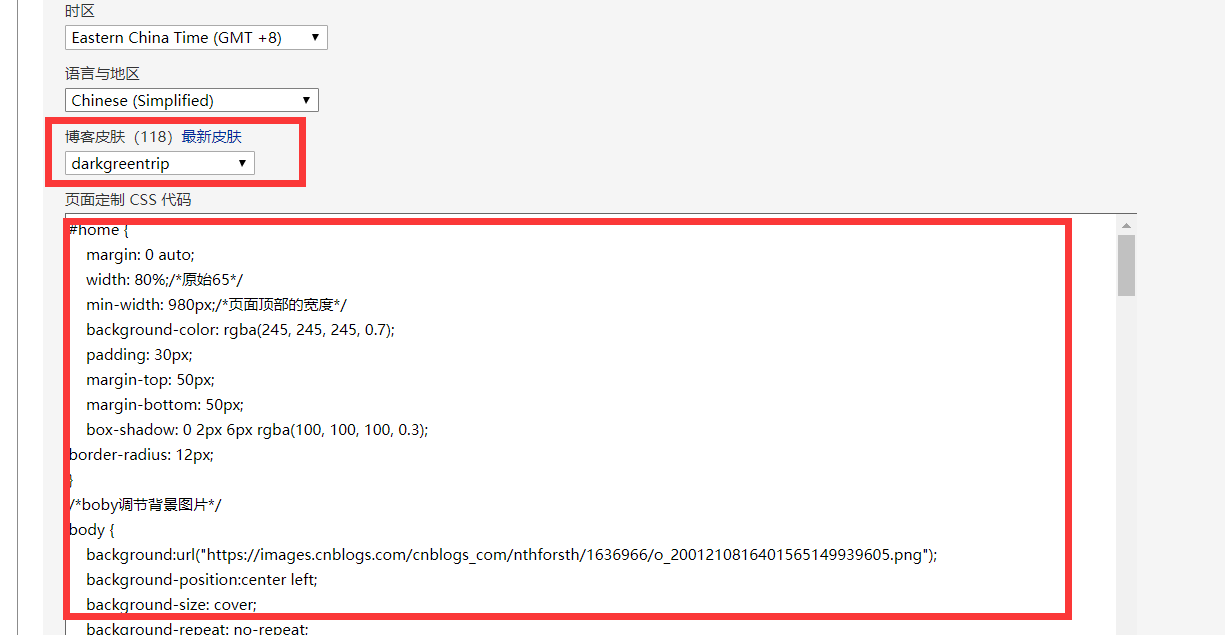
- 3、选择好博客皮肤是darkgreentrip后,就在“页面定制CSS”复制下面的代码进入就行了。很多地方都会有注释,可以根据自己的喜好修改参数。修改完成后点击保存即可。
#home {
    margin: 0 auto;
    width: 80%;/*原始65*/
    min-width: 980px;/*页面顶部的宽度*/
    background-color: rgba(245, 245, 245, 0.7);
    padding: 30px;
    margin-top: 50px;
    margin-bottom: 50px;
    box-shadow: 0 2px 6px rgba(100, 100, 100, 0.3);
border-radius: 12px;  /*调节边框圆度*/
}
/*boby调节背景图片*/
body {
    background:url("https://images.cnblogs.com/cnblogs_com/nthforsth/1636966/o_2001210816401565149939605.png");  /*背景图片链接*/
    background-position:center left;
    background-size: cover;
    background-repeat: no-repeat;
    background-attachment:fixed;
}
#blogTitle {
    height: 100px;  /*高度/
border-radius: 12px;
    clear: both;
    background-color: #cccccc69;   /*博客标题的背景*/

}
#blogTitle h1 {
    font-size: 36px;
color:#808080;
    font-weight: bold;

    line-height: 1.8em;/*原始 1.6em*/
    margin-top: 10px;/*原始 15px */

}
#blogTitle h2 {
    font-weight: normal;
    font-size: 17px; /*原始 16px ;font-size: 1.0rem;*/
    line-height: 1.8;
    color: #320f9d;
    font-weight: bold;
    text-align: right;
    float: right;
}
#navigator{
border-radius: 7px;
    background-color:rgba(135,206,205, 0.5);          /*标题栏下的颜色*/

}
#navList a:link, #navList a:visited, #navList a:active{
    color: #FFFFFF;
    font-size: 18px;
    font-weight: bold;
}
.blogStats{
    color: #eee;
}
.postTitle {
    border-left: 8px solid rgba(132,112,255, 0);
    margin-left: 10px;
    margin-bottom: 10px;
    font-size: 20px;
    float: right;
    width: 100%;
    clear: both;
}
.postTitle a:link, .postTitle a:visited, .postTitle a:active {
    color:     #FF6A6A;
    transition: all 0.4s linear 0s;
}
.postTitle a:hover {
    margin-left: 30px;
    color: #EE6363;
    text-decoration: none;
}
.postCon {
    float: right;
    line-height: 1.5em;
    width: 100%;
    clear: both;
    padding: 10px 0;
}
.day .postTitle a {
    padding-left: 10px;
}
.day {
    background: rgba(255, 255, 255, 0.5);
}
/*文章附加信息*/
.postDesc {
    background: url(images/posted_time.png) no-repeat 0 1px;
    color: #757575;
    float: left;
    width: 100%;
    clear: both;
    text-align: left;
    font-family: "微软雅黑" , "宋体" , "黑体" ,Arial;
    font-size: 13px;
    padding-right: 20px;/*5px  padding-left: 90px;posted 发表时间左边距离*/
    margin-top: 20px;
    line-height: 1.8;
    padding-bottom: 35px;
}
.newsItem, .catListEssay, .catListLink, .catListNoteBook, .catListTag, .catListPostCategory,
.catListPostArchive, .catListImageCategory, .catListArticleArchive, .catListView,
.catListFeedback, .mySearch, .catListComment, .catListBlogRank, .catList, .catListArticleCategory ,#blog-calendar
{
    background: rgba(255, 255, 255, 0.5);
    margin-bottom: 35px;
    word-wrap: break-word;
}
.CalTitle{
    background: rgba(255, 255, 255, 0);
}
.catListTitle{
    background-color: rgba(255,110,180,0.6);   //栏目的条纹颜色
}
#topics{
    background: rgba(255, 255, 255, 0.5);
}
.c_ad_block{
    display: none;
}
#tbCommentBody{
    width: 100%;
    height: 200px;
    background: rgba(255, 255, 255, 0.5);
}
#q{background: rgba(255, 255, 255, 0);}

.CalNextPrev{background: rgba(255, 255, 255, 0);}

.cnblogs_code{
    background: rgba(255, 255, 255, 0);
}
.cnblogs_code div{
    background: rgba(255, 255, 255, 0);
}
.cnblogs_code_toolbar{
    background: rgba(255, 255, 255, 0);
}
#main{min-width: 640px;}
.entrylist{
    background: rgba(255, 255, 255, 0.5);
}
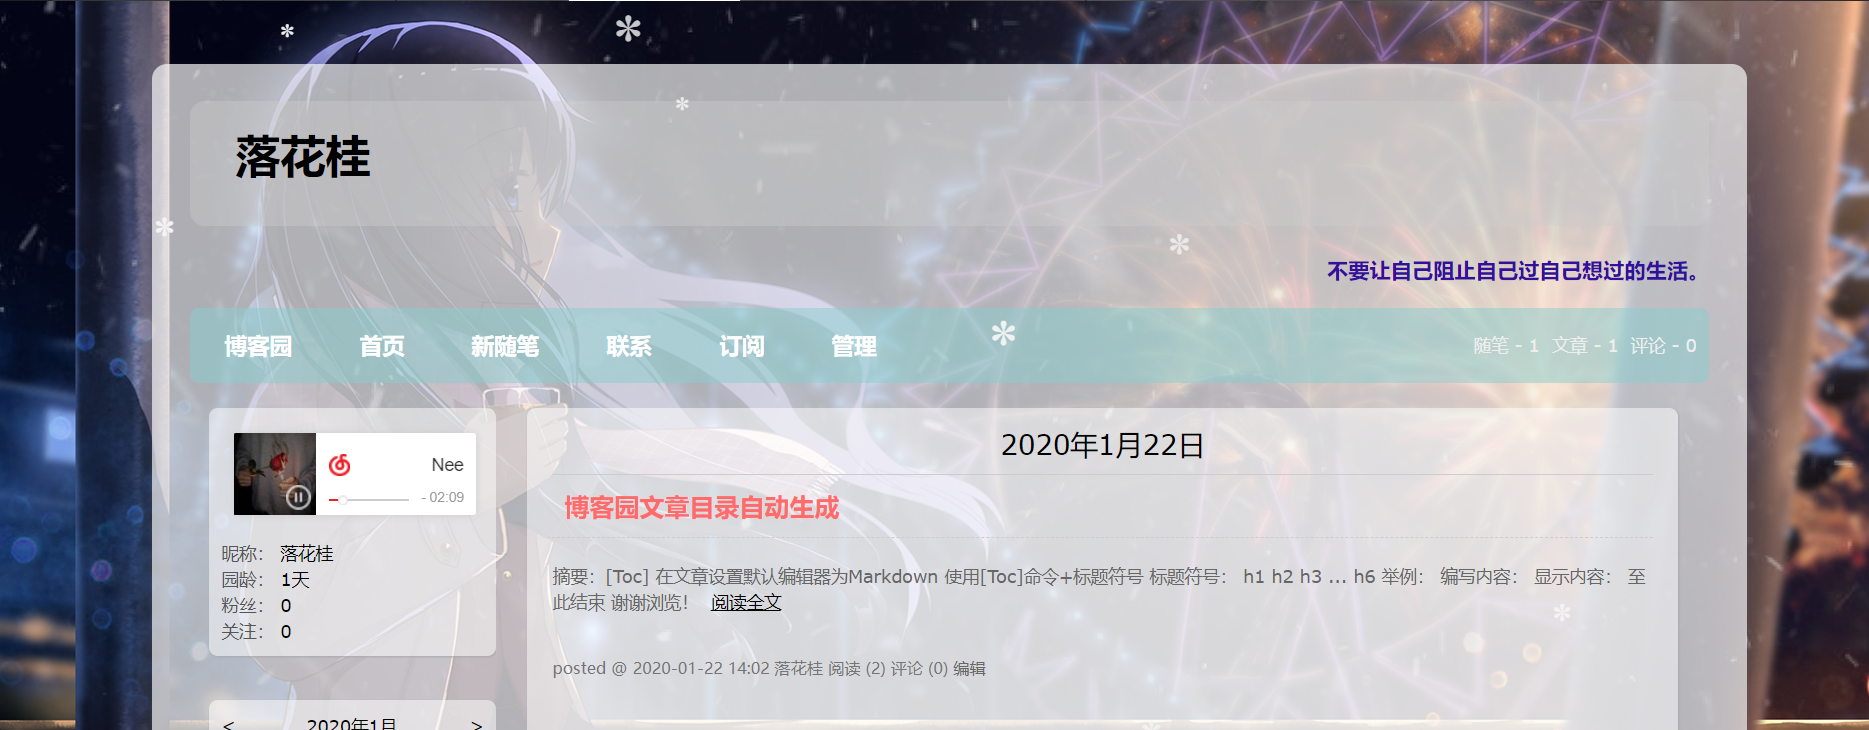
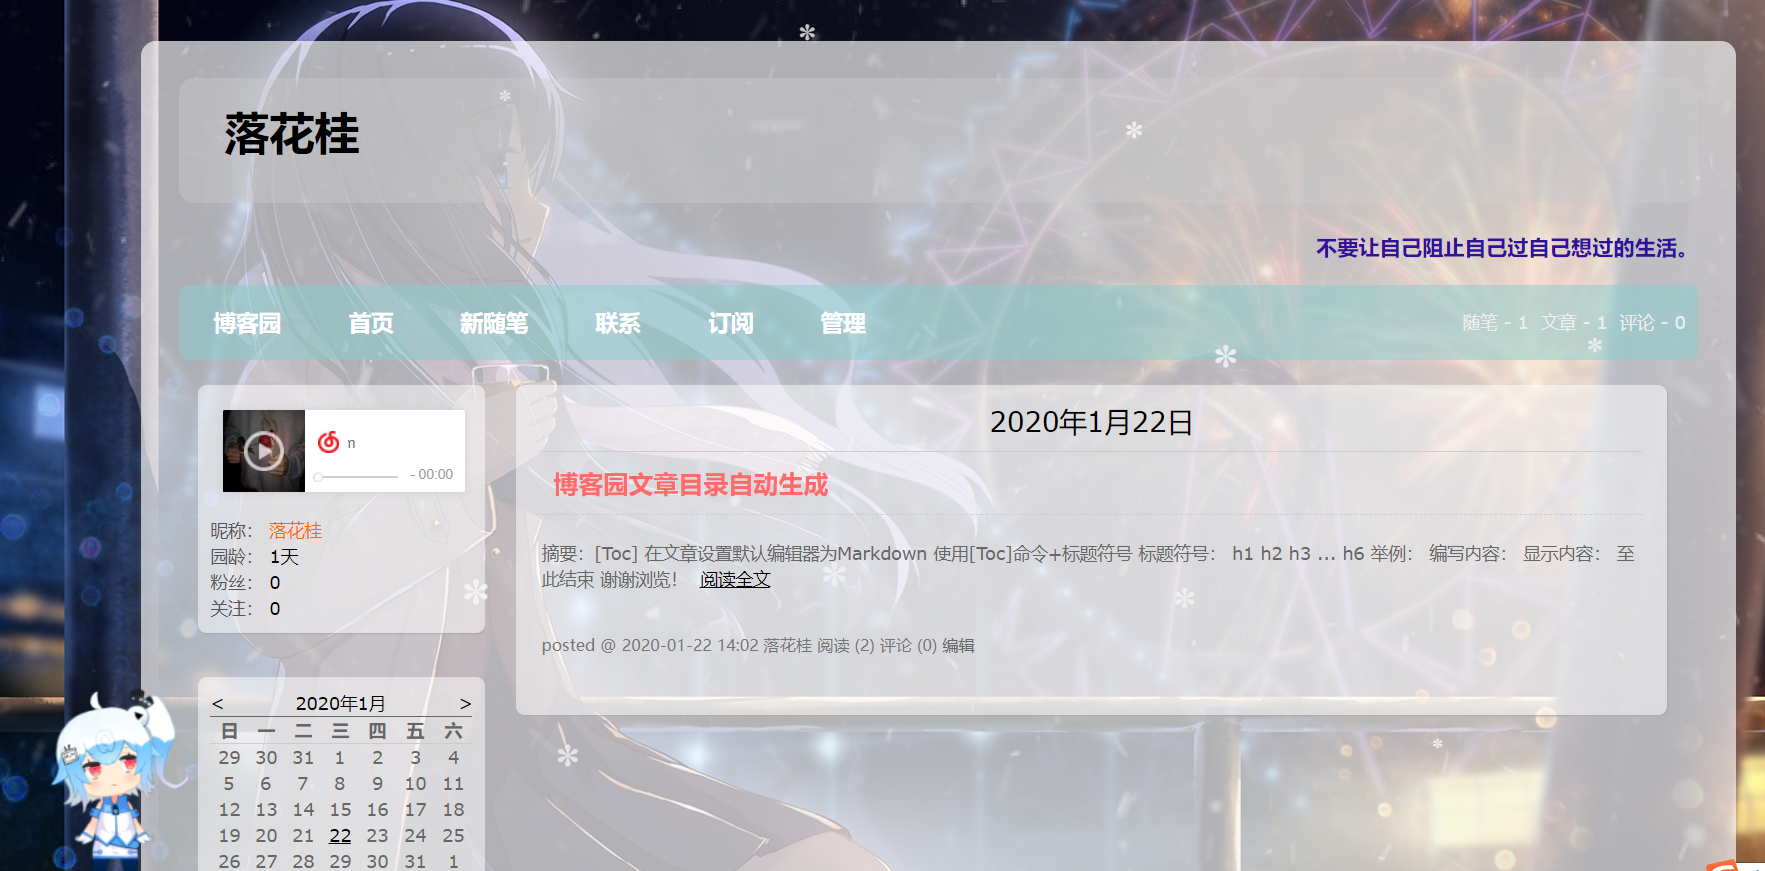
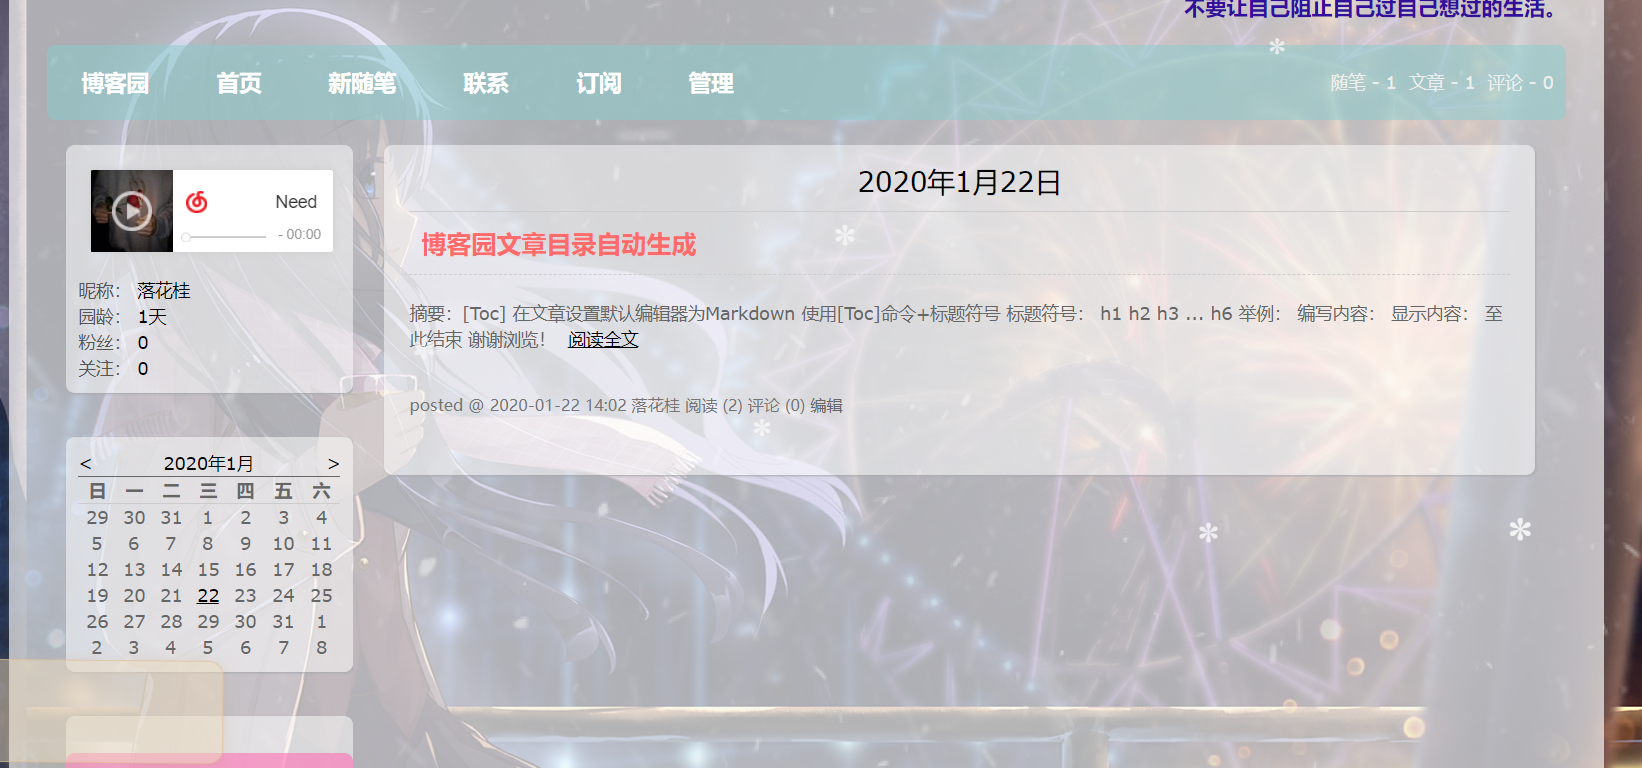
- 4、效果展示:
四、在我的博客中添加看板娘
- 1、申请js。下图是已经申请过的,接下来的教程都是需要申请js后才能正常显示。提交申请理由后一般会在几个小时内审核完。

- 2、下载三个文件,并且上传到我的博客文件中,在第3步中会用到。
waifu-tips.js
waifu.css
live2d.js

- 3、把下面的代码修改后复制进“首页HTML代码块”。把步骤2中上传的三个文件,下面代码的三个文件地址替换为自己的文件地址。在博客文件中,右击文件名,复制链接地址,在如下代码中替换相对应位置。最后一行的flat-ui.min.css不用修改,然后点击保存。
<!DOCTYPE html>
<html xmlns="http://www.w3.org/1999/xhtml">
<head>
    <meta http-equiv="Content-Type" content="text/html; charset=UTF-8" />
    <title>Live2D</title>
    <link rel="stylesheet" type="text/css" href="https://blog-static.cnblogs.com/files/nthforsth/waifu.css"/>  /*修改地一:waifu.css*/
    <script src="https://cdn.bootcss.com/jquery/3.2.1/jquery.min.js"></script>
</head>
<body>
    <link rel="stylesheet" type="text/css" href="https://blog-static.cnblogs.com/files/nthforsth/waifu.css"> /*修改地二:waifu.css*/
    <div class="waifu" id="waifu">
        <div class="waifu-tips" style="opacity: 1;"></div>
        <canvas id="live2d" width="200" height="180" class="live2d"></canvas>
        <div class="waifu-tool">
            <span class="fui-home"></span>
            <span class="fui-chat"></span>
            <span class="fui-eye"></span>
            <span class="fui-user"></span>
            <span class="fui-photo"></span>
            <span class="fui-info-circle"></span>
            <span class="fui-cross"></span>
        </div>
    </div>
    <script src="https://blog-static.cnblogs.com/files/nthforsth/live2d.js"></script> /*修改地三:live2d.js*/
    <script src="https://blog-static.cnblogs.com/files/nthforsth/waifu-tips.js"></script>  /*修改地四:waifu-tips.js*/
    <script type="text/javascript">initModel()</script>
</body>
</html>
<link rel="stylesheet" type="text/css" href="https://files.cnblogs.com/files/yjlblog/flat-ui.min.css"/>
- 4、效果展示:(如果没有出现的话,需要点几下看板娘那个地方的小眼睛图标或衣服图标,等待其加载出来即可)
- 5、解决进入或刷新页面看板娘不自动展示问题:
把原来放在页首的HTML代码,放到页脚HTML代码块最后,并行把 html 标签删掉, 把 head 和 body 标签 改成 div 标签 。
<div>
    <meta http-equiv="Content-Type" content="text/html; charset=UTF-8" />
    <title>Live2D</title>
    <link rel="stylesheet" type="text/css" href="https://blog-static.cnblogs.com/files/nthforsth/waifu.css"/>
    <script src="https://cdn.bootcss.com/jquery/3.2.1/jquery.min.js"></script>

	<link  type="text/css" rel="stylesheet" href="https://files.cnblogs.com/files/hafiz/feedback.css">
    <link rel="stylesheet" type="text/css" href="https://files.cnblogs.com/files/yjlblog/flat-ui.min.css"/>
<script src="https://files.cnblogs.com/files/nthforsth/clipboard.min.js"></script>
<script src="https://files.cnblogs.com/files/nthforsth/cp.js"></script>
</div>
<div>
    <link rel="stylesheet" type="text/css" href="https://blog-static.cnblogs.com/files/nthforsth/waifu.css">
    <div class="waifu" id="waifu">
        <div class="waifu-tips" style="opacity: 1;"></div>
        <canvas id="live2d" width="200" height="180" class="live2d"></canvas>
        <div class="waifu-tool">
            <span class="fui-home"></span>
            <span class="fui-chat"></span>
            <span class="fui-eye"></span>
            <span class="fui-user"></span>
            <span class="fui-photo"></span>
            <span class="fui-info-circle"></span>
            <span class="fui-cross"></span>
        </div>
    </div>
    <script src="https://blog-static.cnblogs.com/files/nthforsth/live2d.js"></script>
    <script src="https://blog-static.cnblogs.com/files/nthforsth/waifu-tips.js"></script>
    <script type="text/javascript">initModel()</script>
</div>
五、在我的博客中添加点击特效
参考原博主连接:https://www.cnblogs.com/wkfvawl/p/9414180.html
- 1、鼠标点击特效。把下面的代码直接复制进设置的“首页HTML代码块”中去。
<script type="text/javascript">
/* 鼠标特效 */
var a_idx = 0;
jQuery(document).ready(function($) {
    $("body").click(function(e) {
        var a = new Array("❤富强❤","❤民主❤","❤文明❤","❤和谐❤","❤自由❤","❤平等❤","❤公正❤","❤法治❤","❤爱国❤","❤敬业❤","❤诚信❤","❤友善❤");
        var $i = $("<span></span>").text(a[a_idx]);
        a_idx = (a_idx + 1) % a.length;
        var x = e.pageX,
        y = e.pageY;
        $i.css({
            "z-index": 999999999999999999999999999999999999999999999999999999999999999999999,
            "top": y - 20,
            "left": x,
            "position": "absolute",
            "font-weight": "bold",
            "color": "rgb("+~~(255*Math.random())+","+~~(255*Math.random())+","+~~(255*Math.random())+")"
        });
        $("body").append($i);
        $i.animate({
            "top": y - 180,
            "opacity": 0
        },
        1500,
        function() {
            $i.remove();
        });
    });
});
</script>
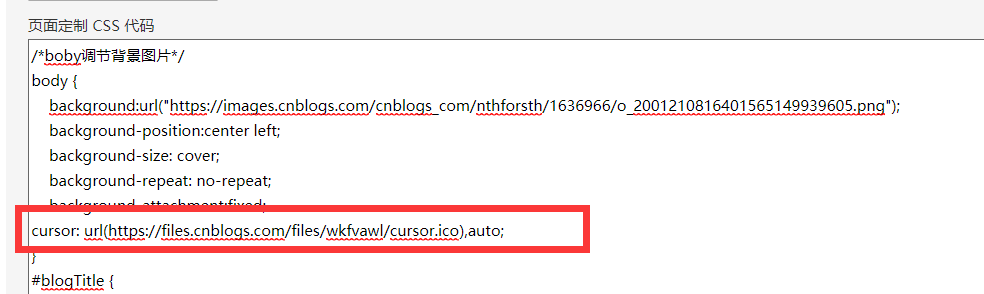
- 2、鼠标图案修改。在“页面定制 CSS 代码”中的这里增加如下代码。
(本次鼠标图案如下,如果需要修改其他团,可自行更改,也可参考该博主:https://www.cnblogs.com/tu-0718/p/11417905.html)

cursor: url(https://files.cnblogs.com/files/wkfvawl/cursor.ico),auto;
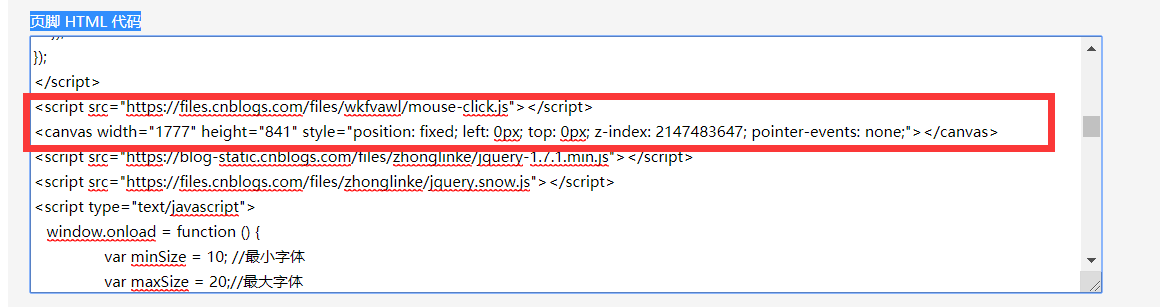
- 3、鼠标点击烟花效果。在“页脚 HTML 代码”中增加如下代码即可。
<script src="https://files.cnblogs.com/files/nthforsth/mouse-click.js"></script>
<canvas width="1777" height="841" style="position: fixed; left: 0px; top: 0px; z-index: 2147483647; pointer-events: none;"></canvas>
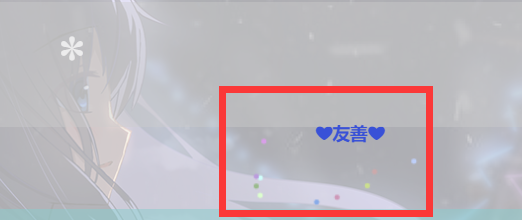
- 4、结果图展示:
六、在我的博客中添加雪花飘落特效
- 1、在“页脚 HTML 代码”中增加如下代码即可。
<script type="text/javascript">
   window.onload = function () {
                var minSize = 10; //最小字体
                var maxSize = 20;//最大字体
                var newOne = 600; //生成雪花间隔
                var flakColor = "#f5f5f5fa"; //雪花颜色
                var flak = $("<div></div>").css({position:"absolute","top":"0px"}).html("✽");//定义一个雪花
                var dhight = $(window).height(); //定义视图高度
                var dw =$(window).width()-80; //定义视图宽度
                setInterval(function(){
                var sizeflak = minSize+Math.random()*maxSize; //产生大小不等的雪花
                var startLeft = Math.random()*dw; //雪花生成是随机的left值
                var startOpacity = 0.7+Math.random()*0.3; //随机透明度
                var endTop= dhight-100; //雪花停止top的位置
                var endLeft= Math.random()*dw; //雪花停止的left位置
                var durationfull = 5000+Math.random()*3000; //雪花飘落速度不同
                flak.clone().appendTo($("body")).css({
                "left":startLeft ,
                "opacity":startOpacity,
                "font-size":sizeflak,
                "color":flakColor
                }).animate({
                "top":endTop,
                "left":endLeft,
                "apacity":0.1
                },durationfull,function(){
                $(this).remove()
                });
                },newOne);
            }
 </script>
<script language="javascript" type="text/javascript">
//生成目录索引列表
function GenerateContentList()
{
    var jquery_h3_list = $('#cnblogs_post_body h3');//如果你的章节标题不是h3,只需要将这里的h3换掉即可
    if(jquery_h3_list.length>0)
    {
        var content = '<a name="_labelTop"></a>';
        content    += '<div id="navCategory">';
        content    += '<p style="font-size:18px"><b>阅读目录</b></p>';
        content    += '<ul>';
        for(var i =0;i<jquery_h3_list.length;i++)
        {
            var go_to_top = '<div style="text-align: right"><a href="#_labelTop">回到顶部</a><a name="_label' + i + '"></a></div>';
            $(jquery_h3_list[i]).before(go_to_top);
            var li_content = '<li><a href="#_label' + i + '">' + $(jquery_h3_list[i]).text() + '</a></li>';
            content += li_content;
        }
        content    += '</ul>';
        content    += '</div>';
        if($('#cnblogs_post_body').length != 0 )
        {
            $($('#cnblogs_post_body')[0]).prepend(content);
        }
    }
}
GenerateContentList();
</script>
- 2、效果展现:
七、设置背景音乐
- 1、登陆网页版的网易云音乐,点击歌曲名或歌单名,然后点击生成外链播放器。

- 2、复制对应代码。

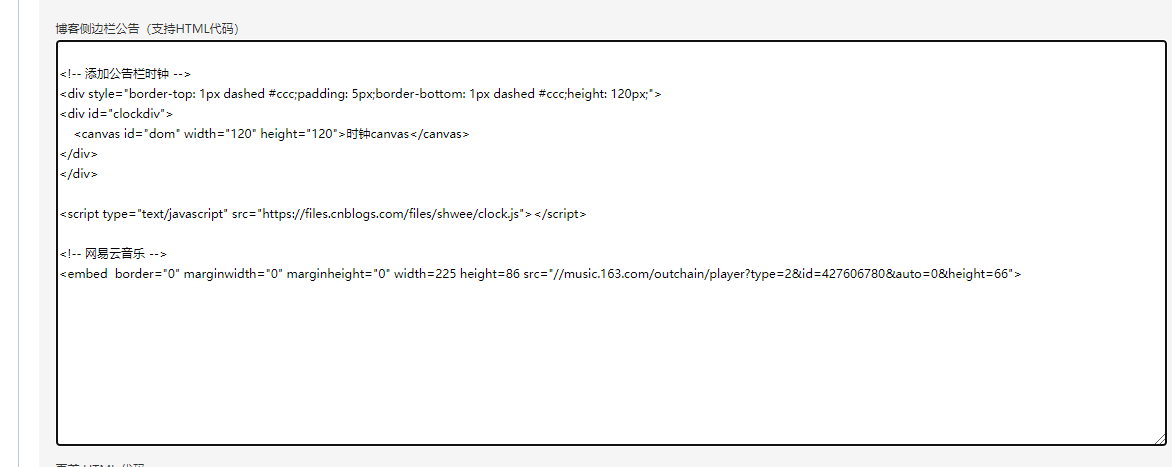
- 3、将上个步骤中所复制的代码,复制到“博客侧边栏公告”中,然后点击保存,刷新界面。

(备注:这里要把iframe 标签改成 embed,如果出现检测到被错误闭合的标签问题,则把最后的 /embed 标签删掉)
- 4、效果图展示:

八、设置博客文章评论功能
参考原博主:https://www.cnblogs.com/hafiz/p/9276689.html
- 1、在“页首HTML代码”中最后添加如下代码:
<link type="text/css" rel="stylesheet" href="https://files.cnblogs.com/files/hafiz/feedback.css">
- 2、在“页脚Html代码”中最后添加如下代码:
<script type="text/javascript">
$(function(){
    $('#blogTitle h1').addClass('bounceInLeft animated');
    $('#blogTitle h2').addClass('bounceInRight animated');
    // 删除反对按钮
    $('.buryit').remove();
    initCommentData();
});
function initCommentData() {
    $('.feedbackItem').each(function() {
        var text = $(this).find('.feedbackListSubtitle .layer').text();
        // 将楼层信息放到data里面
        // $(this).find('.blog_comment_body').attr('data-louceng', text.replace(/^#/g, ''));
        if($(this).find('.feedbackListSubtitle .louzhu').length>0) $(this).addClass('myself');
        var avatar = $(this).find('> .feedbackCon > span').html() || 'http://pic.cnitblog.com/face/sample_face.gif';
        $(this).find('> .feedbackCon > .blog_comment_body').append('<img class="user-avatar" src="'+avatar+'"/>')
    });
}

$(document).ajaxComplete(function(event, xhr, settings) {
  // 监听获取评论ajax事件
  if(settings.url.indexOf('/mvc/blog/GetComments.aspx') >= 0) {
    initCommentData();
  }
});
</script>
- 3、效果展示:

九、设置博客点赞按钮
参考原博主:https://www.cnblogs.com/hafiz/p/9276689.html
- 1、在“页面定制CSS代码”中添加如下CSS代码:
#div_digg{
  padding: 5px;
  border-radius: 5px;
  position: fixed;
  left: 0;
  bottom: 80px;
  width:80px;
  z-index:100;
}
.diggit{
  background: url(http://images2017.cnblogs.com/blog/894443/201709/894443-20170920105433618-867225449.png) no-repeat;
  width: 60px;
  height: 60px;
}
#div_digg .diggnum{
  position: absolute;
  bottom: -20px;
  left: 6px;
  background: #D0D0D0;
  padding: 2px 0;
  display: block;
  color: #555;
  font-size: 12px;
  text-align: center;
  width: 60px;
  -moz-border-radius: 4px;
  -webkit-border-radius: 4px;
  font-weight: bold;
}
/* 删除反对按钮,有点邪恶了 */
.buryit{
  display: none;
}
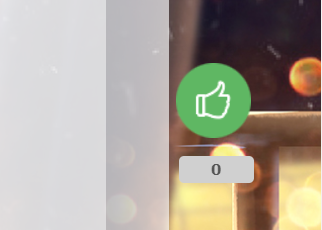
- 2、效果展示:
十、设置博客文章返回顶端按钮
- 1、在"页面定制CSS代码"中添加如下代码:
/* 定制返回顶部按键 */
#back-to-top {
    background-color: #87cefe;
    bottom: 0;
    box-shadow: 0 0 6px #bdc3c7;
    color: #444444;
    padding: 10px 10px;
    position: fixed;
    right: 50px;
    cursor: pointer;
    border-radius: 30px;
}
- 2、在"页脚Html代码"中添加如下代码(可以将文字改为图片):
<span id="back-to-top"><a href="#top">返回顶端</a></span>
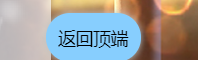
- 3、效果展示:
十一、代码框的复制按钮
- 在页面定制 CSS 代码中最后插入如下代码即可
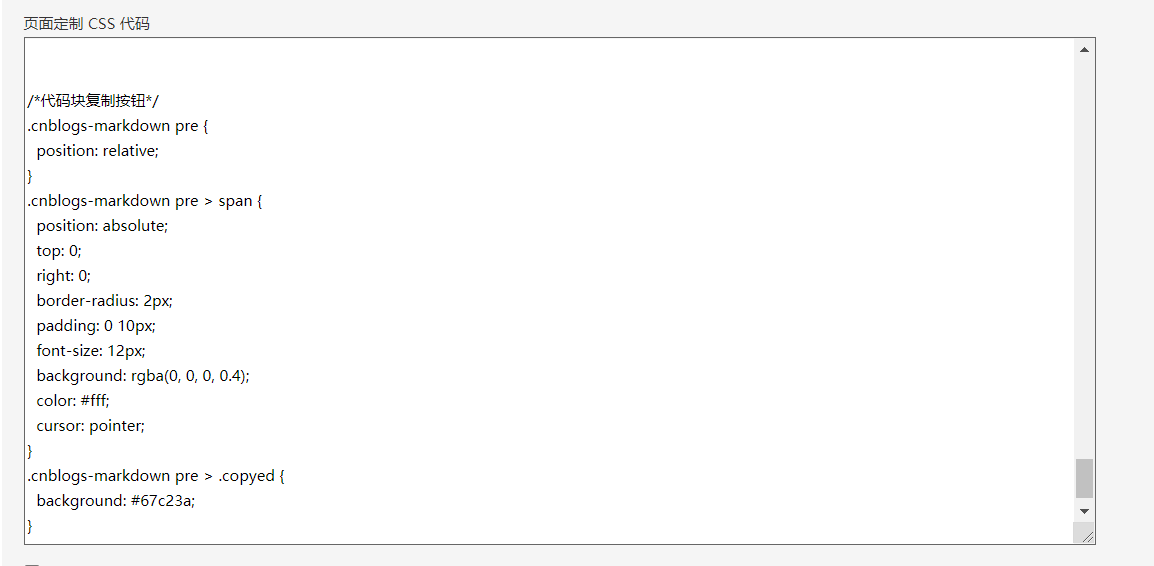
/*代码块复制按钮*/
.cnblogs-markdown pre {
  position: relative;
}
.cnblogs-markdown pre > span {
  position: absolute;
  top: 0;
  right: 0;
  border-radius: 2px;
  padding: 0 10px;
  font-size: 12px;
  background: rgba(0, 0, 0, 0.4);
  color: #fff;
  cursor: pointer;
}
.cnblogs-markdown pre > .copyed {
  background: #67c23a;
}
十二、其他CSS样式代码
/* 定制公告栏时钟位置 */
#clockdiv {
  text-align: center;
}

/*版权*/
#MySignature{border:solid 1px #E5E5E5;
              padding:12px;
              background:#FFFEFE url(http://images.cnblogs.com/cnblogs_com/grenet/226272/o_o_o_info.png) no-repeat scroll 15px 50%;padding-left:80px;line-height: 0.5;}
#MySignature div{line-height: 15px;}


#home {
    margin: 0 auto;
    width: 80%;/*原始65*/
    min-width: 980px;/*页面顶部的宽度*/
    background-color: rgba(245, 245, 245, 0.7);
    padding: 30px;
    margin-top: 50px;
    margin-bottom: 50px;
    box-shadow: 0 2px 6px rgba(100, 100, 100, 0.3);
border-radius: 12px;
}
/*boby调节背景图片*/
body {
    background:url("https://images.cnblogs.com/cnblogs_com/nthforsth/1636966/o_2001210816401565149939605.png");
    background-position:center left;
    background-size: cover;
    background-repeat: no-repeat;
    background-attachment:fixed;
cursor: url(https://files.cnblogs.com/files/wkfvawl/cursor.ico),auto;
}
#blogTitle {
    height: 100px;  /*高度*/
border-radius: 12px;
    clear: both;
    background-color: #cccccc69;   //博客标题的背景
}
#blogTitle h1 {
    font-size: 36px;
color:#808080;
    font-weight: bold;

    line-height: 1.8em;/*原始 1.6em*/
    margin-top: 10px;/*原始 15px */

}
#blogTitle h2 {
    font-weight: normal;
    font-size: 17px;/*原始 16px ;font-size: 1.0rem;*/
    line-height: 1.8;
    color: #320f9d;
    font-weight: bold;
    text-align: right;
    float: right;
}
#navigator{
border-radius: 7px;
    background-color:rgba(135,206,205, 0.5);          //标题栏下的颜色

}
- 博客侧边栏公告
<!-- 添加公告栏时钟 -->
<div style="border-top: 1px dashed #ccc;padding: 5px;border-bottom: 1px dashed #ccc;height: 120px;">
<div id="clockdiv">
    <canvas id="dom" width="120" height="120">时钟canvas</canvas>
</div>
十三、页面刷新时随机背景图
- 在页脚 HTML 代码添加如下代码
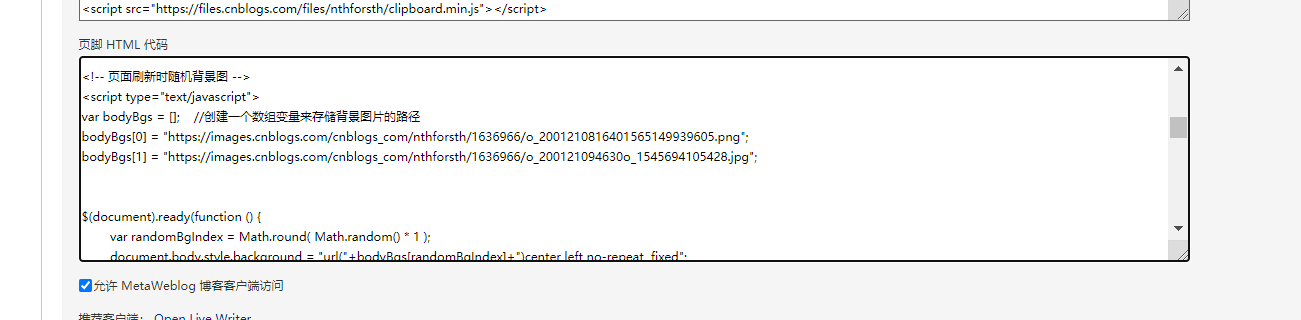
- 代码如下:
<!-- 页面刷新时随机背景图 -->
<script type="text/javascript">
var bodyBgs = [];    //创建一个数组变量来存储背景图片的路径
bodyBgs[0] = "https://images.cnblogs.com/cnblogs_com/nthforsth/1636966/o_2001210816401565149939605.png";
bodyBgs[1] = "https://images.cnblogs.com/cnblogs_com/nthforsth/1636966/o_200121094630o_1545694105428.jpg";


$(document).ready(function () {
	var randomBgIndex = Math.round( Math.random() * 1 );
	document.body.style.background = "url("+bodyBgs[randomBgIndex]+")center left no-repeat  fixed";
	document.body.style.backgroundSize = "cover";
});

</script>
- 备注:图片地址改成自己的图片地址就行,增加多(假设有x)个背景图片时,注意改一下Math.round( Math.random() * (x-1) ); 函数的参数设置。
在文章的结尾,我想说希望本文能对大家有帮助。
喜欢小编的就给我一个关注吧!
作者:落花桂
本文版权归作者和博客园共有,欢迎转载,但未经作者同意必须保留此段声明,且在文章页面明显位置给出原文连接,否则保留追究法律责任的权利。

 浙公网安备 33010602011771号