springboot整合最新版dubbo以及dubbo-admin的安装
一、安装前准备
由于dubbo被阿里捐献给了apache,这次安装admin时,参考网上的资料,地址还是停留在之前的链接,踩了不少坑,这里记录下。
dubbo-admin下载地址:
地址一:https://github.com/apache/incubator-dubbo/releases
该地址2.6版本以上的包中没有dubbo-admin ,2.5x版本的有
地址二:https://github.com/apache/incubator-dubbo-ops
该地址中的dubbo-admin模块被单独拎出来了,springboot方式启动,可以直接运行main方法,或者使用 java -jar 方式启动,很方便,有github账号的可以fork一下,推荐使用这个版本,本文介绍的就是该版本 。
二、dubbo-spring-boot-starter的使用
github地址:https://github.com/alibaba/dubbo-spring-boot-starter 最新版本为2.0 ,本文也是使用的该版本。
2.1、添加依赖
    <dependency>
        <groupId>com.alibaba.spring.boot</groupId>
        <artifactId>dubbo-spring-boot-starter</artifactId>
        <version>2.0.0</version>
    </dependency>
2.2、新建接口模块
目录结构
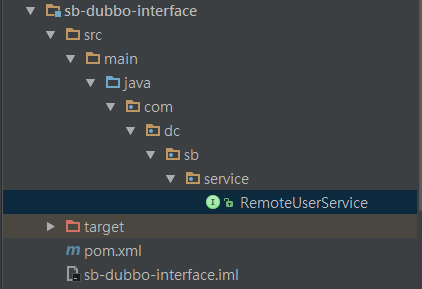
接口类
package com.dc.sb.service;

public interface RemoteUserService {


    String sayHello(String name);


}
2.3、新建provider模块
目录结构
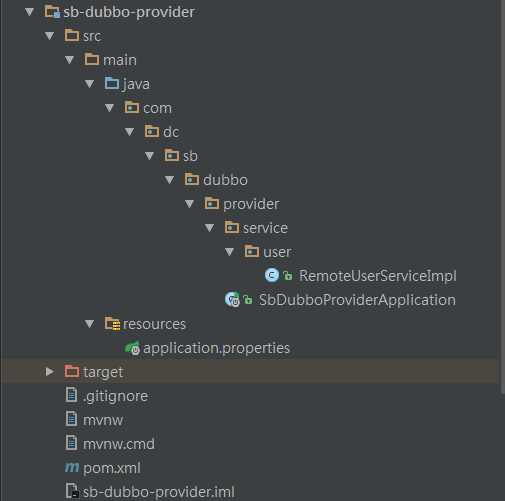
接口实现类
package com.dc.sb.dubbo.provider.service.user;

import com.alibaba.dubbo.config.annotation.Service;
import com.dc.sb.service.RemoteUserService;
import org.slf4j.Logger;
import org.slf4j.LoggerFactory;
import org.springframework.stereotype.Component;

/**
 * dubbo 服务service
 *
 * @author DUCHONG
 * @since 2018-07-03 18:29
 **/
@Component
@Service(version = "1.0.0",timeout = 10000,interfaceClass = RemoteUserService.class)
public class RemoteUserServiceImpl implements RemoteUserService {

    private static final Logger logger = LoggerFactory.getLogger(RemoteUserServiceImpl.class);


    @Override
    public String sayHello(String name) {

        return "Hello "+name;
    }
}
配置文件
server.port=8081
server.context-path=/

spring.application.name=dubbo-spring-boot-starter
spring.dubbo.server=true
spring.dubbo.registry=zookeeper://127.0.0.1:2181
启动类
package com.dc.sb.dubbo.provider;

import com.alibaba.dubbo.spring.boot.annotation.EnableDubboConfiguration;
import org.springframework.boot.SpringApplication;
import org.springframework.boot.autoconfigure.SpringBootApplication;

@SpringBootApplication
@EnableDubboConfiguration
public class SbDubboProviderApplication {

	public static void main(String[] args) {
		SpringApplication.run(SbDubboProviderApplication.class, args);
	}
}
2.4、 消费者模块
目录结构
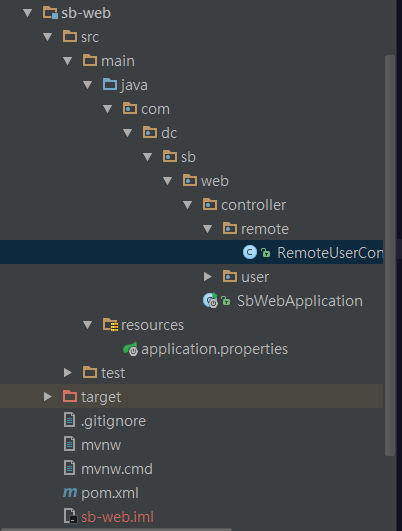
启动类
package com.dc.sb.web;

import com.alibaba.dubbo.spring.boot.annotation.EnableDubboConfiguration;
import com.dc.sb.config.DruidProperties;
import org.mybatis.spring.annotation.MapperScan;
import org.springframework.boot.SpringApplication;
import org.springframework.boot.autoconfigure.SpringBootApplication;
import org.springframework.boot.context.properties.EnableConfigurationProperties;
import org.springframework.context.annotation.ComponentScan;

@SpringBootApplication
@EnableConfigurationProperties({DruidProperties.class})
@MapperScan(basePackages = "com.dc.sb.dao")
@ComponentScan("com.dc.sb.*")
@EnableDubboConfiguration
public class SbWebApplication {

	public static void main(String[] args) {
		SpringApplication.run(SbWebApplication.class, args);
	}
}
配置文件
#server
server.port=8080
server.context-path=/

#mybatis
mybatis.type-aliases-package= com.dc.sb.dao.dataobject
mybatis.mapper-locations= classpath*:META-INF/mybatis/mapper/*.xml

#druid
druid.initialSize= 5
druid.minIdle= 0
druid.maxActive= 20
druid.maxWait= 6000
druid.timeBetweenEvictionRunsMillis= 60000
druid.minEvictableIdleTimeMillis= 300000
druid.validationQuery= SELECT 1 FROM DUAL
druid.testWhileIdle= false
druid.testOnBorrow= false
druid.testOnReturn= false
druid.poolPreparedStatements= true
druid.maxPoolPreparedStatementPerConnectionSize= 20
druid.filters= stat,log4j

#mysql
spring.datasource.driver-class-name= com.mysql.jdbc.Driver
spring.datasource.url= jdbc:mysql://127.0.0.1:3306/test?useUnicode=true&characterEncoding=utf-8&autoReconnect=true&useSSL=false&allowMultiQueries=true
spring.datasource.username= root
spring.datasource.password=root

#redis
spring.redis.host=127.0.0.1
spring.redis.port=6379
spring.redis.password=redis

#dubbo
spring.application.name=dubbo-spring-boot-starter
spring.dubbo.registry=zookeeper://127.0.0.1:2181
引用端
package com.dc.sb.web.controller.remote;


import com.alibaba.dubbo.config.annotation.Reference;
import com.dc.sb.service.RemoteUserService;
import org.springframework.web.bind.annotation.PathVariable;
import org.springframework.web.bind.annotation.RequestMapping;
import org.springframework.web.bind.annotation.RestController;

/**
 * dubbo消费者controller
 * @author DUCHONG
 * @since 2018-07-03 18:44
 **/
@RestController
public class RemoteUserController {

    //timeout 可以不指定,但是version一定要指定 不然会找不到服务 直连需要加url="dubbo://localhost:20880"
    @Reference(version = "1.0.0")
    private RemoteUserService remoteUserService;


    @RequestMapping(value="/dubbo/say/{name}")
    public String sayHello(@PathVariable("name") String name){

        String result=remoteUserService.sayHello(name);
        return result;
    }


}
三、dubbo-admin的启动
下载地址二的包,直接在idea中打开,结构如下:
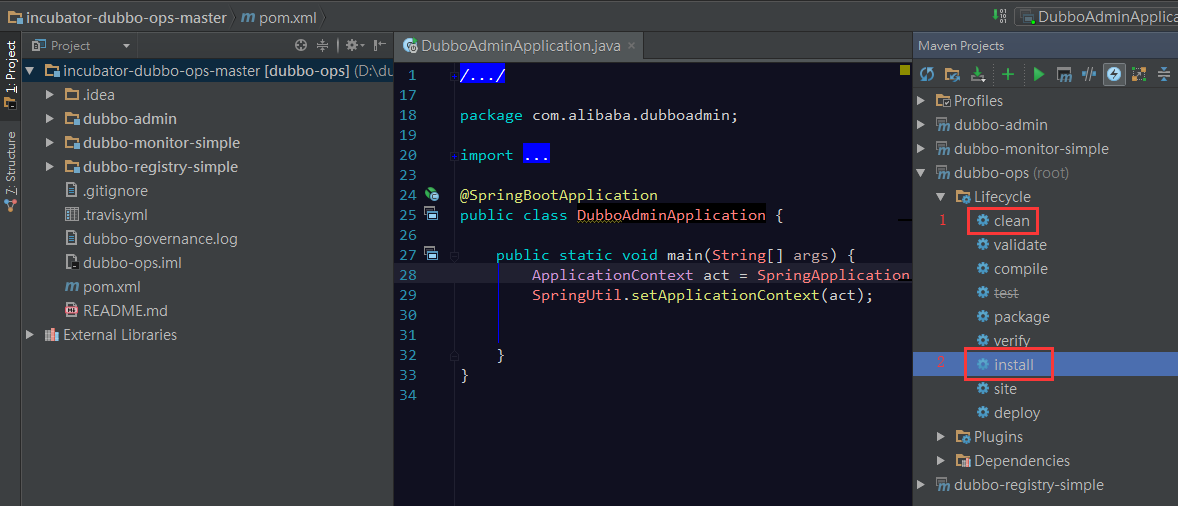
install完成之后,直接右键DubboAdminApplication Run
修改配置文件,位置在 dubbo-admin /src/main/resource下面
#
# Licensed to the Apache Software Foundation (ASF) under one or more
# contributor license agreements.  See the NOTICE file distributed with
# this work for additional information regarding copyright ownership.
# The ASF licenses this file to You under the Apache License, Version 2.0
# (the "License"); you may not use this file except in compliance with
# the License.  You may obtain a copy of the License at
#
#     http://www.apache.org/licenses/LICENSE-2.0
#
# Unless required by applicable law or agreed to in writing, software
# distributed under the License is distributed on an "AS IS" BASIS,
# WITHOUT WARRANTIES OR CONDITIONS OF ANY KIND, either express or implied.
# See the License for the specific language governing permissions and
# limitations under the License.
#

server.port=7001
spring.velocity.cache=false
spring.velocity.charset=UTF-8
spring.velocity.layout-url=/templates/default.vm
spring.messages.fallback-to-system-locale=false
spring.messages.basename=i18n/message
spring.root.password=root
spring.guest.password=guest

dubbo.registry.address=zookeeper://127.0.0.1:2181
根据自己的需要修改,包括dubbo-admin用户名密码,当然zk的配置也是少不了的,具体怎么安装zk,启动以及配置,这里就不多说了,
默认的的用户名和密码为:
root
root

guest
guest
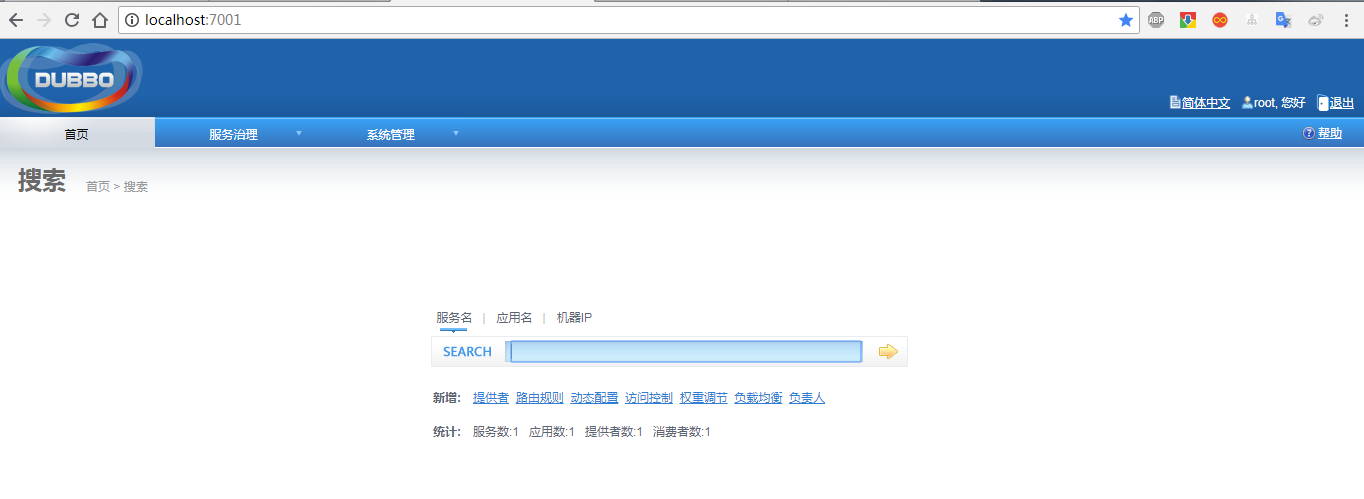
3.1、访问
localhost:7001
首页
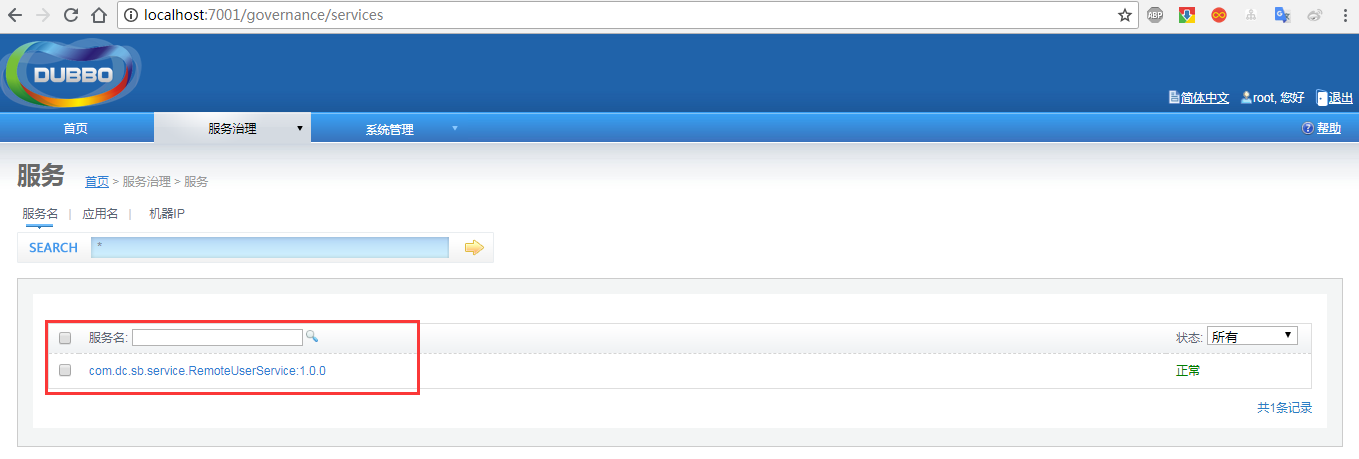
service
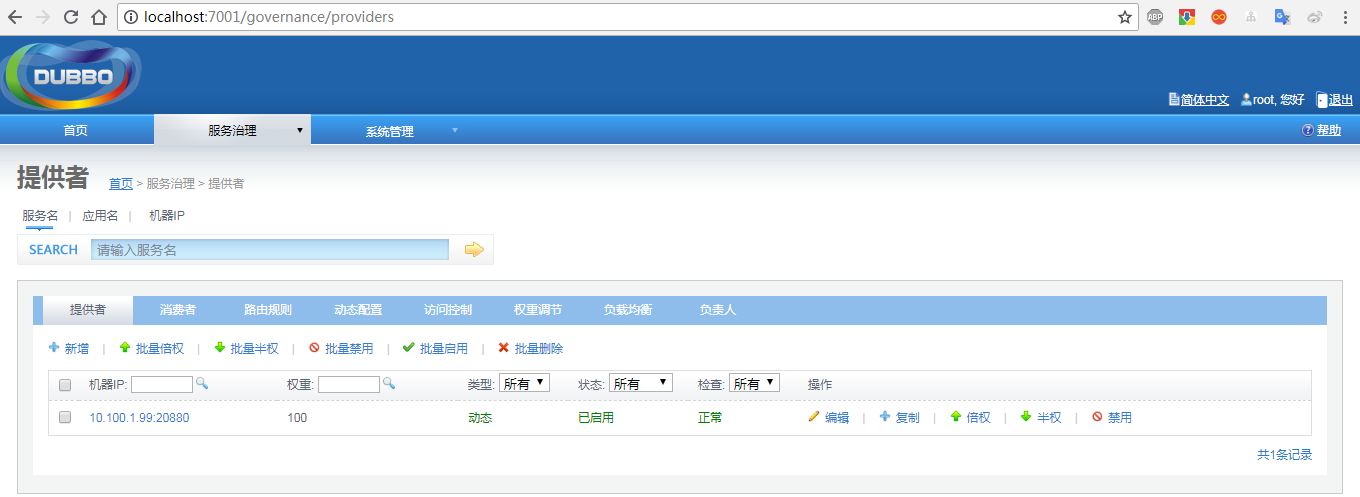
provider
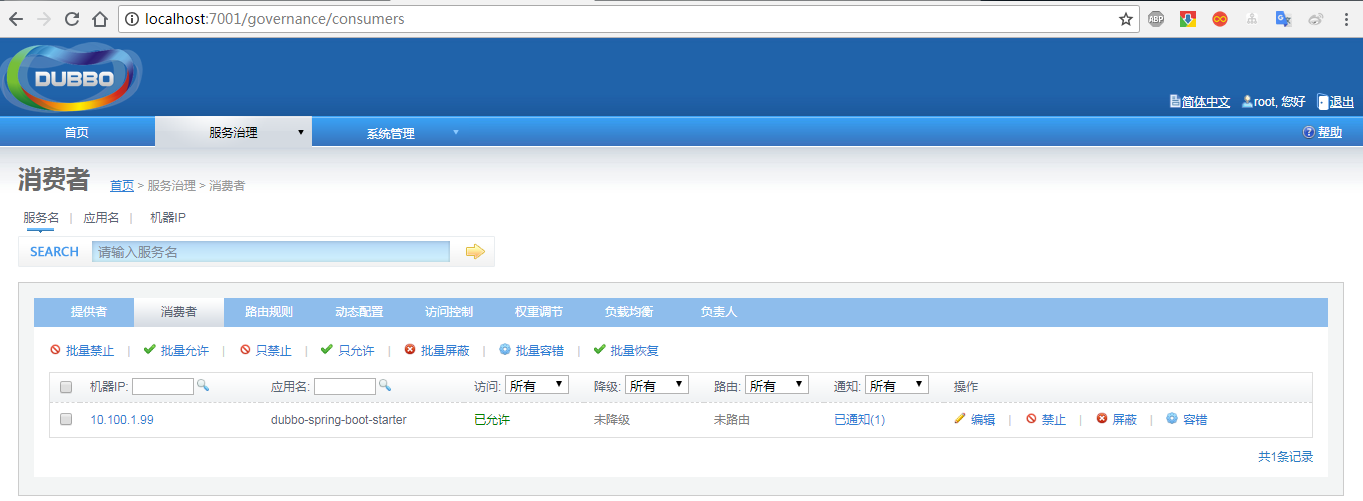
consumer
完整代码已上传github 欢迎fork 传送门


 浙公网安备 33010602011771号