1.前提
安装Jupyter Notebook的前提是需要安装了Python(3.3版本及以上,或2.7版本)
2.安装方法
2.1使用基于Anaconda管理器安装ipthon
jupyter的安装可以使用Anaconda软件进行安装
2.2依赖于ipython内核进行安装
如果没有安装python,首先下载python3 并安装,并升级pip
python -m pip install --upgrade pip
安装ipython
pip install ipython
安装jupiter
pip install jupyter

安装成功提示有:jupyter、jupyter-client、jupyter-console、jupyter-core。
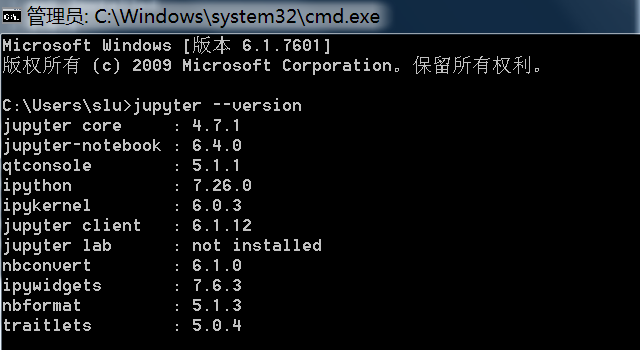
查看安装版本
jupyter --version

配置Jupyter notebook目录路径
安装完成先不要启动,先配置目录路径。要不然默认打开和保存Jupyter notebook文件目录在C盘。
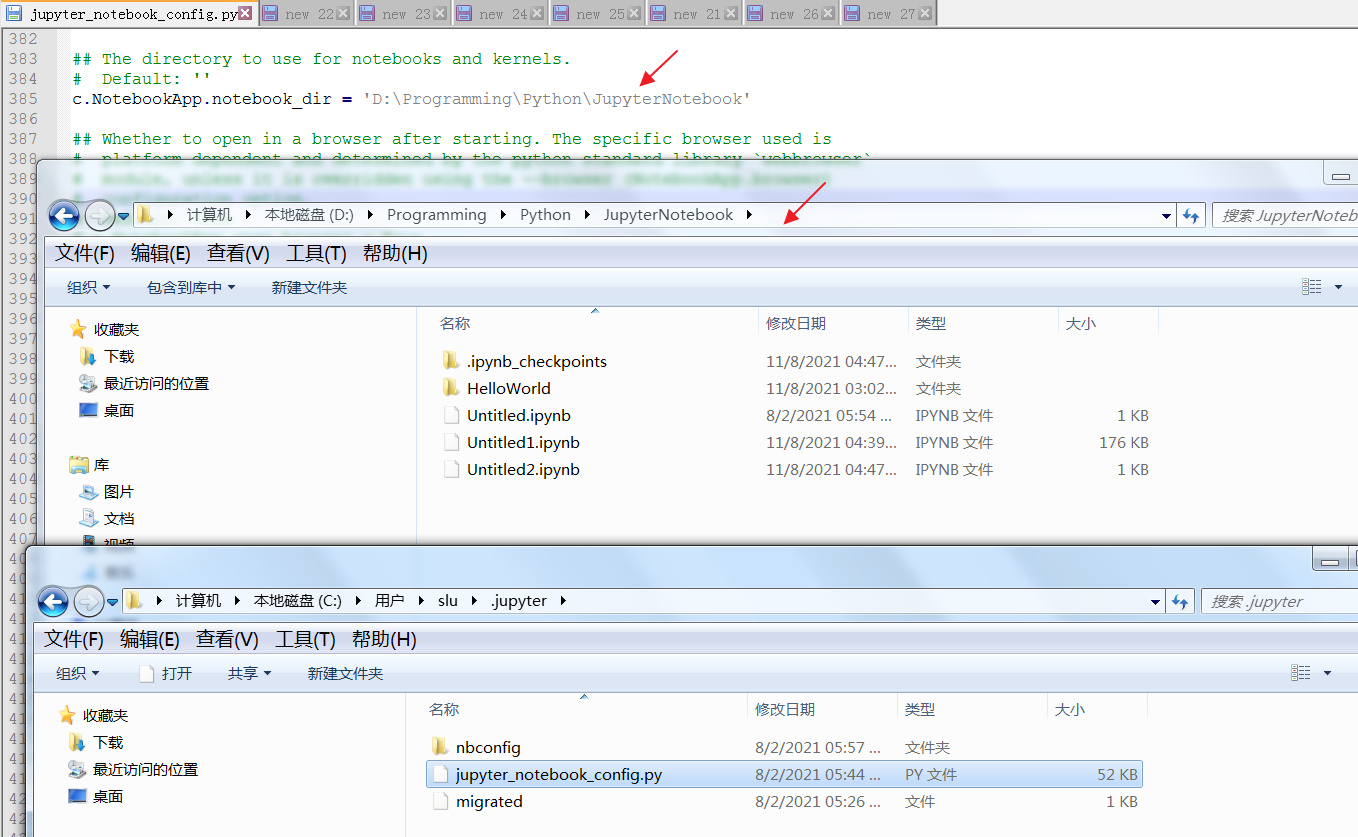
打开cmd命令提示符窗口输入:jupyter notebook--generate-config,生成默认配置文件到C:\Users\Administrator\.jupyter\jupyter_notebook_config.py
注意:一定注意盘符后面是双斜杠 \\

编辑配置文件jupyter_notebook_config.py,修改Jupyter notebook文件的目录路径: c.NotebookApp.notebook_dir

如何使用使用jupyter notebook
启动jupyter notebook
1)在cmd中国年直接输入:Jupyter notebook然后回车即可打开
2)在windows explorer的地址栏中输入:Jupyter notebook
一次安装,到处编写
可以把jupyter notebook安装到服务器上,由于是网页,所以电脑可以打开写、平板打开也能写,手机也行。
这样的好处还在于更换电脑后,不需要再配置环境了,安装过的库仍然存在于你的服务器上。
修改配置文件选项
c.NotebookApp.ip = '*' #允许所有IP访问
c.NotebookApp.port = 8888 #修改端口号,默认8888
然后执行如下命令:
nohup jupyter notebook --allow-root > push.log 2>&1 &
push.log中。然后浏览器打开服务器地址:端口


 浙公网安备 33010602011771号