二、centos7.6安装harbor
先决条件:必须安装docker和docker-compose并且启动docker
1、安装docker
安装必要系统工具
yum install -y yum-utils device-mapper-persistent-data lvm2
添加软件源信息
yum-config-manager --add-repo http://mirrors.aliyun.com/docker-ce/linux/centos/docker-ce.repo
更新yum缓存
yum makecache fast
安装docker-ce
yum -y install docker-ce
启动docker后台服务
systemctl start docker
设置docker开机自启动
systemctl enable docker
2、安装docker-compose
查看有没有安装docker-compose
docker-compose -v
下载二进制文件
curl -L https://github.com/docker/compose/releases/tag/1.25.0/docker-compose-`uname -s`-`uname -m` -o /usr/local/bin/docker-compose
赋予二进制文件可执行权限
chmod +x /usr/local/bin/docker-compose
根据自己的情况决定是否安装命令补全功能
yum install bash-completion
curl -L https://raw.githubusercontent.com/docker/compose/1.25.0/contrib/completion/bash/docker-compose -o /etc/bash_completion.d/docker-compose
测试是否安装成功
docker-compose --version
3、 harbor安装
下载
wget -P /usr/local/src/ https://github.com/goharbor/harbor/releases/download/v2.8.1/harbor-online-installer-v2.8.1.tgz
解压
tar zxf harbor-online-installer-v2.8.1.tgz -C /usr/local/
修改配置文件
cd /usr/local/harbor/
#复制基础配置文件
cp harbor.yml.tmpl  harbor.yml
# 创建用于存放harbor的持久化数据目录
mkdir -p /data/harbor
# 修改配置
vim harbor.yml
主要修改参数:
hostname: 192.168.10.10          //需要写IP地址或者域名
#http配置
http:
# port for http, default is 80. If https enabled, this port will redirect to https port
port: 80

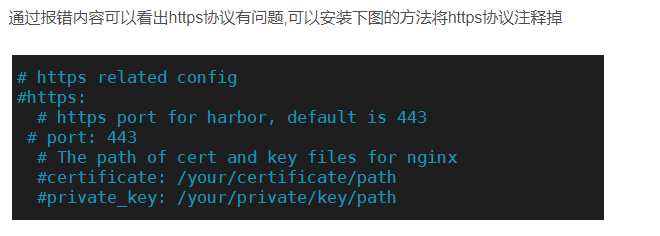
#https配置(如不需要 需要注释掉Https配置)

# https related config
#https:(注释掉)
# https port for harbor, default is 443
 #port: 443(注释掉)
# The path of cert and key files for nginx
 #certificate: /your/certificate/path(注释掉)
 #private_key: /your/private/key/path(注释掉)

harbor_admin_password: Harbor12345         //admin密码

#数据库配置
database:
# The password for the root user of Harbor DB. Change this before any production use.
password: root123
# The maximum number of connections in the idle connection pool. If it <=0, no idle connections are retained.
max_idle_conns: 50
# The maximum number of open connections to the database. If it <= 0, then there is no limit on the number of open connections.
# Note: the default number of connections is 100 for postgres.
max_open_conns: 100

#持久化数据目录
data_volume: /data/harbor
……
执行安装
./install.sh
如果报错:ERROR:root:Error: The protocol is https but attribute ssl_cert is not set
vim harbor.yml

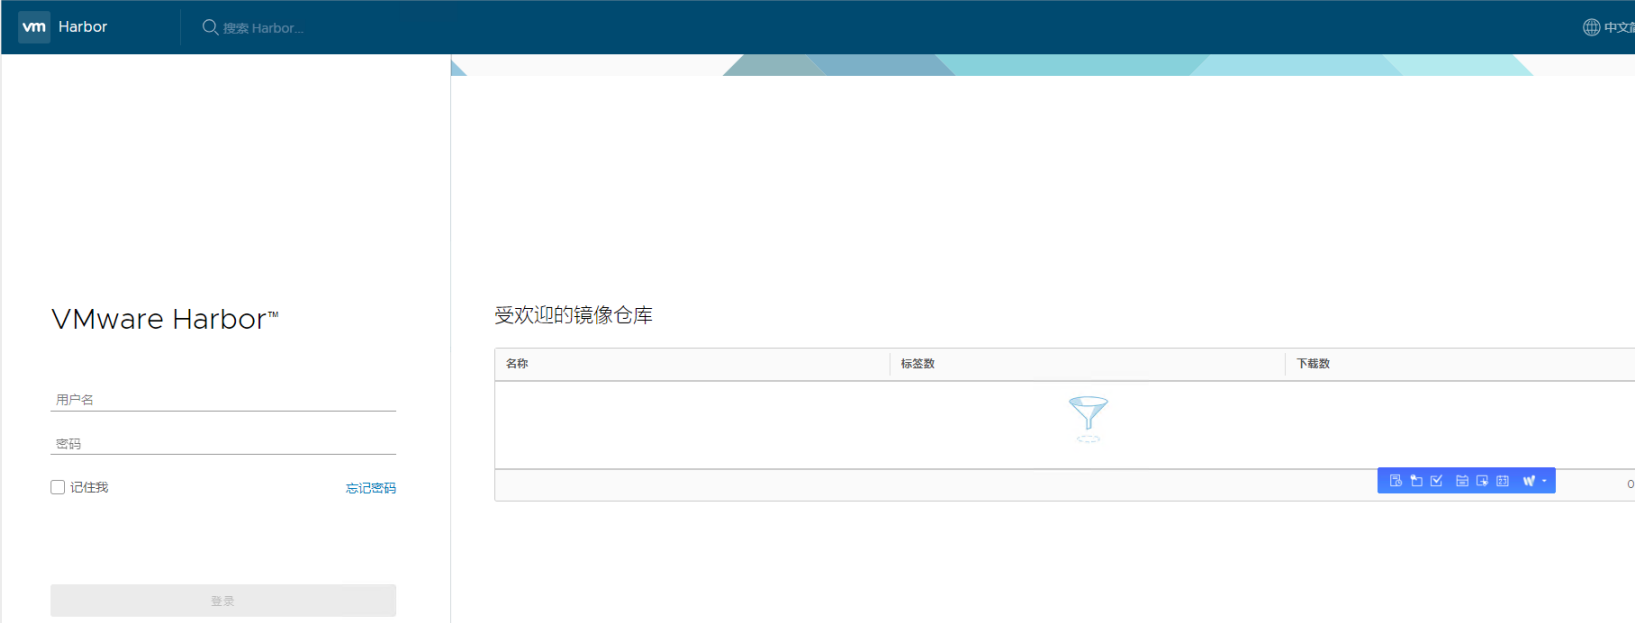
访问
http://192.168.10.10
默认账户密码:admin/Harbor12345 登录后修改密码

启动和重启
Harbor的日常运维管理是通过docker-compose来完成的,Harbor本身有多个服务进程,都放在docker容器中运行,可以通过docker ps命令查看
# 切换到harbor安装目录
cd /usr/local/harbor
# 查看Harbor
docker-compose ps
# 启动Harbor
docker-compose start
# 停止Harbor
docker-compose stop
# 重启Harbor
docker-compose restart
如果是用 docker-compose start 会报错:
ERROR: for nginx UnixHTTPConnectionPool(host='localhost', port=None): Read timed out. (read timeout=60)
ERROR: for harbor-log UnixHTTPConnectionPool(host='localhost', port=None): Read timed out. (read timeout=60)
ERROR: An HTTP request took too long to complete. Retry with --verbose to obtain debug information.
因此使用 docker-compose up -d 启动
命令行登录
docker login 192.168.10.10 -u admin -p Harbor12345
第一次登录都会报错:Error response from daemon: Get "https://192.168.10.10/v2/": dial tcp 10.130.77.48:443: connect: no route to host
原因:Docker自从1.3.X之后docker registry交互默认使用的是HTTPS,但是我们搭建私有镜像默认使用的是HTTP服务,所以与私有镜像交时出现以上错误。
解决:修改Docker的配置文件/etc/docker/daemon.json :
# vim /etc/docker/daemon.json
{
"registry-mirrors": ["https://k728i8z5.mirror.aliyuncs.com"],
#如更改过harbor.yml的http端口需要加上端口号
"insecure-registries":["192.168.10.10:80"]
}
# 然后依次执行如下命令:
docker-compose stop
systemctl daemon-reload
systemctl restart docker
docker-compose up -d
开机自启动
- 配置文件
cd /etc/systemd/system
vim harbor.service[Unit] Description=Harbor After=docker.service systemd-networkd.service systemd-resolved.service Requires=docker.service Documentation=http://github.com/vmware/harbor [Service] Type=simple Restart=on-failure RestartSec=5 ExecStart=/usr/local/bin/docker-compose -f /usr/local/harbor/docker-compose.yml up ExecStop=/usr/local/bin/docker-compose -f /usr/local/harbor/docker-compose.yml down [Install] WantedBy=multi-user.target - 配置权限
chmod 755 harbor.service - 开启开机自启
systemctl daemon-reload systemctl enable harbor systemctl start harbor systemctl status harbor - 验证
reboot
systemctl status harbor
4、上传和下载
客户端拉取镜像
docker pull nginx
客户端将镜像打tag
命令格式:docker tag SOURCE_IMAGE[:TAG] harbor/library/IMAGE[:TAG]
docker tag nginx:latest 192.168.10.10/library/nginx:latest
客户端push镜像之前,先登录服务端
docker login 192.168.10.10 -u admin -p Harbor12345
客户端push
push命令格式: docker push harbor/library/IMAGE[:TAG]
docker push 192.168.10.10/library/nginx:latest
5、配置https
ssl:
前提:
- 拥有一个域名
- 域名A解析指向本地Harbor服务器地址
- 申请子域SSL证书(nginx类型)
修改配置文件,启用https
# Configuration file of Harbor

# The IP address or hostname to access admin UI and registry service.
# DO NOT use localhost or 127.0.0.1, because Harbor needs to be accessed by external clients.
hostname: harbor.ninexch.com #更改为本地解析IP的域名

# http related config
http:
  # port for http, default is 80. If https enabled, this port will redirect to https port
  port: 80
# https related config
https: #开启Https
  # https port for harbor, default is 443
  port: 443 #开启端口
  # The path of cert and key files for nginx
  certificate: /data/cert/harbor.ninexch.com.pem #指定SSL公有证书
  private_key: /data/cert/harbor.ninexch.com.key #指定SSL私有证书
重新编译配置文件
./prepare
docker-compose down -v
docker-compose up -d


【推荐】国内首个AI IDE,深度理解中文开发场景,立即下载体验Trae
【推荐】编程新体验,更懂你的AI,立即体验豆包MarsCode编程助手
【推荐】抖音旗下AI助手豆包,你的智能百科全书,全免费不限次数
【推荐】轻量又高性能的 SSH 工具 IShell:AI 加持,快人一步
· 震惊!C++程序真的从main开始吗?99%的程序员都答错了
· 【硬核科普】Trae如何「偷看」你的代码?零基础破解AI编程运行原理
· 单元测试从入门到精通
· 上周热点回顾(3.3-3.9)
· winform 绘制太阳,地球,月球 运作规律