stm32f103移植lvgl
这篇需做前期工作:https://www.cnblogs.com/njit-sam/p/17699205.html
LVGL官方主页:https://lvgl.io/
当你想快速上手时,点击这个:https://docs.lvgl.io/master/get-started/quick-overview.html
这里,官方建议可以先在电脑上模拟,按照步骤一步步来就可以了,笔者选择的是CodeBlocks,配合上examples,可以有个大概得了解
接着就可以选在一个硬件平台去做移植相关的工作,笔者手里的是stm32
按照文档,首先下载lvgl的源码,依照官方文档往下做
整个过程中,主要改下面几个东西:
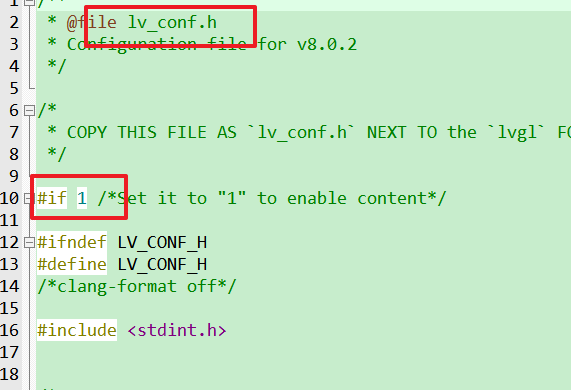
1.lv_conf.h中#if 0改为#if 1
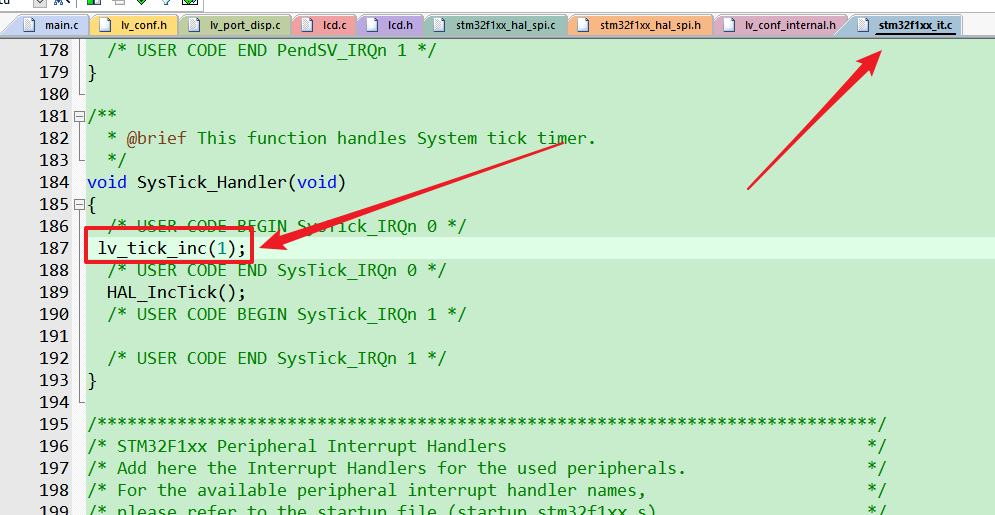
2.给lvgl提供一个心跳,我是在stm32中断文件里面加的,1ms进入累加一次
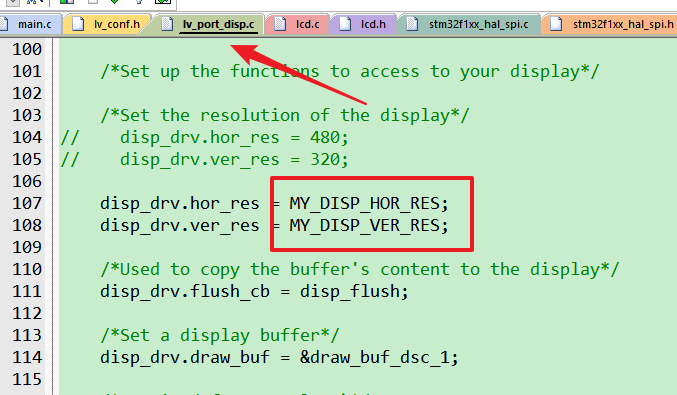
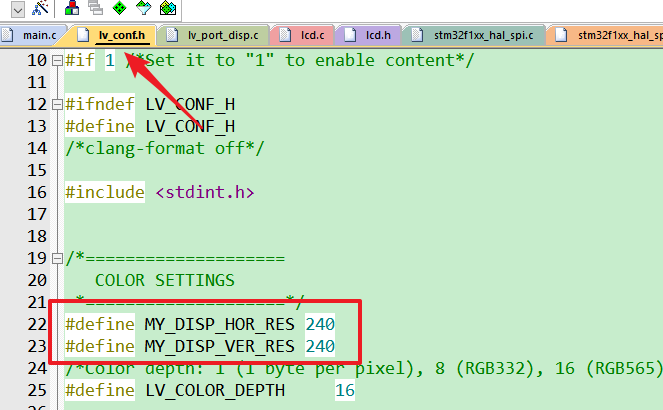
3.更改屏幕的分辨率
4.更改lv_port_disp.c绘制函数
/*Flush the content of the internal buffer the specific area on the display
 *You can use DMA or any hardware acceleration to do this operation in the background but
 *'lv_disp_flush_ready()' has to be called when finished.*/
static void disp_flush(lv_disp_drv_t * disp_drv, const lv_area_t * area, lv_color_t * color_p)
{
    /*The most simple case (but also the slowest) to put all pixels to the screen one-by-one*/

//    int32_t x;
//    int32_t y;
//    for(y = area->y1; y <= area->y2; y++) {
//        for(x = area->x1; x <= area->x2; x++) {
//            /*Put a pixel to the display. For example:*/
//            /*put_px(x, y, *color_p)*/
//            color_p++;
//        }
//    }
     LCD_Fill_Color(area->x1 , area->y1, area->x2, area->y2,(uint16_t*)color_p);
    /*IMPORTANT!!!
     *Inform the graphics library that you are ready with the flushing*/
    lv_disp_flush_ready(disp_drv);
}
其中,LCD_Fill_Color这个函数是lcd屏幕驱动里面实现的,这里一定要主要这个接口的编写
我就是因为屏幕驱动函数之前写的不好,在这浪费了不少时间
/******************************************************************************
      函数说明:在指定区域填充颜色
      入口数据:xsta,ysta   起始坐标
                xend,yend   终止坐标
      返回值:  无
******************************************************************************/
void lv_example_get_started_1(void)
{
    /*Change the active screen's background color*/
    lv_obj_set_style_bg_color(lv_scr_act(), lv_color_hex(0x003a57), LV_PART_MAIN);

    /*Create a white label, set its text and align it to the center*/
    lv_obj_t * label = lv_label_create(lv_scr_act());
    lv_label_set_text(label, "Hello world");
    lv_obj_set_style_text_color(lv_scr_act(), lv_color_hex(0xffffff), LV_PART_MAIN);
    lv_obj_align(label, LV_ALIGN_CENTER, 0, 0);
}
void LCD_Fill_Color(uint16_t xsta,uint16_t ysta,uint16_t xend,uint16_t yend,uint16_t* color)
{
    uint16_t i,j;
    LCD_Address_Set(xsta,ysta,xend,yend);      //设置光标位置
    for(i=ysta;i<=yend;i++)
    {
        for(j=xsta;j<=xend;j++)
        LCD_WR_DATA(*(color++));//设置光标位置
    }
}
最后,在main.c先初始化,在调用一个例子即可
lv_init();
lv_port_disp_init();
lv_port_indev_init();
添加调用示例,即可开启你的hello world
void lv_example_get_started_1(void)
{
    /*Change the active screen's background color*/
    lv_obj_set_style_bg_color(lv_scr_act(), lv_color_hex(0x003a57), LV_PART_MAIN);

    /*Create a white label, set its text and align it to the center*/
    lv_obj_t * label = lv_label_create(lv_scr_act());
    lv_label_set_text(label, "Hello world");
    lv_obj_set_style_text_color(lv_scr_act(), lv_color_hex(0xffffff), LV_PART_MAIN);
    lv_obj_align(label, LV_ALIGN_CENTER, 0, 0);
}
特别的,在配置cubemx的时候,堆和栈的大小默认有点小,我放大了一倍,不然会报错
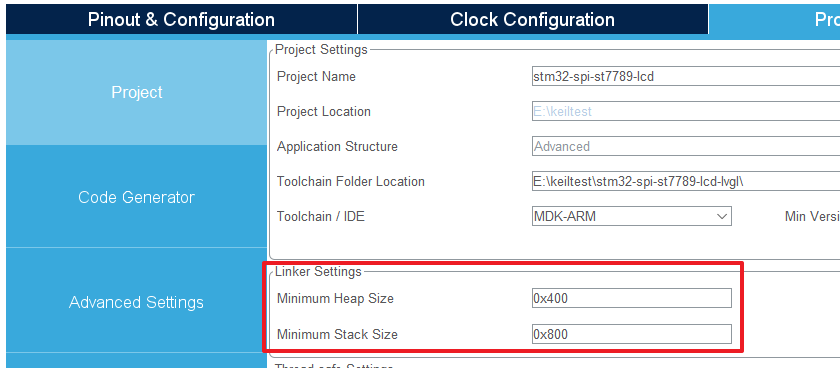
除此以外,目前显示动画感觉不是太顺畅,后期优化一下,看看有没有改进


【推荐】国内首个AI IDE,深度理解中文开发场景,立即下载体验Trae
【推荐】编程新体验,更懂你的AI,立即体验豆包MarsCode编程助手
【推荐】抖音旗下AI助手豆包,你的智能百科全书,全免费不限次数
【推荐】轻量又高性能的 SSH 工具 IShell:AI 加持,快人一步
· 震惊!C++程序真的从main开始吗?99%的程序员都答错了
· 别再用vector<bool>了!Google高级工程师:这可能是STL最大的设计失误
· 【硬核科普】Trae如何「偷看」你的代码?零基础破解AI编程运行原理
· 单元测试从入门到精通
· 上周热点回顾(3.3-3.9)