Mybatis整合Spring与Spingboot的整合--个人笔记
@ConfigurationProperties
ConfigurationProperties(prefix="nxj")
ignoreInvalidFields
@Value
@Value("${person.name}")
@Value("#{11*2+1}")
@Value("你好")
@Value("true")
| @ConfigurationProperties | @Value | |
|---|---|---|
| 松散绑定 | 支持 | 不支持 |
| 全部赋值 | 支持 | 不支持(只能一个个赋值) |
| JSR303 | 支持 | 不支持 |
| SPLE | 不支持 | 支持 |
@ImportResource
@ImportResource(value={"classpath:applicationContext.xml"})
导入Spring的配置文件,让其生效
还有一些注解比如说@Configuration,@Bean等等等等,这些在Spring注解版中都很清楚了,这里就不需要再记录出来了。
配置文件中:
在application.yml或者properties中直接使用${}取值,`name: ${person.name1:hello} `意思就是如果能取到person.name1则取,否则赋值为hello【就是hello字符串】
Profiles
多环境之间需要切换的时候
	1.使用application-xxx.properties
	2.直接在application.yml中使用 '---' 多文档块分割


使用 spring.profiles.active=dev 进行切换
spring:
  profiles:
    active: dev
#最上面文档快指定激活那个哪个文档块
server:
  port: 8081
---
spring:
  config:
    activate:
      on-profile: dev
server:
  port: 8082
🐾自动配置原理
起源:
@SpringBootApplication
	@EnableAutoConfiguration
		@Import(AutoConfigurationImportSelector.class)
		其中AutoConfigurationImportSelector是一个selector,为我们加载了类路径下:META-INF、spring.factories
		这就是自动配置的起源,正因为把这些AutoConfiguration自动加入到了容器中,后面的自动配置才会开始。
示例:
以其中的一个
HttpEncodingAutoConfiguration为例进行说明
//这是一个springboot的配置类【代理设置成false,这样在内部调用@Bean的方法去赋值的时候,直接就创建一个新的对象了,如果设置成true,则会先到ioc中去寻找】
@Configuration(proxyBeanMethods = false)

//将ServerProperties加入到ioc容器中,并且这个类是绑定springboot的配置文件的
@EnableConfigurationProperties(ServerProperties.class)

//判断当前是不是一个Web应用,如果是则导入,否则不
@ConditionalOnWebApplication(type = ConditionalOnWebApplication.Type.SERVLET)

//判断当前是否存在CharacterEncodingFilter这个类【是mvc中用于字符编码的】,如果是则导入,否则不
@ConditionalOnClass(CharacterEncodingFilter.class)

//判断配置文件中是否存在server.servlet.encoding.enabled=true,当然我们指定如果配置文件中没有指定server.servlet.encoding.enabled,我们默认为true
@ConditionalOnProperty(prefix = "server.servlet.encoding", value = "enabled", matchIfMissing = true)
public class HttpEncodingAutoConfiguration {
    private final Encoding properties;

    //我们只有一个有参构造器,因此,properties会自动从ioc容器中取值(也就是隐式调用@Autowired,这个在Spring注解版中了解的已经很清楚了)
	public HttpEncodingAutoConfiguration(ServerProperties properties) {
		this.properties = properties.getServlet().getEncoding();
	}

    //其中方法体中的properties就是上方的属性
	@Bean
    //如果容器中没有这个组件则加载
	@ConditionalOnMissingBean
	public CharacterEncodingFilter characterEncodingFilter() {
		CharacterEncodingFilter filter = new OrderedCharacterEncodingFilter();
		filter.setEncoding(this.properties.getCharset().name());
				filter.setForceRequestEncoding(this.properties.shouldForce(Encoding.Type.REQUEST));
			filter.setForceResponseEncoding(this.properties.shouldForce(Encoding.Type.RESPONSE));
		return filter;
	}
//绑定配置文件
@ConfigurationProperties(prefix = "server", ignoreUnknownFields = true)
public class ServerProperties {
所以我们能在配置文件中配置的,都是来自于**Properties这些。
精髓:
- springboot在启动的时候会加载大量的自动配置类
- 我们看我们需要的功能springboot有没有默认写好的自动配置类
- 如果有的话,我们看下自动配置类中配置了那些组件,有没有我们需要的,如果有且满足我们的要求,我们就不需要再来自动配置了
- 自动配置类在添加组件的时候,会从properties中获取属性,我们可以在配置文件中指定这些属性
xxxAutoConfiguration:自动配置类
xxxProperties:封装配置文件中相关属性
日志
在springboot中,日志接口统一为slf4j,其他的接口通过通过适配层适配,具体实现类使用logback,其他的实现通过适配层适配logback
使用示例:
//import org.slf4j.Logger;
Logger logger = LoggerFactory.getLogger(getClass());

@Test
void test01(){
    //优先级由低到高
    logger.trace("这是trace");
    logger.debug("这是debug");
    //info是默认级别(可在配置文件中修改)logging.level.com.jd.nxj=debug
    logger.info("这是info");
    logger.warn("这是warn");
    logger.error("这是error");

    //logging.file.name= E:\Code\2020\inJDstudy\my-springboot\03-spring-boot-logging\src\main\java\com\jd\nxj\a.txt
    //如果设置,则写入文本,否则只在控制台输出
}
logging: level: com: jd: nxj: debug #配置了logging.file.name则输出到指定文件(也会在控制台打印),否则仅仅在控制台打印 file: name: E:\Code\2020\inJDstudy\my-springboot\a.txt
整合Mybatis
Mybatis注解版
- springboot配置数据源(spring.datasource等)
- 创建mapper,其中mapper上方标注执行sql方法,并将其加入到容器中@Compent
- 然后在ioc容器中获取【@Autowired】即可使用
//这是一个操作数据库的mapper
@Mapper //或者在启动类上标注@MapperScan("")
@Component
public interface UserMapper {
    @Select("select * from z1")
    public List<User> queryAllUser();

    @Select("select * from z1 where id=#{id}")
    public User queryUserById(Integer id);

    //@Options用来设置id是我的自增主键,我插入的时候,直接返回给我的带自增主键的,否则不写的话,就返回给我null
    @Options(useGeneratedKeys = true,keyProperty = "id")
    @Insert("insert into z1 (name,age) values (#{name},#{age})")
    public int insertUser(User user);
}
//这是controller类里面的内容 @Autowired UserMapper userMapper; @ResponseBody @GetMapping("/user") public List<User> queryAllUser(){ return userMapper.queryAllUser(); } @ResponseBody @GetMapping("/use/{id}") public User queryAllUser(@PathVariable("id") Integer id){ return userMapper.queryUserById(id); } @ResponseBody @GetMapping("/userinsert") public User insertUser(User user){ userMapper.insertUser(user); return user; }
Mybatis配置文件版
- springboot配置数据源(spring.datasource等)
- 创建mapper
- 可以创建mybatis的配置文件
- 创建mapper对应实现的xml
- 在springboot的配置文件中绑定mabatis的配置文件与mapper.xml文件
- 从ioc中获取即可调用
1.springboot配置数据源(spring.datasource等)
spring:
  datasource:
    url: jdbc:mysql://localhost:3306/test?serverTimezone=GMT%2B8
    username: root
    password: 123456
    driver-class-name: com.mysql.cj.jdbc.Driver
2.创建mapper
@Component
@Mapper
public interface UserXmlMapper {
    public List<User> queryAllUser();

    public User queryUserById(Integer id);

    public int insertUser(User user);
}
3.可以创建mybatis的配置文件
<?xml version="1.0" encoding="UTF-8" ?>
<!DOCTYPE configuration
        PUBLIC "-//mybatis.org//DTD Config 3.0//EN"
        "http://mybatis.org/dtd/mybatis-3-config.dtd">
<configuration>
	<!--这是mybatis的主配置文件-->
</configuration>
4.创建mapper对应实现的xml
<?xml version="1.0" encoding="UTF-8" ?>
<!DOCTYPE mapper
        PUBLIC "-//mybatis.org//DTD Mapper 3.0//EN"
        "http://mybatis.org/dtd/mybatis-3-mapper.dtd">
<mapper namespace="com.example.springmybtis.mapper.UserXmlMapper">
    <!--这里就是让这个xml配置文件绑定UserXmlMapper,作为它的实现,我只要把它与Mybatis的配置文件加入到ioc中即可使用了-->

    <select id="queryAllUser" resultType="com.example.springmybtis.bean.User">
        select * from z1
    </select>

    <select id="queryUserById" resultType="com.example.springmybtis.bean.User">
        select * from z1 where id=#{id}
    </select>

    <insert id="insertUser">
        insert into z1 (name,age) values (#{name},#{age});
    </insert>
</mapper>
5.在springboot的配置文件中绑定mabatis的配置文件与mapper.xml文件
mybatis:
  config-location: classpath:mybatis/mybatis-config.xml  #指定全局配置文件的位置
  mapper-locations: classpath:mybatis/mapper/*.xml	#指定sql映射文件的位置
6.从ioc中获取即可调用
@Controller
public class UserXmlController {
    @Autowired
    UserXmlMapper userXmlMapper;

    @GetMapping("/all")
    @ResponseBody
    public List<User> getAllUser(){
        return userXmlMapper.queryAllUser();
    }
}
整合Mybatis-plus版
1.实体类
@Data
@ToString
@NoArgsConstructor
@AllArgsConstructor
//@Entity
//@Table(name = "t_type")
@TableName(value = "t_type") // 指定表明
public class Type {

    private Long id;

    private String name;

    @TableField(exist = false)
    private List<Blog> blogs;
}
2.Dao层
public interface TypeDao  extends BaseMapper<Type> {

    int saveType(Type type);

    Type getTypeById(Long id);
}
3.如果想实现自定义sql则编写xml
<?xml version="1.0" encoding="UTF-8" ?>
<!DOCTYPE mapper
        PUBLIC "-//mybatis.org//DTD Mapper 3.0//EN"
        "http://mybatis.org/dtd/mybatis-3-mapper.dtd">
<mapper namespace="com.blog.nxj.dao.TypeDao">
    <!--这里就是让这个xml配置文件绑定Mapper,作为它的实现,我只要把它与Mybatis的配置文件加入到ioc中即可使用了-->

    <sql id="t_types_column">
        name
    </sql>

    <insert id="saveType">
        insert into t_type (name) values (#{name});
    </insert>

    <select id="getTypeById" resultType="com.blog.nxj.po.Type">
        select * from t_type where id = #{id}
    </select>
</mapper>
4.编写Service
public interface TypeService extends IService<Type> {

    int saveType(Type type);

    Type getTypeById(Long id);

    Page<Type> listType(Pageable pageable);

    Type updateType(Type type);

    void deleteType(Type type);
}
5.编写实现类
@Service
/*mybatis-plus查询表明如何变化*/
public class TypeServiceImpl extends ServiceImpl<TypeDao, Type> implements TypeService {

    @Autowired
    TypeDao typeDao;

    @Override
    public int saveType(Type type) {
        int saveCount = typeDao.saveType(type);
        return saveCount;
    }

    @Override
    public Type getTypeById(Long id) {
        Type typeById = typeDao.getTypeById(id);
        return typeById;
    }

    @Override
    public Page<Type> listType(Pageable pageable) {
        return null;
    }

    @Override
    public Type updateType(Type type) {
        return null;
    }

    @Override
    public void deleteType(Type type) {

    }
}
7.配置文件
mybatis-plus则所有代码在mybatis-plus开头的地方书写mybatis-plus: # xml扫描,多个目录用逗号或者分号分隔(告诉 Mapper 所对应的 XML 文件位置) mapper-locations: classpath:mybatis/mapper/*.xml configuration: # 是否开启自动驼峰命名规则映射:从数据库列名到Java属性驼峰命名的类似映射 map-underscore-to-camel-case: true这样后,就可以直接使用了!
springboot启动配置原理
只要看到
getSpringFactoriesInstances这个方法,它就是从类路径下META-INF/spring.factories下获取相关信息Bootstrapper ApplicationContextInitializer ApplicationListener
1.创建SpringApplication对象
public SpringApplication(ResourceLoader resourceLoader, Class<?>... primarySources){

     this.resourceLoader = resourceLoader;
     Assert.notNull(primarySources, "PrimarySources must not be null");

     this.primarySources = new LinkedHashSet<>(Arrays.asList(primarySources));
     //推断是是一个WebApplicationType什么类型的
     this.webApplicationType = WebApplicationType.deduceFromClasspath();

     this.bootstrappers = new ArrayList<>(getSpringFactoriesInstances(Bootstrapper.class));
     //获取类路径下META-INF/spring.factories下ApplicationContextInitializer配置的Initializer
        setInitializers((Collection) 				getSpringFactoriesInstances(ApplicationContextInitializer.class));
    //获取类路径下META-INF/spring.factories下ApplicationListener配置的相关的Listener
     setListeners((Collection) getSpringFactoriesInstances(ApplicationListener.class));
     this.mainApplicationClass = deduceMainApplicationClass();
}
2.执行run方法
public ConfigurableApplicationContext run(String... args) {
    StopWatch stopWatch = new StopWatch();
    stopWatch.start();
    DefaultBootstrapContext bootstrapContext = createBootstrapContext();
    ConfigurableApplicationContext context = null;

    //设置java.awt相关的,一般我们也不用
    configureHeadlessProperty();

    //从类路径下的META-INF/spring.factories中获取所有的SpringApplicationRunListener
    SpringApplicationRunListeners listeners = getRunListeners(args);

    //回调所有SpringApplicationRunListeners的starting方法
    listeners.starting(bootstrapContext, this.mainApplicationClass);
    try {

        //封装命令行参数
        ApplicationArguments applicationArguments = new DefaultApplicationArguments(args);

        //准备环境
        ConfigurableEnvironment environment = prepareEnvironment(listeners, bootstrapContext, applicationArguments);
        	//获取或者创建环境,然后配置管径
        	//回调SpringApplicationRunListener的environmentPrepared方法

        //设置环境中需要忽略的组件信息
        configureIgnoreBeanInfo(environment);

        Banner printedBanner = printBanner(environment);

        //创建ioc容器
        context = createApplicationContext();

        //设置context的applicationStartup属性
        context.setApplicationStartup(this.applicationStartup);

        //准备上下文
        prepareContext(bootstrapContext, context, environment, listeners, applicationArguments, printedBanner);
        	//设置环境
        	//注册一些内部组件
        	//获取所有的ApplicationContextInitializer【上方】,并调用其initialize方法
        	//回调SpringApplicationRunListener的contextPrepared方法
        	//全部执行完最后回调SpringApplicationRunListener的contextLoaded方法

        //刷新容器,这里就是和spring原理一样,BeanPostProcessors或者组件注册等都在这里
        refreshContext(context);

        //内部无任何实现,留给子类扩充
        afterRefresh(context, applicationArguments);

        stopWatch.stop();

        if (this.logStartupInfo) {
            new StartupInfoLogger(this.mainApplicationClass).logStarted(getApplicationLog(), stopWatch);
        }

        //回调SpringApplicationRunListener的started方法
        listeners.started(context);

        //从ioc容器中获取ApplicationRunner与CommandLineRunner组件
        //然后将获取出来这两类组件排序后
        //先调用ApplicationRunner的run方法
        //再调用CommandLineRunner的run方法
        callRunners(context, applicationArguments);
    }
    catch (Throwable ex) {
        handleRunFailure(context, ex, listeners);
        throw new IllegalStateException(ex);
    }

    try {
        //回调SpringApplicationRunListener的running方法
        listeners.running(context);
    }
    catch (Throwable ex) {
        handleRunFailure(context, ex, null);
        throw new IllegalStateException(ex);
    }
    //将创建好的ioc容器返回
    return context;
}
上方小结
可以看出以下需要在类路径下:META-INF/spring.factories中配置
Bootstrapper

*ApplicationContextInitializer

ApplicationListener

*SpringApplicationRunListener
而
*
ApplicationRunner与
*
CommandLineRunner是从ioc容器中取得【也就是对象创建完了,我们去拿】
应用测试
1.分别创建
ApplicationContextInitializer与SpringApplicationRunListener与ApplicationRunner与CommandLineRunner的实现类public class MyApplicationContextInitializer implements ApplicationContextInitializer { @Override public void initialize(ConfigurableApplicationContext configurableApplicationContext) { System.out.println("MyApplicationContextInitializer...initialize"+configurableApplicationContext.getApplicationName()); } }public class MySpringApplicationRunListener implements SpringApplicationRunListener { public MySpringApplicationRunListener(SpringApplication application, String[] args) { System.out.println("chushihua"); } @Override public void starting(ConfigurableBootstrapContext bootstrapContext) { System.out.println("starting"); } @Override public void environmentPrepared(ConfigurableBootstrapContext bootstrapContext, ConfigurableEnvironment environment) { System.out.println("environmentPrepared"); } @Override public void contextPrepared(ConfigurableApplicationContext context) { System.out.println("contextPrepared"); } @Override public void contextLoaded(ConfigurableApplicationContext context) { System.out.println("contextLoaded"); } @Override public void started(ConfigurableApplicationContext context) { System.out.println("started"); } @Override public void running(ConfigurableApplicationContext context) { System.out.println("running"); } @Override public void failed(ConfigurableApplicationContext context, Throwable exception) { System.out.println("failed"); } }@Component public class MyApplicationRunner implements ApplicationRunner { @Override public void run(ApplicationArguments args) throws Exception { System.out.println("MyApplicationRunner...run"+ Arrays.asList(args)); } }@Component public class MyCommandLineRunner implements CommandLineRunner { @Override public void run(String... args) throws Exception { System.out.println("MyCommandLineRunner...run"+ Arrays.asList(args)); } }
2.在类路径下META-INF下创建spring.factories,内容如下:
org.springframework.context.ApplicationContextInitializer=\
com.example.springmybtis.test.MyApplicationContextInitializer

org.springframework.boot.SpringApplicationRunListener=\
com.example.springmybtis.test.MySpringApplicationRunListener
启动主程序,输出顺序如下:
chushihua
starting
environmentPrepared

  .   ____          _            __ _ _
 /\\ / ___'_ __ _ _(_)_ __  __ _ \ \ \ \
( ( )\___ | '_ | '_| | '_ \/ _` | \ \ \ \
 \\/  ___)| |_)| | | | | || (_| |  ) ) ) )
  '  |____| .__|_| |_|_| |_\__, | / / / /
 =========|_|==============|___/=/_/_/_/
 :: Spring Boot ::                (v2.4.0)

MyApplicationContextInitializer...initialize
contextPrepared

contextLoaded

started
MyApplicationRunner...run[org.springframework.boot.DefaultApplicationArguments@f446158]
MyCommandLineRunner...run[]
running
自定义starter
@Configuration //指定这是一个配置类
@ConditionalOnXXX //指定条件生效时自动配置类才生效
@AutoConfigureAfter //指定自动配置类的顺序(这里是在这些写自动配置加载完后,这个类再加载)
@Bean //给容器中添加组件

@ConditionalOnProperty //结合xxProperties来绑定属性赋值
@EnableConfigurationProperties //让xxProperties生效并加入到ioc容器中

自动配置类要能生效,源于我们在META-INF/spring.factories下的自动配置,如:
org.springframework.boot.autoconfigure.EnableAutoConfiguration=\
org.springframework.boot.autoconfigure.admin.SpringApplicationAdminJmxAutoConfiguration,\
org.springframework.boot.autoconfigure.aop.AopAutoConfiguration
命名时,我们最好xxx-spring-boot-starter

【启动器只用于一来到日,专门写一个自动配置模块】(这是spring在书写时stater时的规范)
1.我们得代码写在xxx-spring-boot-starter-configure下
2.xxx-spring-boot-starter依赖xxx-spring-boot-starter-configure
3.我们使用xxx-spring-boot-starter
1.创建pom工程起名为nxj-spring-boot-starter
注意这里千万不要因为在其他文件夹下,从而出现parent节点,很容易出问题,导致其他pom引入出错。
<?xml version="1.0" encoding="UTF-8"?>
<project xmlns="http://maven.apache.org/POM/4.0.0"
         xmlns:xsi="http://www.w3.org/2001/XMLSchema-instance"
         xsi:schemaLocation="http://maven.apache.org/POM/4.0.0 http://maven.apache.org/xsd/maven-4.0.0.xsd">
    <modelVersion>4.0.0</modelVersion>

    <artifactId>nxj-spring-boot-starter</artifactId>
    <groupId>org.jd.nxj</groupId>
    <version>1.0.0</version>
    <dependencies>
        <!--引入我的自动配置模块-->
        <dependency>
            <groupId>com.jd.nxj</groupId>
            <artifactId>nxj-spring-boot-starter-configure</artifactId>
            <version>0.0.1-SNAPSHOT</version>
        </dependency>
    </dependencies>

</project>
2.编写nxj-spring-boot-starter-configure
和配置文件属性赋值绑定的XXXProperties
@ConfigurationProperties(prefix = "nxj")
public class NxjProperties {
    private String prefix;
    private String suffix;

    public String getPrefix() {
        return prefix;
    }

    public void setPrefix(String prefix) {
        this.prefix = prefix;
    }

    public String getSuffix() {
        return suffix;
    }

    public void setSuffix(String suffix) {
        this.suffix = suffix;
    }
}
3.写一个NxjService
public class NxjService {

    private NxjProperties nxjProperties;

    public NxjProperties getNxjProperties() {
        return nxjProperties;
    }

    public void setNxjProperties(NxjProperties nxjProperties) {
        this.nxjProperties = nxjProperties;
    }

    public String sayHello(String name){
        return nxjProperties.getPrefix()+"-"+name+"-"+nxjProperties.getSuffix();
    }
}
4.自动配置类
@Configuration
@ConditionalOnWebApplication
@EnableConfigurationProperties(NxjProperties.class)
public class NxjServiceAutoConfig {
    @Autowired
    NxjProperties nxjProperties;
    @Bean
    public NxjService nxjService(NxjProperties nxjProperties){
        NxjService nxjService = new NxjService();
        nxjService.setNxjProperties(nxjProperties);
        return nxjService;
    }
}
5.要让自动配置类能生效,必须在类路径下:META-INF/spring.factories中配置
org.springframework.boot.autoconfigure.EnableAutoConfiguration=\
com.jd.nxj.autoconfig.NxjServiceAutoConfig
引入:
1.pom文件引入
<dependency>
    <artifactId>nxj-spring-boot-starter</artifactId>
    <groupId>org.jd.nxj</groupId>
    <version>1.0.0</version>
</dependency>
2.配置文件中写值,我们可以赋予上去
nxj.prefix=前缀
nxj.suffix=后缀
3.编写controller测试
@Controller
public class HelloController {
    @Autowired
    NxjService nxjService;

    @GetMapping("/nxj")
    @ResponseBody
    public String hello(){
        return nxjService.sayHello("nxj");
    }
}
结果:前缀-nxj-后缀
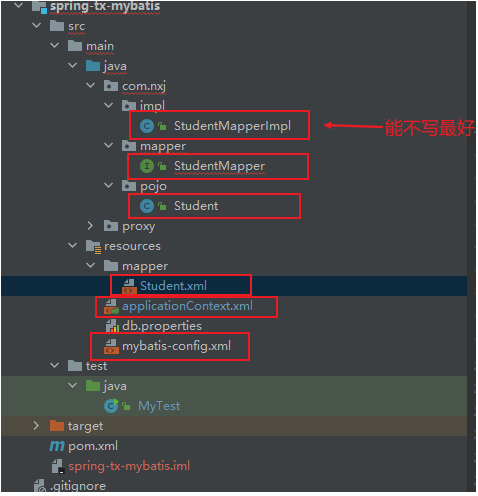
Spring整合Mybatis
applicationContext.xml
<?xml version="1.0" encoding="UTF-8"?>
<beans xmlns="http://www.springframework.org/schema/beans"
       xmlns:xsi="http://www.w3.org/2001/XMLSchema-instance"
       xmlns:context="http://www.springframework.org/schema/context"
       xsi:schemaLocation="http://www.springframework.org/schema/beans http://www.springframework.org/schema/beans/spring-beans.xsd http://www.springframework.org/schema/context https://www.springframework.org/schema/context/spring-context.xsd">

    <!--
    读取 jdbc.properties 中的内容
         property-placeholder: 占位符
         location: 属性文件的位置

         这个不太好用,可能读的不全【我自己粘贴过来可以,读取它的就报错密码不对...】
    -->
    <context:property-placeholder location="classpath:db.properties"/>
    <!-- 1) 获得数据库连接池对象,并交由 spring 同一管理 -->
    <!--数据源-->
    <bean id="dataSource" class="org.springframework.jdbc.datasource.DriverManagerDataSource">
        <property name="driverClassName" value="com.mysql.jdbc.Driver"/>
        <property name="username" value="root"/>
        <property name="password" value="123456"/>
        <property name="url" value="jdbc:mysql://mysql-cn-north-1-3a9ad9cdc01f4821.rds.jdcloud.com:3358/b2b_center"/>
    </bean>

    <!-- 2) 获取 SqlSessionFactory 对象,并交由 spring 管理-->
    <bean id="sqlSessionFactory" class="org.mybatis.spring.SqlSessionFactoryBean">
        <!-- 注入连接池
         给 sqlsessionFactory 的属性 dataSource 赋值
            ref="引用该 spring容器 中的另一个 bean的id"
        -->
        <property name="dataSource" ref="dataSource"/>
        <!-- 注入 映射文件 mapper
         给 sqlsessionFactory 的属性 mapperLocation 赋值
           value="映射文件 XXXmapper.xml 的相对路径"
          -->
        <property name="mapperLocations" value="classpath:mapper/*.xml"/>
        <!--<property name="configLocation" value="写mybatis配置文件的位置"/>-->
    </bean>

    <!-- 3) 获取 SqlSession 对象,并交由 spring 管理  用SqlSessionTemplate得到的SqlSession可以不用我们自己操心事务的管理,以及关闭操作-->
    <bean id="sqlSession" class="org.mybatis.spring.SqlSessionTemplate">
        <!-- 给 SqlSessionTemplate 的构造函数赋值-->
        <constructor-arg index="0" ref="sqlSessionFactory" />
    </bean>

    <!--自己写写实现类(一般不会这样写的,写了下方这个就注释掉!!)-->
    <bean id="studentMapperImpl" class="com.nxj.impl.StudentMapperImpl">
        <constructor-arg name="sessionTemplate" ref="sqlSession"/>
    </bean>

    <!--mybatis封装了这个,不需要写实现类就可以借助这个工厂生成相应的bean(这个是真的强!(底部用到动态代理等))-->
    <bean id="studentMapper" class="org.mybatis.spring.mapper.MapperFactoryBean">
        <property name="targetInterface" value="com.nxj.mapper.StudentMapper"/>
        <property name="proxy" ref="sqlSession" />
    </bean>

</beans>
mybatis-config.xml
<?xml version="1.0" encoding="UTF-8" ?>
     <!DOCTYPE configuration
             PUBLIC "-//mybatis.org//DTD Config 3.0//EN"
             "http://mybatis.org/dtd/mybatis-3-config.dtd">
     <configuration>
  <!--mybatis核心配置文件-->

   <!--加载mapper映射配置文件-->
   <mappers>
       <mapper resource="mapper/Student.xml"/>
   </mappers>

</configuration>
Student
@Data
public class Student {
    private String name;
    private Date createTime;
}
StudentMapper
public interface StudentMapper {
     public static final String NAMESPACE = "com.nxj.mapper.StudentMapper";

     // 注解也是和jd封装使用
     @Statement(namespace = NAMESPACE, sqlId = "getStudentById")
     @ProxyMethod(name = "selectOne", parameterTypes = { String.class,Object.class})
     Student getStudentById(Integer id);
}
StudentMapper.xml
<?xml version="1.0" encoding="UTF-8" ?>
    <!DOCTYPE mapper
            PUBLIC "-//mybatis.org//DTD Mapper 3.0//EN"
            "http://mybatis.org/dtd/mybatis-3-mapper.dtd">
    <!-- namespace:命名空间,对sql进行一个分类管理 -->
    <!-- 注意:namespace在mapper代理时,具有重要且特殊的作用
  对应mapper接口的全限定名
-->

   <!--mybatis映射配置文件-->
<mapper namespace="com.nxj.mapper.StudentMapper">
    <sql id="user_column_noid">
        user_name,create_time
    </sql>

    <resultMap id="userMapPlus" type="com.nxj.pojo.Student">
        <result column="user_name" jdbcType="VARCHAR" property="name"/>
        <!--不写的话默认按名字匹配,如果开启驼峰命名,也会按照这个规则匹配-->
        <result column="create_time" jdbcType="DATE" property="createTime"/>
    </resultMap>

     <select id="getStudentById" parameterType="int" resultMap="userMapPlus">
         select
         <include refid="user_column_noid"></include>
         from z_user
         where id = #{id}
     </select>
</mapper>
如果是在找不到不写实现类的,那就自己写个实现类(很恶心,尽量不写这个)
StudentMapperImpl
public class StudentMapperImpl implements StudentMapper {
    SqlSessionTemplate sessionTemplate;

    public StudentMapperImpl() {
    }

    public StudentMapperImpl(SqlSessionTemplate sessionTemplate) {
        this.sessionTemplate = sessionTemplate;
    }


    @Override
    public Student getStudentById(Integer id) {
        StudentMapper mapper = sessionTemplate.getMapper(StudentMapper.class);
        return mapper.getStudentById(id);
    }
}
测试:
public class MyTest {
    public static void main(String[] args) {
        ApplicationContext context = new ClassPathXmlApplicationContext("applicationContext.xml");

        StudentMapper studentMapper = context.getBean("studentMapper", StudentMapper.class);
        System.out.println(studentMapper.getStudentById(1));
    }
}