
Brew安装Maven及其IDEA配置
安装Maven
brew提供了便捷的maven安装方式,并且目前在m1芯片的mac上,brew也会自动帮我们装上arm版本的软件(如果已经更新)。
% brew search maven
#使用搜索工具去搜索maven包
% brew info maven
#使用info查看maven包当前的信息情况,包括版本依赖描述等
maven: stable 3.8.4 (bottled)
Java-based project management
https://maven.apache.org/
Conflicts with:
  mvnvm (because also installs a 'mvn' executable)
/opt/homebrew/Cellar/maven/3.8.4 (79 files, 10MB) *
  Poured from bottle on 2021-12-11 at 01:35:47
From: https://github.com/Homebrew/homebrew-core/blob/HEAD/Formula/maven.rb
License: Apache-2.0
==> Dependencies
Required: openjdk ✔
==> Analytics
install: 77,138 (30 days), 213,336 (90 days), 671,866 (365 days)
install-on-request: 76,660 (30 days), 211,765 (90 days), 667,184 (365 days)
build-error: 0 (30 days)
你可以去homebrew官方网站查看maven安装包的详细信息。https://formulae.brew.sh/formula/maven 可以看到我们jdk已经装过了,没问题,直接安装maven。
% brew install maven
#执行安装命令
Running `brew update --preinstall`...
==> Downloading https://ghcr.io/v2/homebrew/core/maven/manifests/3.8.4
######################################################################## 100.0%
==> Downloading https://ghcr.io/v2/homebrew/core/maven/blobs/sha256:6e032d44f0fef2a59373945e95b7f7522e4dc95069498b54fe9075d065883b5d
==> Downloading from https://pkg-containers.githubusercontent.com/ghcr1/blobs/sha256:6e032d44f0fef2a59373945e95b7f7522e4dc95069498b54fe9075d065883b5d?se=2021-12-10T17%3A45%3A00Z&sig=46FG2QGnp%2BipfJwRP8rl
######################################################################## 100.0%
==> Pouring maven--3.8.4.arm64_monterey.bottle.tar.gz
🍺  /opt/homebrew/Cellar/maven/3.8.4: 79 files, 10MB
==> Running `brew cleanup maven`...
Disable this behaviour by setting HOMEBREW_NO_INSTALL_CLEANUP.
Hide these hints with HOMEBREW_NO_ENV_HINTS (see `man brew`).
安装过程很顺利,这时候brew就已经帮我们做好了环境变量了。很多教程在这一步后会手动去生命maven的目录情况,我看了几个教程里面的设置完全没有道理,根本链接的不是brew的安装位置。
% which mvn
# brew已经帮我们做过链接了,可以直接使用mvn命令

% mvn -v
# 查看安装好的maven信息
Apache Maven 3.8.4 (9b656c72d54e5bacbed989b64718c159fe39b537)
Maven home: /opt/homebrew/Cellar/maven/3.8.4/libexec
Java version: 17.0.1, vendor: Homebrew, runtime: /opt/homebrew/Cellar/openjdk/17.0.1_1/libexec/openjdk.jdk/Contents/Home
Default locale: zh_CN_#Hans, platform encoding: UTF-8
OS name: "mac os x", version: "12.0.1", arch: "aarch64", family: "mac"
配置Maven
可以看到brew自动帮我装好了arm版本的maven,因为我是m1芯片。如果是x86的芯片,会帮你装x86版本,路径位置可能不同,但设置没啥区别,注意换成自己路径即可。我们接下来看maven的配置文件位置。
上面maven信息输出中有Maven home: /opt/homebrew/Cellar/maven/3.8.4/libexec,冒号后面就是brew帮我们下载的安装目录。直接执行cd /opt/homebrew/Cellar/maven/3.8.4/libexec,进入目录。
% cd /opt/homebrew/Cellar/maven/3.8.4/libexec
% ls

logging		settings.xml	toolchains.xml
# 看到了熟悉的setting文件
在xml文件中,我们要关注两个地方,我在下面列了出来localRepository和mirrors。第一个localRepository是你本地仓库所在的位置,你的包都会下载到这里,默认在你用户目录的.m2目录下,我觉得挺直观的,就没修改了,这里可以换成你想存放的地址。第二个mirror是你的包下载地址,因为有墙,所以建议增加阿里云仓库配置,来加速下载。具体配置如下,可以自己在xml中寻找。
  <!-- localRepository
   | The path to the local repository maven will use to store artifacts.
   |
   | Default: ${user.home}/.m2/repository
  <localRepository>/path/to/local/repo</localRepository>


  <mirrors>
    <!-- mirror
     | Specifies a repository mirror site to use instead of a given repository. The repository that
     | this mirror serves has an ID that matches the mirrorOf element of this mirror. IDs are used
     | for inheritance and direct lookup purposes, and must be unique across the set of mirrors.
     |
    <mirror>
      <id>mirrorId</id>
      <mirrorOf>repositoryId</mirrorOf>
      <name>Human Readable Name for this Mirror.</name>
      <url>http://my.repository.com/repo/path</url>
    </mirror>
     -->
<mirror>
  <id>aliyunmaven</id>
  <mirrorOf>*</mirrorOf>
  <name>阿里云公共仓库</name>
  <url>https://maven.aliyun.com/repository/public</url>
</mirror>
    <mirror>
      <id>maven-default-http-blocker</id>
      <mirrorOf>external:http:*</mirrorOf>
      <name>Pseudo repository to mirror external repositories initially using HTTP.</name>
      <url>http://0.0.0.0/</url>
      <blocked>true</blocked>
    </mirror>
  </mirrors>
到这里,我们的maven已经安装完毕。仓库位置在我们本地用户目录下的.m2中,maven安装位置为之前的maven home。我们开始为IDEA配置本地maven环境。
IDEA的Maven配置
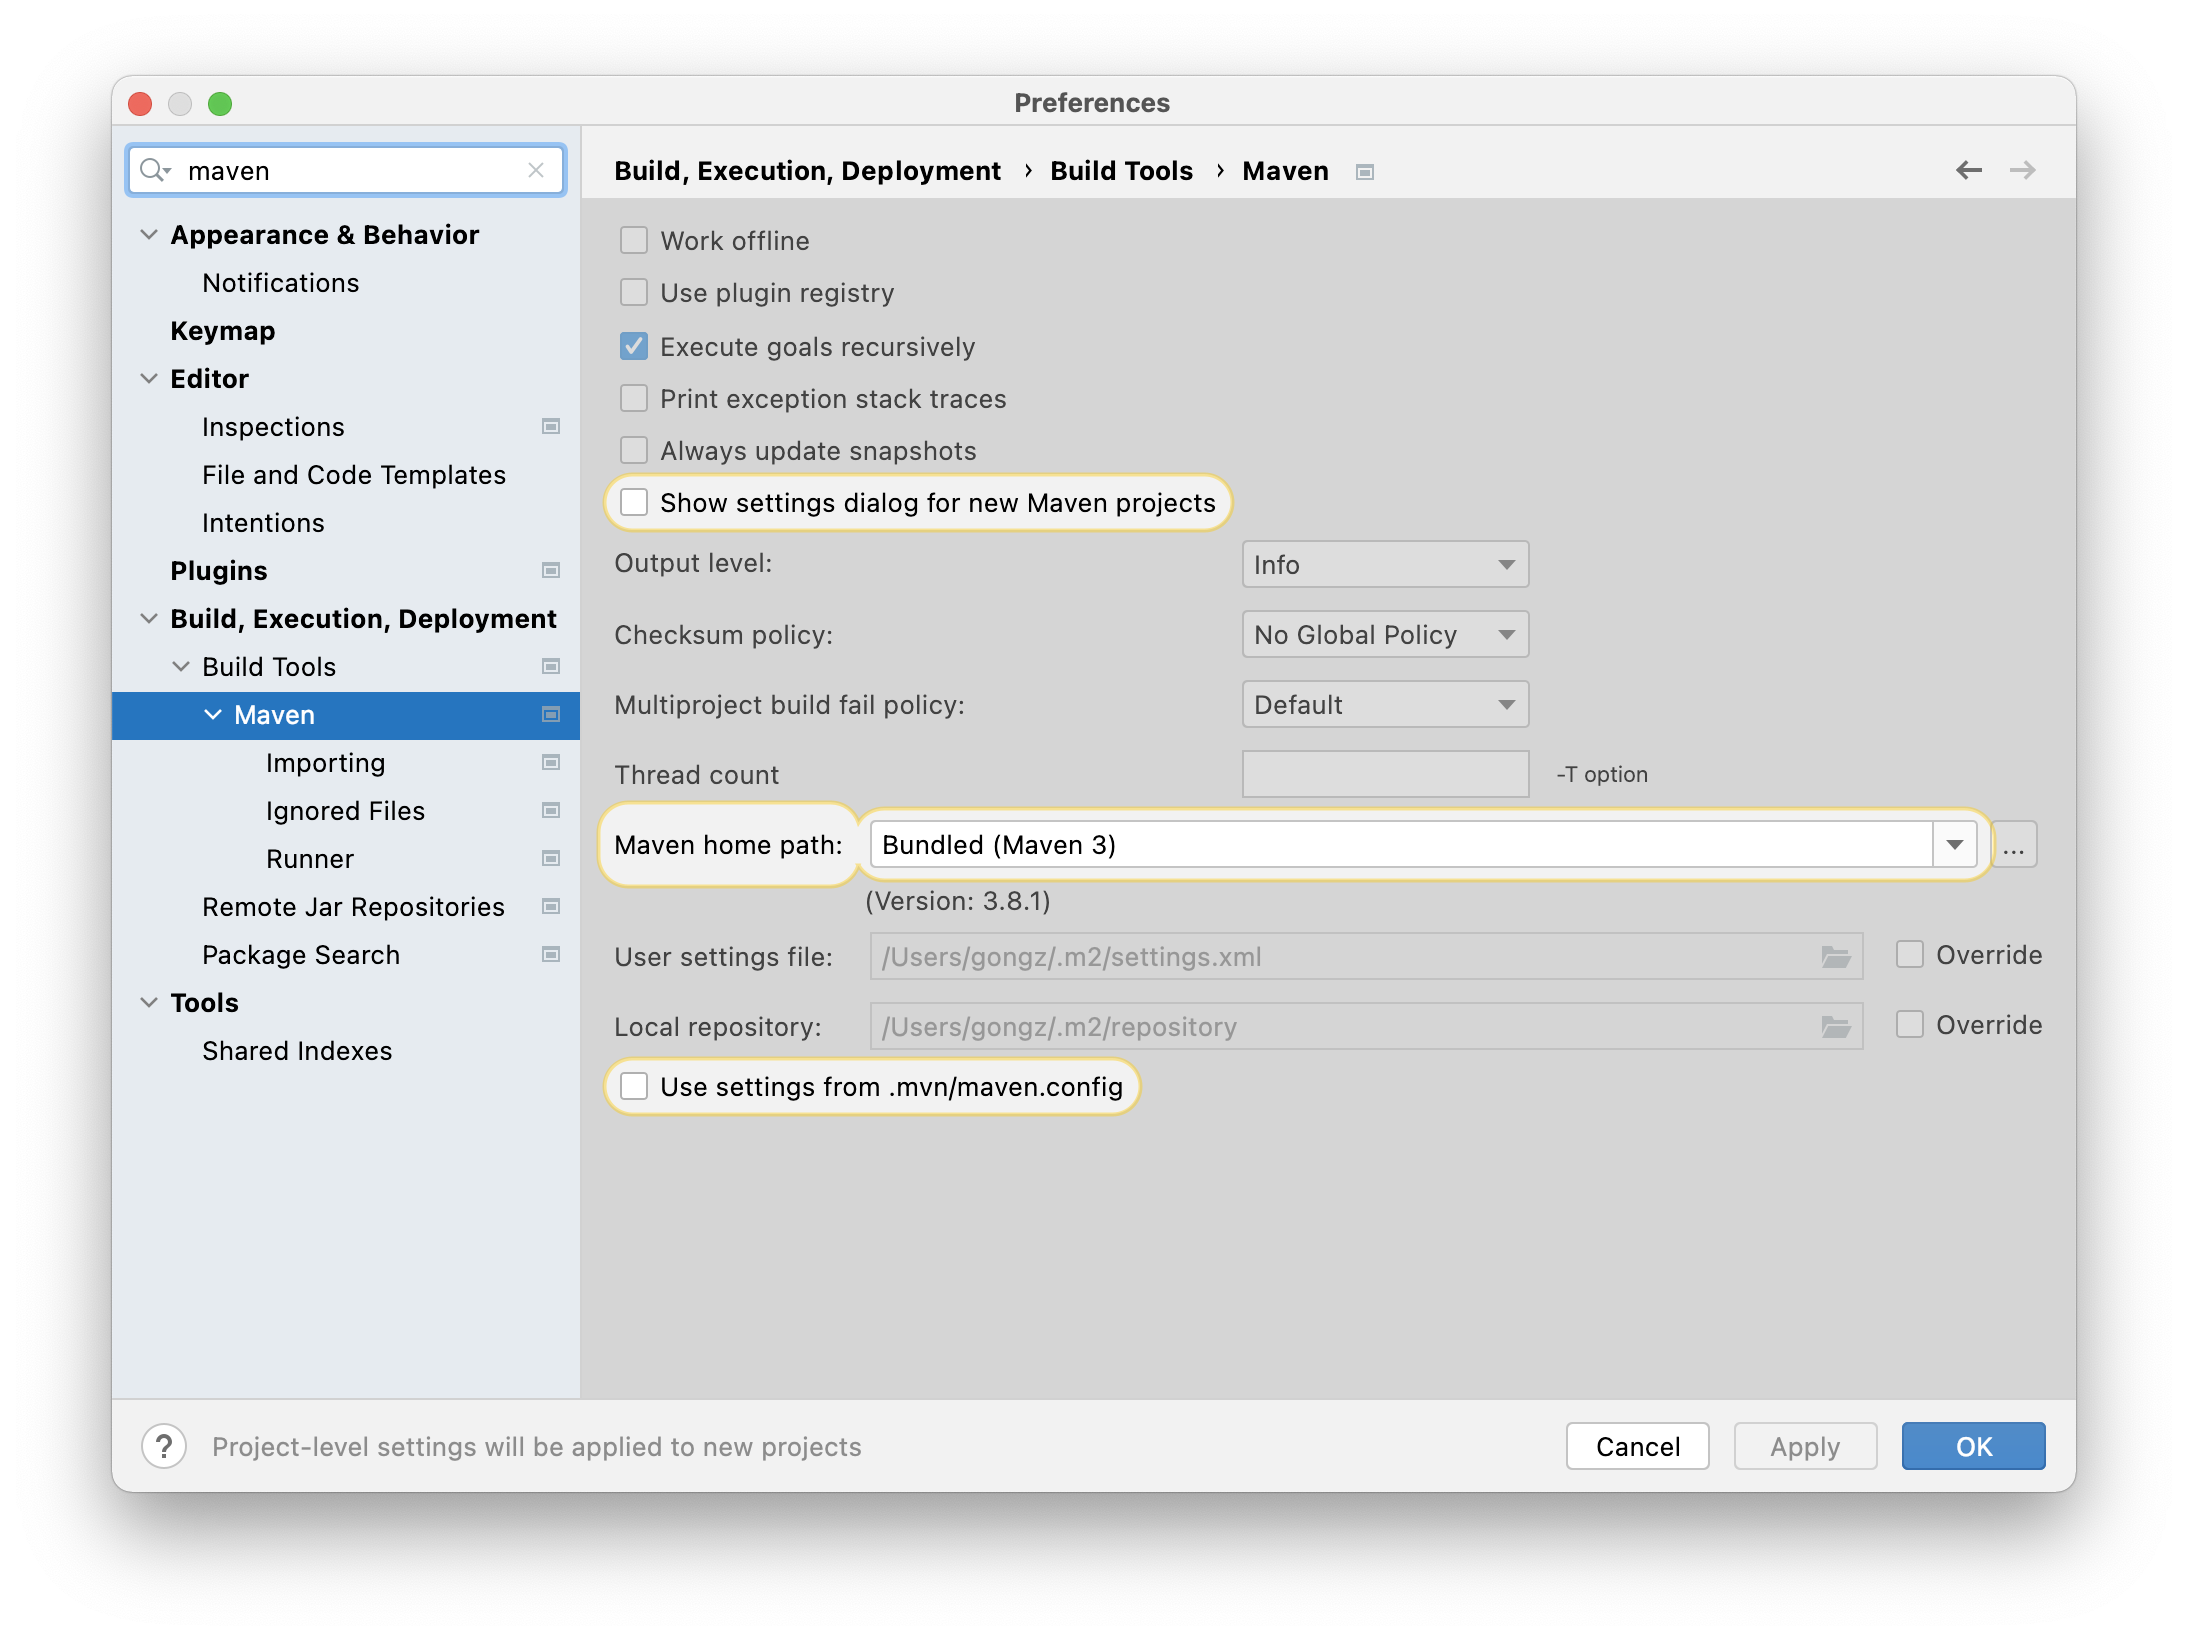
我们打开idea的偏好设置,搜索maven,出现以下的配置界面。
我们将安装目录和配置目录替换成配置maven时确定的路径,不好通过访达选文件就直接把路径复制填上去,应用保存即可。
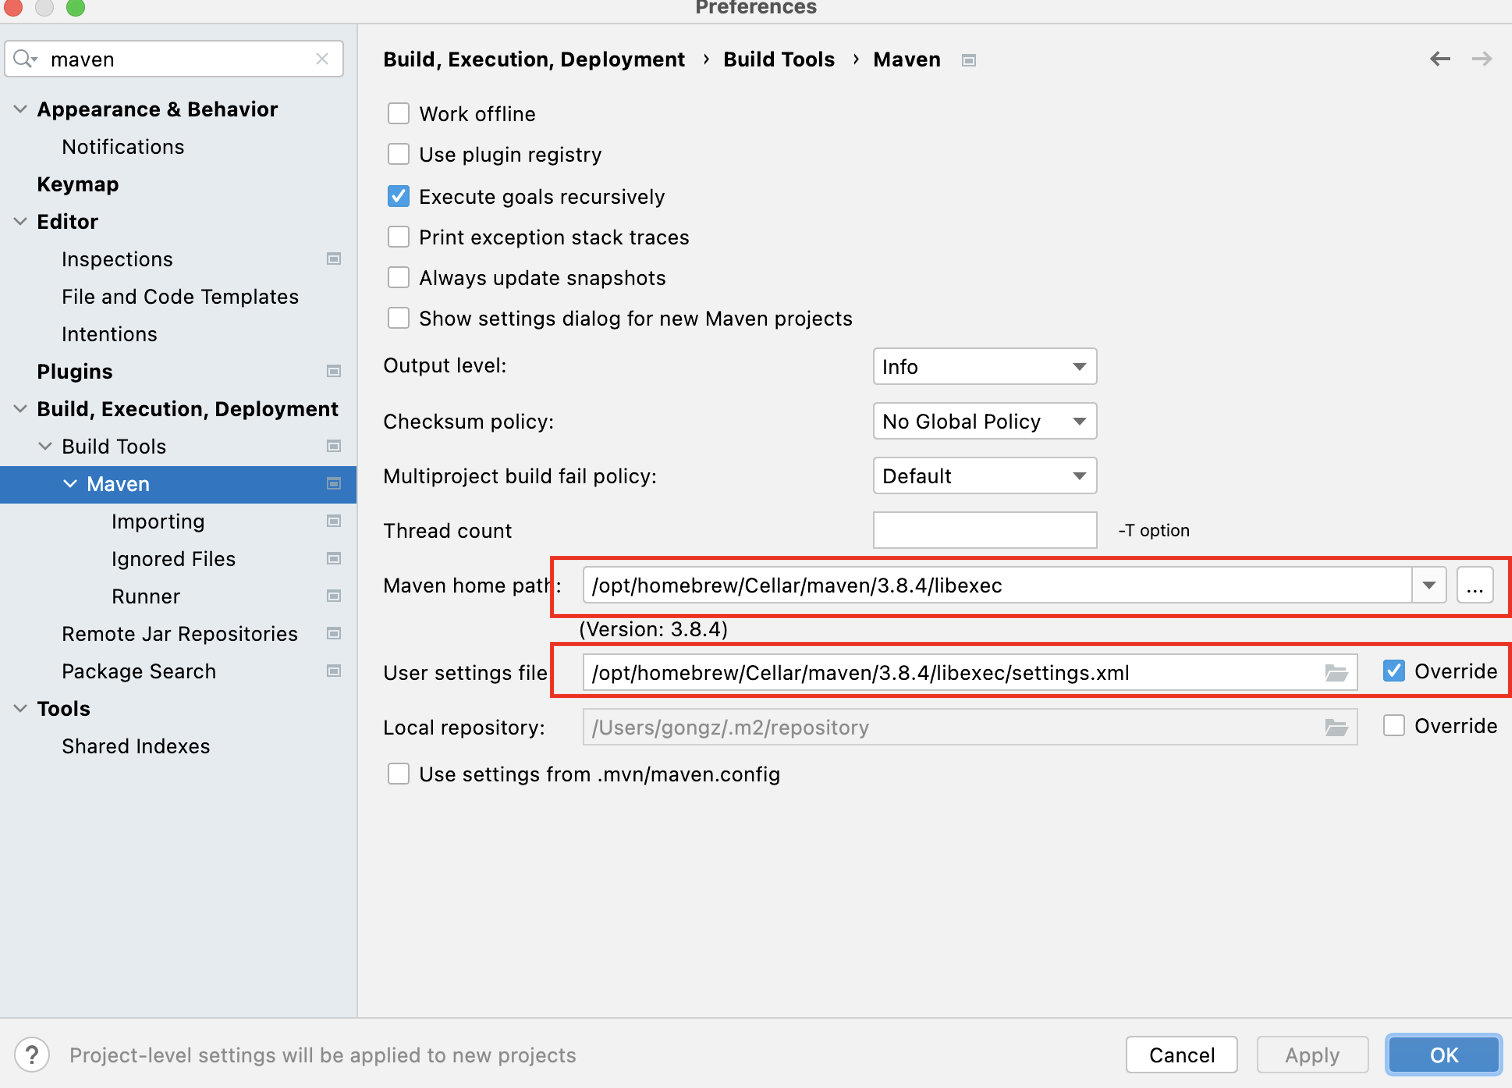
到这里就大功告成了!
