【转】WebView2-Edge Chrome 浏览器开发说明
https://docs.microsoft.com/en-us/microsoft-edge/hosting/webview2/gettingstarted
Getting Started with WebView2 (developer preview)
In this article
- Prerequisites
- Step 1 - Create a single window win32 app
- Step 2 - Install WebView2 SDK
- Step 3 - Create a single WebView within the parent window
- Step 4 - Navigation events
- Step 5 - Scripting
- Step 6 - Communication between host and web content
- Next Steps
- Feedback
This walkthrough goes over the commonly used functionalities of WebView2 (developer preview) and gets you started on creating your first WebView2 app. Visit API reference to learn more about individual APIs.
Prerequisites
- Microsoft Edge (Chromium) installed on supported OS (currently Windows 10, Windows 8.1, and Windows 7). We recommend using the Canary channel and the minimum required version is 82.0.430.0.
- Visual Studio 2015 or later with C++ support installed.
Step 1 - Create a single window win32 app
We will start with a basic desktop project containing a single main window. As this is not the main focus of this walkthrough, we will simply use modified sample code from Walkthrough: Create a traditional Windows Desktop application (C++). Download the modified sample to get started.
Open WebView2GettingStarted.sln in Visual Studio. If you are using an older version of Visual Studio, right click on the WebView2GettingStarted project and click Properties. Under Configuration Properties > General, modify Windows SDK Version and Platform Toolset to use the Win10 SDK and VS toolset available to you.
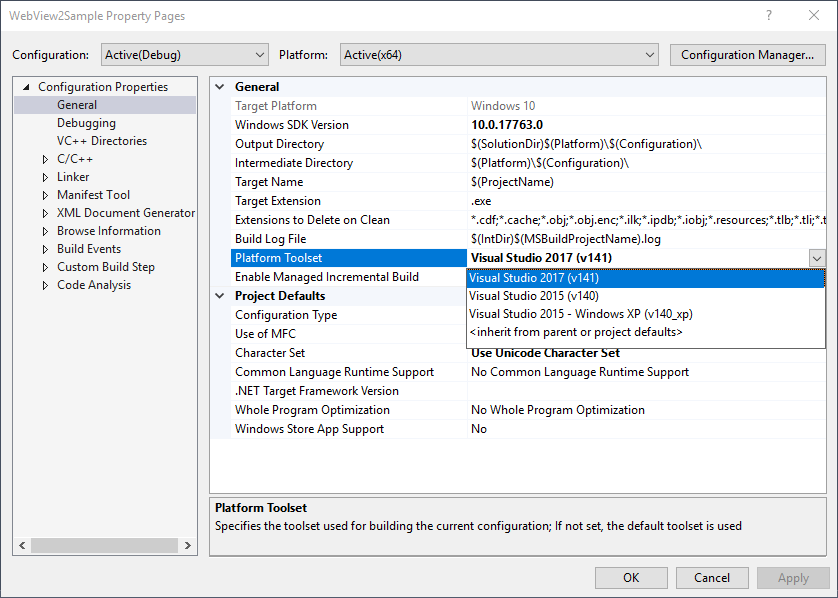
Visual Studio may show some errors due to missing WebView2 header file, which should go away once Step 2 is completed.
Step 2 - Install WebView2 SDK
Now let's add the WebView2 SDK into the project. For the developer preview, you can install the Win32 SDK via Nuget.
-
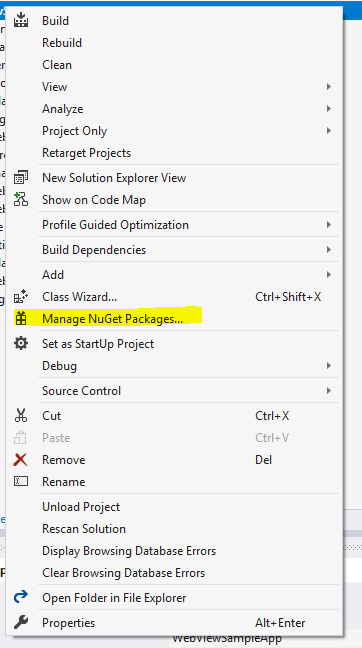
Right click the project and click Manage Nuget Packages.
-
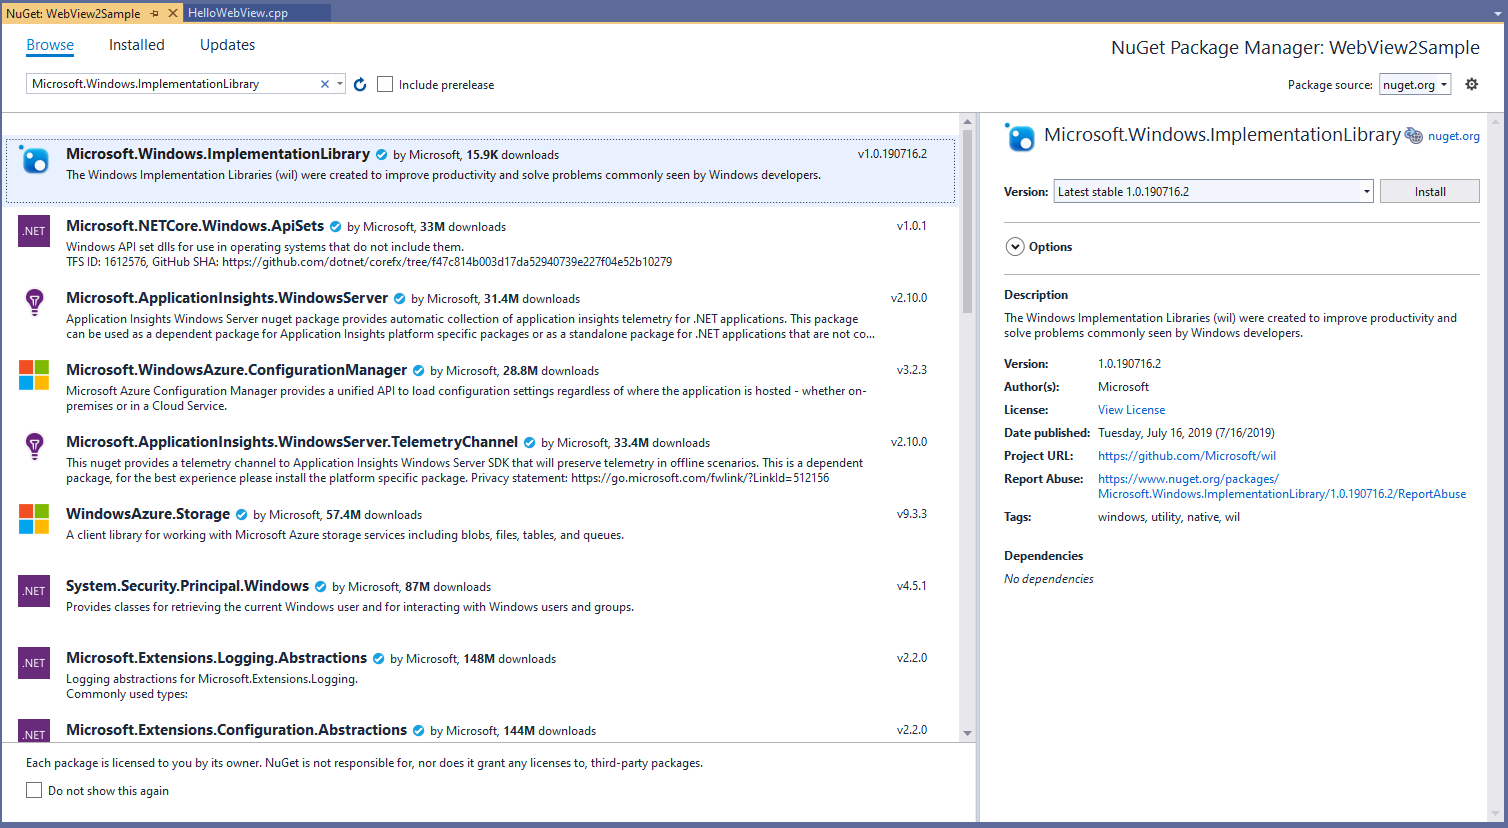
Enter Microsoft.Windows.ImplementationLibrary in the search bar, click Microsoft.Windows.ImplementationLibrary from the results, and click Install inthe right hand side window and install the latest SDK. Nuget will download the SDK to your machine. While we use Windows Implementation Library and Windows Runtime C++ Template Library to make working with COM easier in this walkthrough, they are completely optional.
-
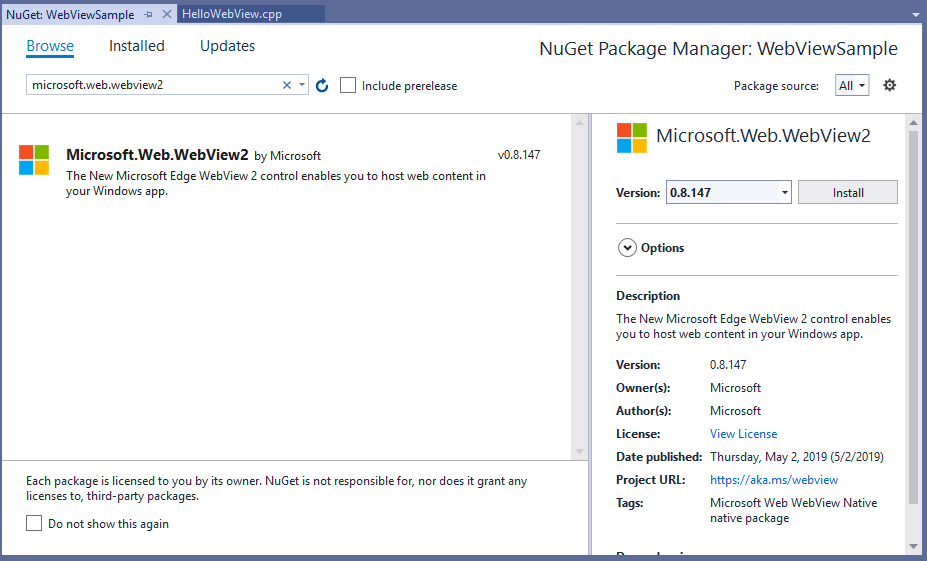
Enter Microsoft.Web.WebView2 in the search bar, click Microsoft.Web.WebView2 from the results, and click Install in the right hand side window and install the latest SDK. Nuget will download the SDK to your machine.
-
Include the WebView2 header. In HelloWebView.cpp, add
#include "WebView2.h"below the lines of#includes.C++... #include <wrl.h> #include <wil/com.h> // include WebView2 header #include "WebView2.h"
You are all set to use and build against the WebView2 API. Press F5 to build and run the sample app. You should see an app displaying an empty window.
Step 3 - Create a single WebView within the parent window
Now let's add a WebView to the main window. We'll use CreateCoreWebView2Environment to set up the environment and locate the Microsoft Edge (Chromium) browser powering the control. You can also use CreateCoreWebView2EnvironmentWithDetails if you want to specify browser location, user folder, browser flags, etc., instead of using the default setting. Upon the completion of CreateCoreWebView2Environment, you'll be able to call ICoreWebView2Environment::CreateCoreWebView2Host inside the ICoreWebView2CreateCoreWebView2EnvironmentCompletedHandler callback and call ICoreWebView2Host::get_CoreWebView2 to get the associated WebView.
In the callback, let's also set a few settings, resize the WebView to take 100% of the parent window, and navigate to Bing.
Copy the following code to HelloWebView.cpp between // <-- WebView2 sample code starts here --> and // <-- WebView2 sample code ends here -->.
// Step 3 - Create a single WebView within the parent window
// Locate the browser and set up the environment for WebView
CreateCoreWebView2EnvironmentWithDetails(nullptr, nullptr, nullptr,
    Callback<ICoreWebView2CreateCoreWebView2EnvironmentCompletedHandler>(
        [hWnd](HRESULT result, ICoreWebView2Environment* env) -> HRESULT {

            // Create a CoreWebView2Host and get the associated CoreWebView2 whose parent is the main window hWnd
            env->CreateCoreWebView2Host(hWnd, Callback<ICoreWebView2CreateCoreWebView2HostCompletedHandler>(
                [hWnd](HRESULT result, ICoreWebView2Host* host) -> HRESULT {
                if (host != nullptr) {
                    webviewHost = host;
                    webviewHost->get_CoreWebView2(&webviewWindow);
                }

                // Add a few settings for the webview
                // this is a redundant demo step as they are the default settings values
                ICoreWebView2Settings* Settings;
                webviewWindow->get_Settings(&Settings);
                Settings->put_IsScriptEnabled(TRUE);
                Settings->put_AreDefaultScriptDialogsEnabled(TRUE);
                Settings->put_IsWebMessageEnabled(TRUE);

                // Resize WebView to fit the bounds of the parent window
                RECT bounds;
                GetClientRect(hWnd, &bounds);
                webviewHost->put_Bounds(bounds);

                // Schedule an async task to navigate to Bing
                webviewWindow->Navigate(L"https://www.bing.com/");

                // Step 4 - Navigation events


                // Step 5 - Scripting


                // Step 6 - Communication between host and web content


                return S_OK;
            }).Get());
        return S_OK;
    }).Get());
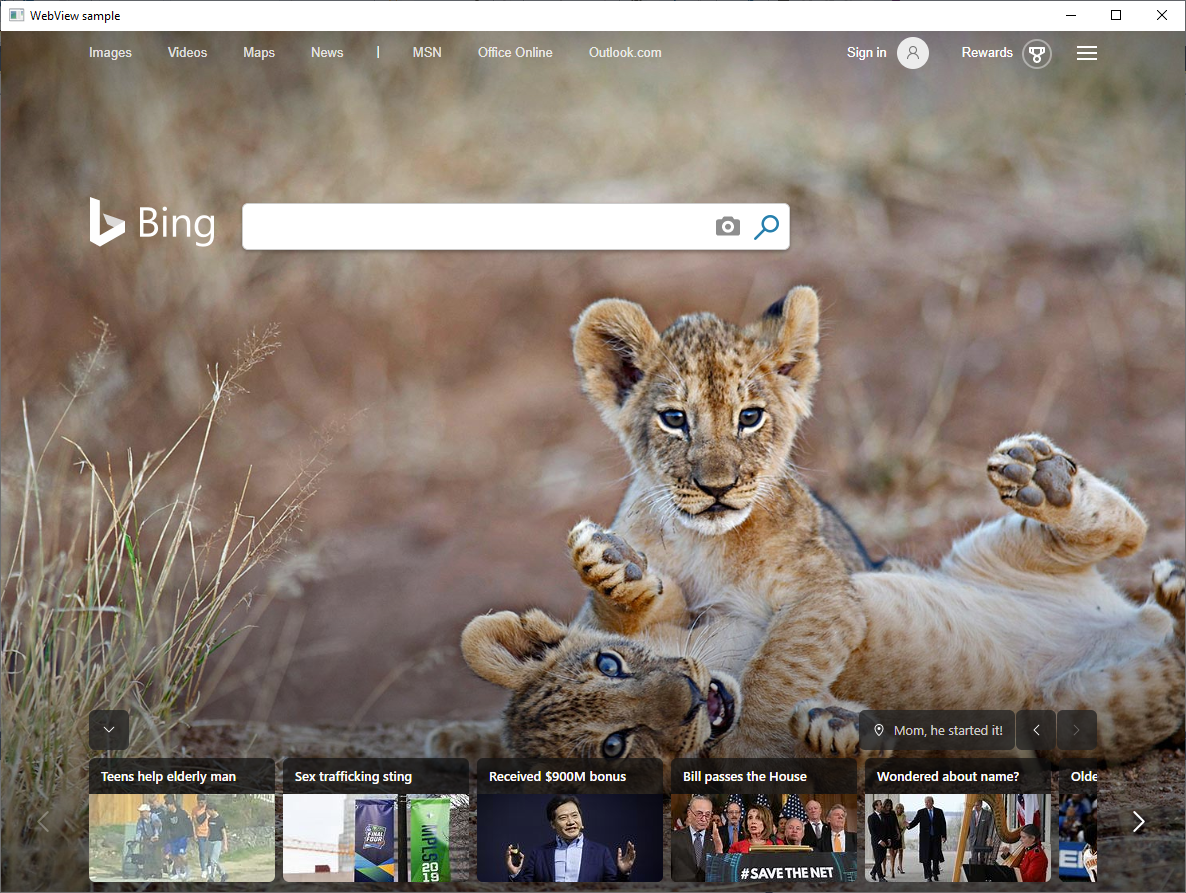
Press F5 to build and run the app. Now you have a WebView window displaying Bing.
Step 4 - Navigation events
We already covered navigating to URL using ICoreWebView2::Navigate in the last step. During navigation, WebView fires a sequence of events that the host can listen to - NavigationStarting, SourceChanged, ContentLoading, HistoryChanged, and then NavigationCompleted. Click here to learn more.
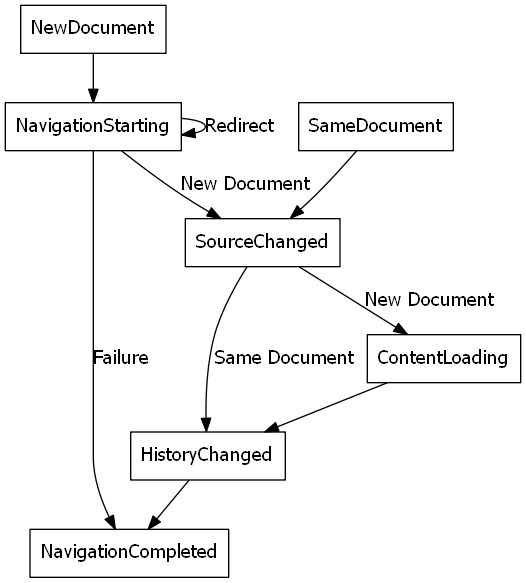
In error cases there may or may not be SourceChanged, ContentLoading, or HistoryChanged event(s) depending on whether the navigation is continued to an error page. In case of an HTTP redirect, there will be multiple NavigationStarting events in a row.
As an example of utilizing those events, let's register a handler for NavigationStarting to cancel any non-https requests. Copy the following code to HelloWebView.cpp below // Step 4 - Navigation events.
// register an ICoreWebView2NavigationStartingEventHandler to cancel any non-https navigation
EventRegistrationToken token;
webviewWindow->add_NavigationStarting(Callback<ICoreWebView2NavigationStartingEventHandler>(
    [](ICoreWebView2* webview, ICoreWebView2NavigationStartingEventArgs * args) -> HRESULT {
        PWSTR uri;
        args->get_Uri(&uri);
        std::wstring source(uri);
        if (source.substr(0, 5) != L"https") {
            args->put_Cancel(true);
        }
        CoTaskMemFree(uri);
        return S_OK;
    }).Get(), &token);
Now the app will not navigate to any non-https sites. You can use similar mechanism to accomplish other tasks, such as restricting navigation to within your own domain.
Step 5 - Scripting
The hosting app can also inject JavaScript into WebView. You can task WebView to execute arbitrary JavaScript or add initialization scripts. Added initialization scripts apply to all future top level document and child frame navigation until removed, and run after the global object has been created and before any other script included by the HTML document is executed.
Copy the following code below // Step 5 - Scripting.
// Schedule an async task to add initialization script that freezes the Object object
webviewWindow->AddScriptToExecuteOnDocumentCreated(L"Object.freeze(Object);", nullptr);
// Schedule an async task to get the document URL
webviewWindow->ExecuteScript(L"window.document.URL;", Callback<ICoreWebView2ExecuteScriptCompletedHandler>(
    [](HRESULT errorCode, LPCWSTR resultObjectAsJson) -> HRESULT {
        LPCWSTR URL = resultObjectAsJson;
        //doSomethingWithURL(URL);
        return S_OK;
    }).Get());
Now WebView will always freeze the Object object and return the page document once.
Note that these script injection APIs (and some other WebView2 APIs) are asynchronous, you should use callbacks if code is to be executed in a particular order.
Step 6 - Communication between host and web content
The host and the web content can also communicate with each other through postMessage. The web content running within a WebView can post to the host through window.chrome.webview.postMessage, and the message would be handled by any registered ICoreWebView2WebMessageReceivedEventHandler on the host. Likewise, the host can message the web content through ICoreWebView2::PostWebMessageAsString or ICoreWebView2::PostWebMessageAsJSON, which would be caught by handlers added from window.chrome.webview.addEventListener. The communication mechanism allows the web content to utilize native capabilities by passing messages to ask the host to call native APIs.
As an example to understand the mechanism, let's try printing out the document URL in WebView with a little detour,
- the host registers a handler to return received message back to the web content
- the host injects a script to the web content that registers a handler to print message from the host
- the host injects a script to the web content that posts the URL to the host
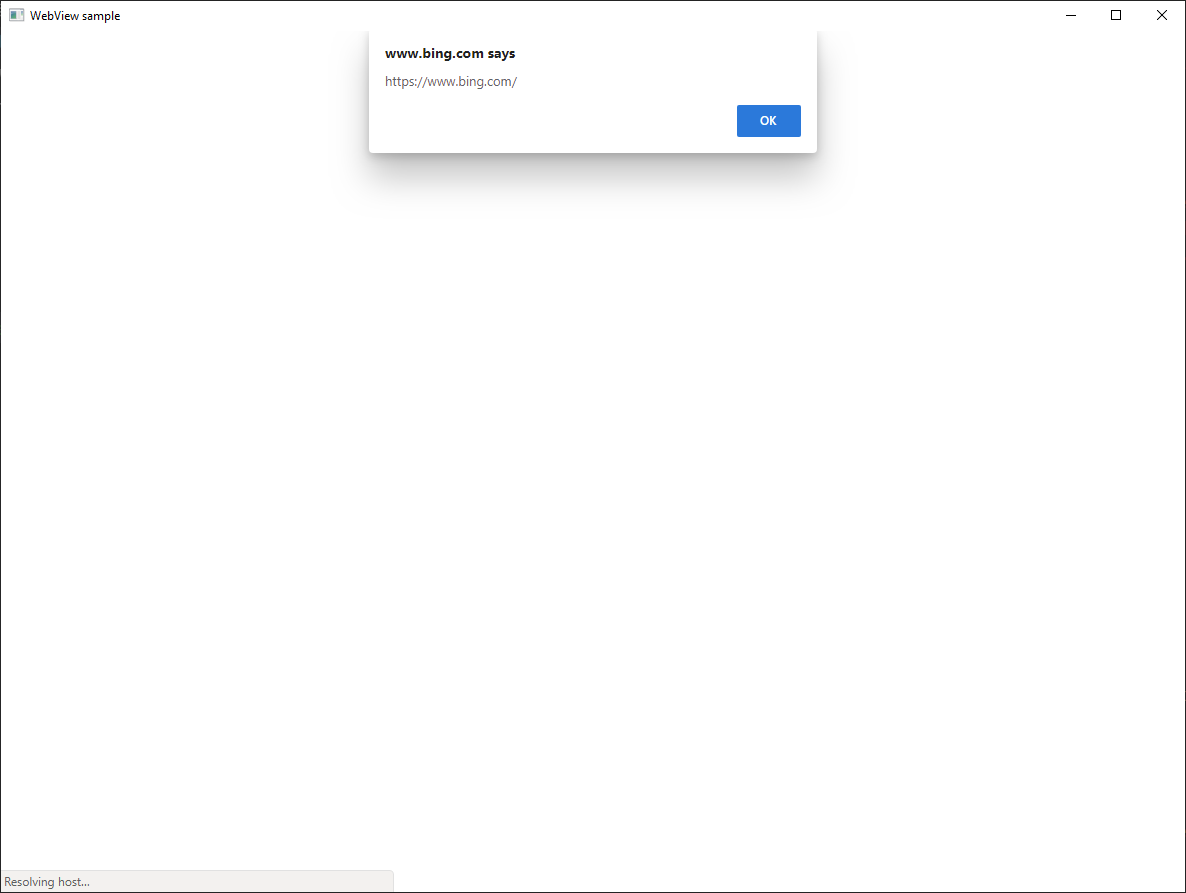
- the host's handler is triggered and returns the message (the URL) to the web content
- the web content's handler is triggered and prints the host's message (the URL)
Copy the following code below // Step 6 - Communication between host and web content,
// Set an event handler for the host to return received message back to the web content
webviewWindow->add_WebMessageReceived(Callback<ICoreWebView2WebMessageReceivedEventHandler>(
    [](ICoreWebView2* webview, ICoreWebView2WebMessageReceivedEventArgs * args) -> HRESULT {
        PWSTR message;
        args->TryGetWebMessageAsString(&message);
        // processMessage(&message);
        webview->PostWebMessageAsString(message);
        CoTaskMemFree(message);
        return S_OK;
    }).Get(), &token);

// Schedule an async task to add initialization script that
// 1) Add an listener to print message from the host
// 2) Post document URL to the host
webviewWindow->AddScriptToExecuteOnDocumentCreated(
    L"window.chrome.webview.addEventListener(\'message\', event => alert(event.data));" \
    L"window.chrome.webview.postMessage(window.document.URL);",
nullptr);
Press F5 to build and run the app. It will now show URLs before navigating to pages.
Congratulations, you've just built your first WebView2 app!
Next Steps
There are plenty of WebView2 functionalities that are not covered in this walkthrough.
To learn more:
- Checkout WebView2 API Sample for a comprehensive example of our SDKs capabilities.
- Checkout WebView2Browser an application built using WebView2.
- Please explore API reference for detailed information about out API.
总结:
实际测试发现,VS2015不能编译,很多报错,VS2019可以编译,平台工具集:V142,Windows SDK版本:10,是否能在Win7上(已安装Edge-Chrome浏览器)还有待测试。现在看WebView2 还需要时间沉淀。


