springboot 多数据源项目demo
背景: 公司要新建一个数据项目,因为要查询多个数据源的数据,且之前也没有做项目搭建的笔记,这次做一个记录。开箱即用,真香警告!
搭建过程中遇到了一些问题,会逐步说明。代码地址:https://gitee.com/aaron_qc/multi-datasource.git
- 先上主菜。多数据源配置步骤
- 引入依赖 tkmapper + druid + mysql + spring-boot-configuration-processor
-
<dependency>
    <groupId>org.springframework.boot</groupId>
    <artifactId>spring-boot-configuration-processor</artifactId>
    <version>2.1.5.RELEASE</version>
</dependency>

<!-- mysql and mybatis etc -->
<dependency>
    <groupId>tk.mybatis</groupId>
    <artifactId>mapper-spring-boot-starter</artifactId>
    <version>2.1.4</version>
</dependency>

<dependency>
    <groupId>mysql</groupId>
    <artifactId>mysql-connector-java</artifactId>
    <version>8.0.11</version>
</dependency>

<!-- druid -->
<dependency>
    <groupId>com.alibaba</groupId>
    <artifactId>druid-spring-boot-starter</artifactId>
    <version>1.1.10</version>
</dependency>
-
- 配置如下
- 启动类加上@EnableConfigurationProperties。
- OceanApplication
/**
 * @author QuCheng on 2019-09-16.
 * EnableConfigurationProperties 使 @ConfigurationProperties 注解的类(需要加@Component)生效。
 */
@EnableConfigurationProperties
@SpringBootApplication
public class OceanApplication {
    public static void main(String[] args) {
        SpringApplication.run(OceanApplication.class, args);
    }
}
- OceanApplication
- yml配置相应属性
- application.yml 属性自定义名称,只需要和对应java类对应即可
druid:
  # 数据源配置
  user: root
  password: xxxx
  driverClass: com.mysql.cj.jdbc.Driver
  # 初始化 最小 最大
  initialSize: 5
  minIdle: 5
  maxActive: 20
  testOnBorrow: false
  urlIceberg: jdbc:mysql://106.12.176.120/iceberg?serverTimezone=GMT%2B8&characterEncoding=UTF-8&useSSL=false  # 设置时区
  urlOcean: jdbc:mysql://106.12.176.120/ocean?serverTimezone=GMT%2B8&characterEncoding=UTF-8&useSSL=false  # 设置时区
  urlAccount: jdbc:mysql://106.12.176.120/account?serverTimezone=GMT%2B8&characterEncoding=UTF-8&useSSL=false  # 设置时区
- application.yml 属性自定义名称,只需要和对应java类对应即可
- 自定义属性加载父类BaseProperty
- 映射yml配置 。
package com.hb.ocean.druid;

import com.alibaba.druid.pool.DruidDataSource;
import lombok.Data;
import org.springframework.boot.context.properties.ConfigurationProperties;
import org.springframework.stereotype.Component;

import javax.sql.DataSource;

/**
 * datasource base class
 * @author qucheng
 */
@Data
@ConfigurationProperties(prefix = "druid")
@Component
class BaseProperty {

    protected String user;

    protected String password;

    protected String driverClass;

    protected int initialSize;

    protected int maxActive;

    protected int minIdle;

    protected boolean testOnBorrow;

    protected String urlAccount;

    protected String urlOcean;

    protected String urlIceberg;


    DataSource createDataSource(String url) {
        DruidDataSource dataSource = new DruidDataSource();
        dataSource.setDriverClassName(driverClass);
        dataSource.setUrl(url);
        dataSource.setUsername(user);
        dataSource.setPassword(password);
        dataSource.setInitialSize(initialSize);
        dataSource.setMaxActive(maxActive);
        dataSource.setMinIdle(minIdle);
        dataSource.setTestOnBorrow(testOnBorrow);
        return dataSource;
    }
}
- 映射yml配置 。
- 各数据源配置自己的映射路径(mapper接口+xml文件)
- 配置路径 -- 此处省略2个其他配置
package com.hb.ocean.druid;

import org.apache.ibatis.session.SqlSessionFactory;
import org.mybatis.spring.SqlSessionFactoryBean;
import org.springframework.beans.factory.annotation.Qualifier;
import org.springframework.context.annotation.Bean;
import org.springframework.core.io.support.PathMatchingResourcePatternResolver;
import org.springframework.jdbc.datasource.DataSourceTransactionManager;
import org.springframework.stereotype.Component;
import tk.mybatis.spring.annotation.MapperScan;

import javax.sql.DataSource;

/**
 * account datasource
 * MapperScan(如果要使用表名映射实体使用tk)注解用于绑定扫描的包和指定的数据源,且指定目录下的mapper无需加注解处理
 *
 * @author qucheng
 */
@Component
@MapperScan(basePackages = "com.hb.ocean.mapper.account", sqlSessionFactoryRef = "accountSqlSessionFactory")
public class AccountConfig extends BaseProperty {

    @Bean(name = "accountDataSource")
    public DataSource createDataSource() {
        return createDataSource(urlAccount);
    }

    @Bean(name = "accountTransactionManager")
    public DataSourceTransactionManager accountTransactionManager() {
        return new DataSourceTransactionManager(createDataSource());
    }

    @Bean(name = "accountSqlSessionFactory")
    public SqlSessionFactory masterSqlSessionFactory(@Qualifier("accountDataSource") DataSource accountDataSource)
            throws Exception {
        final SqlSessionFactoryBean sessionFactory = new SqlSessionFactoryBean();
        sessionFactory.setDataSource(accountDataSource);
        String mapperLocation = "classpath:mapper/account/*.xml";
        sessionFactory.setMapperLocations(new PathMatchingResourcePatternResolver()
                .getResources(mapperLocation));
        return sessionFactory.getObject();
    }
}
- 配置路径 -- 此处省略2个其他配置
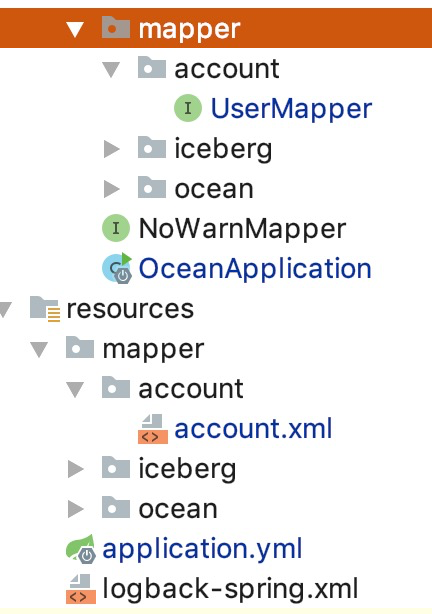
- 创建相应目录下的文件。在启动项目时会加载。
- 结构如图
![]()
- 结构如图
- 启动类加上@EnableConfigurationProperties。
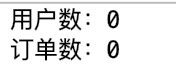
- 成功之后启动测试结果如下
- 测试代码
package com.hb.ocean.controller; import com.hb.ocean.mapper.account.UserMapper; import com.hb.ocean.mapper.iceberg.ItemOrderMapper; import org.springframework.web.bind.annotation.GetMapping; import org.springframework.web.bind.annotation.RequestMapping; import org.springframework.web.bind.annotation.RestController; import javax.annotation.Resource; /** * @author QuCheng on 2019-09-17. */ @RestController @RequestMapping("/qc") public class TestView { /** * 不推荐直接在controller层引入Dao层。这里只做演示使用 */ @Resource private UserMapper userMapper; @Resource private ItemOrderMapper itemOrderMapper; @GetMapping("/test") public String test() { System.out.println("用户数:" + userMapper.selectCountUser(null, null)); System.out.println("订单数:" + itemOrderMapper.selectCountSuccessOrder(null, null)); return "ok"; } } - 测试结果
- 测试代码
- 引入依赖 tkmapper + druid + mysql + spring-boot-configuration-processor
以上过程也出现的几个问题
- 多数据源共用了一个yml基础配置,除了数据源url地址不一致之外。
- 自定义yml属性配置项需要
- 引入spring-boot-configuration-processor。
- 启动类使用注解@EnableConfigurationProperties
- 解析类上面要引入3个注解@Data只是为了方便。@ConfigurationProperties(prefix = "druid")指明读取的是"druid"开始的属性。@Component表示由容器管理
- 配置类@MapperScan注解是使用的tk.mybatis.spring.annotation.MapperScan注解。org.mybatis.spring.annotation.MapperScan也可以用但是它不能配合使用@Table注解映射表。
springboot多数据源配置的过程如上。这是demo版本,之后会出更多记录文章。实际应用数据中还涉及
- eureka的注册发现。启动类注解引入
- feign接口调用以及失败熔断
- 优雅停机简单处理
- swagger文档
- redis分布式事务
是谁来自江河湖海,却囿于昼夜厨房与爱

 浙公网安备 33010602011771号