

多人开发代码格式化配置, 使用eslint+prettier+husky
插件介绍
- Prettier: 用于代码格式的校验(并格式化代码), 如tab长度、js语句末尾是否加分号、何时使用逗号等,不会对代码质量进行校验(eslint校验质量)。
- 对HTML/ CSS/JavaScript/vue/Scss都有效果
- 参考文档: Prettier 中文网 · Prettier 是一个“有态度”的代码格式化工具
项目中引入配置项说明
安装依赖: (避免不同的编辑器没有对应的拓展)
npm install --save-dev prettier |
配置prettier规则:
// .prettierrc.js
module.exports = {
  // 行末分号
  semi: true,
  // 使用单引号
  singleQuote: true,
  // 行尾换行格式
  endOfLine: 'auto',
  // 最大长度80个字符(包括JSX部分)
  printWidth: 80,
  // JSX双引号
  jsxSingleQuote: false,
  // 行尾逗号,默认none,可选 none|es5|all
  // es5 包括es5中的数组、对象
  // all 包括函数对象等所有可选
  trailingComma: 'es5',
  // 在对象文字中的空格, true: { foo: bar }, false: {foo: bar}
  bracketSpacing: true,
  // JSX标签闭合位置 默认false
  // false: <div
  //          className=""
  //          style={{}}
  //       >
  // true: <div
  //          className=""
  //          style={{}} >
  jsxBracketSameLine: false,
  // 箭头函数参数括号 默认avoid 可选 avoid| always
  // avoid 能省略括号的时候就省略 例如x => x
  // always 总是有括号
  arrowParens: "always",
  // 在文件顶部插入一个特殊的 @format 标记,指定文件格式需要被格式化。
  insertPragma: false,
  // 缩进2字符
  tabWidth: 2,
  // 是否使用tab缩进
  useTabs: false,
  HTMLWhitespaceSensitivity: "strict",
};
|
安装插件用于解决eslint和prettier的冲突(新建项目时选择eslint+prettier默认有这个配置, 这样就不用安装了):
npm install --save-dev eslint-plugin-prettier npm install --save-dev eslint-config-prettier |
更新了eslint的配置, 以处理prettier和eslint的冲突:
// package.json中eslint部分(或者配置单独的.eslintrc.js文件)
module.exports = {
  // ...其他配置
  extends: [
    // 继承 vue 的标准特性
    "plugin:vue/essential",
    "eslint:recommended",
    // eslint规范与prettier中有冲突时需要配置, 意味着使用插件: eslint-plugin-prettier和eslint-config-prettier
    "plugin:prettier/recommended",
  ],
  // 其他配置不变
};
|
利用git hook工具提交前做一些事情
在提交代码时自动检查与校正——Husky工具
虽然项目已经利用eslint+prettier进行了代码格式的校验,但是也不能保证我们提交的代码都将这些问题解决了:
- 我们希望提交到库中的代码都是符合规范的
- 那么在每个开发人员提交代码之前,不符合eslint规范的地方,需要自动根据规范进行修复
可以通过Husky工具:
- Husky工具是一个git hook工具,在git提交代码的各个阶段:pre-commit(提交之前),commit msg(对commit message进行校验),pre-push(push之前)
- 对执行的命令: git commit m "" 进行监听并拦截, 执行操作eslint - fix修改代码不合规范之处
自动配置命令
npx husky-init && npm install or npx husky-init ; npm install |
"npx husky-init && npm install"命令做了三件事:
- 安装husky相关的依赖
- 在项目目录下创建.husky文件夹
- 在package.json中添加脚本: “prepare”:“husky install”。拦截时默认会执行这个脚本
在生成的.husky/pre-commit中更换命令为:npm run lint(默认是npm test)
(遇到npx不能执行的情况,移步npx教程:npx 使用教程 - 阮一峰 (ruanyifeng.com))
(遇到&&不能识别的情况下,将&&换成“;”)
这时候我们在git commit的时候,会自动对代码进行lint校验修复并提交。
如何规范提交代码备注——commitizen
commitizen是一个帮我们生成commit message的工具
安装依赖:
// 安装commitizen |
执行后初始化,工具会自动配置好commitizen:
"config": {
|
配置后,我们提交代码需要
- 执行命令(注意不执行git commit了, 用npx cz替代)
git add . |
- 第一步选择提交的类型Type:
| Type | 描述 |
|---|---|
| feat | 新增特性(feature) |
| fix | 修复Bug(Bug fix) |
| docs | 修改文档(documentation) |
| style | 代码格式修改(white-space,formatting,missing semi colons,etc) |
| refactor | 代码重构(refactor) |
| perf | 改善性能(A code change that improves performance) |
| test | 测试(when adding missing tests) |
| build | 变更项目构建或外部依赖(例如:scopes:webpack,npm,glup,etc) |
| ci | 更改持续集成软件的配置文件和package中的script脚本等,例如scopes:Travis,Circle等 |
| chore | 变更构建流程或辅助工具(比如更改测试环境) |
| revert | 代码回退 |
- 第二步选择本次修改的范围(作用域)
- 第三步填写提交的信息(84个字符以内)
- 第四步填写提交信息具体描述
- 第五步是否是一次较大的改动,直接回车默认N
- 第六步这次改动是否关联一些开放的问题issues
- 过程如下:

最终生成的提交信息如下:

如何阻止用git commit提交方式提交代码?
我们项目中想使用cz来规范代码提交备注,但是依然有项目成员使用git commit这种方式,应如何避免?使用commitlint来限制提交
安装依赖
// 安装@commitlint/config-conventional 和 @commitlint/cli |
新建commitlint.config.js文件:
module.exports = {
|
在git hooks的husky文件夹中添加commit-msg文件,执行命令,生成文件:
npx husky add .husky/commit-msg "npx --no-install commitlint --edit $1" |
此时使用git commit -m "msg"会出现如下问题:

不按照规定的提交备注提交代码不会成功。
按照这种规范提交的代码记录样本(某开源项目):

规范、整洁清晰了很多。
开发工具配置(以下为项目小伙伴们需要手动在自己的VS code编辑器中添加的设置)
拓展安装
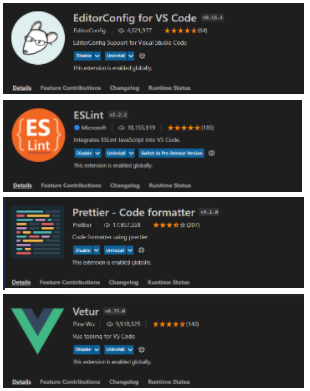
需要在vscode中搜索并安装 eslint, prettier, vetur拓展,如图: (据说webStorm是将这些集成在编辑器中的, 不需要安装拓展)
vscode工作区settings.json文件设置项更改
{
  "eslint.enable": true,
  "eslint.options": {
    "extensions": [".js", ".vue", ".ts", ".tsx"]
  },
  "editor.formatOnSave": true,
  "editor.codeActionsOnSave": {
    "source.fixAll.eslint": true
  },
  "eslint.validate": [
    "vue",
    "html",
    "javascript",
    "typescript",
    "javascriptreact",
    "typescriptreact"
  ],
  "vetur.format.defaultFormatter.html": "prettier",
  "window.zoomLevel": -2
}
|
vscode两个配置需要注意一下
问题1:在vscode中Vetur也有一套Format规则,需要设置以解决冲突,
文件——首选项——设置,在打开的页面点击,用户—拓展—Vetur,搜索default formatter,项目中使用到的语言对应下拉选择prettier即可。
问题2:HTML中代码格式无法修复,一般提示格式问题语句如下:Property 'id' does not exist on type 'unknown'
文件——首选项——设置,在打开的页面点击,用户—拓展—Vetur,搜索Interpolation,找到Validation: Interpolation一栏,取消勾选即可。
补充
1. 项目中代码格式问题有很多, 我需要手动一个文件一个文件这样去改吗?
package.json建立脚本: (注意结合忽略文件来使用, 否则就会全部文件都格式化导致问题)
`npm run lint --fix`
"scripts" : {
  ...
  "prettier": "prettier --write .",
  ...
}
|
执行命令:
`npm run prettier` `npm run lint --fix` |
一键修改代码中的'prettier'问题。
2. 开发中不需要prettier格式化的文件配置(打包文件, 配置文件, svg格式文件等), 增加配置文件:
.prettierignore
/dist/
.local
.output.js
/node_modules/**

**/*.svg
**/*.sh

/public/*
|
结语
按照上面步骤配置好之后项目团队开发人员ctrl+s保存时即可修正不一致的代码风格, 整体代码风格会保持一致,不但在合并时可减少不必要的冲突,长期来看还有助于代码 review 和后期项目维护。


【推荐】编程新体验,更懂你的AI,立即体验豆包MarsCode编程助手
【推荐】凌霞软件回馈社区,博客园 & 1Panel & Halo 联合会员上线
【推荐】抖音旗下AI助手豆包,你的智能百科全书,全免费不限次数
【推荐】博客园社区专享云产品让利特惠,阿里云新客6.5折上折
【推荐】轻量又高性能的 SSH 工具 IShell:AI 加持,快人一步
· 在鹅厂做java开发是什么体验
· 百万级群聊的设计实践
· WPF到Web的无缝过渡:英雄联盟客户端的OpenSilver迁移实战
· 永远不要相信用户的输入:从 SQL 注入攻防看输入验证的重要性
· 浏览器原生「磁吸」效果!Anchor Positioning 锚点定位神器解析