EfficientNet环境搭建&网络修改
引子
在深度学习CV领域,最初2012年突破的就是图像分类,发展这么多年,基本上已经没有什么进展了。此篇作为之前EfficientNet挽留过的总结,现在整理下,OK,让我们开始吧。
一、EfficientNet安装
1、pytorch版本网址:https://github.com/lukemelas/EfficientNet-PyTorch
2、pip install efficientnet_pytorch
二、特征提取网络修改
1、修改EfficientNet原始代码model.py中extract_features函数如下图:

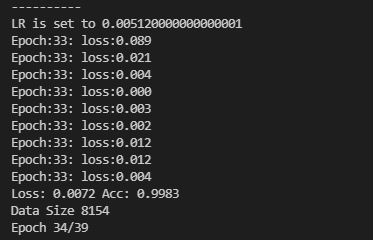
新增红框中pool层,修改特征输出维度,重新训练,训练log如下:
2、pth模型转onnx
import torch
from efficientnet_pytorch import EfficientNet
import torch.nn as nn

net_path=r'efficientnet-b0_1.pth'
model=torch.load(net_path)

model.set_swish(memory_efficient=False)
model.eval()

input_names = ["input"]
output_names = ["output"]
onnx_names= "NonplateColor.onnx"
dynamic = True
if dynamic:
    dummy_input = torch.randn(1, 3, 224, 224, device='cuda')
    dynamic_axes = {"input":{0:"batch_size"},"output":{0:"batch_size"}}
    torch.onnx.export(  model,
                        dummy_input,
                        onnx_names,
                        verbose=False,
                        input_names=input_names,
                        output_names=output_names,
                        dynamic_axes=dynamic_axes,
                        do_constant_folding= True,
                        opset_version=10,
                        )
else:
    dummy_input = torch.randn(1, 3, 224, 224, device='cuda')
    torch.onnx.export(model, dummy_input, onnx_names, verbose=True, input_names=input_names, output_names=output_names)
3、onnx模型删减网络层
import onnx

onnx_model = onnx.load("EfficientNetType1115.onnx")
graph = onnx_model.graph
node  = graph.node

# 909节点为要删除的Conv节点
old_scale_node = node[254]
old_scale_node1 = node[255]
old_scale_node2 = node[256]
# 删除旧节点
graph.node.remove(old_scale_node)
graph.node.remove(old_scale_node1)
graph.node.remove(old_scale_node2)
# 上一节点
gap_node = node[253]
# 连接输出
gap_node.output[0] = 'output'

# 修改输出维度
for output in onnx_model.graph.output:
    d = output.type.tensor_type.shape.dim
    # d[0].dim_value= 'batch_size'
    d[1].dim_value = 1280

# 保存新的模型
onnx.checker.check_model(onnx_model)
onnx.save(onnx_model, 'out.onnx')

 浙公网安备 33010602011771号