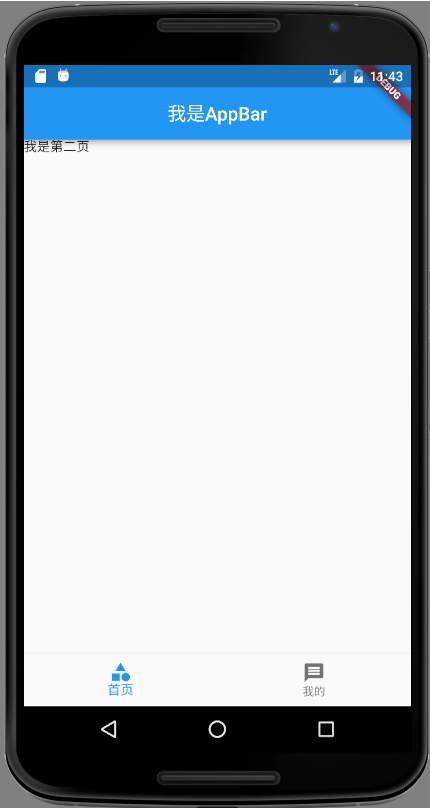
Flutter 实现 ViewPager、bottomNavigationBar 界面切换
1、前言
首先我们想一下,如果在 Android 中实现 布局切换,通常的思路是:
- 做一个 viewpager
- 一组 Fragment
- 每个 Fragment 绑定一个 xml
- 最后填充至 viewpager
2、Flutter 实现
上边提到的用安卓原生做,思路是很明确,但是代码量还是有的,那么来看一下, Flutter 如何使用 Viewpager 实现的。
2.1、创建有状态 Widget
首先创建有状态 StatefulWidget,然后构建 state:_ApplicationPageState
class ApplicationPage extends StatefulWidget {
  //@override
  //_ApplicationPageState createState() => new _ApplicationPageState();
   等同于上边注释掉的 createState();
    @override
    State<StatefulWidget> createState() {
      // TODO: implement createState
      return _ApplicationPageState();
    }

}
2.2、state
Scaffold 实现了基本的纸墨设计布局结构。所以我们 new Scaffold 然后 return 即可。
class _ApplicationPageState extends State<ApplicationPage> {

  int _currentPageIndex = 0;
  var _pageController = new PageController(initialPage: 0);

  @override
  Widget build(BuildContext context) {
    return new Scaffold(
      appBar:
       new AppBar(
         title: new Text("我是AppBar"),
         centerTitle: true,
       ),
      body: new PageView.builder(
          onPageChanged:_pageChange,
          controller: _pageController,
          itemBuilder: (BuildContext context,int index){
            return index==1?new Text("我是第一页"):new Text("我是第二页");
          },
          itemCount: 2,
      ),
      bottomNavigationBar: new BottomNavigationBar(items: [
              BottomNavigationBarItem(
                  icon: new Icon(Icons.category), title: new Text("首页")),
              BottomNavigationBarItem(
                  icon: new Icon(Icons.message), title: new Text("我的")),
          ],
          currentIndex: _currentPageIndex,
          onTap: onTap,
      ),
    );
  }

  // bottomnaviagtionbar 和 pageview 的联动
  void onTap(int index) {
    // 过pageview的pagecontroller的animateToPage方法可以跳转
    _pageController.animateToPage(index,
        duration: const Duration(milliseconds: 300), curve: Curves.ease);
  }

  void _pageChange(int index) {
    setState(() {
      if (_currentPageIndex != index) {
        _currentPageIndex = index;
      }
    });
  }

}
关于上边有几个方法:
Scaffold 有下面几个主要属性:
-
appBar:显示在界面顶部的一个 AppBar,也就是 Android 中的 ActionBar 、Toolbar
-
body:当前界面所显示的主要内容 Widget
-
bottomNavigationBar: 显示在页面底部的导航栏
2.3、navBar和pageview如何联动?
通过上边的代码也可以发现,pageView有个 onPageChanged 属性,并且类中定义了一个 _pageChange 方法,
通过 pageview 的 pagecontroller 的 animateToPage 方法实现的界面跳转;


