
spring cloud(一)
1、预热
定义端口启动项目:
java -jar 项目.jar --server.port=8081
启动项目填充属性占位符:
java -jar 项目.jar --占位名称=值
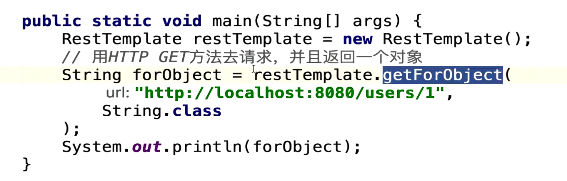
spring mvc 提供了一个访问一个地址后,获取其返回出来的数据的方法:RestTemplate
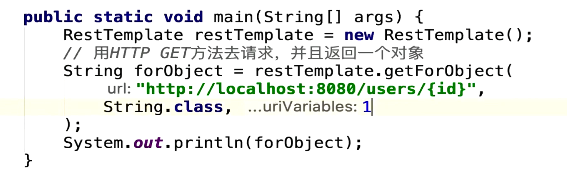
get请求(Object)
get请求(Entity)
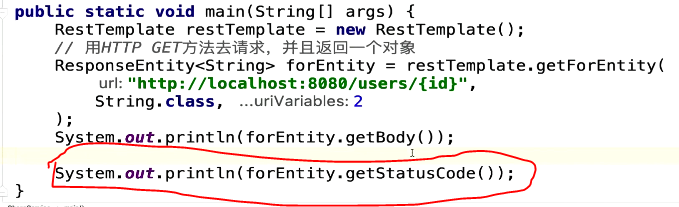
Entity相比于Object,Entity可以获取状态码。
可以将他交给ioc容器管理,就不需要new他了。
在启动类或者配置类添加:
    @Bean
    public RestTemplate restTemplate(){
        return new RestTemplate();
    }
测试:
启动端口为8889的项目,然后访问该项目的 /finduser 接口,从而调用端口为8888的项目接口,并获取其返回出来的数据。(如果不知道返回出来的数据类型是什么,可以使用 Object 接收,但是参数二要改为 Object.class)
    @Resource
    private RestTemplate restTemplate;


    @GetMapping("/finduser")
    public ResultUtil findUser(){
        //获取该路径返回出来的数据
        ResultUtil forObject = restTemplate.getForObject("http://localhost:8888/user/findbyid?id=2", ResultUtil.class);

        return forObject;
    }
结果:
{
    "code": 200,
    "data": {
        "id": 2,
        "wxId": 123,
        "wxNickname": "asd",
        "roles": "0",
        "avatarUrl": "0",
        "createTime": "2021-11-01T19:57:29",
        "updateTime": null,
        "bonus": 0
    },
    "message": "查询成功!"
}
2、Spring cloud

安装nacos(有linux版本,有window版。。。)
在linux启动nacos
启动命令:
sh startup.sh -m standalone
RestTem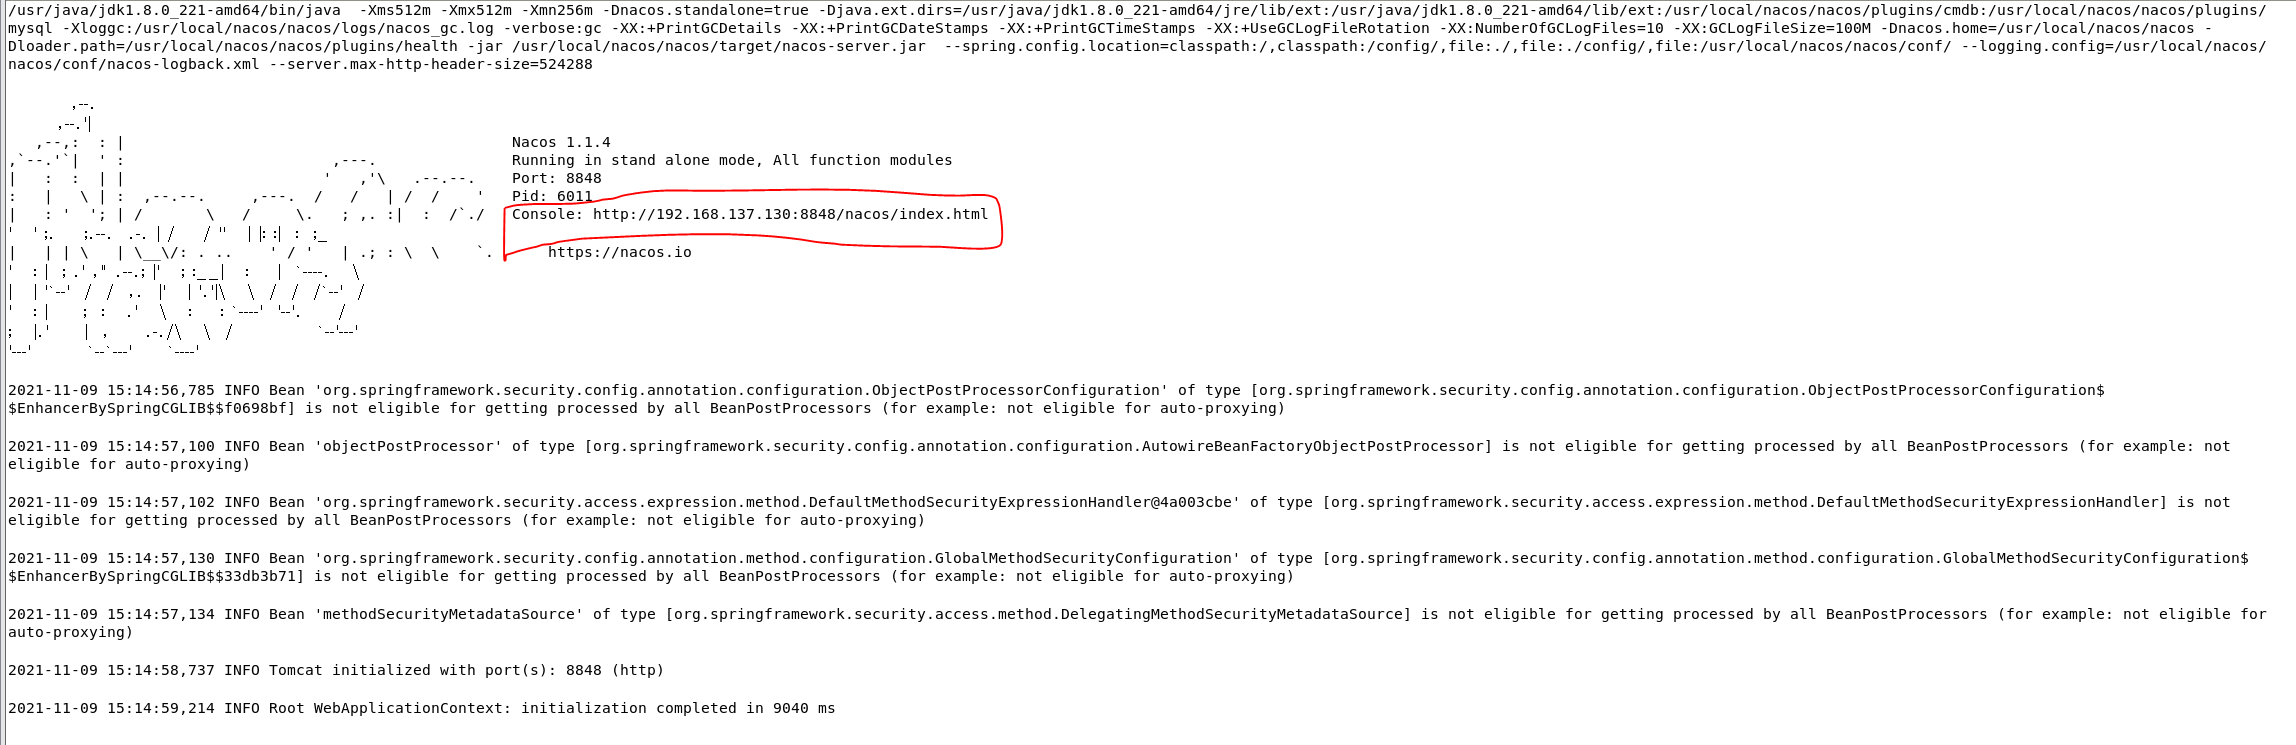
访问该地址,用户名和密码:Nacos
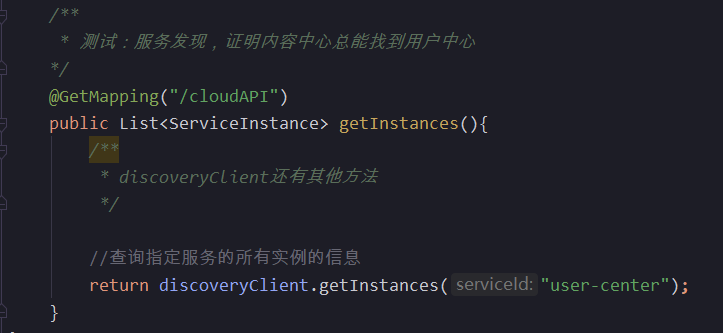
spring cloud提供了一个类:DiscoveryClient
@Resource
private DiscoveryClient discoveryClient;
访问后输出
[
    {
        "serviceId": "user-center",
        "host": "192.168.5.126",
        "port": 8888,
        "secure": false,
        "metadata": {
            "nacos.instanceId": "192.168.5.126#8888#DEFAULT#DEFAULT_GROUP@@user-center",
            "nacos.weight": "1.0",
            "nacos.cluster": "DEFAULT",
            "nacos.healthy": "true",
            "preserved.register.source": "SPRING_CLOUD"
        },
        "uri": "http://192.168.5.126:8888",
        "scheme": null,
        "instanceId": null
    }
]
与RestTemplate结合使用
    //spring cloud 提供的类
    @Resource
    private DiscoveryClient discoveryClient;
    //spring mvc 提供的类
    @Resource
    private RestTemplate restTemplate;


    @GetMapping("/finduser")
    public ResultUtil findUser(){
        //获取指定服务的所有实例的信息
        List<ServiceInstance> instances = discoveryClient.getInstances("user-center");
        String targetURL = instances.stream()
                //数据变换
                .map(instance -> instance.getUri().toString() + "/user/findbyid?id=2")
                .findFirst()
                //当instances为空时才会走这一步
                .orElseThrow(() -> new IllegalArgumentException("没有当前实例!"));
        log.info("请求地址:{}", targetURL);
        //获取该路径返回出来的数据
        ResultUtil forObject = restTemplate.getForObject(targetURL, ResultUtil.class);

        return forObject;
    }
结果:
{
    "code": 200,
    "data": {
        "id": 2,
        "wxId": 123,
        "wxNickname": "asd",
        "roles": "0",
        "avatarUrl": "0",
        "createTime": "2021-11-01T19:57:29",
        "updateTime": null,
        "bonus": 0
    },
    "message": "查询成功!"
}
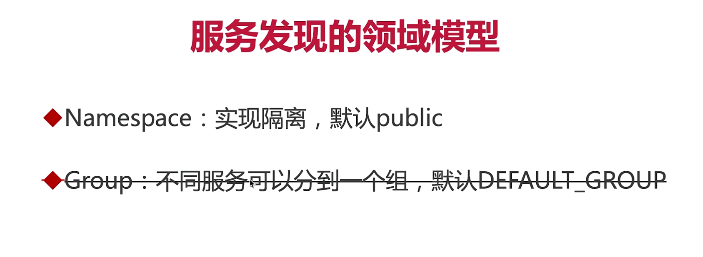
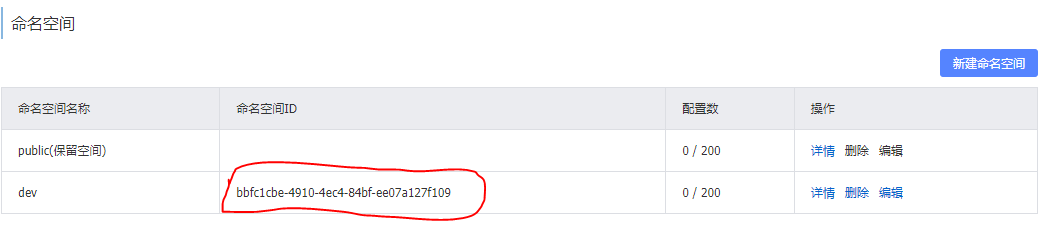
2.1.1、服务发现的领域模型
访问nacos,前往”命名空间“,这里就是领域模型(namespace),namespace作用就是用来实现隔离
Group:分组,在服务列表,点击详情:
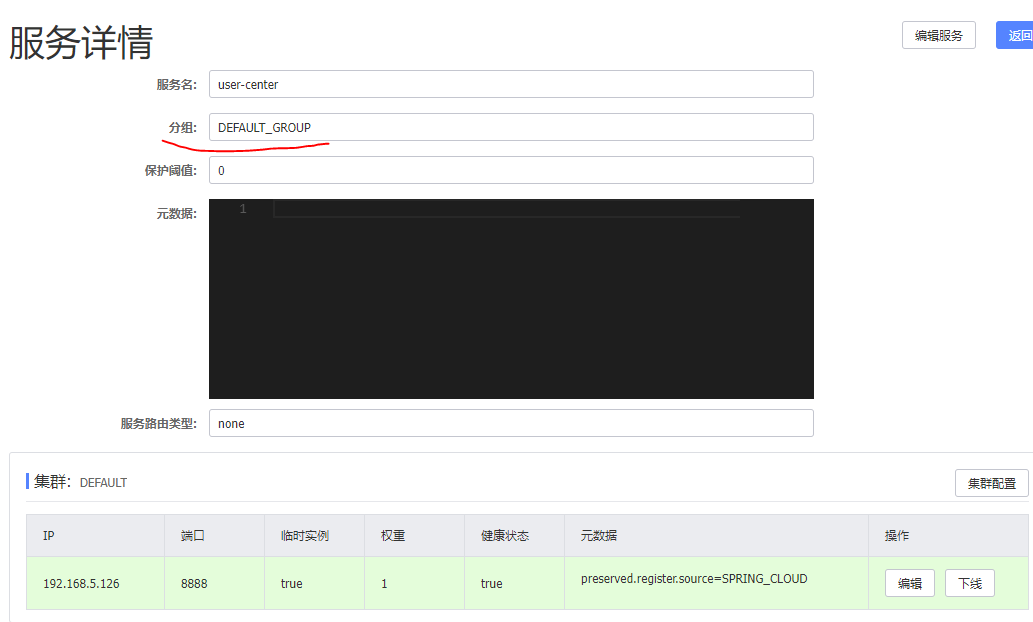
Group在目前版本还没用到。
2.1.2、创建一个服务发现的领域模型
前往”命名空间“,点击新建命名空间

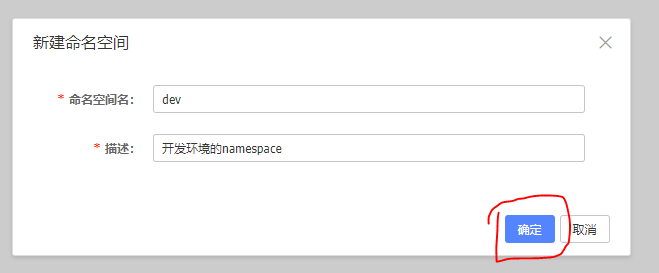
自动生成id
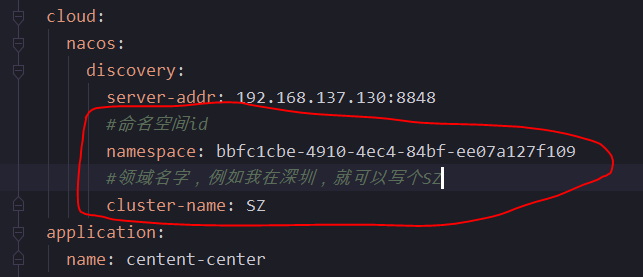
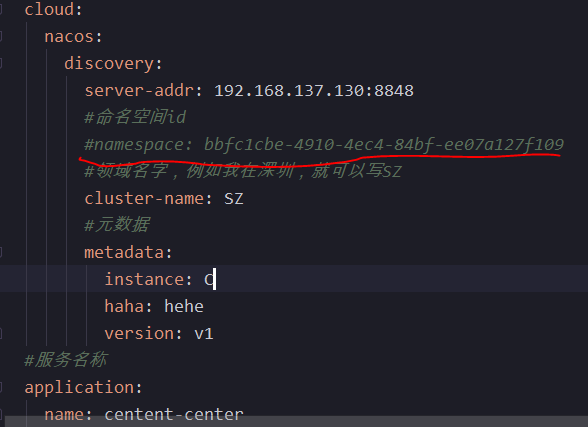
回到项目的配置文件中,添加配置:
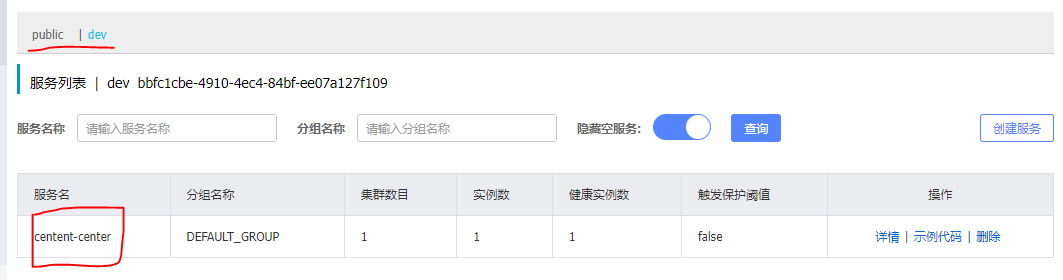
添加之后重启项目,并进入nacos中的服务列表
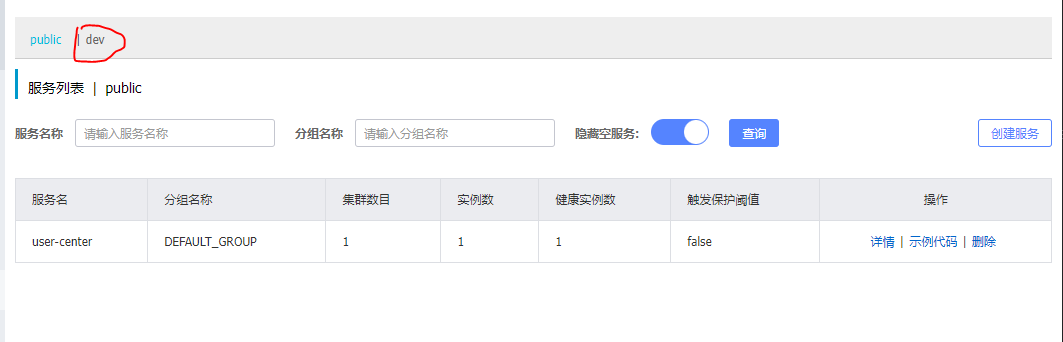
这里会多了一个dev,并且centent-center服务不在public中了,而是在dev里面,因为上面把命名空间id写入了 centent-center服务的配置文件里面了。
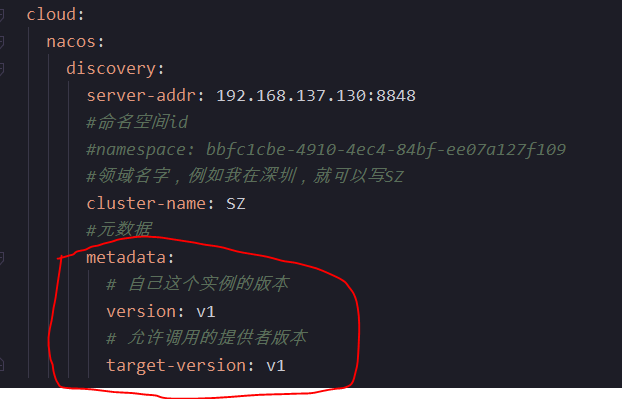
2.2.1、元数据
元数据就是一堆的描述信息,以map存储。
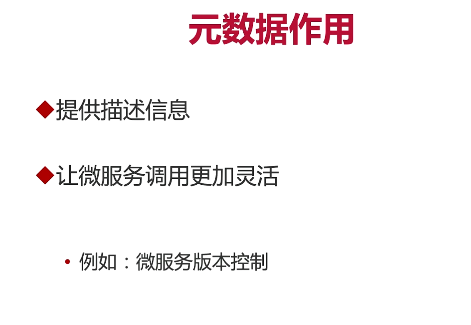
例如有两个版本的内容中心分别为v1和v2,两个版本的用户中心分别为u1和u2,而v1只能调用u1不能调用u2,v2只能调用u2不能调用u1,这种场景就非常适用元数据解决。
2.2.2、如何设置元数据
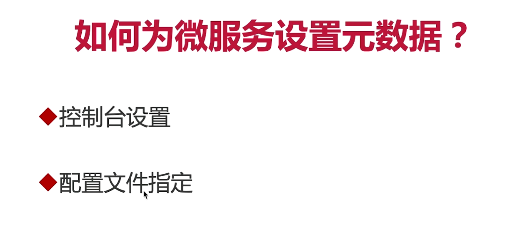
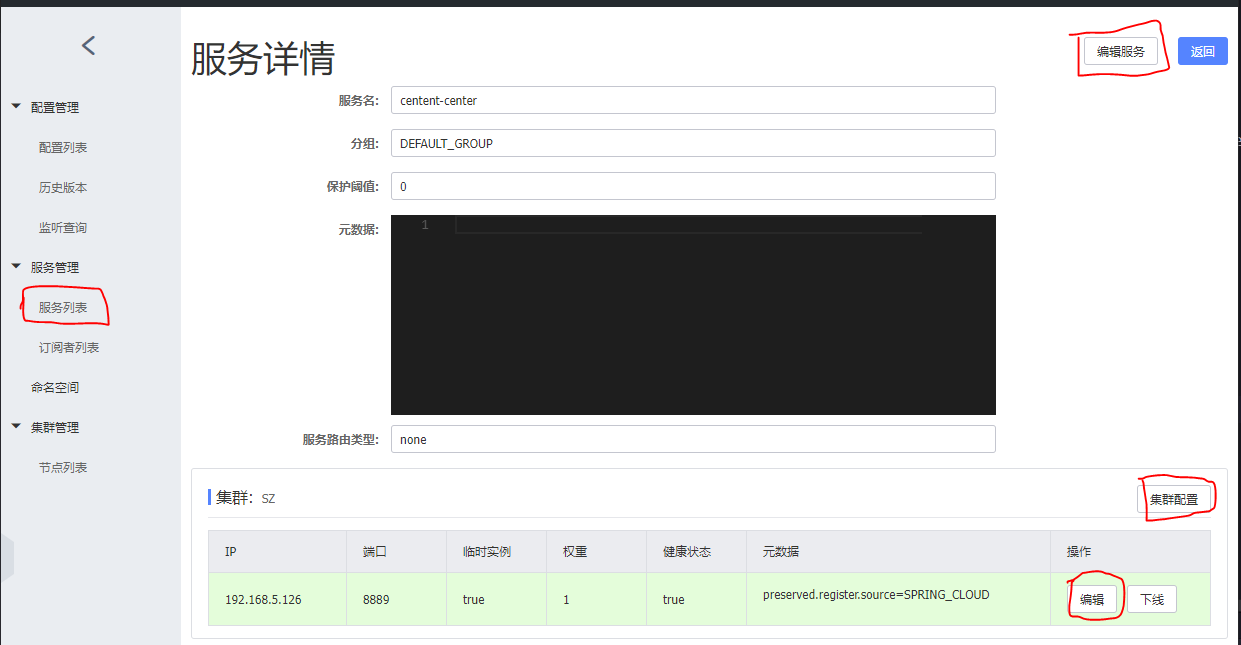
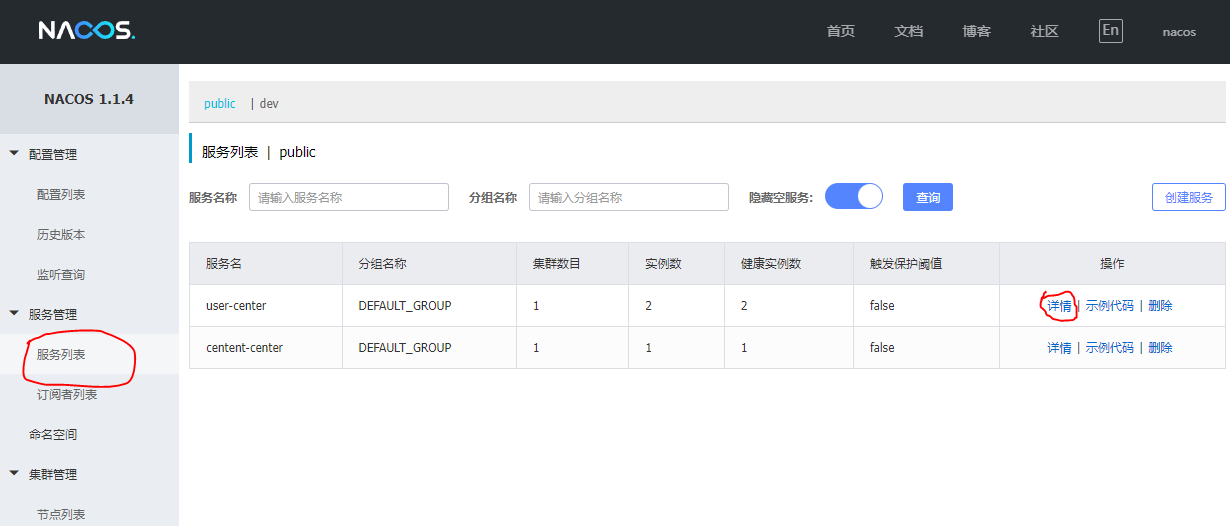
控制台设置:
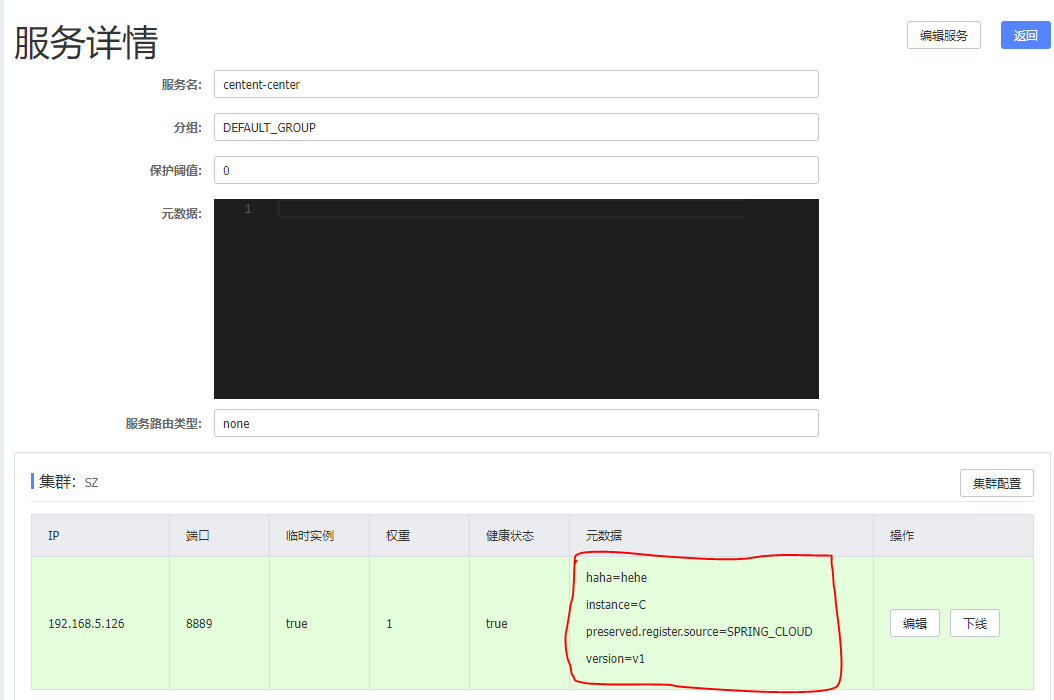
前往服务列表,点击详情
配置文件设置:
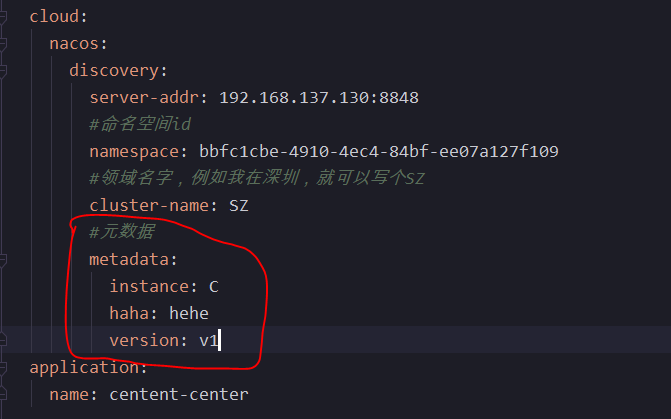
重启项目,进入详情:
2.2.3、如何解决2.2.1所述的问题?
这个问题后面再说。
3、负载均衡
负载均衡,其含义就是指将负载(工作任务)进行平衡、分摊到多个操作单元上进行运行。
3.1、使用Ribbon实现负载均衡
因为Nacos依赖包含了Ribbon,所以不需要再引入依赖。
1)回到服务消费者(centent-center),注释掉命名空间id配置。因为服务消费者与服务提供者不在同一个命名空间,会导致服务消费者无法调用服务提供者。
2)前往配置类或启动类(看你把ReastTemplate这个Bean写到哪里去了),向ReastTemplate添加注解
    @Bean
    @LoadBalanced
    public RestTemplate restTemplate(){
        return new RestTemplate();
    }
3)修改 /finduser 接口
    @GetMapping("/finduser")
    public ResultUtil findUser(){
        //获取该路径返回出来的数据 把url中的ip地址和端口号改为服务提供者的名称
        ResultUtil forObject = restTemplate.getForObject("http://user-center/user/findbyid?id={id}", ResultUtil.class,2);
        return forObject;
    }
4)启动服务提供者(端口号为8888)项目,然后更改他的端口号为8887后再启动一个服务提供者(这两个服务提供者的名称都要为 user-center ),启动服务消费者,重复发送请求:
服务消费者(centent-center)会轮询调用服务提供者,也就是说第一次会请求:端口号为8888的服务提供者,第二次会请求:端口号为8887的服务提供者,第三次会请求:端口号为8888的服务提供者.......
这就是轮询,Ribbon默认规则。
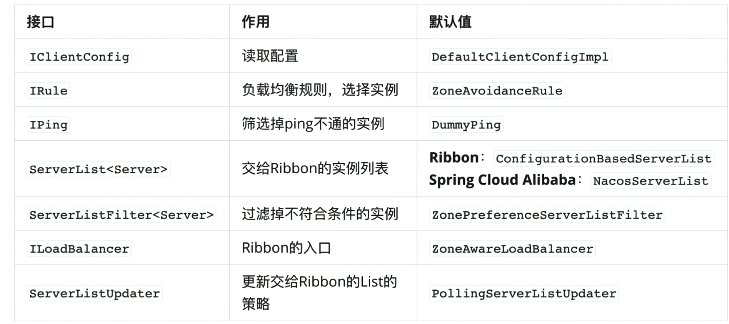
3.1、Ribbon组成
4、细粒度配置自定义(自定义Ribbon负载均衡规则)
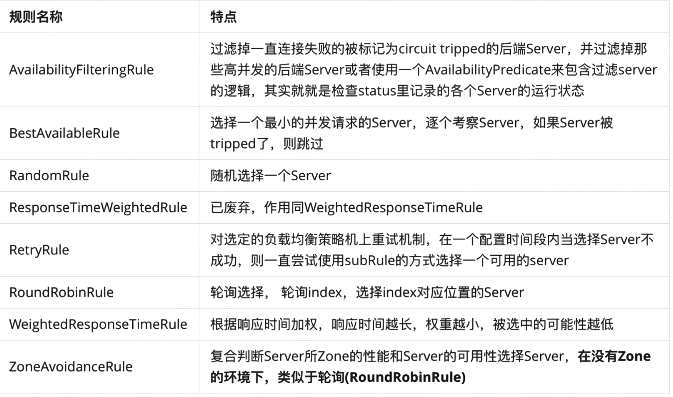
再不配置规则的情况下默认是使用ZoneAvoidanceRule规则
4.1、自定义负载均衡规则
4.1.1、使用java代码配置
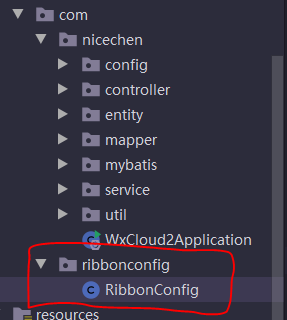
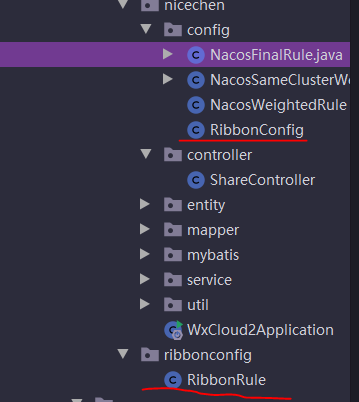
1)前往服务消费者,在启动类所在包外创建ribbonconfig包,再该包下创建RibbonConfig,这样做是为了防止父子上下文重叠
@Configuration
public class RibbonConfig {

    @Bean
    public IRule ribbonRule() {
        //返回想要的规则,这个是随机选择一个Server规则
        return new RandomRule();
    }
}
什么是父子上下文重叠?
首先我们可以查看一下@Configuration注解,发现是一个组合注解,其中

里面就包含了@Component注解,也就是说@Configuration注解也是一种

特殊的Component。

接下来我们再看一下@SpringBootApplication注解,他也是一个组合注

解,其中里面也包含了一个@ComponentScan注解,解释一下

@ComponentScan注解的作用是用来扫描Component的,也就是说

@Component,@Controller,@Service,@Repository等这些Component

注解都会被扫描到,包括上面提到的@Configuration注解也会被扫描到。

默认扫描的位置是当前启动类所在的包以及启动类包下面的所有

Component。

通过上面的描述,Ribbon的配置类一定不能让@SpringBootApplication注

解扫描到。这是为什么呢???这就是因为Spring的上下文,是一个树状的

上下文。在我们的应用里@SpringBootApplication注解所扫描的上下文叫

主上下文,而Ribbon也会有一个上下文,是一个子上下文。那么如果父子上

下文所扫描的包重叠,就会出现各种各样奇葩的问题。
2)回到启动类所在包下创建UserCenterRibbon
@Configuration
//指定这个类是为user-center服务的
@RibbonClient(name="user-center",configuration = RibbonConfig.class)
public class UserCenterRibbon {
}
3)启动项目,调用 /finduser 接口,可以发现服务消费者会随机调用一个服务提供者(user-center)
4.1.2、配置属性方式
1)注释掉4.1.1的配置方式
2)回到服务消费者,按两下Shift键,查找想要的规则
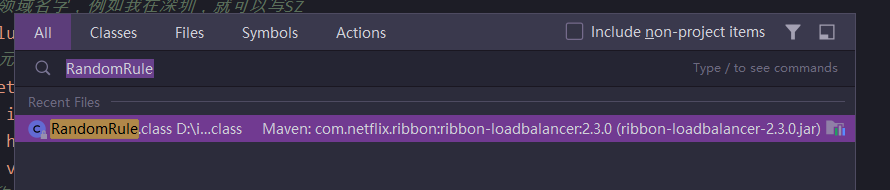
3)进入该规则的类,复制他的全路径
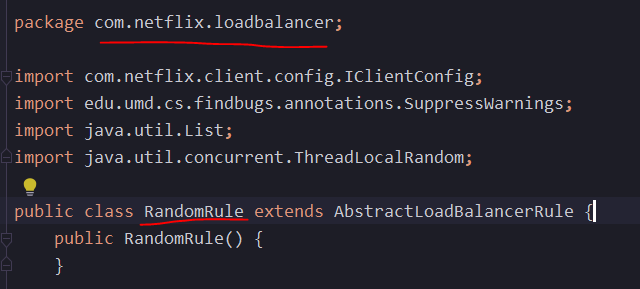
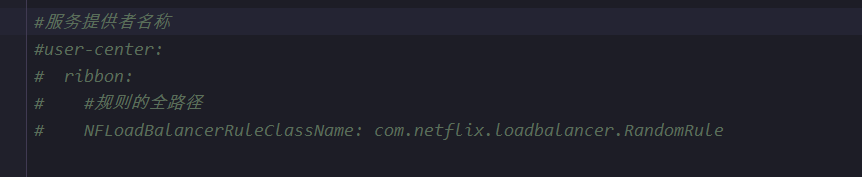
4)回到回到服务消费者,添加配置文件
#服务提供者名称
user-center:
  ribbon:
    #规则的全路径
    NFLoadBalancerRuleClassName: com.netflix.loadbalancer.RandomRule
5)启动项目,测试 /finduser 接口,服务消费者会随机调用服务提供者。
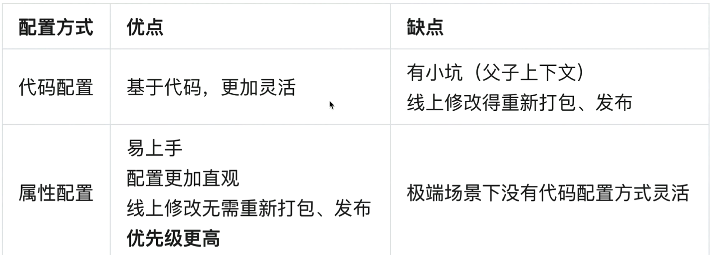
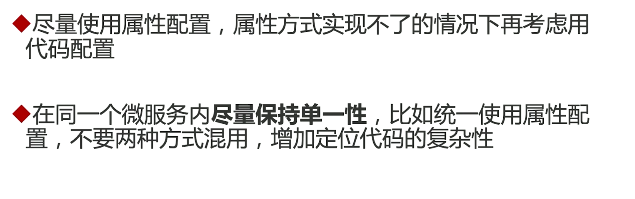
4.2、java代码配置 vs 配置属性方式
4.3、全局配置
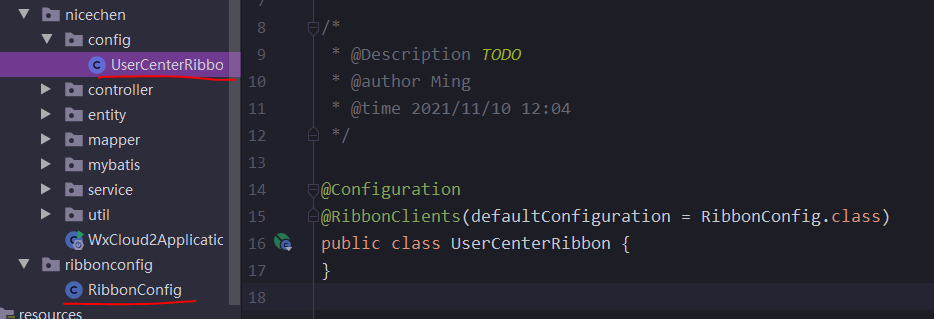
1)把配置类中的配置注释掉
2)回到config包下,修改UserCenterRibbon类
@Configuration
@RibbonClients(defaultConfiguration = RibbonConfig.class)
public class UserCenterRibbon {
}
3)打开启动类所在包外的RibbonConfig注释,这样修改就可以了
5、支持配置项
在3.1所示表格中的每一个配置项都可以自定义,比如在4.1中,就自定义了IRule项。
自定义每一项的方法都类似于4.1中的方法。
5.1、演示自定义IPing
5.1.1、java代码配置方式
1)回到服务消费者启动类所在包外的类,添加IPing的Bean;
2)与4.1.1方法一样
5.1.2、配置属性配置方式和全局配置方式都与上面4一样。
配置文件:
#服务提供者名称
user-center:
  ribbon:
    #规则的全路径
    NFLoadBalancerRuleClassName: com.netflix.loadbalancer.RandomRule
    NFLoadBalancerClassName: ILoadBalancer 实现类全路径
    NFLoadBalancerPingClassName: IPing 实现类全路径
    NIWSServerListClassName: ServerList 实现类全路径
    NIWSServerListFilterClassName: ServerListFilter 实现类全路径
6、饥饿加载
负载均衡默认是懒加载模式的。
启动项目后首次访问 /finduser 接口,才会调用user-center服务的负载均衡,所以首次访问速度会比较慢,第二次及以后都会比较快

6.1、开启饥饿加载
只需要在配置问加添加配置即可:
#开启饥饿加载
ribbon:
  eager-load:
    #为哪些服务开启饥饿加载
    clients: user-center
    enabled: true
7、扩展Ribbon-支持Nacos权重
前往Nacos页面,点击服务,点击详情
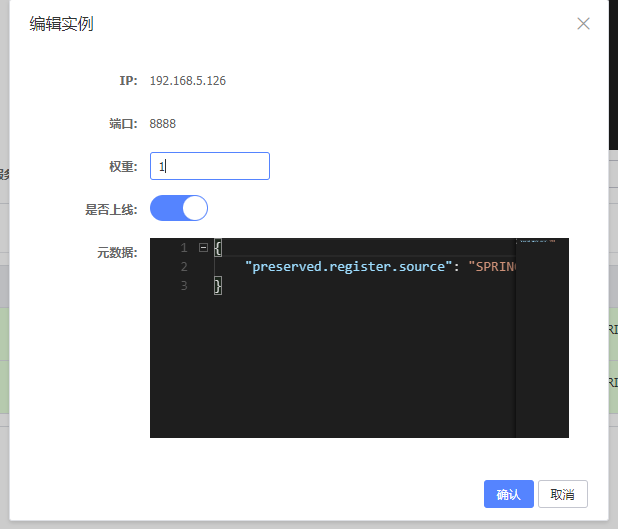
点击编辑端口号为8888的服务
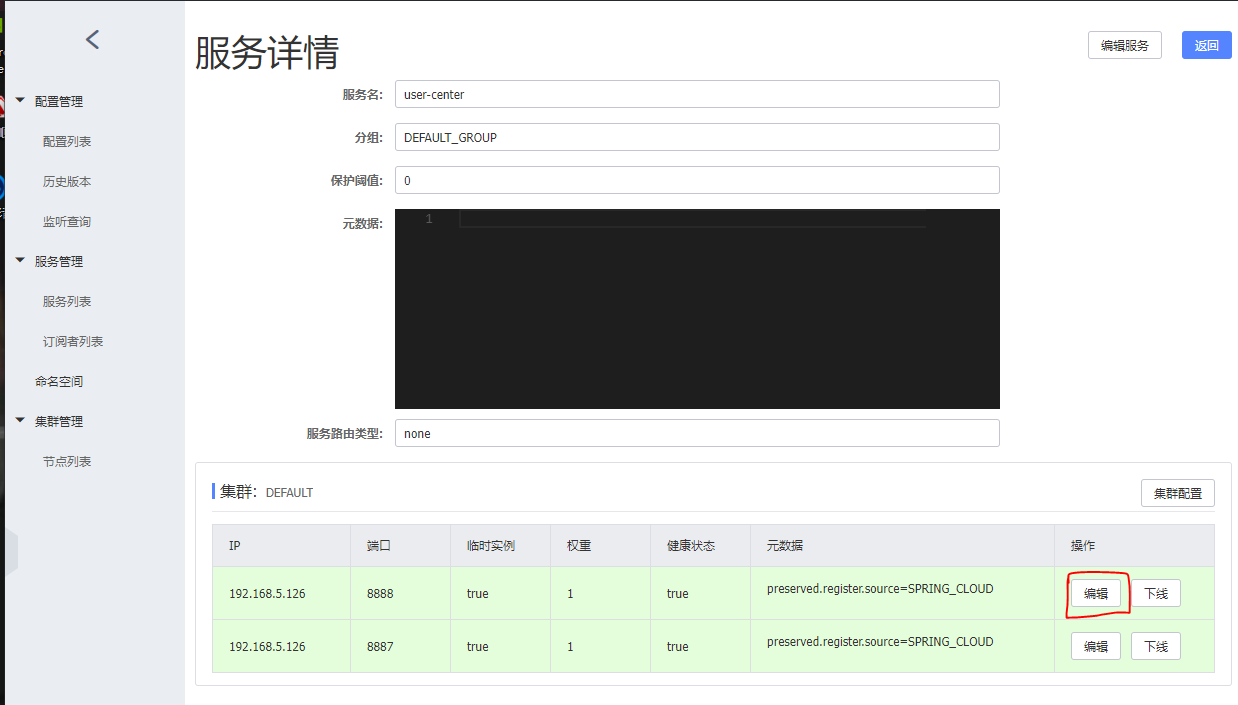
修改权重,权重为0-1之间,数值越大,服务被调用的概率越大
但是4中的IRule表格都不支持权重。
7.1、自定义IRule,为权重生效
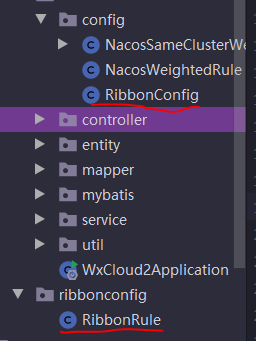
1)在config中创建自定义IRule的类
@Slf4j
public class NacosWeightedRule extends AbstractLoadBalancerRule {
    @Autowired
    private NacosDiscoveryProperties properties;
    @Override
    public void initWithNiwsConfig(IClientConfig iClientConfig) {
        //读取配置文件,并初始化NacosWeightedRule
    }

    @Override
    public Server choose(Object o) {
        try {
            //IRule入口
            //ILoadBalancer loadBalancer = this.getLoadBalancer();   ILoadBalancer没有getName方法
            BaseLoadBalancer loadBalancer = (BaseLoadBalancer)this.getLoadBalancer();

            //想要请求的微服务的名称
            String name = loadBalancer.getName();

            //实现负载均衡算法
            //拿到服务发现的相关API
            NamingService namingService = properties.namingServiceInstance();

            //nacos client 自动通过基于权重的负载均衡算法,给我们选择一个实例
            Instance instance = namingService.selectOneHealthyInstance(name);

            log.info("port:  {}  -------  instance:  {}", instance.getPort(),instance);
            return new NacosServer(instance);
        } catch (NacosException e) {
            return null;
        }
    }
}
2)使用自定义的规则,全局配置的方式

RibbonRule
@Configuration
//指定自定义IRule类
@RibbonClients(defaultConfiguration = NacosWeightedRule.class)
public class RibbonRule {
}
RibbonConfig
@Configuration
public class RibbonConfig {
    @Bean
    public IRule ribbonRule() {
        //返回自定义的IRule类
        return new NacosWeightedRule();
    }
}
设置端口为8888的权重为0.3,端口号为8887的权重为1.
启动项目,多次访问 /finduser 接口
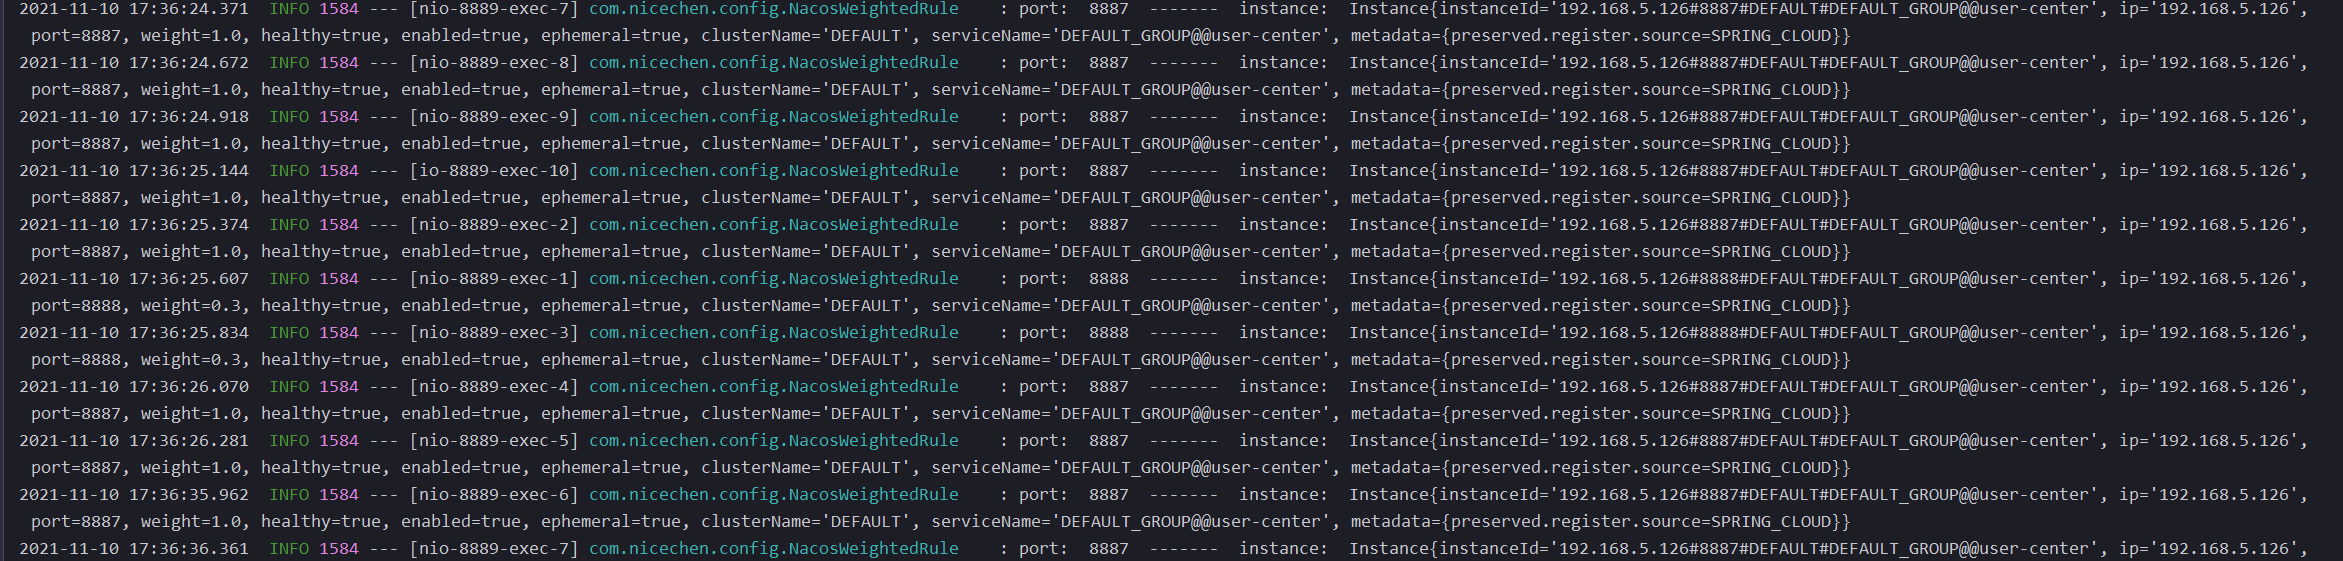
调用端口为8888的次数比端口为8887的次数少很多。
8、扩展Ribbon-同集群优先
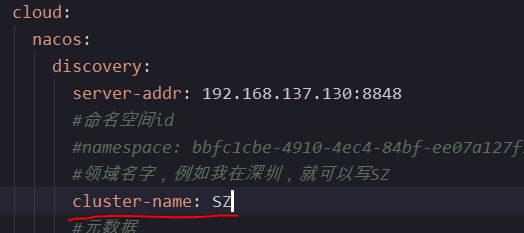
需求:如果没有意外,服务消费者(所在领域为SZ)只调用所在领域为SZ的服务提供者,所在领域为SZ的服务提供者都死机了,才会调用其他领域的服务提供者。
1)在服务消费者config下定义Ribbon规则
@Slf4j
public class NacosSameClusterWeightedRule extends AbstractLoadBalancerRule {
    @Autowired
    private NacosDiscoveryProperties properties;
    @Override
    public void initWithNiwsConfig(IClientConfig iClientConfig) {

    }

    @Override
    public Server choose(Object o) {
        try {
            //拿到配置文件中的领域名称 SZ
            String clusterName = properties.getClusterName();

            BaseLoadBalancer loadBalancer = (BaseLoadBalancer) this.getLoadBalancer();
            //想要请求的微服务名称
            String name = loadBalancer.getName();
            //拿到服务发现的相关API
            NamingService namingService = properties.namingServiceInstance();

            // 1. 找到指定服务的所有实例
            List<Instance> instances = namingService.selectInstances(name, true);

            // 2.过滤出相同领域下的所有实例
            List<Instance> sameClustInstane = instances.stream()
                    .filter(instance -> {
                        return Objects.equals(instance.getClusterName(), clusterName);
                    })
                    .collect(Collectors.toList());

            // 3.如果相同领域下没有其他实例,就使用其他实例(1)
            List<Instance> instancesToBeChosen = new ArrayList<>();
            if (CollectionUtils.isEmpty(sameClustInstane)) {
                instancesToBeChosen = instances;
                log.warn("发生跨集群的调用,name={}, clusterName={}, instances={}",name,clusterName,instances);

            }else {
                instancesToBeChosen = sameClustInstane;
            }

            // 4.基于权重的负载均衡算法,返回1个实例
            Instance host = ExtendBalancer.getHostByRandomWeight2(instancesToBeChosen);
            log.info("port:{} ------ instance:{}",host.getPort(),host);
            return new NacosServer(host);
        } catch (NacosException e) {
            e.printStackTrace();
        }

        return null;
    }
}
//调用Nacos算法底层
class ExtendBalancer extends Balancer {
    public static Instance getHostByRandomWeight2(List<Instance> hosts) {
        return getHostByRandomWeight(hosts);
    }
}
2)Ribbon规则配置为全局使用
RibbonConfig
@Configuration
public class RibbonConfig {
    @Bean
    public IRule ribbonRule() {
        //返回自定义的IRule类
        return new NacosSameClusterWeightedRule();
    }

}
RibbonRule
@Configuration
//指定自定义IRule类
@RibbonClients(defaultConfiguration = NacosSameClusterWeightedRule.class)
public class RibbonRule {
}
3)服务消费者所在领域
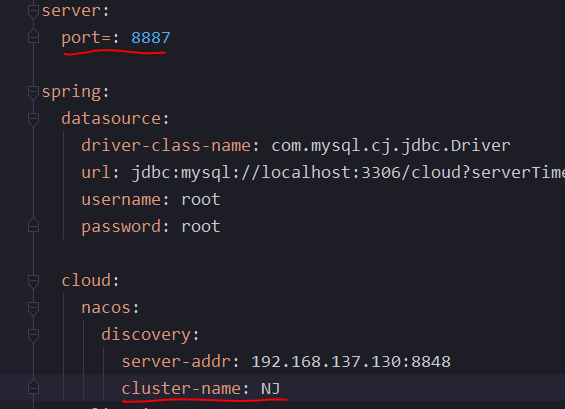
3)回到服务提供者(user-conter),配置领域和端口
端口号为8887的服务提供者领域设为NJ
启动该项目
修改配置文件,端口改为8888,领域改为SZ
再次启动这个项目(总共2个user-center服务提供者)
多次访问接口 /finduser,发现调用的都是领域为SZ的服务提供者(端口号为8888)。
关闭领域为SZ的服务提供者(端口号为8888),再次调用 /finduser,发现调用的才是领域为NJ的服务提供者(端口号为8887)。
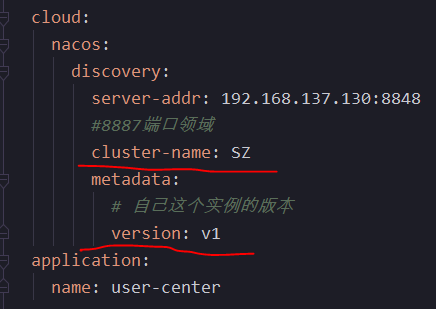
9、扩展Ribbon - 基于元数据的版本控制
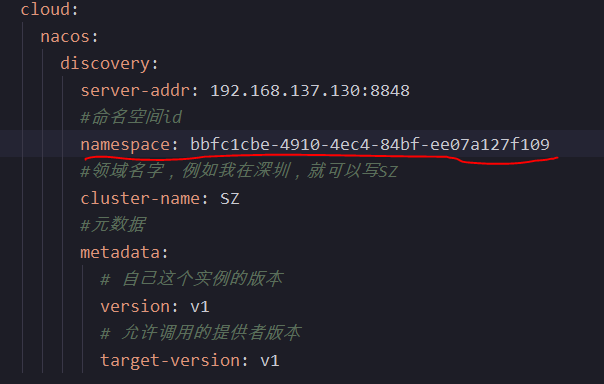
1)来到服务消费者(centent-center)配置文件,添加配置:
2)添加规则:
public class NacosFinalRule extends AbstractLoadBalancerRule {
    @Autowired
    private NacosDiscoveryProperties properties;

    @Override
    public void initWithNiwsConfig(IClientConfig iClientConfig) {

    }

    @Override
    public Server choose(Object o) {
        //负载均衡规则:优先选择同领域下,符合metadata的实例
        //如果没有,就选择所有领域下,符合metadata的实例

        // 1、查询所有实例 A
        // 2、筛选元数据匹配的实例 B
        // 3、筛选出同cluster下元数据匹配的实例 C
        // 4、如果C为空,就用B
        // 5、随机选择实例

        try {
            //获取服务领域
            String clusterName = properties.getClusterName();

            //获取服务metadata
            Map<String, String> metadata = properties.getMetadata();
            String version = metadata.get("target-version");

            //拿到服务提供者名称
            DynamicServerListLoadBalancer loadBalancer = (DynamicServerListLoadBalancer) this.getLoadBalancer();
            String name = loadBalancer.getName();

            //拿到服务发现的相关API
            NamingService namingService = properties.namingServiceInstance();
       //使用服务发现API查找服务名为name,并且健康的所有服务实例
            List<Instance> instances = namingService.selectInstances(name, true);

            //领域相同,且版本一致
            List<Instance> collect1 = instances.stream()
                    .filter(instance -> {
                        //获取服务提供者的元数据
                        Map<String, String> metadata1 = instance.getMetadata();
                        String version1 = metadata1.get("version");
                        boolean versionName = Objects.equals(version1, version);
                        boolean clustername = Objects.equals(instance.getClusterName(), clusterName);
                        return versionName && clustername;
                    })
                    .collect(Collectors.toList());


            //所有领域中版本一致
            List<Instance> collect2 = instances.stream()
                    .filter(instance -> {
                        //获取服务提供者的元数据
                        Map<String, String> metadata1 = instance.getMetadata();
                        String version1 = metadata1.get("version");
                        return Objects.equals(version1, version);
                    })
                    .collect(Collectors.toList());

            // 如果有领域相同,且版本一致,则使用该规则
            if (!CollectionUtils.isEmpty(collect1)) {
                Instance instance = VersionName.getHostByRandomWeight2(collect1);
                //使用该规则
                return new NacosServer(instance);

            //所有领域中版本一致
            } else if (!CollectionUtils.isEmpty(collect2)) {
                Instance instance = VersionName.getHostByRandomWeight2(collect2);
                //使用该规则
                return new NacosServer(instance);
            } else {
                throw new RuntimeException("没有符合规则的服务!");
            }

        } catch (Exception e) {
            e.printStackTrace();
            throw new RuntimeException("没有符合规则的服务!");
        }
    }

}

//调用Nacos算法底层
class VersionName extends Balancer {
    public static Instance getHostByRandomWeight2(List<Instance> hosts) {
        return getHostByRandomWeight(hosts);
    }
}
3)设置该规则为全局配置:
与前面全局配置方法一样。
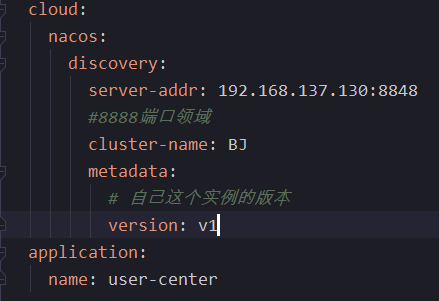
4)前往服务提供者(user-center)添加配置文件,并启动
启动第一个:
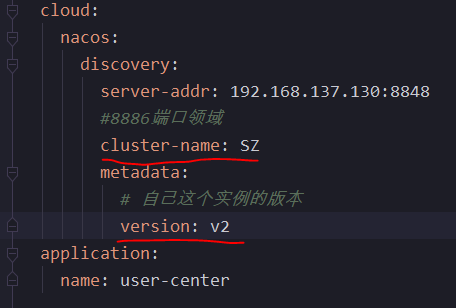
启动第二个:
启动第三个
5)测试,宕机测试。
第9章小结
1)注入的properties可以获取本服务内,配置文件中配置的值
    @Autowired
    private NacosDiscoveryProperties properties;

    //获取服务领域
    String clusterName = properties.getClusterName();
2)调用服务提供消费者的接口(/finduser)时,就可以知道服务提供者的名称
/finduser 接口

所以就可以拿到服务提供者的名称了,方法如下:
    //拿到服务提供者名称
    //ILoadBalancer loadBalancer = this.getLoadBalancer(); IloadBalancer没有GetName()方法
    //BaseLoadBalancer loadBalancer = (BaseLoadBalancer) this.getLoadBalancer();
    DynamicServerListLoadBalancer loadBalancer = (DynamicServerListLoadBalancer) this.getLoadBalancer(); //DynamicServerListLoadBalancer继承了BaseLoadBalancer
    //获取服务提供者名称
    String name = loadBalancer.getName();
3)采用下面方法,可以按条件获取到相应的服务实例。
里面的 properties从 (1)里面来的。
    //拿到服务发现的相关API
    NamingService namingService = properties.namingServiceInstance();
    //使用服务发现API查找服务名为name,并且健康的所有服务实例
    List<Instance> instances = namingService.selectInstances(name, true);
4)Stream为JDK1.8特点。调用.filter,即过滤,判断这些Instance是否符合条件(返回值为true/false),最后通过.collect 返回出符合条件的Instance。
List<Instance> sameClustInstane = instances.stream()
                    .filter(instance -> {
                        return Objects.equals(instance.getClusterName(), clusterName);
                    })
                    .collect(Collectors.toList());
10、namespace
前面有简单的讲一下 namespace(配置文件中的一个属性)
前往服务消费者,解开namespace注释
启动项目后,服务消费者无法调用服务提供者的服务。因为此时的服务消费者的空间与服务提供者的空间不一致,所以导致无法调用。
将namespace以及他的值,复制到服务提供者的配置文件中,使他们在同一个空间里,启动项目,服务消费者就可以调用服务提供者。
综上所述,namespace可以实现隔离的效果。

 浙公网安备 33010602011771号