Intellij笔记
环境
官网:
http://www.jetbrains.com/idea/download/
需要Java的JDK,需要安装 JDK,而不是 JRE! http://www.oracle.com/technetwork/java/javase/downloads/jdk8-downloads-2133151.html
配置环境变量: JAVA_HOME
Tomcat: http://tomcat.apache.org/ ,选 Core x64 Zip
使用时不要启动Tomcat!
包查找: http://mvnrepository.com/
破解:打开网站 http://idea.lanyus.com/ , 看到最新的授权服务器( http://idea.imsxm.com/)
需要在 File -> Settings 中配置:
File Encoding -> UTF8 !
File->Settings->Editor-> General -> Appearence->Show Line Number
Build,Execution,Deployment-> Maven -> Maven home directory (Intellij已集成一个。可以不做。)
Build,Execution,Deployment-> Application Server -> + Tomcat Server
参考:http://www.cnblogs.com/yjmyzz/p/intellij-idea-13-getting-started.html
Java8: http://www.jb51.net/article/48304.htm
Svn签入设置:
选中:
subversion:
auto-update after commit
before commit:
reformat code
preform code analysis (默认)
check todo(show all)(默认)
Linux无法绑定1024以下的端口
http://www.xuebuyuan.com/1432737.html
1. 绑定 1024 以上的端口。
2. 端口转发:
tables -t nat -A PREROUTING -p tcp –dport 80 -j REDIRECT –to-ports 8080
iptables -t nat -A OUTPUT -p tcp -d 127.0.0.1 –dport 80 -j REDIRECT –to-ports 8080
学习
1.RequestMapping: http://www.cnblogs.com/qq78292959/p/3760560.html
如果路由中有正则,和指定URL相同, 则URL优先。
2.RequestBody : http://www.cnblogs.com/qq78292959/p/3760651.html
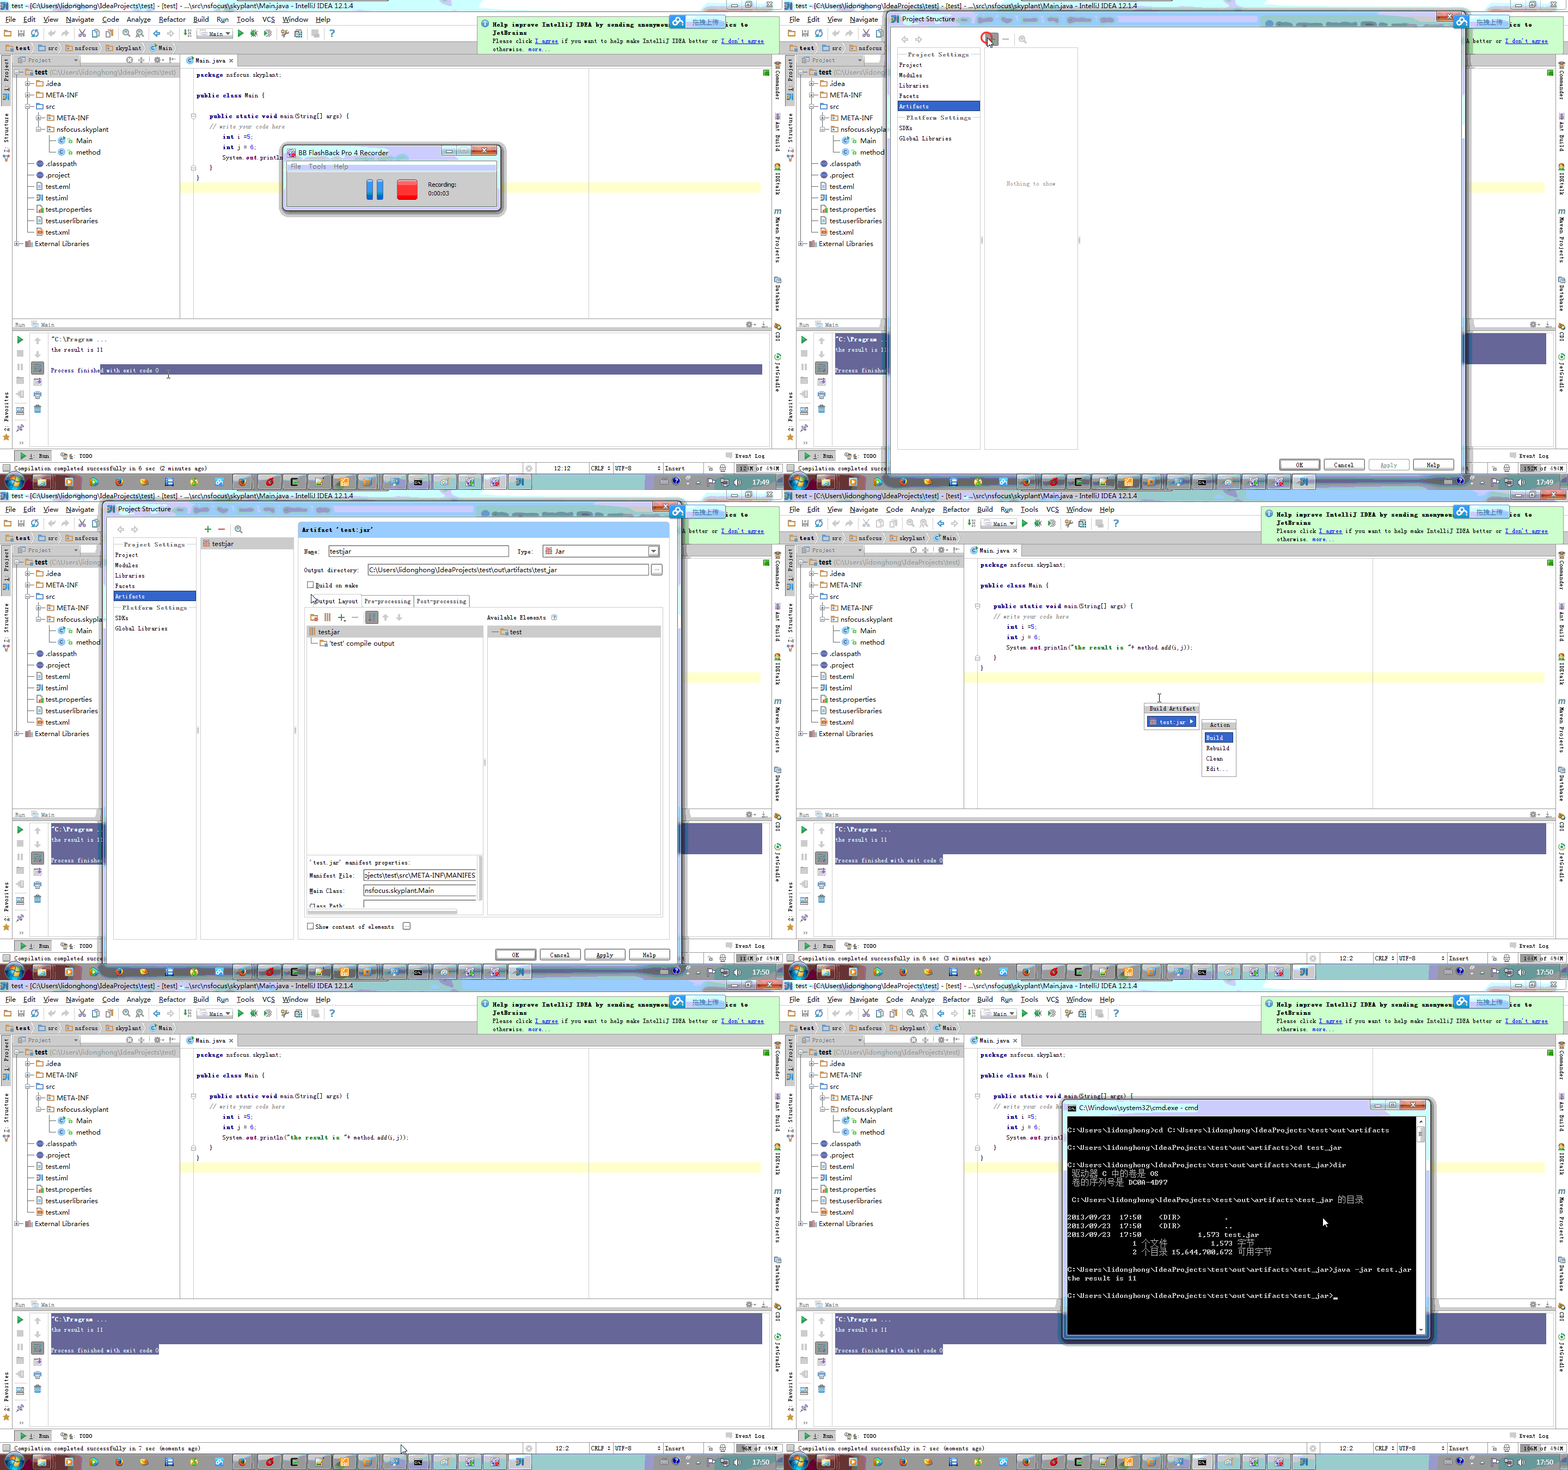
3.创建Jar包: http://www.hankcs.com/program/java/methods-intellij-idea-source-jar-package.html
intellij里很重要的概念:
project是一个solution.

module相当于一个project.
新建Jar包(相当于Dll),NewProject->EmptyProject->目录,New Module ->Java EE ,即新建了一个Dll
4. 引用Jar包: http://www.fwqtg.net/intellij-idea-%E6%B7%BB%E5%8A%A0jar%E5%8C%85%E7%9A%84%E4%B8%89%E7%A7%8D%E6%96%B9%E5%BC%8F.html
Project Structure -> Libraries -> + Java + 选Lib项目的根文件夹 -> + 选中Root -> 排除 test .
Project Structure -> Modules -> Dependencies -> + Libraries ->Java 选中 Dll项目中out文件夹中编译好的 Jar包。
按这个做法,一直失败。
测试发现:可以引用同一个Project里的Module。
5. 在 Project 中粘帖多个文件,删除多个文件,非常慢。到100个,真的可以喝杯茶了。
6. Intellij 里的 Tomcat 配置文件位置:
C:\Users\Administrator\.IntelliJIdea14\system\tomcat\Tomcat_8_0_26_MvcApp\conf
但是每次发布这些配置文件都会被覆盖。
7. 创建 Jar包: http://blog.csdn.net/eastgrand/article/details/11945309
详细程度,不忍独享:

8. 引入Jar包
Libraries 下引入 Java 包,可以引用多个Jar包。
Modules -》 Dependencies -> Jar包文件组 : Scope = Provided (是指不进行静态链接,仅提供编译时的动态链接 : http://www.xuebuyuan.com/1581741.html)
如果是运行的程序(相当于 .exe 或 webApplication ),还需要:
Artifacts 下,对 war exploded 包里的 Output Layout 添加如下结构:
WEB-INF
lib: 右键: Add Copy Of -> Libraries -> 选择添加到 Libraries的Jar包。
引入的Jar包
9.各种标记
标记为 Resource ,生成到: target-> web-Inf -> classes 文件夹。
9. 正则替换:
mor\.(\w+)\.(\w+)!!
mor\.$1\.$2
打War包:
1. 在 Libraries 里添加各类Jar包。
2. 在 Modules 里的 Dependencies 里添加, 如果是 Provided 表示仅编译时进行链接,不会把Jar包放到 class 里。
3. 在 Modules 的 Sources 里,把想要放到 classes 的文件,标记为 Resoueces。
4. 在 Facets 里设置好正确的Web路径 ,加 Web和 Detection, 如果添加了Web项,则提示添加到 Artifacts 里。
5. 在 Artifacts 里设置 两个导出路径(WAR,WA:Exported),添加额外的输出。 对WAR 取消勾选 build on make , 对WA:Exported 选中 build on make.
在需要生成 War包的时候,点: Build-> Build Artifacts
远程调试
1. Configuration,添加 Remote
2. Copy 第一行: -agentlib:jdwp=transport=dt_socket,server=y,suspend=n,address=5005
3. 设置 Host: 服务器Ip
4. 服务器启动时,添加第2步的内容:
java -agentlib:jdwp=transport=dt_socket,server=y,suspend=n,address=5005 -Xmx150m -jar xxx.jar --参数
5. 本地调试启动Remote
各种错误
新建一个 Spring Mvc 项目,启动,报错:
Error running Tomcat8: Address localhost:1099 is already in use
参考:http://my.oschina.net/u/1157906/blog/205907
我机器的原因是: ElasticSearch占用了端口,服务里停掉它。
使用命令: netstat -aon|findstr "1099" 可以找出进程ID。在任务管理器或使用命令: tasklist |findstr “PID”
findstr 区分大小写
或者,修改Tomcat 的JVM端口,把 1099改为1199 .
Information:java: javacTask: 源发行版 8 需要目标发行版 1.8
Settings->Build,Execution,Deployment->Java Complier -> 项目的 Target bytecode version 与JDK版本不一致。
http://blog.csdn.net/kinger0/article/details/46491831
Language Level 不一致
Project Structure里 Project里,可以设置 Language Level,Modules 里也可以设置 Langeuage Level。
现实中也有这么一批程序员,不按系统思想的写代码,把变量定义的乱78糟,还总有理由。
Project.LanguageLevel = 8 & Modules.LanguageLevel = 6 & Setting.JavaCompile.TargetByteCodeVersion = 1.6 编译通过。
Project.LanguageLevel = 8 & Modules.LanguageLevel = 8 & Setting.JavaCompile.TargetByteCodeVersion = 1.6 编译不通过。
Project.LanguageLevel = 8 & Modules.LanguageLevel = 8 & Setting.JavaCompile.TargetByteCodeVersion = 1.8 编译通过。
普通项目转Maven。
http://stackoverflow.com/questions/7642456/intellij-convert-a-java-project-module-into-a-maven-project-module
解包,打包
http://blog.csdn.net/a13069730106/article/details/53812482
Maven添加非Maven打包Jar包
1. 首先,把jar包放到 src/main/resources 文件夹中。
2. 在 Module 中添加 Jar包 , Scope 为 Combile
3. 修改 pom.xml
添加:
先添加 dependency,再添加 build的resources
<dependency>
   <groupId>abc</groupId>
   <artifactId>def</artifactId>
   <version>1.0.0</version>
   <type>jar</type>
   <scope>system</scope>
   <systemPath>${basedir}/src/main/resources/CCP_REST_SMS_SDK_JAVA_v2.6.3r.jar</systemPath>
</dependency>
<resources>
   <resource>
      <directory>src/main/resources</directory>
      <targetPath>BOOT-INF/lib/</targetPath>
      <includes>
         <include>**/*.jar</include>
      </includes>
   </resource>
   <resource>
      <directory>src/main/resources</directory>
      <targetPath>BOOT-INF/</targetPath>
      <includes>
         <include>**/*.properties</include>
      </includes>
   </resource>
</resources>
Maven打包命令
http://www.cnblogs.com/softidea/p/6063629.html
mvn clean package -Dmaven.test.skip=true -P prod
Idea live Template
如果类继承自Map,属性是Map.key的映射。可以使用如下模板快速生成代码。
public void set$CNAME$($TYPE$ $NAME$) {
    this.put("$NAME$", $NAME$);
}

public $TYPE$ get$CNAME$(){ Object $NAME$ = this.get("$NAME$"); if( $NAME$ == null) return null; return ($TYPE$)$NAME$; }
其中: 变量 CNAME Expression 是: capitalize(NAME) , 变量顺序: TYPE,NAME,CNAME
关于函数: https://www.jetbrains.com/help/idea/template-variables.html#predefined_functions

|
作者:NewSea 出处:http://newsea.cnblogs.com/
QQ,MSN:iamnewsea@hotmail.com 如无特别标记说明,均为NewSea原创,版权私有,翻载必纠。欢迎交流,转载,但要在页面明显位置给出原文连接。谢谢。 |


【推荐】国内首个AI IDE,深度理解中文开发场景,立即下载体验Trae
【推荐】编程新体验,更懂你的AI,立即体验豆包MarsCode编程助手
【推荐】抖音旗下AI助手豆包,你的智能百科全书,全免费不限次数
【推荐】轻量又高性能的 SSH 工具 IShell:AI 加持,快人一步
· go语言实现终端里的倒计时
· 如何编写易于单元测试的代码
· 10年+ .NET Coder 心语,封装的思维:从隐藏、稳定开始理解其本质意义
· .NET Core 中如何实现缓存的预热?
· 从 HTTP 原因短语缺失研究 HTTP/2 和 HTTP/3 的设计差异
· 周边上新:园子的第一款马克杯温暖上架
· 分享 3 个 .NET 开源的文件压缩处理库,助力快速实现文件压缩解压功能!
· Ollama——大语言模型本地部署的极速利器
· DeepSeek如何颠覆传统软件测试?测试工程师会被淘汰吗?
· 使用C#创建一个MCP客户端