配置 swagger2
不会,我可以学;落后,我可以追赶;跌倒,我可以站起来;我一定行!
swagger2是什么?自行百度,这里直接贴代码,尽是干货!
1、引入pom文件
        <!-- swagger2 -->
        <dependency>
            <groupId>io.springfox</groupId>
            <artifactId>springfox-swagger2</artifactId>
            <version>2.9.2</version>
        </dependency>
        <dependency>
            <groupId>io.springfox</groupId>
            <artifactId>springfox-swagger-ui</artifactId>
            <version>2.9.2</version>
        </dependency>
        <!-- 引入了第三方的UI界面美化jar包,不是必须的 -->
        <dependency>
            <groupId>com.github.xiaoymin</groupId>
            <artifactId>swagger-bootstrap-ui</artifactId>
            <version>1.6</version>
        </dependency>
2、配置swagger2,看代码
package com.config;

import org.springframework.context.annotation.Bean;
import org.springframework.context.annotation.Configuration;

import springfox.documentation.builders.ApiInfoBuilder;
import springfox.documentation.builders.PathSelectors;
import springfox.documentation.builders.RequestHandlerSelectors;
import springfox.documentation.service.ApiInfo;
import springfox.documentation.service.Contact;
import springfox.documentation.spi.DocumentationType;
import springfox.documentation.spring.web.plugins.Docket;
import springfox.documentation.swagger2.annotations.EnableSwagger2;

@Configuration
@EnableSwagger2
public class Swagger2Config {
    @Bean
    public Docket createRestApi() {
        return new Docket(DocumentationType.SWAGGER_2)
                .apiInfo(apiInfo())
                .select()
                .apis(RequestHandlerSelectors.basePackage("com"))
                .paths(PathSelectors.any())
                .build();
    }

    private ApiInfo apiInfo() {
        return new ApiInfoBuilder()
                .title("SprintBoot Swagger2 build API docs")
                .description("Spring Boot Swagger2 Restful API")
                .contact(new Contact("demo", "", ""))
                .version("1.0")
                .build();
    }
}
注: 这个config配置其实也可以不用写,只需把@EnableSwagger2注解加到springboot启动类中即可,但是controller类中必须要有对应的内容才可以, 也是可以显示的,但有时候我们需要做一些可配置的需求,就要利用swagger的配置来进行。
3、在controller中的应用
@RestController
@RequestMapping("/goods")
@Api(value = "GoodsController",tags= "商品管理")
public class GoodsController {

    @GetMapping("/findAll")
    @ApiOperation(value = "商品查询",notes="查询所有的商品信息")
    @ApiImplicitParams({ @ApiImplicitParam(name = "type", value = "商品类型",required=true)})
    public String findAll(@RequestParam(name="type",required=true)String type) {
        return type;
    }

    @PostMapping("/add")
    @ApiOperation(value = "商品增加",notes="增加商品信息")
    //@ApiImplicitParam(name="goods",value="商品信息",paramType = "body", required = true)
    public String add(@RequestBody Goods goods) {
        return goods.toString();
    }

}
4、springboot中swagger密码配置
swagger:
  production: false
  basic:
    enable: false
    username: test
    password: test123
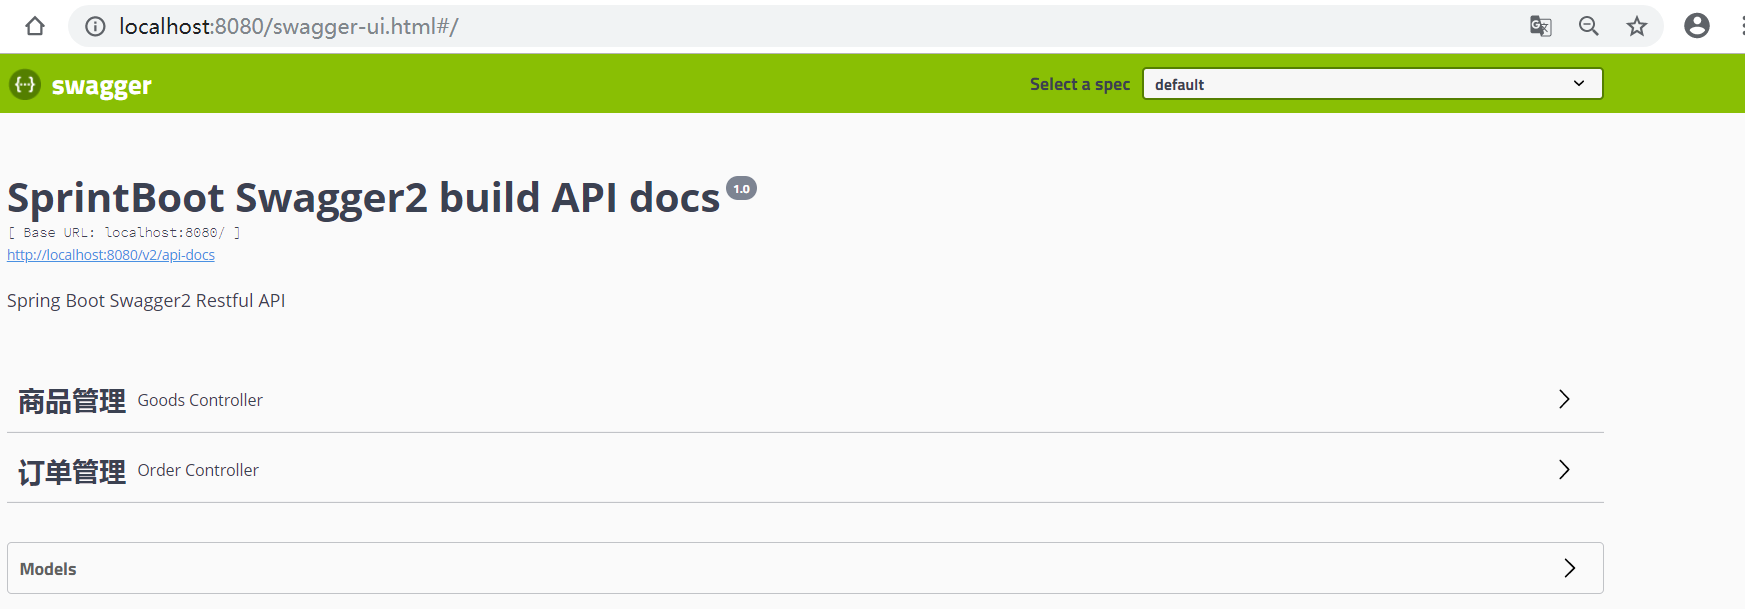
5、启动项目访问
如果没有引入第三方的UI界面美化jar包 -->>swagger-bootstrap-ui
访问:http://localhost:8080/swagger-ui.html#/
如果引入了第三方的UI界面美化jar包 -->>swagger-bootstrap-ui
访问:http://localhost:8080/swagger-ui.html#/ 或者 http://localhost:8080/doc.html#/,都是可以的
看看两者的区别,加入第三UI,显示风格不同而已

如果还不明白,可以参考:https://blog.csdn.net/xiaojin21cen/article/details/78653506
https://www.cnblogs.com/ynhk/p/10873964.html
github示例:https://github.com/kh5218/DemoForSpringBoot/tree/master/springBoot-swagger2
以上内容代表个人观点,仅供参考,不喜勿喷。。。

 浙公网安备 33010602011771号