
git - 3 远程协作
书接上回Git - 2 使用Git
分享了git对象变化的原理,以及一些常用命令的演示,跟branch的操作.
这篇把远程写作讲完就收尾了.
先回顾这张图:
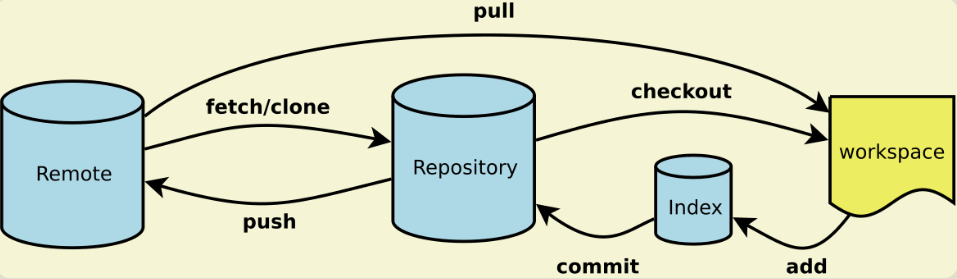
0111 远程仓库
前面几篇着重讲述git的原理,主要都是自己玩本地的版本管理,不跟别人互动.
现在开始要跟别人一起玩了.
0x00 为何要用远程仓库
如果你的电脑是自己玩,不用跟别人一起工作,而且那无所谓的了.
但你又能保证你的电脑硬盘,不会坏吗? 电脑不会坏吗?
所以,狡兔三窟,我们在github上申请个账号玩.
其他的仓库有许多,如gitee,gitlab等.
如果是在企业里, 大多是自己搭建的gitlab服务吧.
0x01 本地仓库同步到远端
1. 创建个远端仓库
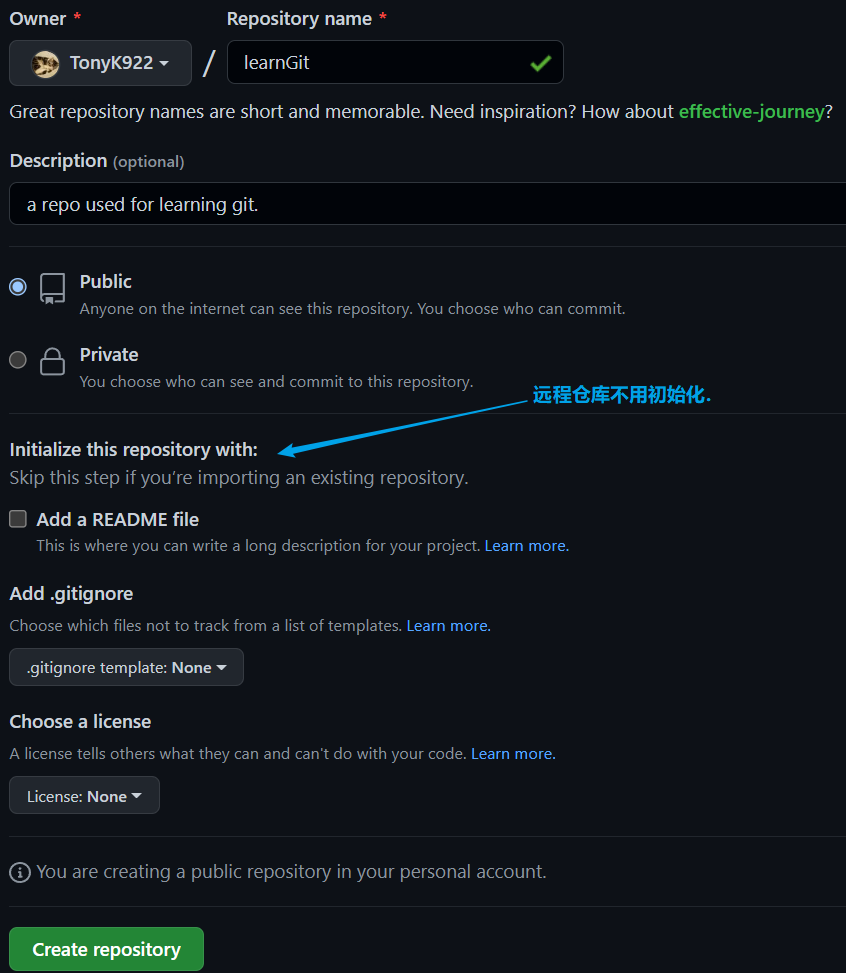
2. 第一次远程同步
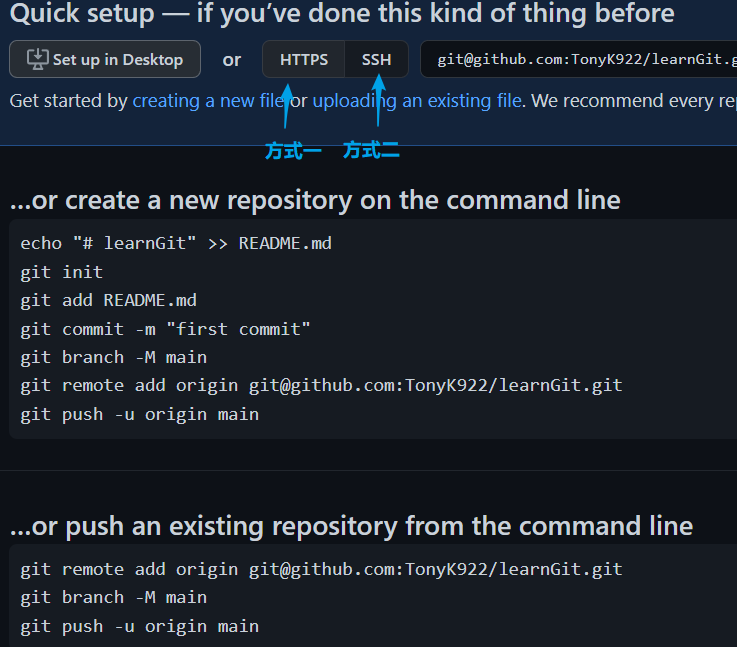
方式一,需要在push的时候,输入账号密码;
方式二,不用输入账号密码,但需要先把证书设置好.
我们选择方式二:
来弄证书:
- 先创建个SSH key.
然后一路enter,就是默认目录,且不设密码.$ ssh-keygen -t rsa -C "youremail@example.com" # 这里填你的邮箱tony@ubuntu:~/learnGit$ ls /home/tony/.ssh/ id_rsa id_rsa.pub # 成功了.这两个就是SSH Key的秘钥对,id_rsa是私钥,不能泄露出去. # id_rsa.pub是公钥,可以放心地告诉任何人。
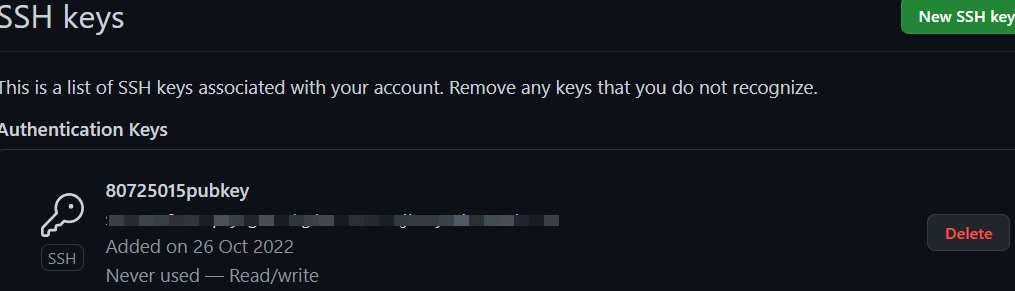
- 登陆github,Account Settings,`SSH Keys`.
- 点"New SSH Key",填上任意Title,在Key文本框里粘贴id_rsa.pub文件的内容.
- 点 Add Key 就行了.
3. 本地的仓库push上去.
tony@ubuntu:~/learnGit$ git remote add TonyK922 git@github.com:TonyK922/learnGit.git
tony@ubuntu:~/learnGit$ git branch -M main # 把当前分支改名为 main 因为对面分支名是main一样就好区分.
tony@ubuntu:~/learnGit$ git branch
* main                                    #### 改好了.
tony@ubuntu:~/learnGit$ git push -u TonyK922 main

The authenticity of host 'github.com (ip地址不给看)' can't be established.
ECDSA key fingerprint is SHA256:p2QAMXNIC1TJYWeIOttrVc98/R1BUFWu3/LiyKgUfQM.
Are you sure you want to continue connecting (yes/no/[fingerprint])? y
Please type 'yes', 'no' or the fingerprint: yes    # SSH方式第一次都会警告.
Warning: Permanently added 'github.com,20.*.*.26' (ECDSA) to the list of known hosts.
枚举对象中: 28, 完成.
对象计数中: 100% (28/28), 完成.
使用 2 个线程进行压缩
压缩对象中: 100% (26/26), 完成.            # 对象是先压缩后传输的.
写入对象中: 100% (28/28), 2.75 KiB | 1.38 MiB/s, 完成.
总共 28 (差异 7),复用 0 (差异 0)
remote: Resolving deltas: 100% (7/7), done.
To github.com:TonyK922/learnGit.git
 * [new branch]      main -> main
分支 'main' 设置为跟踪来自 'TonyK922' 的远程分支 'main'。
远程库的真正名字
git@github.com:TonyK922/learnGit.git,也就是它的地址.
用git remote add [reponame] [url]可以将远程仓库与本地仓库关联起来,如何关联的呢?就是在我本地用
TonyK922跟远程仓库的url进行关联,从此就用TonyK922来代表那一长串地址.
为何取名TonyK922,因为这个项目仓库可能由多个人来共同开发.用它来表示这个仓库是谁的远程仓库.
如果有另外一个名叫Tom的,在他那也clone了这个仓库,那如果我需要再跟他的仓库互动,
就可以用Tom来标记他的远程仓库.
把本地库的内容推送到远程,用git push命令,实际上是把当前分支main推送到远程.
git push命令也可以写完全体:git push TonyK922 main:main 远端仓库 本地分支:远端分支
由于远程库是空的,我们第一次推送main分支时,加上了-u参数,
Git不但会把本地的main分支内容推送到远程新的main分支,
还会让把本地的main分支追踪远程的main分支,在以后的推送push或者拉取fetch/pull时就可以简化命令。
-u是--set-upstream的缩写
看看这个仓库:
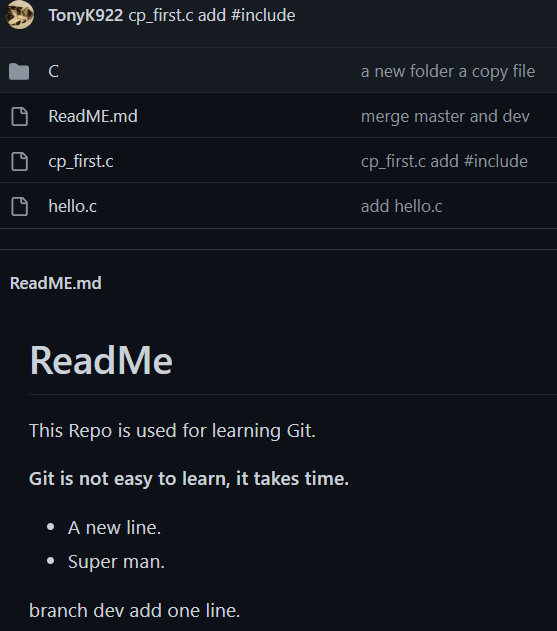
OK!
0x02 秉承传统看看变化
首先是config的变化:
tony@ubuntu:~/learnGit$ cat .git/config
[core]
	repositoryformatversion = 0
	filemode = true
	bare = false
	logallrefupdates = true
[remote "TonyK922"]             # 多了个remote项 是远程仓库配置项
	url = git@github.com:TonyK922/learnGit.git    # TonyK922的地址
	fetch = +refs/heads/*:refs/remotes/TonyK922/*
[branch "main"]
	remote = TonyK922                  # main分支远端仓库
	merge = refs/heads/main           # merge到哪个分支
log里的变化:
tony@ubuntu:~/learnGit$ tree .git/logs/
.git/logs/
├── HEAD
└── refs
    ├── heads          ## 本地仓库
    │   └── main       ## 本地分支
    └── remotes
        └── TonyK922   ## 远端仓库名
            └── main   ## 远端仓库的分支
refs里的变化:
tony@ubuntu:~/learnGit$ tree .git/refs/
.git/refs/
├── heads     ### 本地仓库和分支
│   └── main
├── remotes
│   └── TonyK922  ### 远端仓库和分支
│       └── main
└── tags
用命令查看变化:
git status
tony@ubuntu:~/learnGit$ git status
位于分支 main
您的分支与上游分支 'TonyK922/main' 一致。 #### 多出了与远端分支同步的信息.
git branch -r
查看远端的分支有哪些:
tony@ubuntu:~/learnGit$ git branch -r
  TonyK922/main
git branch -a & git branch -vv
tony@ubuntu:~/learnGit$ git branch -a
* main
  remotes/TonyK922/main

tony@ubuntu:~/learnGit$ git branch -vv
* main 7593f36 [TonyK922/main] cp_first.c add #include    # -v只显示本地信息, -vv显示远程上游分支信息.
git log --oneline --graph --abbrev
tony@ubuntu:~/learnGit$ git log --oneline --graph --abbrev
* 7593f36 (HEAD -> main, TonyK922/main) cp_first.c add #include  # 多了远程仓库分支
*   c76ca50 merge master and dev
|\
| * 78bdc45 dev branch ReadME.md add one line
* | a7ad2b4 add hello.c
* | 7e5efb6 try amend add Super man
* | 9a83361 a new line
|/
* b4f6e34 a new folder a copy file
* 9449491 insert a line words
* f8f9cf4 first commit
git remote -v
tony@ubuntu:~/learnGit$ git remote -v  # 查看 我的本地仓库 关联了那些远程仓库
TonyK922	git@github.com:TonyK922/learnGit.git (fetch)   # 目前只有一个.
TonyK922	git@github.com:TonyK922/learnGit.git (push)
git remote show TonyK922
tony@ubuntu:~/learnGit$ git remote show TonyK922   # 看看这个远程仓库的详细情况.
* 远程 TonyK922
  获取地址:git@github.com:TonyK922/learnGit.git
  推送地址:git@github.com:TonyK922/learnGit.git
  HEAD 分支:main
  远程分支:
    main 已跟踪                      # 远程分支跟踪 track 情况
  为 'git pull' 配置的本地分支:
    main 与远程 main 合并
  为 'git push' 配置的本地引用:
    main 推送至 main (最新)
git ls-remote [remote]
tony@ubuntu:~/learnGit$ git ls-remote TonyK922   # 看看远端仓库的HEAD跟refs/里的内容
7593f363c4e134a9983c981a1374bbe3bd84efff	HEAD
7593f363c4e134a9983c981a1374bbe3bd84efff	refs/heads/main
0x03 编辑并同步
我在本地main分支做了一次提交,然后新建了个分支,新分支有了一次提交.
# 就是这个样子:
tony@ubuntu:~/learnGit$ git log -n4 --oneline --graph --all
* 73ef0b4 (tmp) branch tmp edit cp_firstfile.c
* fef5dc6 (HEAD -> main) fix .gitignore
* 7593f36 (TonyK922/main) cp_first.c add #include
*   c76ca50 merge master and dev
这个时候查看分支同步状态:
tony@ubuntu:~/learnGit$ git switch main
已经位于 'main'
您的分支领先 'TonyK922/main' 共 1 个提交。
  (使用 "git push" 来发布您的本地提交)

# git status 看看:
  tony@ubuntu:~/learnGit$ git status
位于分支 main
您的分支领先 'TonyK922/main' 共 1 个提交。
  (使用 "git push" 来发布您的本地提交)

无文件要提交,干净的工作区

# git branch -vv 看看
tony@ubuntu:~/learnGit$ git branch -vv
* main fef5dc6 [TonyK922/main: 领先 1] fix .gitignore
  tmp  73ef0b4 branch tmp edit cp_firstfile.c
git push 同步两边分支
同步已有分支:
tony@ubuntu:~/learnGit$ git push
枚举对象中: 4, 完成.
对象计数中: 100% (4/4), 完成.
使用 2 个线程进行压缩
压缩对象中: 100% (2/2), 完成.
写入对象中: 100% (3/3), 290 字节 | 290.00 KiB/s, 完成.
总共 3 (差异 1),复用 0 (差异 0)
remote: Resolving deltas: 100% (1/1), completed with 1 local object.
To github.com:TonyK922/learnGit.git
   7593f36..fef5dc6  main -> main
push本地有远端没有的分支:
我本地有个tmp分支,现在把它push过去.
tony@ubuntu:~/learnGit$ git switch tmp # 切过来
切换到分支 'tmp'

tony@ubuntu:~/learnGit$ git push TonyK922 tmp:tmp # 仓库 本地分支名:远端分支名 注意没有加 -u
枚举对象中: 5, 完成.                                # 没加-u 意味着没有建立跟踪
对象计数中: 100% (5/5), 完成.
使用 2 个线程进行压缩
压缩对象中: 100% (3/3), 完成.
写入对象中: 100% (3/3), 349 字节 | 349.00 KiB/s, 完成.
总共 3 (差异 2),复用 0 (差异 0)
remote: Resolving deltas: 100% (2/2), completed with 2 local objects.
remote:
remote: Create a pull request for 'tmp' on GitHub by visiting:
remote:      https://github.com/TonyK922/learnGit/pull/new/tmp
remote:
To github.com:TonyK922/learnGit.git
 * [new branch]      tmp -> tmp
没有建立跟踪我们先看看:
tony@ubuntu:~/learnGit$ git branch -vv
  main fef5dc6 [TonyK922/main] fix .gitignore
* tmp  73ef0b4 branch tmp edit cp_firstfile.c   # 没有跟踪的显示是这样的

tony@ubuntu:~/learnGit$ git remote show TonyK922  # 查看远端仓库细节
* 远程 TonyK922
  获取地址:git@github.com:TonyK922/learnGit.git
  推送地址:git@github.com:TonyK922/learnGit.git
  HEAD 分支:main
  远程分支:
    main 已跟踪
    tmp  已跟踪                       # 这里显示已跟踪实际没有完全跟踪
  为 'git pull' 配置的本地分支:
    main 与远程 main 合并
  为 'git push' 配置的本地引用:
    main 推送至 main (最新)
    tmp  推送至 tmp  (最新)

tony@ubuntu:~/learnGit$ cat .git/config   # 看配置
[core]
	repositoryformatversion = 0
	filemode = true
	bare = false
	logallrefupdates = true
[remote "TonyK922"]
	url = git@github.com:TonyK922/learnGit.git
	fetch = +refs/heads/*:refs/remotes/TonyK922/*
[branch "main"]
	remote = TonyK922
	merge = refs/heads/main                 # 配置文件里也还没有tmp
手动给新分支建立跟踪:
tony@ubuntu:~/learnGit$ git branch -u TonyK922/tmp
分支 'tmp' 设置为跟踪来自 'TonyK922' 的远程分支 'tmp'。

# 这时候看变化:
tony@ubuntu:~/learnGit$ git branch -vv
  main fef5dc6 [TonyK922/main] fix .gitignore
* tmp  73ef0b4 [TonyK922/tmp] branch tmp edit cp_firstfile.c # 跟main显示的是一样的了,之前还不一样.

# config文件也多了 tmp的项
tony@ubuntu:~/learnGit$ cat .git/config
[core]
	repositoryformatversion = 0
	filemode = true
	bare = false
	logallrefupdates = true
[remote "TonyK922"]
	url = git@github.com:TonyK922/learnGit.git
	fetch = +refs/heads/*:refs/remotes/TonyK922/*
[branch "main"]
	remote = TonyK922
	merge = refs/heads/main
[branch "tmp"]             # 就是这个了.
	remote = TonyK922
	merge = refs/heads/tmp

# 远程分支细节呢:
tony@ubuntu:~/learnGit$ git remote show TonyK922
* 远程 TonyK922
  获取地址:git@github.com:TonyK922/learnGit.git
  推送地址:git@github.com:TonyK922/learnGit.git
  HEAD 分支:main
  远程分支:
    main 已跟踪
    tmp  已跟踪
  为 'git pull' 配置的本地分支:
    main 与远程 main 合并
    tmp  与远程 tmp 合并              # 有了 pull
  为 'git push' 配置的本地引用:
    main 推送至 main (最新)
    tmp  推送至 tmp  (最新)
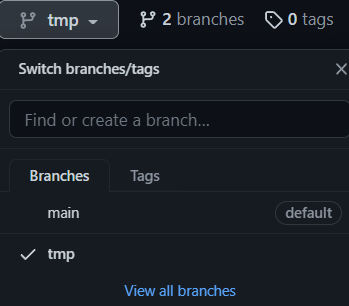
看看github那边有没有自动创建新分支
看下log:
tony@ubuntu:~/learnGit$ git log --oneline --graph --all -n4
* 73ef0b4 (HEAD -> tmp, TonyK922/tmp) branch tmp edit cp_firstfile.c
* fef5dc6 (TonyK922/main, main) fix .gitignore
* 7593f36 cp_first.c add #include
*   c76ca50 merge master and dev
git clone 及操作后的变化
当新成员加入这个项目时,就可以用git clone从远端仓库下载项目:
之前的那个参与者是在/home/tony/下创建的项目文件夹,
我把本地另一处/home/tony/path/作为第三个参与此项目的人.
clone github上的main分支:
# 我选择SSH方式:
tony@ubuntu:~/path$ git clone git@github.com:TonyK922/learnGit.git
正克隆到 'learnGit'...
remote: Enumerating objects: 39, done.
remote: Counting objects: 100% (39/39), done.
remote: Compressing objects: 100% (25/25), done.
remote: Total 39 (delta 14), reused 36 (delta 11), pack-reused 0
接收对象中: 100% (39/39), 完成.
处理 delta 中: 100% (14/14), 完成.

tony@ubuntu:~/path/learnGit$ pwd
/home/tony/path/learnGit          # ok了
刚clone下来,快趁热看看状态:
tony@ubuntu:~/path/learnGit$ cat .git/config
[core]
	repositoryformatversion = 0
	filemode = true
	bare = false
	logallrefupdates = true
[remote "origin"]
	url = git@github.com:TonyK922/learnGit.git
	fetch = +refs/heads/*:refs/remotes/origin/*
[branch "main"]          ### 目前只有 main 分支####
	remote = origin         ########## clone下来自动把那边的仓库在本地命名为origin并建立跟踪.
	merge = refs/heads/main

## 远端分支情况:
tony@ubuntu:~/path/learnGit$ git branch -r
  origin/HEAD -> origin/main   # 远端HEAD指向远端main分支.
  origin/main          # 两个分支
  origin/tmp

tony@ubuntu:~/path/learnGit$ git branch -vv ## 关联情况
* main 1375497 [origin/main] add one line:cherry-pick

tony@ubuntu:~/path/learnGit$ git remote  ## 远端仓库的本地名
origin
tony@ubuntu:~/path/learnGit$ git remote show origin
* 远程 origin
  获取地址:git@github.com:TonyK922/learnGit.git
  推送地址:git@github.com:TonyK922/learnGit.git
  HEAD 分支:main
  远程分支:
    main 已跟踪
    tmp  已跟踪
  为 'git pull' 配置的本地分支:
    main 与远程 main 合并
  为 'git push' 配置的本地引用:
    main 推送至 main (最新)
文件系统的变化呢:
tony@ubuntu:~/path/learnGit$ tree .git/
.git/
├── branches
├── config
├── description
├── HEAD
├── hooks
├── index
├── info
│   └── exclude
├── logs              ## log下也是只有main分支,而github可是有两个分支的哦.
│   ├── HEAD
│   └── refs
│       ├── heads
│       │   └── main
│       └── remotes
│           └── origin
│               └── HEAD
├── objects
│   ├── info
│   └── pack  ## pack中有了东西.
│       ├── pack-9b6602b14c3722bda841308df13d22068d6c89f5.idx
│       └── pack-9b6602b14c3722bda841308df13d22068d6c89f5.pack
├── packed-refs # 这个是什么呢.
└── refs         # 也是只有一个main分支.
    ├── heads
    │   └── main
    ├── remotes
    │   └── origin
    │       └── HEAD
    └── tags
在pro git书中有关于传输时压缩的介绍,可以自己去读一下.简单说,就是git在双端传输时,
会先把你objects下所有对象进行压缩.就是git clone时这句打印:
remote: Compressing objects: 100% (25/25), done.
看看packed-refs是什么呢?
tony@ubuntu:~/path/learnGit$ cat .git/packed-refs
# pack-refs with: peeled fully-peeled sorted
1375497f39a78d0197ee91b55b25ac82621394ec refs/remotes/origin/main
50a5ce253af44bddd6496c49a16ed1cf7c051e6f refs/remotes/origin/tmp
packed-refs文件中记录着 git clone时,远端仓库各分支指向的最后提交对象.
我们可以用git verify-pack去查看objects/pack/*.idx的文件:
tony@ubuntu:~/path/learnGit$ git verify-pack .git/objects/pack/pack-9b6602b14c3722bda841308df13d22068d6c89f5.idx -s
非 delta:25 个对象
链长 = 1: 6 对象
链长 = 2: 6 对象
链长 = 3: 1 对象
链长 = 4: 1 对象
-s参数会概括性的告诉你,压缩文件中,有多少个对象.
-v参数会详细把压缩文件中的,所有blob,tree,commit对象通通打印出来.很长.
简单看几个重要的:
tony@ubuntu:~/path/learnGit$ git verify-pack .git/objects/pack/pack-9b6602b14c3722bda841308df13d22068d6c89f5.idx -v
50a5ce253af44bddd6496c49a16ed1cf7c051e6f commit 217 159 12  #是tmp分支指向的提交对象
1375497f39a78d0197ee91b55b25ac82621394ec commit 217 157 171 #main分支指向的对象
73ef0b447cf95cc5675e10e7eee2b7393e20305e commit 223 158 328
fef5dc665cb7e1b243cb5365659db381f9c4f86e commit 207 149 486
7593f363c4e134a9983c981a1374bbe3bd84efff commit 216 160 635
就是说,其实
git clone执行完,下载到本地时, 远端仓库所有的对象都下载过来了.
而且,还在packed-refs里记录了远端仓库的所有分支名,与指向的最新提交对象.
那么如果你要对github下的tmp分支进行操作,就可以自己建个分支,然后追踪tmp分支就行了.
git fetch 与 git pull
git fetch与git pull都可以从远程仓库同步到本地仓库区别在于:
git fetch会把远端仓库的所有分支的最新提交都下载过来,然后本地的远端分支
origin/main,tmp会指向最新提交.而不会自动地把本地分支与origin/下的远端分支进行merge合并操作.
而git pull会在下载后,自动执行merge操作.
总结就是:
git pull = git fetch + merge
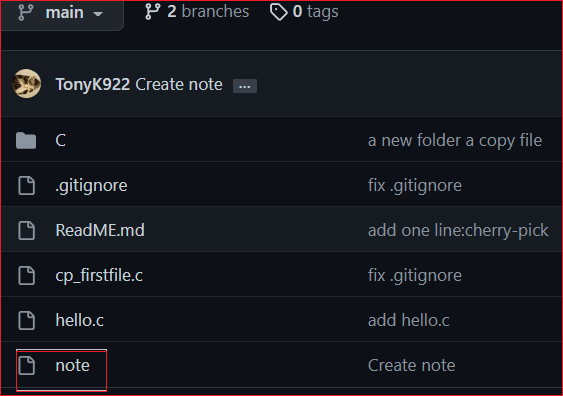
我先在github的仓库上在main分支新建一个文件.此时的提交hash是:134b89b.
执行 git remote show origin:
tony@ubuntu:~/path/learnGit$ git remote show origin
* 远程 origin
  获取地址:git@github.com:TonyK922/learnGit.git
  推送地址:git@github.com:TonyK922/learnGit.git
  HEAD 分支:main
  远程分支:
    main 已跟踪
  为 'git pull' 配置的本地分支:
    main 与远程 main 合并
  为 'git push' 配置的本地引用:
    main 推送至 main (本地已过时)  ## 看到本地的main分支已过时了.
执行 git fetch:
tony@ubuntu:~/path/learnGit$ git fetch
remote: Enumerating objects: 4, done.
remote: Counting objects: 100% (4/4), done.
remote: Compressing objects: 100% (2/2), done.
remote: Total 3 (delta 1), reused 0 (delta 0), pack-reused 0
展开对象中: 100% (3/3), 676 字节 | 676.00 KiB/s, 完成.
来自 github.com:TonyK922/learnGit
   1375497..134b89b  main       -> origin/main
然后用一些命令看看状态:
tony@ubuntu:~/path/learnGit$ git status
位于分支 main
您的分支落后 'origin/main' 共 1 个提交,并且可以快进。 ## 告诉你本地main落后1个提交
  (使用 "git pull" 来更新您的本地分支)      # 就是没有自动把main与origin/main合并

无文件要提交,干净的工作区

tony@ubuntu:~/path/learnGit$ git branch -vv
* main 1375497 [origin/main: 落后 1] add one line:cherry-pick

### git log 加--all 看一下
tony@ubuntu:~/path/learnGit$ git log --oneline --graph -4 --all
* 134b89b (origin/main, origin/HEAD) Create note
* 1375497 (HEAD -> main) add one line:cherry-pick
| * 50a5ce2 (origin/tmp) add one line:cherry-pick
| * 73ef0b4 branch tmp edit cp_firstfile.c
### main确实落后一个提交
执行git merge origin/main
tony@ubuntu:~/path/learnGit$ git merge origin/main
更新 1375497..134b89b
Fast-forward
 note | 3 +++
 1 file changed, 3 insertions(+)
 create mode 100644 note

####### 看看git log
tony@ubuntu:~/path/learnGit$ git log --oneline --graph -4 --all
* 134b89b (HEAD -> main, origin/main, origin/HEAD) Create note
* 1375497 add one line:cherry-pick
| * 50a5ce2 (origin/tmp) add one line:cherry-pick
| * 73ef0b4 branch tmp edit cp_firstfile.c
### 可以了
我们再来看看git pull:
先切回/home/tony/目录下的那个仓库:
### 先联网看看远端仓库的变化:
tony@ubuntu:~/learnGit$ git remote show TonyK922
* 远程 TonyK922
  获取地址:git@github.com:TonyK922/learnGit.git
  推送地址:git@github.com:TonyK922/learnGit.git
  HEAD 分支:main
  远程分支:
    main 已跟踪
    tmp  已跟踪
  为 'git pull' 配置的本地分支:
    main 与远程 main 合并
    tmp  与远程 tmp 合并
  为 'git push' 配置的本地引用:
    main 推送至 main (本地已过时)  ### 有新变化了
    tmp  推送至 tmp  (最新)
执行git pull看看与git fetch的区别:
tony@ubuntu:~/learnGit$ git pull
更新 1375497..134b89b
Fast-forward             # 执行git fetch 的时候不会有merge方式打印
 note | 3 +++
 1 file changed, 3 insertions(+)
 create mode 100644 note

### 看一下 git log
tony@ubuntu:~/learnGit$ git log --oneline --graph -4 --all
* 134b89b (HEAD -> main, TonyK922/main) Create note     ## 同步了.
* 1375497 add one line:cherry-pick
| * 50a5ce2 (TonyK922/tmp, tmp) add one line:cherry-pick
| * 73ef0b4 branch tmp edit cp_firstfile.c
所以 git pull 会自动merge.
0x04 分支的同步
本地有新分支,远程没有,已经介绍过了同步了.再看看其他几个情况.
远程有个新分支,同步到本地
github上新建个dev分支.
### 看一下远程
tony@ubuntu:~/learnGit$ git remote show TonyK922
* 远程 TonyK922
  获取地址:git@github.com:TonyK922/learnGit.git
  推送地址:git@github.com:TonyK922/learnGit.git
  HEAD 分支:main
  远程分支:
    dev  新的(下一次获取将存储于 remotes/TonyK922) ### 有了
    main 已跟踪
  为 'git pull' 配置的本地分支:
    main 与远程 main 合并
  为 'git push' 配置的本地引用:
    main 推送至 main (最新)
取回来
来自 github.com:TonyK922/learnGit
 * [新分支]          dev        -> TonyK922/dev

 tony@ubuntu:~/learnGit$ git branch -a
* main
  remotes/TonyK922/dev
  remotes/TonyK922/main
切过去:
tony@ubuntu:~/learnGit$ git checkout dev
分支 'dev' 设置为跟踪来自 'TonyK922' 的远程分支 'dev'。
切换到一个新分支 'dev'

### 自动跟踪了
tony@ubuntu:~/learnGit$ git remote show TonyK922
* 远程 TonyK922
  获取地址:git@github.com:TonyK922/learnGit.git
  推送地址:git@github.com:TonyK922/learnGit.git
  HEAD 分支:main
  远程分支:
    dev  已跟踪
    main 已跟踪
  为 'git pull' 配置的本地分支:
    dev  与远程 dev 合并
    main 与远程 main 合并
  为 'git push' 配置的本地引用:
    dev  推送至 dev  (最新)
    main 推送至 main (最新)

### 没问题:
tony@ubuntu:~/learnGit$ git branch -vv
* dev  134b89b [TonyK922/dev] Create note
  main 134b89b [TonyK922/main] Create note
本地删除个分支,也想把远程的删除了
- 把dev分支再删了:
tony@ubuntu:~/learnGit$ git switch main
切换到分支 'main'
您的分支与上游分支 'TonyK922/main' 一致。
tony@ubuntu:~/learnGit$ git branch -d dev
已删除分支 dev(曾为 134b89b)。
用 git push -d/-D/--delete 远程仓库名 分支名
git remote remove是用来删除远端关联的仓库的,别混了
tony@ubuntu:~/learnGit$ git push -d TonyK922 dev
To github.com:TonyK922/learnGit.git
 - [deleted]         dev
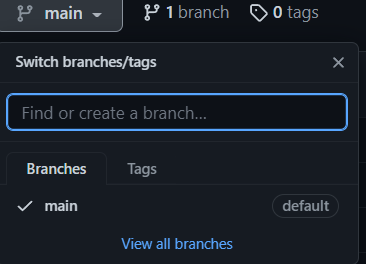
确实删掉了.
远程仓库删掉某分支,同步到本地
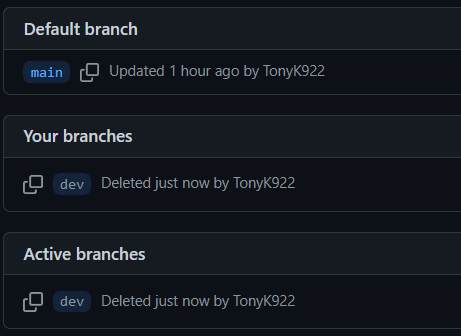
刚刚在github删除了dev分支.
tony@ubuntu:~/learnGit$ git remote show TonyK922
* 远程 TonyK922
  获取地址:git@github.com:TonyK922/learnGit.git
  推送地址:git@github.com:TonyK922/learnGit.git
  HEAD 分支:main
  远程分支:
    main                      已跟踪
    refs/remotes/TonyK922/dev 过时(使用 'git remote prune' 来移除)
  为 'git pull' 配置的本地分支:
    dev  与远程 dev 合并
    main 与远程 main 合并
  为 'git push' 配置的本地引用:
    main 推送至 main (最新)
refs/remotes/TonyK922/dev 过时(使用 'git remote prune' 来移除)
提示我们用 prune这个来删除.
### 先切到main分支.
tony@ubuntu:~/learnGit$ git switch main
切换到分支 'main'
您的分支与上游分支 'TonyK922/main' 一致。

###然后执行 `git remote prune`
tony@ubuntu:~/learnGit$ git remote prune TonyK922
修剪 TonyK922
URL:git@github.com:TonyK922/learnGit.git
 * [已删除] TonyK922/dev
看看:
tony@ubuntu:~/learnGit$ git branch -a
  dev
* main
  remotes/TonyK922/main
这里需要注意了,prune只会删除remote/TonyK922/下的分支文件,本地分支不会自动删
git remote prune 远端仓库名=git fetch --prune=git pull --prune
本地的dev分支需要你git branch -d来删.
tony@ubuntu:~/learnGit$ tree .git/refs/
.git/refs/
├── heads
│   ├── dev             ## 需要手动删
│   └── main
├── remotes
│   └── TonyK922
│       └── main       ### 没了
└── tags
到这里,最近github贼慢可能是两C会的原因,切gitee:
tony@ubuntu:~/learnGit$ git remote -v
TonyK922	git@github.com:TonyK922/learnGit.git (fetch)
TonyK922	git@github.com:TonyK922/learnGit.git (push)
gitee	git@gitee.com:TonyK922/learn-git.git (fetch)
gitee	git@gitee.com:TonyK922/learn-git.git (push)
0x05 不同成员冲突了
先在/tony/path/learnGit/下更改内容,再add,commit,push到gitee上.
然后在/tony/learnGit/下改动一样的文件,在add,commit,push这时候就会冲突.
tony@ubuntu:~/learnGit$ git push gitee main:main
To gitee.com:TonyK922/learn-git.git
 ! [rejected]        main -> main (fetch first)
error: 无法推送一些引用到 'git@gitee.com:TonyK922/learn-git.git'
提示:更新被拒绝,因为远程仓库包含您本地尚不存在的提交。这通常是因为另外
提示:一个仓库已向该引用进行了推送。再次推送前,您可能需要先整合远程变更
提示:(如 'git pull ...')。
提示:详见 'git push --help' 中的 'Note about fast-forwards' 小节。
果然会有冲突了,人家先你一步提交了,没跟你说,你不知道.
那先git pull下来.
tony@ubuntu:~/learnGit$ git pull gitee
remote: Enumerating objects: 9, done.
remote: Counting objects: 100% (9/9), done.
remote: Compressing objects: 100% (4/4), done.
remote: Total 5 (delta 3), reused 0 (delta 0), pack-reused 0
展开对象中: 100% (5/5), 401 字节 | 401.00 KiB/s, 完成.
来自 gitee.com:TonyK922/learn-git
   134b89b..eb84551  main       -> gitee/main
自动合并 cp_firstfile.c
冲突(内容):合并冲突于 cp_firstfile.c
自动合并失败,修正冲突然后提交修正的结果。
没办法咯,先vim解冲突吧.
tony@ubuntu:~/learnGit$ vim cp_firstfile.c

### 解完冲突
tony@ubuntu:~/learnGit$ git add cp_firstfile.c

### 瞅一眼status
tony@ubuntu:~/learnGit$ git status
位于分支 main
您的分支和 'gitee/main' 出现了偏离,
并且分别有 1 和 1 处不同的提交。
  (使用 "git pull" 来合并远程分支)

所有冲突已解决但您仍处于合并中。
  (使用 "git commit" 结束合并)

要提交的变更:
	修改:     C/Firstfile.c

### 没什么问题,合并吧
tony@ubuntu:~/learnGit$ git commit  ### 执行这个会有窗口,里面第一行就是这次提交的message
[main 1023200] Merge branch 'main' of gitee.com:TonyK922/learn-git into main
tony@ubuntu:~/learnGit$ git status
位于分支 main
您的分支领先 'gitee/main' 共 2 个提交。 ## 我本地commit一次, pull gitee一次.
  (使用 "git push" 来发布您的本地提交)

无文件要提交,干净的工作区
冲突解完,push
tony@ubuntu:~/learnGit$ git push gitee
枚举对象中: 9, 完成.
对象计数中: 100% (9/9), 完成.
使用 2 个线程进行压缩
压缩对象中: 100% (5/5), 完成.
写入对象中: 100% (5/5), 569 字节 | 569.00 KiB/s, 完成.
总共 5 (差异 3),复用 0 (差异 0)
remote: Powered by GITEE.COM [GNK-6.4]
To gitee.com:TonyK922/learn-git.git
   eb84551..1023200  main -> main
push完跟另一个队友讲,让他先git pull同步一下.
### /path/下的另一个队友了.
tony@ubuntu:~/path/learnGit$ git pull gitee
remote: Enumerating objects: 9, done.
remote: Counting objects: 100% (9/9), done.
remote: Compressing objects: 100% (5/5), done.
remote: Total 5 (delta 3), reused 0 (delta 0), pack-reused 0
展开对象中: 100% (5/5), 549 字节 | 549.00 KiB/s, 完成.
来自 gitee.com:TonyK922/learn-git
   eb84551..1023200  main       -> gitee/main
更新 eb84551..1023200
Fast-forward
 cp_firstfile.c | 2 +-
 1 file changed, 1 insertion(+), 1 deletion(-)
结束语
git到这里基本就把原理,本地自己玩,到跟别人一起玩的常用流程走完了.
当然还有很多高级用法, 以后看情况再补充吧.
遇到了不知道的,就多搜吧. 用的多了,就记得了.
git的
学习曲线还是很高的. 如果你不去学习基本原理, 那么多命令, 那么多参数,
你肯定会头晕的,所以学Git, 一定要学好原理, 至于命令用法, 不记得就Google就行了.

 浙公网安备 33010602011771号