[AngularJS] AngularJS系列(4) 中级篇之指令
目录
- API概览
- 使用Angular.UI.Bootstrap
- 自定义指令
- scope
- link
- 我的指令
angular中的指令可谓是最复杂的一块
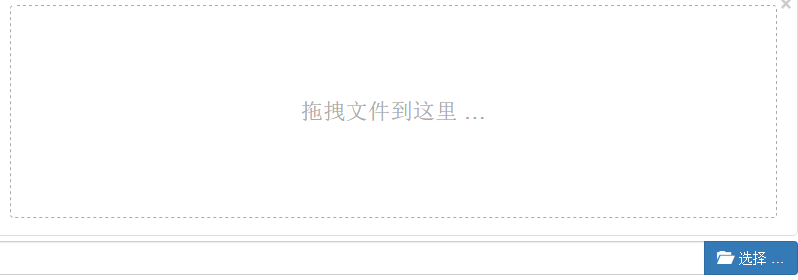
但是我们的上传组件就能这么写

效果图:
API概览
先上一段伪代码:
angular.module('moduleName', []).directive(
        'namespaceDirectiveName',
        [ function() {
            return {
                restrict : '',// 描述指令在模版中的使用方式,包括元素E,属性A,CSS样式类,注释或者以上方式的任意主和
                priority : 0,// 设置指令在模版中的执行顺序,顺序是相对于其他指令而言
                template : '',// 以字符串的形式编写一个内联模版,如果以url的形式提供模版,此属性会被忽略
                templateUrl : '',// 描述加载模版所需要的url。如果使用temlate形式提供模版,此属性会被忽略
                replace : true,// 如果设置为true则替换指令所在的元素,否则就追加到元素内部
                transclude : true,// 把指令元素原来的子节点移动到一个新模版内部
                scope : 'bool or object',// 为当前指令创建一个新的作用域,而不是使之继承父作用域
                constroller : function($scope, $element, $attrs, $transclude) {
                    // 创建一个控制器,它会暴露一个API,利用这个API可以在多个指令之间进行通信
                },
                require : '',// 要求必须存在另个一指令,当前指令才能执行
                link : function(scope, iElement, iAttrs) {
                    // 使用编程的方式修改最终生成的dom元素的实例,添加事件监听器,并设置数据绑定
                },
                compile : function(tElement, tAttrs, transclude) {
                    //在使用ng-repeat用编程的方式修改dom模版,从而实现一个指令跨越多个指令的特性。
                    //也可以返回一个link函数,可以用它来修改产生元素的示例
                    return {
                        pre : function preLink(scope, iElement, iAttrs,
                                controller) {
                        },
                        post : function postLink(scope, iElement, iAttrs,
                                controller) {
                        }

                    }
                }
            };
        } ]);
这里重点介绍几个定义
restrict: 描述指令在模版中的使用方式,包括:元素、样式类、属性、注释,或者以上几种方式的任意组合。(默认为AE)

使用AngularUI.Bootstrap
GitHub:https://angular-ui.github.io/bootstrap/
Nuget:
Install-Package Angular.UI.Bootstrap(该库在Bootstrap3.3.7下测试通过,这里顺便说包中的带tpls.js实际就是自带了模板的js)
这里演示一个最常用到的Pager

    <link href="Content/bootstrap.min.css" rel="stylesheet" />
</head>
<body ng-app="ui.bootstrap.demo">
    <div ng-controller="PaginationDemoCtrl">
        <ul uib-pagination total-items="totalItems" previous-text="上页" next-text="下页" first-text="首页" last-text="末页" items-per-page="itemsPerPage" ng-model="currentPage" max-size="maxSize" class="pagination-sm" boundary-links="true" force-ellipses="true" ng-change="pageChanged()"></ul>
    </div>
    <script src="Scripts/angular.min.js"></script>
    <script src="Scripts/angular-ui/ui-bootstrap-tpls.min.js"></script>
    <script>
        angular.module('ui.bootstrap.demo', ['ui.bootstrap']).controller('PaginationDemoCtrl', function ($scope, $log) {
            $scope.totalItems = 1000;
            $scope.currentPage = 4;
            $scope.maxSize = 5;//显示分页码个数
            $scope.itemsPerPage = 20;//每页大小

            $scope.pageChanged = function () {
                $log.log('Page changed to: ' + $scope.currentPage);
            };
        });
    </script>
</body>
更多需要ui-bootstrap的其他插件 访问对应的GitHub Pages
自定义指令
对于restrict,template,replace,transclude并不复杂,本节不做过多赘述.
scope
scope默认false: 表示使用现有的scope
设置为true : 表示新的scope(会继承父scope的属性)
设置为{} : 表示独立的scope(默认访问不到父scope的属性)
在设置为对象{}的时候,可以通过绑定策略传递父scope的属性

scope为true和默认false时,观察h2内容即可看到效果
<body ng-app="myApp" ng-init="user='aaa'">
    <h2>{{user}}</h2>
    <span hello></span>
    <script>
        angular.module('myApp', [])
            .directive('hello', [function () {
                return {
                    scope: true,
                    template: '<span>Hello-{{user}}</span>',
                    link: function ($scope) {
                        $scope.user = 'ccc';
                    }
                }
            }]);
    </script>
</body>
我们再探索下为scope为对象的时候,在上面的例子中做下调整,使用绑定策略@
    <span hello="{{user}}"></span>
    <script>
        angular.module('myApp', [])
            .directive('hello', [function () {
                return {
                    scope: {
                        user: '@hello'
                    },
                    template: '<span>Hello-{{user}}</span>',
                    link: function ($scope) {
                        $scope.user = 'ccc';
                    }
                }
            }]);
    </script>
发现和scope为false的时候效果一样,其实这已经为完全独立的scope了
我们再调整下绑定策略为=
<span hello="user"></span>
    return {
                    scope: {
                        user: '=hello'
                    },
                    template: '<span>Hello-{{user}}</span>',
                    link: function ($scope) {
                        $scope.user = 'ccc';
                    }
                }
最后我们看下&
<body ng-app="myApp" ng-controller="helloCtrl">
    <span func="log(aa,bb)"></span>
    <script>
        angular.module('myApp', []).controller('helloCtrl', function ($scope) {
            $scope.log = function (name, age) {
                console.log('hello:' + name + ':' + age);
            }
        }).directive('hello', [function () {
            return {
                scope: {
                    func: '&'
                },
                template: '<span ng-click="func({aa:\'小2\',bb:\'19岁\'})">Click Me</span>',
                link: function ($scope) {
                    $scope.user = 'ccc';
                    $scope.func({ aa: '小M', bb: '18岁' });
                }
            }
        }]);
    </script>
</body>
我想到此,scope已经ok.
link
谈到link一般都会说说compile,但我这里会重点介绍controller,require
link函数 会在指令的每个实例上触发一次.
controller函数 一般用来在指令间传递数据
require函数 依赖其他的指令
我们来自定义一个'经典的'according
<body ng-app="myApp" ng-init="items=[{title:'t1',text:'x1'},{title:'t2',text:'x2'},{title:'t3',text:'x3'}]">
    <div hello>
        <div word title="item.title" ng-repeat="item in items">{{item.text}}</div>
    </div>
</body>
先定义hello 指令
        angular.module('myApp', [])
            .directive('hello', [
                function () {
                    return {
                        scope: {
                            title: '='
                        },
                        transclude: true,
                        replace: true,
                        controller: function () {
                            var words = [];
                            this.add = function (word) {
                                words.push(word);
                            }
                            this.openOne = function (word) {
                                for (var i = 0; i < words.length; i++) {
                                    if (words[i] !== word)
                                        words[i].show = false;
                                }
                            }
                        },
                        template: '<div ng-transclude></div>'
                    }
                }
            ])
word指令
    .directive('word', [
                function () {
                    return {
                        require: '?^hello',
                        scope: {
                            title: '='
                        },
                        transclude: true,
                        replace: true,
                        template: '<div><div ng-click="toggle()">{{title}}</div><div ng-show="show" ng-transclude></div></div>',
                        link: function (scope, ele, attr, ctrl) {
                            if (!ctrl) {
                                console.warn('无hello指令');
                                return;
                            }
                            scope.show = false;
                            ctrl.add(scope);
                            scope.toggle = function () {
                                scope.show = !scope.show;
                                ctrl.openOne(scope);
                            }
                        }
                    }
                }
            ]);
效果图(这个according是不是太low了):

require
require接受字符串或字符串数组.会将对应的控制器注入到link函数的第4个参数上.
默认会在自身找的元素找指令
加^表示会从父级找指令
加?表示如果没找到,传递null给link
通常为了防止报错,会传'?^'组合(不分先后)
这里再补充下ngModel的情况.因为常常要和模型做交互
也就是require:'?ngModel'这种情况.
再补充下ngModelCtrl常用的属性或方法:
$setViewValue(): 设置ngModel值
$formatters: 格式化模型显示值
$render: 定义模型如何渲染展示方法
我的指令
虽然angular已经有很多指令插件,但我还是忍不住写了一些指令.
如分页,文件上传,富文本等。
分享1个今天写的fileinput 热乎着呢。
Nuget:Install-Package angularjs.fileinput
GitHub: https://github.com/NeverCL/Angular.FileInput
同时推荐一篇很详细的博客:http://www.cnblogs.com/rohelm/p/4051437.html
本文地址:http://www.cnblogs.com/neverc/p/5916247.html

 浙公网安备 33010602011771号