23.第17章 企业级容器技术docker
一.Docker一键安装脚本
#docker一键安装版本
[root@centos7 ~]# cat install_docker-v2.sh
#!/bin/bash
#
#******************************************************************************
#Author:        zhanghui
#QQ:            19661891
#Date:          2021-04-05
#FileName:      install_docker-v2.sh
#URL:           www.cnblogs.com/neteagles
#Description:   install_docker for centos 7/8 & ubuntu 18.04/20.04
#Copyright (C): 2021 All rights reserved
#******************************************************************************
COLOR="echo -e \\033[01;31m"
END='\033[0m'

os(){
    if grep -Eqi "CentOS" /etc/issue || grep -Eq "CentOS" /etc/*-release;then
        rpm -q redhat-lsb-core &> /dev/null || { ${COLOR}"安装lsb_release工具"${END};yum -y install  redhat-lsb-core &> /dev/null; }
    fi
    OS_ID=`lsb_release -is`
    OS_RELEASE_VERSION_VERSION=`lsb_release -rs |awk -F'.' '{print $1}'`
    OS_CODENAME=`lsb_release -cs`
}

ubuntu_install_docker(){
    dpkg -s docker-ce &>/dev/null && ${COLOR}"Docker已安装,退出"${END} && exit
    local DOCKER_VERSION="5:19.03.15~3-0~ubuntu-${OS_CODENAME}"

    ${COLOR}"开始安装DOCKER依赖包"${END}
    apt update &> /dev/null
    apt -y install apt-transport-https ca-certificates curl software-properties-common &> /dev/null
    curl -fsSL https://mirrors.tuna.tsinghua.edu.cn/docker-ce/linux/ubuntu/gpg | sudo apt-key add - &> /dev/null
    add-apt-repository  "deb [arch=amd64] https://mirrors.tuna.tsinghua.edu.cn/docker-ce/linux/ubuntu  ${OS_CODENAME} stable" &> /dev/null
    apt update &> /dev/null

    ${COLOR}"Docker有以下版本"${END}
    apt-cache madison docker-ce
    ${COLOR}"10秒后即将安装:Docker-"${DOCKER_VERSION}"版本......"${END}
    ${COLOR}"如果想安装其它Docker版本,请按Ctrl+c键退出,修改版本再执行"${END}
    sleep 10

    ${COLOR}"开始安装DOCKER"${END}
    apt -y install docker-ce=${DOCKER_VERSION} docker-ce-cli=${DOCKER_VERSION} &> /dev/null
}

centos_install_docker(){
    rpm -q docker-ce &> /dev/null && ${COLOR}"Docker已安装,退出"${END} && exit
    local DOCKER_VERSION="19.03.15-3.el${OS_RELEASE_VERSION}"
    cat > /etc/yum.repos.d/docker.repo <<-EOF
[docker]
name=docker
gpgcheck=0
baseurl=https://mirrors.tuna.tsinghua.edu.cn/docker-ce/linux/centos/${OS_RELEASE_VERSION}/x86_64/stable/
EOF
    yum clean all &> /dev/null

    ${COLOR}"Docker有以下版本"${END}
    yum list docker-ce.x86_64 --showduplicates  |grep docker-ce |sort -nr
    ${COLOR}"10秒后即将安装:Docker-"${DOCKER_VERSION}"版本......"${END}
    ${COLOR}"如果想安装其它Docker版本,请按Ctrl+c键退出,修改版本再执行"${END}
    sleep 10

    ${COLOR}"开始安装DOCKER"${END}
    yum -y install docker-ce-$DOCKER_VERSION docker-ce-cli-$DOCKER_VERSION &> /dev/null || { ${COLOR}"Base,Extras的yum源失败,请检查yum配置"${END};exit; }
}

aliyun_jxjsq(){
    mkdir -p /etc/docker
    tee /etc/docker/daemon.json <<-'EOF'
{
    "registry-mirrors": ["https://hzw5xiv7.mirror.aliyuncs.com"]
}
EOF
    systemctl daemon-reload
    systemctl enable --now docker
    docker version &&  ${COLOR}"Docker 安装成功"${END} || ${COLOR}"Docker 安装失败"${END}
}

set_alias(){
    echo 'alias rmi="docker imasges -qa|xargs docker rmi -f"' >> .bashrc
    echo 'alias rmc="docker ps -qa|xargs docker rm -f"' >> .bashrc
}

set_swap_limit(){
    ${COLOR}'设置Docker的"WARNING: No swap limit support"警告'${END}
    chmod u+w /etc/default/grub
    sed -i.bak 's/GRUB_CMDLINE_LINUX=.*/GRUB_CMDLINE_LINUX=" net.ifnames=0 cgroup_enable=memory swapaccount=1"/' /etc/default/grub
    chmod u-w /etc/default/grub ;update-grub
    ${COLOR}"10秒后,机器会自动重启"${END}
    sleep 10
    reboot
}

main(){
    os
    if [ ${OS_ID} == "CentOS" ] &> /dev/null;then
        centos_install_docker
        aliyun_jxjsq
        set_alias
        set_swap_limit
    else
        ubuntu_install_docker
        aliyun_jxjsq
        set_alias
        set_swap_limit
    fi
}

main


#docker菜单选择版本
[root@centos7 ~]# cat install_docker_menu_v2.sh
#!/bin/bash
#
#******************************************************************************
#Author:        zhanghui
#QQ:            19661891
#Date:          2021-01-08
#FileName:      install_docker_menu_v2.sh
#URL:           www.cnblogs.com/neteagles
#Description:   install_docker_menu for centos 7/8 & ubuntu 18.04/20.04
#Copyright (C): 2021 All rights reserved
#******************************************************************************
COLOR="echo -e \\033[01;31m"
END='\033[0m'

os(){
    if grep -Eqi "CentOS" /etc/issue || grep -Eq "CentOS" /etc/*-release;then
        rpm -q redhat-lsb-core &> /dev/null || { ${COLOR}"安装lsb_release工具"${END};yum -y install  redhat-lsb-core &> /dev/null; }
    fi
    OS_RELEASE_VERSION=`lsb_release -rs |awk -F'.' '{print $1}'`
    OS_CODENAME=`lsb_release -cs`
}

ubuntu_install_docker(){
    dpkg -s docker-ce &>/dev/null && ${COLOR}"Docker已安装,退出"${END} && exit

    ${COLOR}"开始安装DOCKER依赖包"${END}
    apt update &> /dev/null
    apt -y install apt-transport-https ca-certificates curl software-properties-common &> /dev/null
    curl -fsSL https://mirrors.tuna.tsinghua.edu.cn/docker-ce/linux/ubuntu/gpg | sudo apt-key add - &> /dev/null
    add-apt-repository  "deb [arch=amd64] https://mirrors.tuna.tsinghua.edu.cn/docker-ce/linux/ubuntu  ${OS_CODENAME} stable" &> /dev/null
    apt update &> /dev/null

    ${COLOR}"Docker有以下版本"${END}
    apt-cache madison docker-ce
    ${COLOR}"10秒后即将安装:Docker-"${DOCKER_VERSION}"版本......"${END}
    ${COLOR}"如果想安装其它Docker版本,请按Ctrl+c键退出,修改版本再执行"${END}
    sleep 10

    ${COLOR}"开始安装DOCKER"${END}
    apt -y install docker-ce=${DOCKER_VERSION} docker-ce-cli=${DOCKER_VERSION} &> /dev/null
}

ubuntu_docker_version_2010(){
    DOCKER_VERSION="5:20.10.5~3-0~ubuntu-${OS_CODENAME}"
}

ubuntu_docker_version_1903(){
    DOCKER_VERSION="5:19.03.15~3-0~ubuntu-${OS_CODENAME}"
}

ubuntu_docker_version_1809(){
    DOCKER_VERSION="5:18.09.9~3-0~ubuntu-${OS_CODENAME}"
}

centos_install_docker(){
    rpm -q docker-ce &> /dev/null && ${COLOR}"Docker已安装,退出"${END} && exit
    cat > /etc/yum.repos.d/docker.repo <<-EOF
[docker]
name=docker
gpgcheck=0
baseurl=https://mirrors.tuna.tsinghua.edu.cn/docker-ce/linux/centos/${OS_RELEASE_VERSION}/x86_64/stable/
EOF
    yum clean all &> /dev/null

    ${COLOR}"Docker有以下版本"${END}
    yum list docker-ce.x86_64 --showduplicates |grep docker-ce |sort -nr
    ${COLOR}"10秒后即将安装:Docker-"${DOCKER_VERSION}"版本......"${END}
    ${COLOR}"如果想安装其它Docker版本,请按Ctrl+c键退出,修改版本再执行"${END}
    sleep 10

    ${COLOR}"开始安装DOCKER"${END}
    yum -y install docker-ce-$DOCKER_VERSION docker-ce-cli-$DOCKER_VERSION &> /dev/null || { ${COLOR}"Base,Extras的yum源失败,请检查yum配置"${END};exit; }
}

centos_docker_version_2010(){
    DOCKER_VERSION="20.10.5-3.el${OS_RELEASE_VERSION}"
}

centos_docker_version_1903(){
    DOCKER_VERSION="19.03.15-3.el${OS_RELEASE_VERSION}"
}

aliyun_jxjsq(){
    mkdir -p /etc/docker
    tee /etc/docker/daemon.json <<-'EOF'
{
    "registry-mirrors": ["https://hzw5xiv7.mirror.aliyuncs.com"]
}
EOF
    systemctl daemon-reload
    systemctl enable --now docker &> /dev/null
    docker version &&  ${COLOR}"Docker 安装成功"${END} || ${COLOR}"Docker 安装失败"${END}
}

set_alias(){
    echo 'alias rmi="docker imasges -qa|xargs docker rmi -f"' >> .bashrc
    echo 'alias rmc="docker ps -qa|xargs docker rm -f"' >> .bashrc
}

PS3="请选择相应的Docker版本(1-6):"
MENU="
Ubuntu_Docker_5:20.10.5~3-0版本
Ubuntu_Docker_5:19.03.15~3-0版本
Ubuntu_Docker_5:18.09.9~3-0版本
CentOS_Docker_20.10.5-3版本
CentOS_Docker_19.03.15-3版本
退出
"

os

select menu in $MENU;do
    case $REPLY in
    1)
        ubuntu_docker_version_2010
        ubuntu_install_docker
        aliyun_jxjsq
        set_alias
        break
        ;;
    2)
        ubuntu_docker_version_1903
        ubuntu_install_docker
        aliyun_jxjsq
        set_alias
        break
        ;;
    3)
        ubuntu_docker_version_1809
        ubuntu_install_docker
        aliyun_jxjsq
        set_alias
        break
        ;;
    4)
        centos_docker_version_2010
        centos_install_docker
        aliyun_jxjsq
        set_alias
        break
        ;;
    5)
        centos_docker_version_1903
        centos_install_docker
        aliyun_jxjsq
        set_alias
        break
        ;;
    6)
        break
        ;;
    *)
        ${COLOR}"输入错误,请输入正确的数字(1-6)!"${END}
        ;;
    esac
done


#docker手动输入版本
[root@centos7 ~]# cat install_docker_input_v2.sh
#!/bin/bash
#
#******************************************************************************
#Author:        zhanghui
#QQ:            19661891
#Date:          2021-01-09
#FileName:      install_docker_input_v2.sh
#URL:           www.cnblogs.com/neteagles
#Description:   install_docker_input for centos 7/8 & ubuntu 18.04/20.04
#Copyright (C): 2021 All rights reserved
#******************************************************************************
COLOR="echo -e \\033[01;31m"
END='\033[0m'

os(){
    if grep -Eqi "CentOS" /etc/issue || grep -Eq "CentOS" /etc/*-release;then
        rpm -q redhat-lsb-core &> /dev/null || { ${COLOR}"安装lsb_release工具"${END};yum -y install  redhat-lsb-core &> /dev/null; }
    fi
    OS_ID=`lsb_release -is`
    OS_RELEASE_VERSION=`lsb_release -rs |awk -F'.' '{print $1}'`
    OS_CODENAME=`lsb_release -cs`
}

ubuntu_install_docker(){
    dpkg -s docker-ce &>/dev/null && ${COLOR}"Docker已安装,退出"${END} && exit

    ${COLOR}"开始安装DOCKER依赖包"${END}
    apt update &>/dev/null
    apt -y install apt-transport-https ca-certificates curl software-properties-common &>/dev/null
    curl -fsSL https://mirrors.tuna.tsinghua.edu.cn/docker-ce/linux/ubuntu/gpg | sudo apt-key add - &>/dev/null
    add-apt-repository  "deb [arch=amd64] https://mirrors.tuna.tsinghua.edu.cn/docker-ce/linux/ubuntu  ${OS_CODENAME} stable" &>/dev/null
    apt update &>/dev/null

    ${COLOR}"Docker有以下版本"${END}
    apt-cache madison docker-ce
    read -p "请输入要安装Docker版本(例如:5:19.03.14~3-0~ubuntu-bionic):" DOCKER_VERSION
    ${COLOR}"10秒后即将安装:Docker-"${DOCKER_VERSION}"版本......"${END}
    ${COLOR}"如果想安装其它Docker版本,请按Ctrl+c键退出,重新输入版本再执行"${END}
    sleep 10

    ${COLOR}"开始安装DOCKER"${END}
    apt -y install docker-ce=${DOCKER_VERSION} docker-ce-cli=${DOCKER_VERSION} &>/dev/null
}

centos_install_docker(){
    rpm -q docker-ce &> /dev/null && ${COLOR}"Docker已安装,退出"${END} && exit
    cat > /etc/yum.repos.d/docker.repo <<-EOF
[docker]
name=docker
gpgcheck=0
baseurl=https://mirrors.tuna.tsinghua.edu.cn/docker-ce/linux/centos/$os_version/x86_64/stable/
EOF
    yum clean all &>/dev/null

    ${COLOR}"Docker有以下版本"${END}
    yum list docker-ce.x86_64 --showduplicates |grep docker-ce |sort -nr
    read -p "请输入要安装Docker版本(例如:19.03.14-3.el8):" DOCKER_VERSION
    ${COLOR}"10秒后即将安装:Docker-"${DOCKER_VERSION}"版本......"${END}
    ${COLOR}"如果想安装其它Docker版本,请按Ctrl+c键退出,重新输入版本再执行"${END}
    sleep 10

    ${COLOR}"开始安装DOCKER"${END}
    yum -y install docker-ce-$DOCKER_VERSION docker-ce-cli-$DOCKER_VERSION &>/dev/null || { ${COLOR}"Base,Extras的yum源失败,请检查yum配置"${END};exit; }
}

aliyun_jxjsq(){
    mkdir -p /etc/docker
    tee /etc/docker/daemon.json <<-'EOF'
{
    "registry-mirrors": ["https://hzw5xiv7.mirror.aliyuncs.com"]
}
EOF
    systemctl daemon-reload
    systemctl enable --now docker &>/dev/null
    docker version &&  ${COLOR}"Docker 安装成功"${END} || ${COLOR}"Docker 安装失败"${END}
}

set_alias(){
    echo 'alias rmi="docker imasges -qa|xargs docker rmi -f"' >> .bashrc
    echo 'alias rmc="docker ps -qa|xargs docker rm -f"' >> .bashrc
}

main(){
    os
    if [ ${OS_ID} == "CentOS" ] &> /dev/null;then
        centos_install_docker
        aliyun_jxjsq
        set_alias
    else
        ubuntu_install_docker
        aliyun_jxjsq
        set_alias
    fi
}

main
二.Docker 镜像制作
2.1Dockerfile 制作基于基础镜像的Base镜像
2.1.1准备目录结构,下载镜像并初始化系统
#按照业务类型或系统类型等方式划分创建目录环境,方便后期镜像比较多的时候进行分类
root@ubuntu1804-2:~# mkdir -p /data/dockerfile/{web/{nginx,apache,tomcat,jdk},system/{centos,ubuntu,debian,alpine}}
root@ubuntu1804-2:~# tree /data/dockerfile
/data/dockerfile
├── system
│   ├── alpine
│   ├── centos
│   ├── debian
│   └── ubuntu
└── web
    ├── apache
    ├── jdk
    ├── nginx
    └── tomcat

10 directories, 0 files

#下载基础镜像
root@ubuntu1804-2:~# docker pull centos:centos7.9.2009
root@ubuntu1804-2:~# docker images
REPOSITORY          TAG                 IMAGE ID            CREATED             SIZE
centos              centos7.9.2009      8652b9f0cb4c        2 months ago        204MB
2.1.2先制作基于基础镜像的系统Base镜像
#先制作基于基础镜像的系统base镜像
root@ubuntu1804-2:~# cd /data/dockerfile/system/centos/
root@ubuntu1804-2:/data/dockerfile/system/centos# mkdir centos7.9
root@ubuntu1804-2:/data/dockerfile/system/centos# cd centos7.9/
root@ubuntu1804-2:/data/dockerfile/system/centos/centos7.9# vim Dockerfile
FROM centos:centos7.9.2009
LABEL maintainer="zhanghui <root@neteagles.cn>" description="CentOS 7.9 Base image" QQ="19661891"
RUN yum -y install wget && rm -f /etc/yum.repos.d/* && wget -P /etc/yum.repos.d/ http://mirrors.aliyun.com/repo/Centos-7.repo \
    && wget -P /etc/yum.repos.d/ http://mirrors.aliyun.com/repo/epel-7.repo \
    && sed -i -e '/mirrors.cloud.aliyuncs.com/d'  -e '/mirrors.aliyuncs.com/d' /etc/yum.repos.d/Centos-7.repo \
    && yum -y install vim-enhanced tcpdump lrzsz tree telnet bash-completion net-tools psmisc wget bzip2 lsof \
       zip unzip nfs-utils gcc make gcc-c++ glibc glibcdevel pcre pcre-devel openssl openssl-devel systemd-devel zlib-devel \
    && rm -rf /var/cache/yum/* \
    && rm -f /etc/localtime && ln -s ../usr/share/zoneinfo/Asia/Shanghai /etc/localtime
:wq

root@ubuntu1804-2:/data/dockerfile/system/centos/centos7.9# vim build.sh
#!/bin/bash
#
#********************************************************************
#Author:            zhanghui
#QQ:                19661891
#Date:              2021-01-14
#FileName:         build.sh
#URL:               www.neteagles.cn
#Description:      The test script
#Copyright (C):     2021 All rights reserved
docker build -t $1 .
:wq

root@ubuntu1804-2:/data/dockerfile/system/centos/centos7.9# chmod +x build.sh
root@ubuntu1804-2:/data/dockerfile/system/centos/centos7.9# ./build.sh centos7.9-base:v1.0 .
root@ubuntu1804-2:/data/dockerfile/system/centos/centos7.9# docker images
REPOSITORY          TAG                 IMAGE ID            CREATED             SIZE
centos7.9-base      v1.0                0c980dea2a41        2 minutes ago       404MB
centos              centos7.9.2009      8652b9f0cb4c        2 months ago        204MB
root@ubuntu1804-2:/data/dockerfile/system/centos/centos7.9# docker image history centos7.9-base:v1.0
IMAGE               CREATED             CREATED BY                                      SIZE                COMMENT
0c980dea2a41        3 minutes ago       /bin/sh -c yum -y install wget && rm -f /etc…   200MB
876ce0b1fbd8        4 minutes ago       /bin/sh -c #(nop)  LABEL maintainer=zhanghui…   0B
8652b9f0cb4c        2 months ago        /bin/sh -c #(nop)  CMD ["/bin/bash"]            0B
<missing>           2 months ago        /bin/sh -c #(nop)  LABEL org.label-schema.sc…   0B
<missing>           2 months ago        /bin/sh -c #(nop) ADD file:b3ebbe8bd304723d4…   204MB
2.2Dockerfile 制作基于Base镜像的 nginx 镜像
2.2.1在Dockerfile目录下准备编译安装的相关文件
root@ubuntu1804-2:~# cd /data/dockerfile/web/nginx/
root@ubuntu1804-2:/data/dockerfile/web/nginx# ls
root@ubuntu1804-2:/data/dockerfile/web/nginx# mkdir nginx-1.18
root@ubuntu1804-2:/data/dockerfile/web/nginx# cd nginx-1.18/
root@ubuntu1804-2:/data/dockerfile/web/nginx/nginx-1.18# wget http://nginx.org/download/nginx-1.18.0.tar.gz
root@ubuntu1804-2:/data/dockerfile/web/nginx/nginx-1.18# echo welcome to nginx website in Docker >index.html
2.2.2在一台模版机进行编译安装同一版本的nginx,生成模版配置文件
[root@centos7-2 ~]# yum -y install vim-enhanced tcpdump lrzsz tree telnet bash-completion net-tools psmisc wget bzip2 lsof zip unzip nfs-utils gcc make gcc-c++ glibc glibcdevel pcre pcre-devel openssl openssl-devel systemd-devel zlib-devel
[root@centos7-2 ~]# wget -P /usr/local/src/ http://nginx.org/download/nginx-1.18.0.tar.gz
[root@centos7-2 ~]# cd /usr/local/src/
[root@centos7-2 src]# ls
nginx-1.18.0.tar.gz
[root@centos7-2 src]# tar xvf nginx-1.18.0.tar.gz
[root@centos7-2 src]# cd nginx-1.18.0
[root@centos7-2 nginx-1.18.0]# ./configure --prefix=/apps/nginx
[root@centos7-2 nginx-1.18.0]# make && make install

[root@centos7-2 nginx-1.18.0]# cd /apps/nginx/sbin/
[root@centos7-2 sbin]# ls
nginx
[root@centos7-2 sbin]# ./nginx
[root@centos7-2 sbin]# ss -ntl
State      Recv-Q Send-Q                    Local Address:Port                                   Peer Address:Port
LISTEN     0      128                                   *:80                                                *:*
LISTEN     0      128                                   *:22                                                *:*
LISTEN     0      100                           127.0.0.1:25                                                *:*
LISTEN     0      128                                [::]:22                                             [::]:*
LISTEN     0      100                               [::1]:25                                             [::]:*

[root@centos7-2 sbin]# ss -ntl
State      Recv-Q Send-Q                    Local Address:Port                                   Peer Address:Port
LISTEN     0      128                                   *:22                                                *:*
LISTEN     0      100                           127.0.0.1:25                                                *:*
LISTEN     0      128                                [::]:22                                             [::]:*
LISTEN     0      100                               [::1]:25                                             [::]:*
[root@centos7-2 sbin]# ./nginx -h
nginx version: nginx/1.18.0
Usage: nginx [-?hvVtTq] [-s signal] [-c filename] [-p prefix] [-g directives]

Options:
  -?,-h         : this help
  -v            : show version and exit
  -V            : show version and configure options then exit
  -t            : test configuration and exit
  -T            : test configuration, dump it and exit
  -q            : suppress non-error messages during configuration testing
  -s signal     : send signal to a master process: stop, quit, reopen, reload
  -p prefix     : set prefix path (default: /apps/nginx/)
  -c filename   : set configuration file (default: conf/nginx.conf)
  -g directives : set global directives out of configuration file

[root@centos7-2 sbin]#  ./nginx -g "daemon off;"	#nginx 前台运行
2.2.3编写Dockerfile文件
root@ubuntu1804-2:/data/dockerfile/web/nginx/nginx-1.18# vim Dockerfile
FROM centos7.9-base:v1.0
LABEL maintainer="zhanghui <root@neteagles.cn>" description="Nginx 1.18" QQ="19661891"
ENV version=1.18.0
ADD nginx-$version.tar.gz /usr/local/src
RUN cd /usr/local/src/nginx-$version && ./configure --prefix=/apps/nginx && make && make install && rm -rf /usr/local/src/nginx* \
    && sed -i 's/.*nobody.*/user nginx;/' /apps/nginx/conf/nginx.conf && useradd -r nginx
COPY index.html /apps/nginx/html/
EXPOSE 80 443
CMD ["/apps/nginx/sbin/nginx","-g","daemon off;"]
:wq
2.2.4生成nginx镜像
root@ubuntu1804-2:/data/dockerfile/web/nginx/nginx-1.18# vim build.sh
#!/bin/bash
#
#********************************************************************
#Author:            zhanghui
#QQ:                19661891
#Date:              2021-01-14
#FileName:         build.sh
#URL:               www.neteagles.cn
#Description:      The test script
#Copyright (C):     2021 All rights reserved
#********************************************************************
docker build -t $1 .
:wq

root@ubuntu1804-2:/data/dockerfile/web/nginx/nginx-1.18# chmod +x build.sh
root@ubuntu1804-2:/data/dockerfile/web/nginx/nginx-1.18# ./build.sh nginx-centos7.9:1.18 .
root@ubuntu1804-2:/data/dockerfile/web/nginx/nginx-1.18# docker images
REPOSITORY          TAG                 IMAGE ID            CREATED             SIZE
nginx-centos7.9     1.18                147a94376ddc        27 seconds ago      414MB
centos7.9-base      v1.0                0c980dea2a41        41 minutes ago      404MB
centos              centos7.9.2009      8652b9f0cb4c        2 months ago        204MB
2.2.5生成的容器测试镜像
root@ubuntu1804-2:/data/dockerfile/web/nginx/nginx-1.18# docker run -d --name nginx01 -p 80:80 nginx-centos7.9:1.18
1f999456991b20bc17aea4d7ded3d6b719b0ac3c7dae98a0d8ff6dc36ab300ee
root@ubuntu1804-2:/data/dockerfile/web/nginx/nginx-1.18# docker ps
CONTAINER ID        IMAGE                  COMMAND                  CREATED             STATUS              PORTS                         NAMES
1f999456991b        nginx-centos7.9:1.18   "/apps/nginx/sbin/ng…"   6 seconds ago       Up 4 seconds        0.0.0.0:80->80/tcp, 443/tcp   nginx01
root@ubuntu1804-2:/data/dockerfile/web/nginx/nginx-1.18# docker exec -it nginx01 bash
[root@1f999456991b /]# ps aux
USER        PID %CPU %MEM    VSZ   RSS TTY      STAT START   TIME COMMAND
root          1  0.0  0.1  20580  2492 ?        Ss   14:44   0:00 nginx: master process /apps/nginx/sbin/nginx -g daemon off;
nginx         7  0.0  0.1  21016  2360 ?        S    14:44   0:00 nginx: worker process
root          8  0.5  0.1  12368  3576 pts/0    Ss   14:45   0:00 bash
root         28  0.0  0.1  51744  3508 pts/0    R+   14:45   0:00 ps aux
[root@1f999456991b /]# exit
exit
root@ubuntu1804-2:/data/dockerfile/web/nginx/nginx-1.18# curl 127.0.0.1
welcome to nginx website in Docker
2.3Dockerfile 直接制作nginx镜像
2.3.1在Dockerfile目录下准备编译安装的相关文件
root@ubuntu1804-2:~# cd /data/dockerfile/web/nginx/
root@ubuntu1804-2:/data/dockerfile/web/nginx# mkdir nginx-1.18-2
root@ubuntu1804-2:/data/dockerfile/web/nginx# cd nginx-1.18-2/
root@ubuntu1804-2:/data/dockerfile/web/nginx/nginx-1.18-2# wget http://nginx.org/download/nginx-1.18.0.tar.gz
root@ubuntu1804-2:/data/dockerfile/web/nginx/nginx-1.18-2# echo welcome to nginx website in Docker >index.html
2.3.2编写Dockerfile文件
root@ubuntu1804-2:/data/dockerfile/web/nginx/nginx-1.18-2# vim Dockerfile
FROM centos:centos7.9.2009
LABEL maintainer="zhanghui <root@neteagles.cn>" description="Nginx 1.18" QQ="19661891"
RUN yum install -y gcc gcc-c++ pcre pcre-devel zlib zlib-devel openssl  openssl-devel \
    && yum clean all
ENV version=1.18.0
ADD nginx-$version.tar.gz /usr/local/src
RUN cd /usr/local/src/nginx-$version && ./configure --prefix=/apps/nginx && make && make install && rm -rf /usr/local/src/nginx* \
    && sed -i 's/.*nobody.*/user nginx;/' /apps/nginx/conf/nginx.conf && useradd -r nginx
COPY index.html /apps/nginx/html/
EXPOSE 80 443
CMD ["/apps/nginx/sbin/nginx","-g","daemon off;"]
:wq
2.3.3生成 nginx 镜像
root@ubuntu1804-2:/data/dockerfile/web/nginx/nginx-1.18-2# vim bulid.sh
#!/bin/bash
#
#********************************************************************
#Author:            zhanghui
#QQ:                19661891
#Date:              2021-01-15
#FileName:         bulid.sh
#URL:               www.neteagles.cn
#Description:      The test script
#Copyright (C):     2021 All rights reserved
#********************************************************************
docker build -t $1 .
:wq

root@ubuntu1804-2:/data/dockerfile/web/nginx/nginx-1.18-2# chmod +x bulid.sh
root@ubuntu1804-2:/data/dockerfile/web/nginx/nginx-1.18-2# ./bulid.sh nginx-centos7.9:1.18-2 .

root@ubuntu1804-2:/data/dockerfile/web/nginx/nginx-1.18-2# docker images "*nginx*"
REPOSITORY          TAG                 IMAGE ID            CREATED              SIZE
nginx-centos7.9     1.18-2              60d08719996d        About a minute ago   317MB
nginx-centos7.9     1.18                147a94376ddc        32 hours ago         414MB
2.3.4生成容器测试镜像
root@ubuntu1804-2:/data/dockerfile/web/nginx/nginx-1.18-2# docker run -d --name nginx01 -p 80:80 nginx-centos7.9:1.18-2
89a5f895cb17a2a019a239e552eea8ddc9071c4f89b889926549871fc6b8ce9a
root@ubuntu1804-2:/data/dockerfile/web/nginx/nginx-1.18-2# docker ps
CONTAINER ID        IMAGE                    COMMAND                  CREATED             STATUS              PORTS                         NAMES
89a5f895cb17        nginx-centos7.9:1.18-2   "/apps/nginx/sbin/ng…"   20 seconds ago      Up 19 seconds       0.0.0.0:80->80/tcp, 443/tcp   nginx01
root@ubuntu1804-2:/data/dockerfile/web/nginx/nginx-1.18-2# curl 127.0.0.1
welcome to nginx website in Docker

root@ubuntu1804-2:/data/dockerfile/web/nginx/nginx-1.18-2# docker exec -it nginx01 bash
[root@89a5f895cb17 /]# ps aux
USER        PID %CPU %MEM    VSZ   RSS TTY      STAT START   TIME COMMAND
root          1  0.0  0.1  20580  2408 ?        Ss   14:40   0:00 nginx: master process /apps/nginx/sbin/nginx -g daemon off;
nginx         6  0.0  0.1  21016  2288 ?        S    14:40   0:00 nginx: worker process
root          7  0.1  0.1  11840  3064 pts/0    Ss   14:41   0:00 bash
root         20  0.0  0.1  51744  3456 pts/0    R+   14:42   0:00 ps aux
[root@89a5f895cb17 /]# exit
exit
2.4基于 Ubuntu 基础镜像制作 nginx 镜像
#下载ubuntu1804镜像
root@ubuntu1804-2:~# docker pull ubuntu:18.04
root@ubuntu1804-2:~# docker images ubuntu*
REPOSITORY          TAG                 IMAGE ID            CREATED             SIZE
ubuntu              18.04               2c047404e52d        7 weeks ago         63.3MB


root@ubuntu1804-2:~#  cd /data/dockerfile/web/nginx/
root@ubuntu1804-2:/data/dockerfile/web/nginx# mkdir nginx-1.18-ubuntu18.04
root@ubuntu1804-2:/data/dockerfile/web/nginx# cd nginx-1.18-ubuntu18.04/
root@ubuntu1804-2:/data/dockerfile/web/nginx/nginx-1.18-ubuntu18.04#
root@ubuntu1804-2:/data/dockerfile/web/nginx/nginx-1.18-ubuntu18.04# vim sources.list
deb http://mirrors.aliyun.com/ubuntu/ bionic main restricted universe multiverse
deb-src http://mirrors.aliyun.com/ubuntu/ bionic main restricted universe multiverse

deb http://mirrors.aliyun.com/ubuntu/ bionic-security main restricted universe multiverse
deb-src http://mirrors.aliyun.com/ubuntu/ bionic-security main restricted universe multiverse

deb http://mirrors.aliyun.com/ubuntu/ bionic-updates main restricted universe multiverse
deb-src http://mirrors.aliyun.com/ubuntu/ bionic-updates main restricted universe multiverse

deb http://mirrors.aliyun.com/ubuntu/ bionic-proposed main restricted universe multiverse
deb-src http://mirrors.aliyun.com/ubuntu/ bionic-proposed main restricted universe multiverse

deb http://mirrors.aliyun.com/ubuntu/ bionic-backports main restricted universe multiverse
deb-src http://mirrors.aliyun.com/ubuntu/ bionic-backports main restricted universe multiverse
:wq

root@ubuntu1804-2:/data/dockerfile/web/nginx/nginx-1.18-ubuntu18.04# wget http://nginx.org/download/nginx-1.18.0.tar.gz
root@ubuntu1804-2:/data/dockerfile/web/nginx/nginx-1.18-ubuntu18.04# echo welcome to nginx website in Docker >index.html

root@ubuntu1804-2:/data/dockerfile/web/nginx/nginx-1.18-ubuntu18.04# vim Dockerfile
FROM ubuntu:18.04
LABEL maintainer="zhanghui <root@neteagles.cn>" description="Nginx 1.18" QQ="19661891"
COPY sources.list /etc/apt/sources.list
RUN apt update && apt -y install iproute2 ntpdate tcpdump telnet traceroute nfs-kernel-server nfs-common \
    lrzsz tree openssl libssl-dev libpcre3 libpcre3-dev zlib1g-dev gcc openssh-server iotop unzip zip make
ENV version=1.18.0
ADD nginx-$version.tar.gz /usr/local/src
RUN cd /usr/local/src/nginx-$version && ./configure --prefix=/apps/nginx && make && make install && rm -rf /usr/local/src/nginx* \
    && sed -i 's/.*nobody.*/user nginx;/' /apps/nginx/conf/nginx.conf && useradd -r nginx
COPY index.html /apps/nginx/html/
EXPOSE 80 443
CMD ["/apps/nginx/sbin/nginx","-g","daemon off;"]
:wq

root@ubuntu1804-2:/data/dockerfile/web/nginx/nginx-1.18-ubuntu18.04# vim build.sh
#!/bin/bash
#
#********************************************************************
#Author:            zhanghui
#QQ:                19661891
#Date:              2021-01-14
#FileName:         build.sh
#URL:               www.neteagles.cn
#Description:      The test script
#Copyright (C):     2021 All rights reserved
#********************************************************************
docker build -t $1 .
:wq

root@ubuntu1804-2:/data/dockerfile/web/nginx/nginx-1.18-ubuntu18.04# ./build.sh nginx-ubuntu1804:1.18
root@ubuntu1804-2:/data/dockerfile/web/nginx/nginx-1.18-alpine# docker images "*ubuntu*"
REPOSITORY          TAG                 IMAGE ID            CREATED             SIZE
nginx-ubuntu1804    1.18                c2b43eff0921        About an hour ago   394MB
ubuntu              18.04               2c047404e52d        7 weeks ago         63.3MB


root@ubuntu1804-2:/data/dockerfile/web/nginx/nginx-1.18-ubuntu18.04# docker run -d --name nginx02 -p 80:80 nginx-ubuntu1804:1.18
1d6894deb9a85c0691081a6195ea6acd4be2e624b82256c258abe9807db4d855
root@ubuntu1804-2:/data/dockerfile/web/nginx/nginx-1.18-ubuntu18.04# curl 127.0.0.1
welcome to nginx website in Docker
2.5基于 alpine 基础镜像制作 nginx镜像
2.5.1制作alpine的自定义系统镜像
#下载alpine镜像
root@ubuntu1804-2:~# docker pull alpine:3.12.3
root@ubuntu1804-2:~# docker images alpine*
REPOSITORY          TAG                 IMAGE ID            CREATED             SIZE
alpine              3.12.3              389fef711851        4 weeks ago         5.58MB

#准备相关文件和dockfile
root@ubuntu1804-2:~# cd /data/dockerfile/system/alpine/
root@ubuntu1804-2:/data/dockerfile/system/alpine# vim reposirories
http://mirrors.aliyun.com/alpine/v3.11/main
http://mirrors.aliyun.com/alpine/v3.11/community
:wq

root@ubuntu1804-2:/data/dockerfile/system/alpine# vim Dockerfile
FROM alpine:3.12.3
LABEL maintainer="zhanghui <root@neteagles.cn>" description="alpine 3.12.3" QQ="19661891"
COPY repositories /etc/apk/repositories
RUN apk update && apk add iotop gcc libgcc libc-dev libcurl libc-utils pcre-dev zlib-dev libnfs make pcre pcre2 zip unzip net-tool
s pstree wget libevent libevent-dev iproute2
:wq

root@ubuntu1804-2:/data/dockerfile/system/alpine# vim build.sh
#!/bin/bash
#
#********************************************************************
#Author:            zhanghui
#QQ:                19661891
#Date:              2021-01-14
#FileName:         build.sh
#URL:               www.neteagles.cn
#Description:      The test script
#Copyright (C):     2021 All rights reserved
#********************************************************************
docker build -t $1 .
:wq
root@ubuntu1804-2:/data/dockerfile/system/alpine# chmod +x build.sh

root@ubuntu1804-2:/data/dockerfile/system/alpine# ./build.sh alpine-bash:3.12.3 .

root@ubuntu1804-2:/data/dockerfile/system/alpine# docker images alp*
REPOSITORY          TAG                 IMAGE ID            CREATED              SIZE
alpine-bash         3.12.3              513c281b728e        About a minute ago   181MB
alpine              3.12.3              389fef711851        4 weeks ago          5.58MB
2.5.2制作基于alpine自定义镜像的nginx镜像
#准备相关文件
root@ubuntu1804-2:~# cd /data/dockerfile/web/nginx/
root@ubuntu1804-2:/data/dockerfile/web/nginx# mkdir nginx-1.18-alpine
root@ubuntu1804-2:/data/dockerfile/web/nginx# cd nginx-1.18-alpine/
root@ubuntu1804-2:/data/dockerfile/web/nginx/nginx-1.18-alpine# wget http://nginx.org/download/nginx-1.18.0.tar.gz
root@ubuntu1804-2:/data/dockerfile/web/nginx/nginx-1.18-alpine# echo welcome to nginx website in Docker >index.html

#编定Dockerfile文件
root@ubuntu1804-2:/data/dockerfile/web/nginx/nginx-1.18-alpine# vim Dockerfile
FROM alpine-bash:3.12.3
LABEL maintainer="zhanghui <root@neteagles.cn>" description="Nginx 1.18" QQ="19661891"
ENV version=1.18.0
ADD nginx-$version.tar.gz /usr/local/src
RUN cd /usr/local/src/nginx-$version && ./configure --prefix=/apps/nginx && make && make install && rm -rf /usr/local/src/nginx* \
    && sed -i 's/.*nobody.*/user nginx;/' /apps/nginx/conf/nginx.conf && addgroup -g 2019 -S nginx && adduser -s /sbin/nologin -S -D -u 2019 -G nginx nginx
COPY index.html /apps/nginx/html/
EXPOSE 80 443
CMD ["/apps/nginx/sbin/nginx","-g","daemon off;"]
:wq

root@ubuntu1804-2:/data/dockerfile/web/nginx/nginx-1.18-alpine# vim build.sh
#!/bin/bash
#
#********************************************************************
#Author:            zhanghui
#QQ:                19661891
#Date:              2021-01-14
#FileName:         build.sh
#URL:               www.neteagles.cn
#Description:      The test script
#Copyright (C):     2021 All rights reserved
#********************************************************************
docker build -t $1 .
:wq

root@ubuntu1804-2:/data/dockerfile/web/nginx/nginx-1.18-alpine# chmod +x build.sh
root@ubuntu1804-2:/data/dockerfile/web/nginx/nginx-1.18-alpine# ./build.sh nginx-alpine:1.18 .
root@ubuntu1804-2:/data/dockerfile/web/nginx/nginx-1.18-alpine# docker images "*alpine*"
REPOSITORY          TAG                 IMAGE ID            CREATED              SIZE
nginx-alpine        1.18                6deee39ff9a4        About a minute ago   192MB
alpine-bash         3.12.3              513c281b728e        17 minutes ago       181MB
alpine              3.12.3              389fef711851        4 weeks ago          5.58MB

root@ubuntu1804-2:/data/dockerfile/web/nginx/nginx-1.18-alpine# docker run -d --name alpine01 -p 80:80 nginx-alpine:1.18
393d04585e7c6200c6e53f140ff8c046481eb763d9d7f9486efe828f7205bc77
root@ubuntu1804-2:/data/dockerfile/web/nginx/nginx-1.18-alpine# curl 127.0.0.1
welcome to nginx website in Docker
三.Docker 数据管理
3.1目录数据卷
3.1.1在宿主机创建容器所使用的目录
root@ubuntu1804-2:~# mkdir /data/testdir
root@ubuntu1804-2:~# echo test page on host > /data/testdir/index.html
3.1.2查看容器相关目录路径
root@ubuntu1804-2:~# docker images "*nginx*"
REPOSITORY          TAG                 IMAGE ID            CREATED             SIZE
nginx-alpine        1.18                6deee39ff9a4        22 hours ago        192MB
nginx-ubuntu1804    1.18                c2b43eff0921        23 hours ago        394MB
nginx-centos7.9     1.18                147a94376ddc        24 hours ago        414MB

root@ubuntu1804-2:~# docker run -it --rm nginx-alpine:1.18 sh
/ # echo test page based nginx-alpine > /apps/nginx/html/index.html
/ # exit

root@ubuntu1804-2:~# docker ps -a
CONTAINER ID        IMAGE               COMMAND             CREATED             STATUS              PORTS               NAMES
3.1.3引用宿主机的数据卷启动容器
引用同一个数据卷目录,开启多个容器,实现多个容器共享数据
root@ubuntu1804-2:~# docker run -d --name n1 -v /data/testdir:/apps/nginx/html/ -p 80:80 nginx-alpine:1.18
bdbd53b9fe2eda72a73f5c7f54b9d6e1e4ab7b08cc8d992c6c1251bd22b09e4e
root@ubuntu1804-2:~# docker run -d --name n2 -v /data/testdir:/apps/nginx/html/ -p 81:80 nginx-alpine:1.18
937cf1377ad04063fc4a37b25cba55f3265115383d88dd68945b1003e58b13d9

root@ubuntu1804-2:~# docker ps
CONTAINER ID        IMAGE               COMMAND                  CREATED             STATUS              PORTS                         NAMES
937cf1377ad0        nginx-alpine:1.18   "/apps/nginx/sbin/ng…"   16 seconds ago      Up 16 seconds       443/tcp, 0.0.0.0:81->80/tcp   n2
bdbd53b9fe2e        nginx-alpine:1.18   "/apps/nginx/sbin/ng…"   26 seconds ago      Up 25 seconds       0.0.0.0:80->80/tcp, 443/tcp   n1

root@ubuntu1804-2:~# curl 127.0.0.1
test page on host
root@ubuntu1804-2:~# curl 127.0.0.1:81
test page on host
3.1.4进入到容器内测试写入数据
进入其中一个容器写入数据,可以其它容器的数据也变化
root@ubuntu1804-2:~# docker exec -it n1 sh
/ # df
Filesystem           1K-blocks      Used Available Use% Mounted on
overlay               95595940   3649000  87047820   4% /
tmpfs                    65536         0     65536   0% /dev
tmpfs                  1008748         0   1008748   0% /sys/fs/cgroup
shm                      65536         0     65536   0% /dev/shm
/dev/sda1             95595940   3649000  87047820   4% /etc/resolv.conf
/dev/sda1             95595940   3649000  87047820   4% /etc/hostname
/dev/sda1             95595940   3649000  87047820   4% /etc/hosts
/dev/sda5             47797996     56448  45283796   0% /apps/nginx/html
tmpfs                  1008748         0   1008748   0% /proc/asound
tmpfs                  1008748         0   1008748   0% /proc/acpi
tmpfs                    65536         0     65536   0% /proc/kcore
tmpfs                    65536         0     65536   0% /proc/keys
tmpfs                    65536         0     65536   0% /proc/timer_list
tmpfs                    65536         0     65536   0% /proc/sched_debug
tmpfs                  1008748         0   1008748   0% /proc/scsi
tmpfs                  1008748         0   1008748   0% /sys/firmware
/ # cat /apps/nginx/html/index.html
test page on host
/ # echo test page on host v2 > /apps/nginx/html/index.html

#进入另一个容器看到数据变化
root@ubuntu1804-2:~# docker exec -it n2 sh
/ # cat /apps/nginx/html/index.html
test page on host v2

#访问应用
root@ubuntu1804-2:~# curl 127.0.0.1
test page on host v2
root@ubuntu1804-2:~# curl 127.0.0.1:81
test page on host v2
3.1.5在宿主机修改数据
root@ubuntu1804-2:~# echo test page on host v3 >/data/testdir/index.html
root@ubuntu1804-2:~# cat /data/testdir/index.html
test page on host v3
root@ubuntu1804-2:~# curl 127.0.0.1
test page on host v3
root@ubuntu1804-2:~# curl 127.0.0.1:81
test page on host v3

root@ubuntu1804-2:~# docker exec -it n1 sh
/ # cat /apps/nginx/html/index.html
test page on host v3
root@ubuntu1804-2:~# docker exec -it n2 sh
/ # cat /apps/nginx/html/index.html
test page on host v3
3.1.6只读方法挂载数据卷
默认数据卷为可读可写,加ro选项,可以实现只读挂载,对于不希望容器修改的数据,比如: 配置文
件,脚本等,可以用此方式挂载
root@ubuntu1804-2:~# docker run -d --name n3 -v /data/testdir/:/apps/nginx/html/:ro -p 83:80 nginx-alpine:1.18
2cd2e171241b1cec6554bfbf4247baf708d22ff1582d210435f143a62740e675
root@ubuntu1804-2:~# docker exec -it n3 sh
/ # cat /apps/nginx/html/index.html
test page on host v3
/ # echo test pase on host v4 /apps/nginx/html/index.html
test pase on host v4 /apps/nginx/html/index.html
3.1.7删除容器
删除容器后,宿主机的数据卷还存在,可继续给新的容器使用
root@ubuntu1804-2:~# docker ps
CONTAINER ID        IMAGE               COMMAND                  CREATED             STATUS              PORTS                         NAMES
2cd2e171241b        nginx-alpine:1.18   "/apps/nginx/sbin/ng…"   2 minutes ago       Up 2 minutes        443/tcp, 0.0.0.0:83->80/tcp   n3
937cf1377ad0        nginx-alpine:1.18   "/apps/nginx/sbin/ng…"   10 minutes ago      Up 10 minutes       443/tcp, 0.0.0.0:81->80/tcp   n2
bdbd53b9fe2e        nginx-alpine:1.18   "/apps/nginx/sbin/ng…"   10 minutes ago      Up 10 minutes       0.0.0.0:80->80/tcp, 443/tcp   n1
root@ubuntu1804-2:~# docker rm -f `docker ps -qa`
2cd2e171241b
937cf1377ad0
bdbd53b9fe2e
root@ubuntu1804-2:~# cat /data/testdir/index.html
test page on host v3

#新建的容器还可以继续使用原有的数据卷
root@ubuntu1804-2:~# docker run -d --name n1 -v /data/testdir/:/apps/nginx/html/ -p 80:80 nginx-alpine:1.18
8c5a36cd7c3ef5c24e20d0ecd7ece4f7d09f88d5c020754764f3e9437f6e78ea
root@ubuntu1804-2:~# curl 127.0.0.1
test page on host v3
3.2MySQL使用的数据卷
root@ubuntu1804-2:~# docker pull mysql:5.7.29
root@ubuntu1804-2:~# docker images "*mysql*"
REPOSITORY          TAG                 IMAGE ID            CREATED             SIZE
mysql               5.7.29              5d9483f9a7b2        8 months ago        455MB
root@ubuntu1804-2:~# docker run -d --name mysql -p 3306:3306 -e MYSQL_ROOT_PASSWORD=123456 mysql:5.7.29
a16db240052ad12be29784e8a7d0a629809804cb2cd247145327524b9b0f593d
root@ubuntu1804-2:~# docker ps
CONTAINER ID        IMAGE               COMMAND                  CREATED             STATUS              PORTS                               NAMES
a16db240052a        mysql:5.7.29        "docker-entrypoint.s…"   5 seconds ago       Up 4 seconds        0.0.0.0:3306->3306/tcp, 33060/tcp   mysql

root@ubuntu1804-2:~# docker exec -it mysql bash
root@a16db240052a:/# cat /etc/issue
Debian GNU/Linux 10 \n \l

root@a16db240052a:/# cat /etc/mysql/my.cnf
!includedir /etc/mysql/conf.d/
!includedir /etc/mysql/mysql.conf.d/

root@a16db240052a:/# cat /etc/mysql/mysql.conf.d/mysqld.cnf
[mysqld]
pid-file	= /var/run/mysqld/mysqld.pid
socket		= /var/run/mysqld/mysqld.sock
datadir		= /var/lib/mysql	#数据库存放路径

root@a16db240052a:/# pstree -p
mysqld(1)-+-{mysqld}(126)
          |-{mysqld}(127)
          |-{mysqld}(128)
          |-{mysqld}(129)
          |-{mysqld}(130)
          |-{mysqld}(131)
          |-{mysqld}(132)
          |-{mysqld}(133)
          |-{mysqld}(134)
          |-{mysqld}(135)
          |-{mysqld}(136)
          |-{mysqld}(137)
          |-{mysqld}(139)
          |-{mysqld}(140)
          |-{mysqld}(141)
          |-{mysqld}(142)
          |-{mysqld}(143)
          |-{mysqld}(144)
          |-{mysqld}(145)
          |-{mysqld}(146)
          |-{mysqld}(147)
          |-{mysqld}(148)
          |-{mysqld}(149)
          |-{mysqld}(150)
          |-{mysqld}(151)
          `-{mysqld}(152)

root@ubuntu1804-2:~# apt -y install mysql-client-core-5.7
root@ubuntu1804-2:~# mysql -uroot -p123456 -h127.0.0.1
mysql: [Warning] Using a password on the command line interface can be insecure.
Welcome to the MySQL monitor.  Commands end with ; or \g.
Your MySQL connection id is 2
Server version: 5.7.29 MySQL Community Server (GPL)

Copyright (c) 2000, 2020, Oracle and/or its affiliates. All rights reserved.

Oracle is a registered trademark of Oracle Corporation and/or its
affiliates. Other names may be trademarks of their respective
owners.

Type 'help;' or '\h' for help. Type '\c' to clear the current input statement.

mysql> show databases;
+--------------------+
| Database           |
+--------------------+
| information_schema |
| mysql              |
| performance_schema |
| sys                |
+--------------------+
4 rows in set (0.00 sec)

mysql>

#删除容器后,再创建新的容器,数据库信息丢失
root@ubuntu1804-2:~# docker rm -f mysql
mysql
root@ubuntu1804-2:~# docker run -d --name mysql -p 3306:3306 -e MYSQL_ROOT_PASSWORD=123456 mysql:5.7.29
449c159364dbcb23f064e1976d0de6b0d0efb08db1323b75b55b4eb425648355
root@ubuntu1804-2:~# mysql -uroot -p123456 -h127.0.0.1
mysql: [Warning] Using a password on the command line interface can be insecure.
Welcome to the MySQL monitor.  Commands end with ; or \g.
Your MySQL connection id is 2
Server version: 5.7.29 MySQL Community Server (GPL)

Copyright (c) 2000, 2020, Oracle and/or its affiliates. All rights reserved.

Oracle is a registered trademark of Oracle Corporation and/or its
affiliates. Other names may be trademarks of their respective
owners.

Type 'help;' or '\h' for help. Type '\c' to clear the current input statement.

mysql> show databases;
+--------------------+
| Database           |
+--------------------+
| information_schema |
| mysql              |
| performance_schema |
| sys                |
+--------------------+
4 rows in set (0.00 sec)

mysql>

#利用数据卷创建容器
root@ubuntu1804-2:~# mkdir /data/mysql
root@ubuntu1804-2:~# rmc
449c159364db
root@ubuntu1804-2:~# docker run -d --name mysql -p 3306:3306 -v /data/mysql/:/var/lib/mysql -e MYSQL_ROOT_PASSWORD=123456 mysql:5.7.29
c4d77217971683b372f8237a056242d501fb976ed62f72982a3d0221ac0653d5
root@ubuntu1804-2:~# mysql -uroot -p123456 -h127.0.0.1
mysql: [Warning] Using a password on the command line interface can be insecure.
Welcome to the MySQL monitor.  Commands end with ; or \g.
Your MySQL connection id is 2
Server version: 5.7.29 MySQL Community Server (GPL)

Copyright (c) 2000, 2020, Oracle and/or its affiliates. All rights reserved.

Oracle is a registered trademark of Oracle Corporation and/or its
affiliates. Other names may be trademarks of their respective
owners.

Type 'help;' or '\h' for help. Type '\c' to clear the current input statement.

mysql> create database dockerdb;
Query OK, 1 row affected (0.00 sec)

mysql> show databases;
+--------------------+
| Database           |
+--------------------+
| information_schema |
| dockerdb           |
| mysql              |
| performance_schema |
| sys                |
+--------------------+
5 rows in set (0.00 sec)

mysql> exit
Bye


root@ubuntu1804-2:~# docker rm -fv mysql
mysql
root@ubuntu1804-2:~# ls /data/mysql/
auto.cnf    client-cert.pem  ib_buffer_pool  ib_logfile1  performance_schema  server-cert.pem
ca-key.pem  client-key.pem   ibdata1         ibtmp1       private_key.pem     server-key.pem
ca.pem      dockerdb         ib_logfile0     mysql        public_key.pem      sys

#重新创建新容器,之前数据还在
root@ubuntu1804-2:~# docker run -d --name mysql -p 3306:3306 -v /data/mysql/:/var/lib/mysql -e MYSQL_ROOT_PASSWORD=123456 mysql:5.7.29
71f9e4c2687302d6d015936e5bfc722a99847e9138ea7cd6ab78f4ad449af85c

root@ubuntu1804-2:~# mysql -uroot -p123456 -h127.0.0.1
mysql: [Warning] Using a password on the command line interface can be insecure.
Welcome to the MySQL monitor.  Commands end with ; or \g.
Your MySQL connection id is 2
Server version: 5.7.29 MySQL Community Server (GPL)

Copyright (c) 2000, 2020, Oracle and/or its affiliates. All rights reserved.

Oracle is a registered trademark of Oracle Corporation and/or its
affiliates. Other names may be trademarks of their respective
owners.

Type 'help;' or '\h' for help. Type '\c' to clear the current input statement.

mysql> show databases;
+--------------------+
| Database           |
+--------------------+
| information_schema |
| dockerdb           |
| mysql              |
| performance_schema |
| sys                |
+--------------------+
5 rows in set (0.00 sec)

mysql> exit
Bye

#指定多个数据卷,创建MySQL
root@ubuntu1804-2:~# rmc
283ae404f6e1
ed7e0eb3a95e
root@ubuntu1804-2:~# docker run -d --name mysql-test1 -p 3306:3306 -v /data/mysql/:/var/lib/mysql -e MYSQL_ROOT_PASSWORD=123456  -e MYSQL_DATABASE=wordpress -e MYSQL_USER=wpuser -e MYSQL_PASSWPRD=123456 mysql:5.7.29
b1b654b9c5dcdb945616b67a15269d896d759116c0a89a45091f67fbc633725e

root@ubuntu1804-2:~# vim env.list
MYSQL_ROOT_PASSWORD=123456
MYSQL_DATABASE=wordpress
MYSQL_USER=wpuser
MYSQL_PASSWORD=wppass
:wq

root@ubuntu1804-2:~# vim mysql/mysql-test.cnf
[mysqld]
server-id=100
log-bin=mysql-bin
:wq

root@ubuntu1804-2:~# docker run -d --name mysql-test2 -p 3307:3306 -v /root/mysql/:/etc/mysql/conf.d  -v /data/mysql2/:/var/lib/mysql --env-file=env.list  mysql:5.7.29
3.3文件数据卷
基于ubuntu和centos镜像实现文件数据卷
root@ubuntu1804:~# cat /etc/os-release
NAME="Ubuntu"
VERSION="18.04.5 LTS (Bionic Beaver)"
ID=ubuntu
ID_LIKE=debian
PRETTY_NAME="Ubuntu 18.04.5 LTS"
VERSION_ID="18.04"
HOME_URL="https://www.ubuntu.com/"
SUPPORT_URL="https://help.ubuntu.com/"
BUG_REPORT_URL="https://bugs.launchpad.net/ubuntu/"
PRIVACY_POLICY_URL="https://www.ubuntu.com/legal/terms-and-policies/privacy-policy"
VERSION_CODENAME=bionic
UBUNTU_CODENAME=bionic

root@ubuntu1804:~# docker run -itd --name c1 -v /etc/os-release:/etc/os-release  centos
aeb6db290237acb16493c49076737f6b11729dece07c30eb87a90f26bc72a6a0

root@ubuntu1804:~# docker exec -it c1 bash
[root@aeb6db290237 /]# cat /etc/os-release
NAME="Ubuntu"
VERSION="18.04.5 LTS (Bionic Beaver)"
ID=ubuntu
ID_LIKE=debian
PRETTY_NAME="Ubuntu 18.04.5 LTS"
VERSION_ID="18.04"
HOME_URL="https://www.ubuntu.com/"
SUPPORT_URL="https://help.ubuntu.com/"
BUG_REPORT_URL="https://bugs.launchpad.net/ubuntu/"
PRIVACY_POLICY_URL="https://www.ubuntu.com/legal/terms-and-policies/privacy-policy"
VERSION_CODENAME=bionic
UBUNTU_CODENAME=bionic
[root@aeb6db290237 /]# exit
exit
3.4匿名数据卷
root@ubuntu1804-2:~# docker volume ls
DRIVER              VOLUME NAME
root@ubuntu1804-2:~# docker ps -a
CONTAINER ID        IMAGE               COMMAND             CREATED             STATUS              PORTS               NAMES

#利用匿名数据卷创建容器
root@ubuntu1804-2:~# docker run -d --name nginx01 -p 80:80 -v /usr/share/nginx/html nginx
root@ubuntu1804-2:~# curl 127.0.0.1
<!DOCTYPE html>
<html>
<head>
<title>Welcome to nginx!</title>
<style>
    body {
        width: 35em;
        margin: 0 auto;
        font-family: Tahoma, Verdana, Arial, sans-serif;
    }
</style>
</head>
<body>
<h1>Welcome to nginx!</h1>
<p>If you see this page, the nginx web server is successfully installed and
working. Further configuration is required.</p>

<p>For online documentation and support please refer to
<a href="http://nginx.org/">nginx.org</a>.<br/>
Commercial support is available at
<a href="http://nginx.com/">nginx.com</a>.</p>

<p><em>Thank you for using nginx.</em></p>
</body>
</html>

#查看自动生成的匿名数据卷
root@ubuntu1804-2:~# docker volume ls
DRIVER              VOLUME NAME
local               663050fa703b416a00b343fa406e8d6de1b182903e7b0d8106ce870e2b12c97d

#查看匿名数据卷的详细信息
root@ubuntu1804-2:~# docker inspect --format="{{.Mounts}}" nginx01
[{volume 663050fa703b416a00b343fa406e8d6de1b182903e7b0d8106ce870e2b12c97d /var/lib/docker/volumes/663050fa703b416a00b343fa406e8d6de1b182903e7b0d8106ce870e2b12c97d/_data /usr/share/nginx/html local  true }]

#查看匿名数据卷的文件
root@ubuntu1804-2:~# ls /var/lib/docker/volumes/663050fa703b416a00b343fa406e8d6de1b182903e7b0d8106ce870e2b12c97d/_data
50x.html  index.html

#修改宿主机中匿名数据卷的文件
root@ubuntu1804-2:~# echo Anouymous volume > /var/lib/docker/volumes/663050fa703b416a00b343fa406e8d6de1b182903e7b0d8106ce870e2b12c97d/_data/index.html
root@ubuntu1804-2:~# curl 127.0.0.1
Anouymous volume

#删除容器不会删除匿名数据卷
root@ubuntu1804-2:~# docker rm -f nginx01
nginx01
root@ubuntu1804-2:~# docker volume ls
DRIVER              VOLUME NAME
local               663050fa703b416a00b343fa406e8d6de1b182903e7b0d8106ce870e2b12c97d

root@ubuntu1804-2:~# cat /var/lib/docker/volumes/663050fa703b416a00b343fa406e8d6de1b182903e7b0d8106ce870e2b12c97d/_data/index.html
Anouymous volume

#删除匿名数据卷
root@ubuntu1804-2:~# docker volume rm 663050fa703b416a00b343fa406e8d6de1b182903e7b0d8106ce870e2b12c97d
663050fa703b416a00b343fa406e8d6de1b182903e7b0d8106ce870e2b12c97d

root@ubuntu1804-2:~# docker volume ls
DRIVER              VOLUME NAME
3.5命名数据卷
3.5.1创建命名数据卷
root@ubuntu1804-2:~# docker volume create vol1
vol1
root@ubuntu1804-2:~# docker volume ls
DRIVER              VOLUME NAME
local               vol1
root@ubuntu1804-2:~# docker inspect vol1
[
    {
        "CreatedAt": "2021-01-15T17:29:31+08:00",
        "Driver": "local",
        "Labels": {},
        "Mountpoint": "/var/lib/docker/volumes/vol1/_data",
        "Name": "vol1",
        "Options": {},
        "Scope": "local"
    }
]
3.5.2使用命名数据卷创建容器
root@ubuntu1804-2:~# docker run -d --name nginx01 -p 80:80 -v vol1:/usr/share/nginx/html nginx
80aeda8f8db340af0a382eb6814f55c5d5a34f41d167fc3989c051fc14eabce0
root@ubuntu1804-2:~# curl 127.0.0.1
<!DOCTYPE html>
<html>
<head>
<title>Welcome to nginx!</title>
<style>
    body {
        width: 35em;
        margin: 0 auto;
        font-family: Tahoma, Verdana, Arial, sans-serif;
    }
</style>
</head>
<body>
<h1>Welcome to nginx!</h1>
<p>If you see this page, the nginx web server is successfully installed and
working. Further configuration is required.</p>

<p>For online documentation and support please refer to
<a href="http://nginx.org/">nginx.org</a>.<br/>
Commercial support is available at
<a href="http://nginx.com/">nginx.com</a>.</p>

<p><em>Thank you for using nginx.</em></p>
</body>
</html>

#显示命名数据卷
root@ubuntu1804-2:~# docker volume ls
DRIVER              VOLUME NAME
local               vol1

root@ubuntu1804-2:~# docker volume inspect vol1
[
    {
        "CreatedAt": "2021-01-15T17:31:05+08:00",
        "Driver": "local",
        "Labels": {},
        "Mountpoint": "/var/lib/docker/volumes/vol1/_data",
        "Name": "vol1",
        "Options": {},
        "Scope": "local"
    }
]

root@ubuntu1804-2:~# docker inspect --format="{{.Mounts}}" nginx01
[{volume vol1 /var/lib/docker/volumes/vol1/_data /usr/share/nginx/html local z true }]


#查看命名数据卷的文件
root@ubuntu1804-2:~# ls /var/lib/docker/volumes/vol1/_data/
50x.html  index.html

#修改宿主机命名数据卷的文件
root@ubuntu1804-2:~# echo nginx vol1 website > /var/lib/docker/volumes/vol1/_data/index.html
root@ubuntu1804-2:~# curl 127.0.0.1
nginx vol1 website

#利用现在的命名数据卷再创建新容器,可以和原有容器共享同一个命名数据卷的数据
root@ubuntu1804-2:~# docker run -d --name nginx02 -p 81:80 -v vol1:/usr/share/nginx/html nginx
327445fc359c2db43cf19ef9ade51edf39b343a3624e8c565bacdeccb00226bb
root@ubuntu1804-2:~# curl 127.0.0.1:81
nginx vol1 website
3.5.3创建容器时自动创建命名数据卷
#创建容器自动创建命名数据卷
root@ubuntu1804-2:~# docker run -d --name nginx03 -p 82:80 -v vol2:/usr/share/nginx/html nginx
1f8d285ff00e9f0a1c4f831c565ccc1a7ad73197f2d5ff5e5864e5ef65a2366b
root@ubuntu1804-2:~# docker volume ls
DRIVER              VOLUME NAME
local               vol1
local               vol2
3.6数据卷容器
基于nginx创建数据卷容器
root@ubuntu1804:~# docker volume ls
DRIVER              VOLUME NAME
root@ubuntu1804:~# docker volume create nginx-vol
nginx-vol
root@ubuntu1804:~# docker volume ls
DRIVER              VOLUME NAME
local               nginx-vol

root@ubuntu1804:~# docker run --name server -v /data/nginx/html:/usr/share/nginx/html -v nginx-vol:/data/nginx busybox
Unable to find image 'busybox:latest' locally
latest: Pulling from library/busybox
e5d9363303dd: Pull complete
Digest: sha256:c5439d7db88ab5423999530349d327b04279ad3161d7596d2126dfb5b02bfd1f
Status: Downloaded newer image for busybox:latest

root@ubuntu1804:~# docker ps -a
CONTAINER ID        IMAGE               COMMAND             CREATED             STATUS                      PORTS               NAMES
ab25c4e341bb        busybox             "sh"                53 seconds ago      Exited (0) 52 seconds ago                       server

root@ubuntu1804:~# docker run -d --name n1 --volumes-from server -p 81:80 nginx
0a2f260e4b9b9da12089f919522282b943c73bd1dd87c027716e744a9a419a97
root@ubuntu1804:~# docker exec -it n1 bash
root@0a2f260e4b9b:/# pwd
/
root@0a2f260e4b9b:/# ls /data/
nginx
root@0a2f260e4b9b:/# ls /usr/share/nginx/html/
index.html

root@ubuntu1804:~# ls /data/nginx/html/
index.html
root@ubuntu1804:~# ls /var/lib/docker/volumes/nginx-vol/_data/
root@ubuntu1804:~# touch /var/lib/docker/volumes/nginx-vol/_data/f1.txt

root@0a2f260e4b9b:/# ls /data/nginx/
f1.txt

root@ubuntu1804:~# echo new page > /data/nginx/html/index.html

root@0a2f260e4b9b:/# cat /usr/share/nginx/html/index.html
new page

root@ubuntu1804:~# docker run -d --name n2 --volumes-from server -p 82:80 nginx
83231ca72786c153b63f5e8feed60af5e029ba1945b545f141ac0500fbf8182d

[root@centos8 ~]# curl 10.0.0.100:81
new page
[root@centos8 ~]# curl 10.0.0.100:82
new page

root@ubuntu1804:~# echo new page v2.0 > /data/nginx/html/index.html

[root@centos8 ~]# curl 10.0.0.100:81
new page v2.0
[root@centos8 ~]# curl 10.0.0.100:82
new page v2.0

root@ubuntu1804:~# docker ps -a
CONTAINER ID        IMAGE               COMMAND                  CREATED             STATUS                     PORTS                NAMES
83231ca72786        nginx               "/docker-entrypoint.…"   2 minutes ago       Up 2 minutes               0.0.0.0:82->80/tcp   n2
0a2f260e4b9b        nginx               "/docker-entrypoint.…"   6 minutes ago       Up 6 minutes               0.0.0.0:81->80/tcp   n1
ab25c4e341bb        busybox             "sh"                     8 minutes ago       Exited (0) 8 minutes ago                        server
root@ubuntu1804:~# docker rm -f server
server
root@ubuntu1804:~# docker ps -a
CONTAINER ID        IMAGE               COMMAND                  CREATED             STATUS              PORTS                NAMES
83231ca72786        nginx               "/docker-entrypoint.…"   2 minutes ago       Up 2 minutes        0.0.0.0:82->80/tcp   n2
0a2f260e4b9b        nginx               "/docker-entrypoint.…"   7 minutes ago       Up 7 minutes        0.0.0.0:81->80/tcp   n1

[root@centos8 ~]# curl 10.0.0.100:81
new page v2.0
[root@centos8 ~]# curl 10.0.0.100:82
new page v2.0

root@ubuntu1804:~# cat /data/nginx/html/index.html
new page v2.0
root@ubuntu1804:~# ls /var/lib/docker/volumes/nginx-vol/_data/
f1.txt

root@ubuntu1804:~# docker run -d --name n3 --volumes-from server -p 83:80 nginx
Unable to find image 'nginx:latest' locally
latest: Pulling from library/nginx
Digest: sha256:10b8cc432d56da8b61b070f4c7d2543a9ed17c2b23010b43af434fd40e2ca4aa
Status: Image is up to date for nginx:latest
docker: Error response from daemon: No such container: server.
See 'docker run --help'.

root@ubuntu1804:~# docker run --name server -v /data/nginx/html:/usr/share/nginx/html -v nginx-vol:/data/nginx alpine
Unable to find image 'alpine:latest' locally
latest: Pulling from library/alpine
596ba82af5aa: Pull complete
Digest: sha256:d9a7354e3845ea8466bb00b22224d9116b183e594527fb5b6c3d30bc01a20378
Status: Downloaded newer image for alpine:latest

root@ubuntu1804:~# docker run -d --name n3 --volumes-from server -p 83:80 nginx
3b295fdbba8b8305e7bcc7a645240fb2d956b3892fab5b605ebd9860b7d9697e

root@ubuntu1804:~# echo new page v3.0 > /data/nginx/html/index.html

[root@centos8 ~]# curl 10.0.0.100:81
new page v3.0
[root@centos8 ~]# curl 10.0.0.100:82
new page v3.0
[root@centos8 ~]# curl 10.0.0.100:83
new page v3.0
3.7利用数据卷容器备份MySQL数据库
#MySQL容器默认使用了匿名卷
root@ubuntu1804-2:~# docker run -d --name mysql -p 3306:3306 -e MYSQL_ROOT_PASSWORD=123456 mysql:5.7.29
e145decafba0ca92cf51d7360b4046a8284868415f8fd50820ed31b135ad3b4d
root@ubuntu1804-2:~# docker volume ls
DRIVER              VOLUME NAME
local               735547584bd3f258f329a1c331ad8ea364e60d6853ddb477db23501be72639f7

#备份数据库
root@ubuntu1804-2:~# docker run -it --rm --volumes-from mysql -v $(pwd):/backup centos tar cvf /backup/mysql.tar /var/lib/mysql
root@ubuntu1804-2:~# docker run -it --rm --volumes-from mysql -v $(pwd):/backup centos tar cvf /backup/mysql.tar /var/lib/mysql^C
root@ubuntu1804-2:~# ls
mysql.tar

#删除数据库文件
root@ubuntu1804-2:~# rm -rf /var/lib/docker/volumes/735547584bd3f258f329a1c331ad8ea364e60d6853ddb477db23501be72639f7/_data/*

#还原数据库
root@ubuntu1804-2:~# docker run -it --rm --volumes-from mysql -v $(pwd):/backup centos tar xvf /backup/mysql.tar -C /

root@ubuntu1804-2:~# ls /var/lib/docker/volumes/735547584bd3f258f329a1c331ad8ea364e60d6853ddb477db23501be72639f7/_data/
auto.cnf    ca.pem           client-key.pem  ibdata1      ib_logfile1  mysql               private_key.pem  server-cert.pem  sys
ca-key.pem  client-cert.pem  ib_buffer_pool  ib_logfile0  ibtmp1       performance_schema  public_key.pem   server-key.pem
四. Docker网络管理
4.1 使用容器名称进行容器间通信
4.1.1 先创建第一个指定容器名称的容器
root@ubuntu1804:~# docker run -it --name server1 --rm alpine
Unable to find image 'alpine:latest' locally
latest: Pulling from library/alpine
596ba82af5aa: Pull complete
Digest: sha256:d9a7354e3845ea8466bb00b22224d9116b183e594527fb5b6c3d30bc01a20378
Status: Downloaded newer image for alpine:latest
/ # cat /etc/hosts
127.0.0.1	localhost
::1	localhost ip6-localhost ip6-loopback
fe00::0	ip6-localnet
ff00::0	ip6-mcastprefix
ff02::1	ip6-allnodes
ff02::2	ip6-allrouters
172.17.0.2	e511dbbe4b16
/ # ip a
1: lo: <LOOPBACK,UP,LOWER_UP> mtu 65536 qdisc noqueue state UNKNOWN qlen 1000
    link/loopback 00:00:00:00:00:00 brd 00:00:00:00:00:00
    inet 127.0.0.1/8 scope host lo
       valid_lft forever preferred_lft forever
4: eth0@if5: <BROADCAST,MULTICAST,UP,LOWER_UP,M-DOWN> mtu 1500 qdisc noqueue state UP
    link/ether 02:42:ac:11:00:02 brd ff:ff:ff:ff:ff:ff
    inet 172.17.0.2/16 brd 172.17.255.255 scope global eth0
       valid_lft forever preferred_lft forever
/ # ping 172.17.0.2
PING 172.17.0.2 (172.17.0.2): 56 data bytes
64 bytes from 172.17.0.2: seq=0 ttl=64 time=0.041 ms
64 bytes from 172.17.0.2: seq=1 ttl=64 time=0.133 ms
^C
--- 172.17.0.2 ping statistics ---
2 packets transmitted, 2 packets received, 0% packet loss
round-trip min/avg/max = 0.041/0.087/0.133 ms
/ # ping server1
PING server1 (173.236.90.106): 56 data bytes
64 bytes from 173.236.90.106: seq=0 ttl=127 time=243.789 ms
64 bytes from 173.236.90.106: seq=1 ttl=127 time=244.710 ms
^C
--- server1 ping statistics ---
2 packets transmitted, 2 packets received, 0% packet loss
round-trip min/avg/max = 243.789/244.249/244.710 ms
4.1.2 新建第二个容器时引用第一个容器的名称
会自动将第一个主机的名称加入/etc/hosts文件,从而可以利用第一个容器名称进行访问
root@ubuntu1804:~# docker run -it --rm --name server2 --link server1 alpine
/ # env
HOSTNAME=1e46bceacae5
SHLVL=1
HOME=/root
SERVER1_NAME=/server2/server1
TERM=xterm
PATH=/usr/local/sbin:/usr/local/bin:/usr/sbin:/usr/bin:/sbin:/bin
PWD=/
/ # cat /etc/hosts
127.0.0.1	localhost
::1	localhost ip6-localhost ip6-loopback
fe00::0	ip6-localnet
ff00::0	ip6-mcastprefix
ff02::1	ip6-allnodes
ff02::2	ip6-allrouters
172.17.0.2	server1 e511dbbe4b16
172.17.0.3	1e46bceacae5
/ # ping server1
PING server1 (172.17.0.2): 56 data bytes
64 bytes from 172.17.0.2: seq=0 ttl=64 time=0.097 ms
64 bytes from 172.17.0.2: seq=1 ttl=64 time=0.123 ms
^C
--- server1 ping statistics ---
2 packets transmitted, 2 packets received, 0% packet loss
round-trip min/avg/max = 0.097/0.110/0.123 ms
/ # ping server2
ping: bad address 'server2'
/ # ping 1e46bceacae5
PING 1e46bceacae5 (172.17.0.3): 56 data bytes
64 bytes from 172.17.0.3: seq=0 ttl=64 time=0.027 ms
64 bytes from 172.17.0.3: seq=1 ttl=64 time=0.081 ms
^C
--- 1e46bceacae5 ping statistics ---
2 packets transmitted, 2 packets received, 0% packet loss
round-trip min/avg/max = 0.027/0.054/0.081 ms
/ # ping e511dbbe4b16
PING e511dbbe4b16 (172.17.0.2): 56 data bytes
64 bytes from 172.17.0.2: seq=0 ttl=64 time=0.057 ms
64 bytes from 172.17.0.2: seq=1 ttl=64 time=0.119 ms
64 bytes from 172.17.0.2: seq=2 ttl=64 time=0.116 ms
^C
--- e511dbbe4b16 ping statistics ---
3 packets transmitted, 3 packets received, 0% packet loss
round-trip min/avg/max = 0.057/0.097/0.119 ms
/ #

root@ubuntu1804:~# docker ps
CONTAINER ID        IMAGE               COMMAND             CREATED             STATUS              PORTS               NAMES
1e46bceacae5        alpine              "/bin/sh"           3 minutes ago       Up 3 minutes                            server2
e511dbbe4b16        alpine              "/bin/sh"           6 minutes ago       Up 6 minutes                            server1
4.2 实现 wordpress 和 MySQL 两个容器互连
root@ubuntu1804:~# mkdir /data/lamp_docker
root@ubuntu1804:~# cd /data/lamp_docker/

root@ubuntu1804:/data/lamp_docker# vim env_mysql.list
MYSQL_ROOT_PASSWORD=123456
MYSQL_DATABASE=wordpress
MYSQL_USER=wpuser
MYSQL_PASSWORD=wppass
:wq

root@ubuntu1804:/data/lamp_docker# vim env_wordpress.list
WORDPRESS_DB_HOST=mysql:3306
WORDPRESS_DB_NAME=wordpress
WORDPRESS_DB_USER=wpuser
WORDPRESS_DB_PASSWORD=wppass
WORDPRESS_TABLE_PREFIX=wp
:wq

root@ubuntu1804:/data/lamp_docker# mkdir mysql
root@ubuntu1804:/data/lamp_docker# vim mysql/mysql_test.cnf
[mysqld]
server-id=100
log-bin=mysql-bin
:wq

root@ubuntu1804:/data/lamp_docker# tree
.
├── env_mysql.list
├── env_wordpress.list
└── mysql
    └── mysql_test.cnf

1 directory, 3 files

root@ubuntu1804:/data/lamp_docker# docker run --name mysql -v /data/lamp_docker/mysql/:/etc/mysql/conf.d -v /data/mysql:/var/lib/mysql --env-file=/data/lamp_docker/env_mysql.list -d -p 3306:3306 mysql:5.7.30

root@ubuntu1804:/data/lamp_docker# docker run -d --name wordpress --link mysql --env-file=/data/lamp_docker/env_wordpress.list -p 80:80 wordpress

root@ubuntu1804:/data/lamp_docker# docker ps
CONTAINER ID        IMAGE               COMMAND                  CREATED             STATUS              PORTS                               NAMES
b55c4a84c2db        wordpress           "docker-entrypoint.s…"   6 seconds ago       Up 5 seconds        0.0.0.0:80->80/tcp                  wordpress
fd671f6eba5c        mysql:5.7.30        "docker-entrypoint.s…"   2 minutes ago       Up 2 minutes        0.0.0.0:3306->3306/tcp, 33060/tcp   mysql
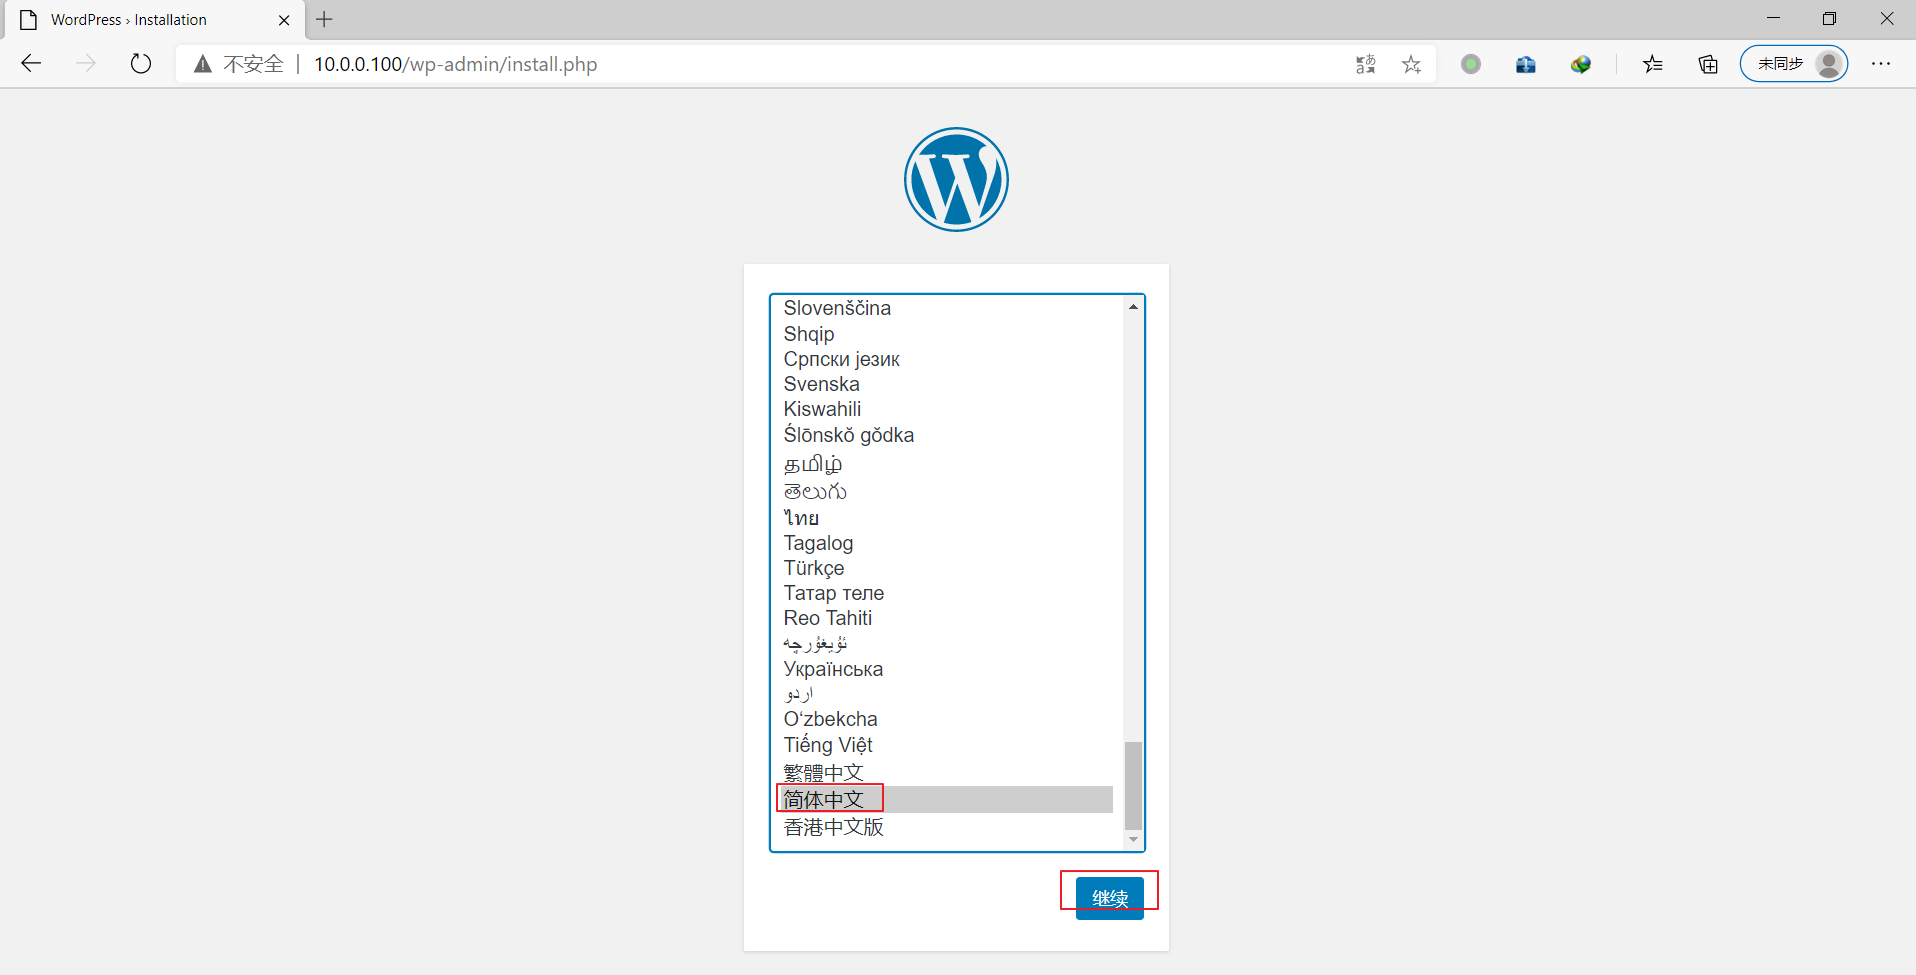
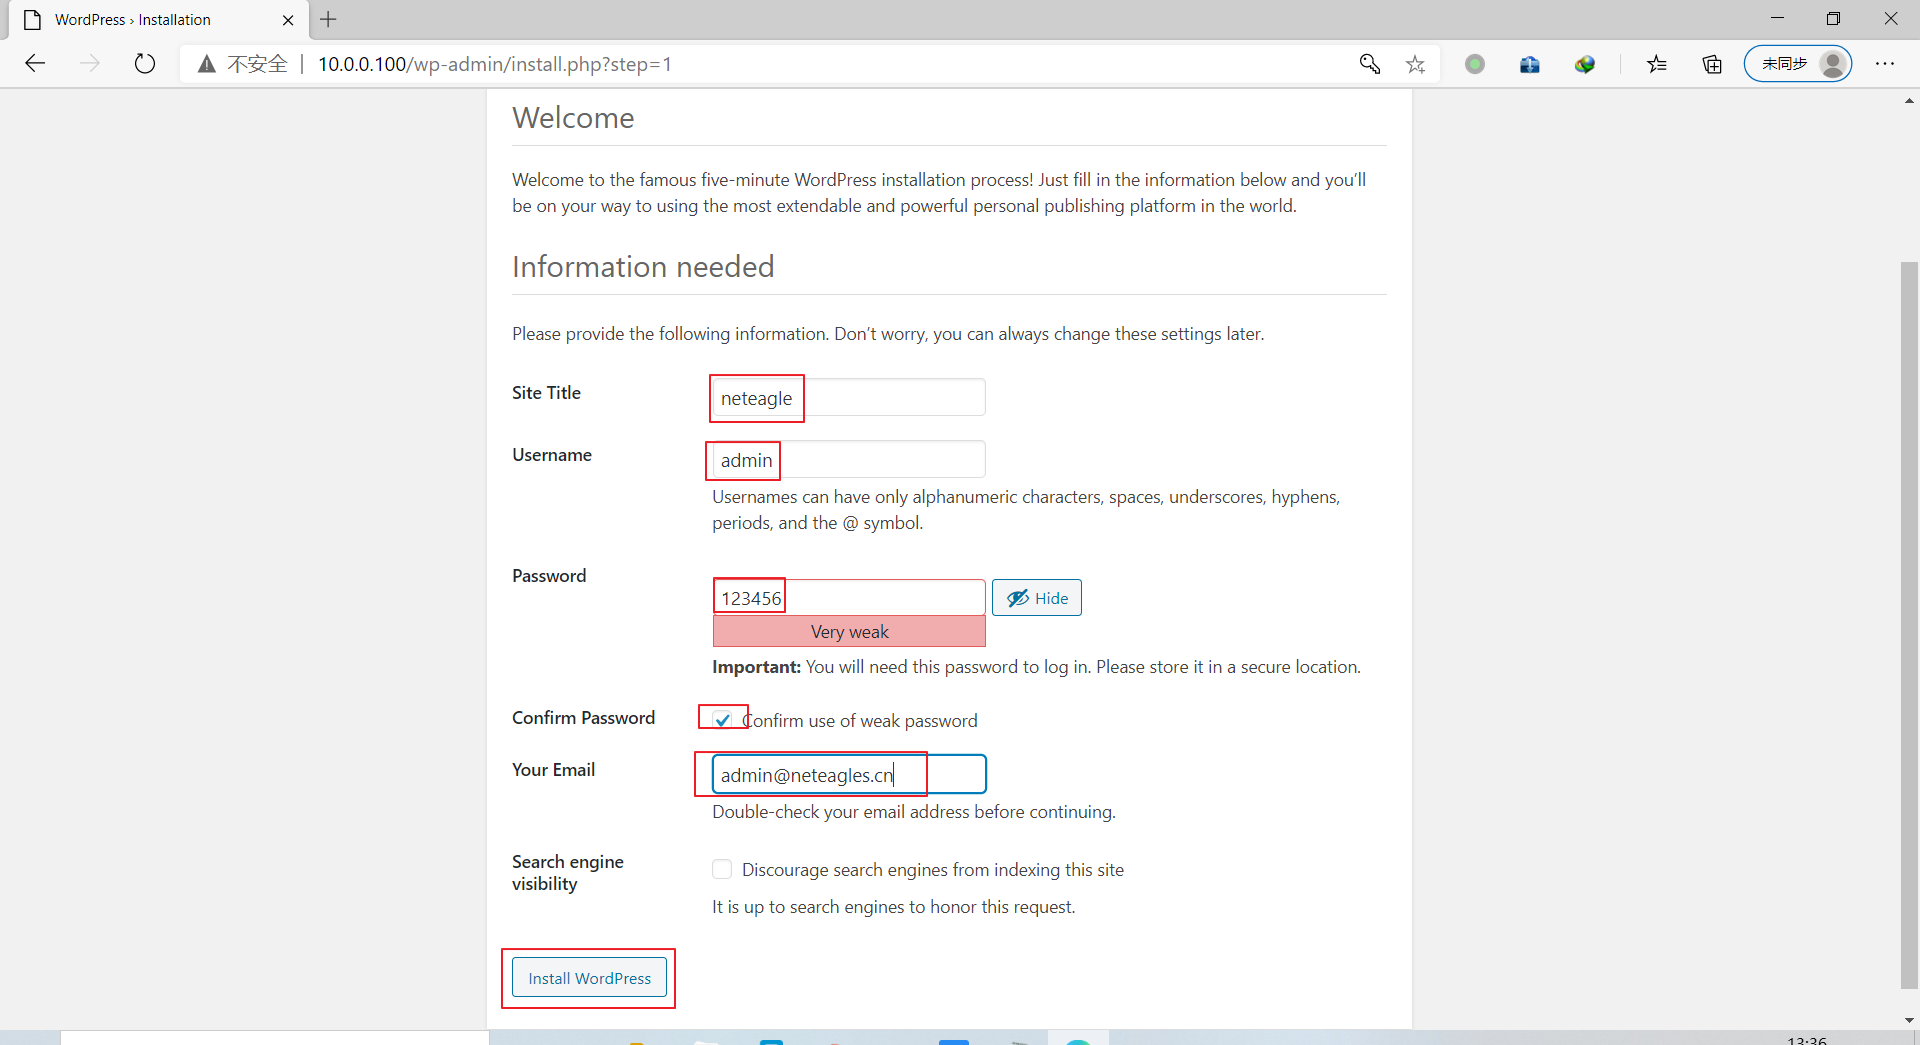


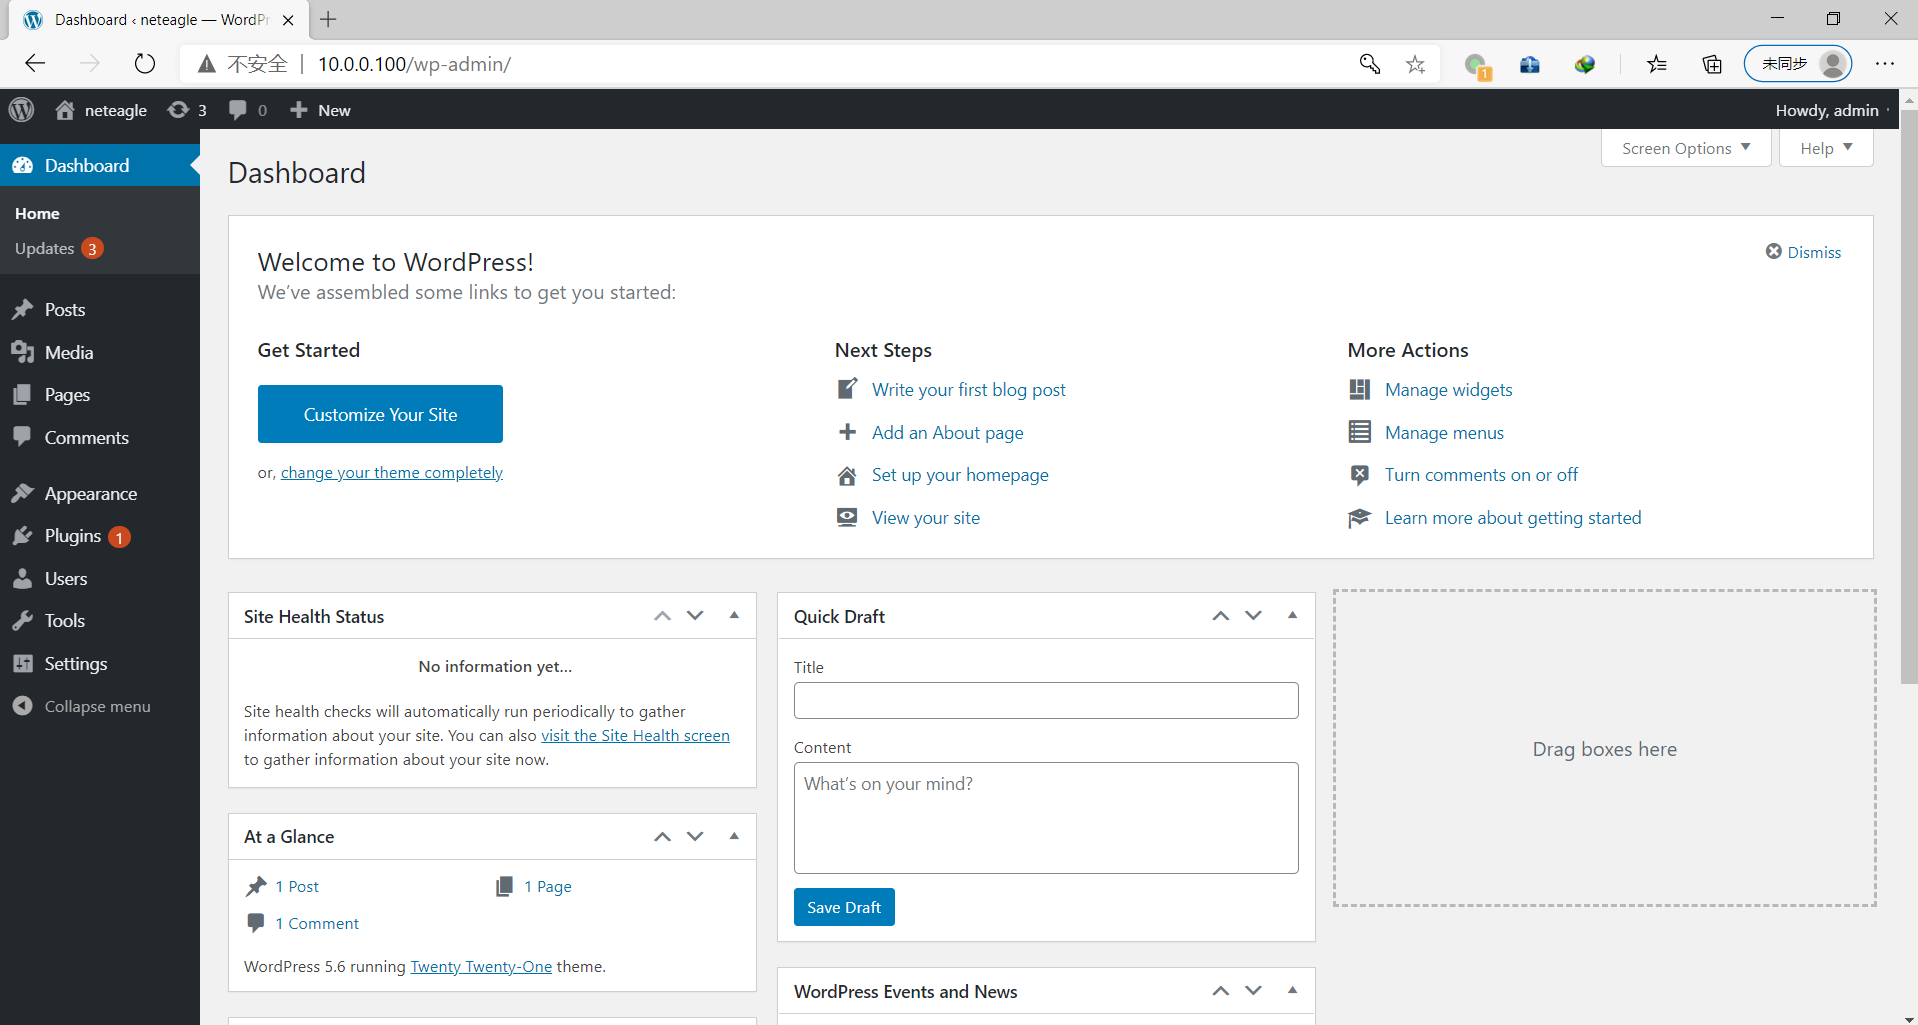
一个wordpress的博客就搭建好了。
4.3 使用容器别名
创建第三个容器,引用前面创建的容器,并起别名
root@ubuntu1804:~# docker run -it --rm --name server3 --link server1:server1-alias alpine
/ # env
HOSTNAME=b487ee5a7c80
SHLVL=1
HOME=/root
TERM=xterm
PATH=/usr/local/sbin:/usr/local/bin:/usr/sbin:/usr/bin:/sbin:/bin
PWD=/
SERVER1_ALIAS_NAME=/server3/server1-alias
/ # cat /etc/hosts
127.0.0.1	localhost
::1	localhost ip6-localhost ip6-loopback
fe00::0	ip6-localnet
ff00::0	ip6-mcastprefix
ff02::1	ip6-allnodes
ff02::2	ip6-allrouters
172.17.0.4	server1-alias 6091a0b958e2 server1
172.17.0.6	b487ee5a7c80
/ # ping server1
PING server1 (172.17.0.4): 56 data bytes
64 bytes from 172.17.0.4: seq=0 ttl=64 time=0.119 ms
64 bytes from 172.17.0.4: seq=1 ttl=64 time=0.169 ms
^C
--- server1 ping statistics ---
2 packets transmitted, 2 packets received, 0% packet loss
round-trip min/avg/max = 0.119/0.144/0.169 ms
/ # ping server1-alias
PING server1-alias (172.17.0.4): 56 data bytes
64 bytes from 172.17.0.4: seq=0 ttl=64 time=0.056 ms
^C
--- server1-alias ping statistics ---
1 packets transmitted, 1 packets received, 0% packet loss
round-trip min/avg/max = 0.056/0.056/0.056 ms
创建第四个容器,引用前面创建的容器,并起多个别名
root@ubuntu1804:~# docker run -it --name server4 --link server1:"server1-alias server1-alias2" alpine
/ # cat /etc/hosts
127.0.0.1	localhost
::1	localhost ip6-localhost ip6-loopback
fe00::0	ip6-localnet
ff00::0	ip6-mcastprefix
ff02::1	ip6-allnodes
ff02::2	ip6-allrouters
172.17.0.4	server1-alias server1-alias2 6091a0b958e2 server1
172.17.0.7	7e6d6b75f2f7
/ # ping server1
PING server1 (172.17.0.4): 56 data bytes
64 bytes from 172.17.0.4: seq=0 ttl=64 time=0.197 ms
64 bytes from 172.17.0.4: seq=1 ttl=64 time=0.118 ms
^C
--- server1 ping statistics ---
2 packets transmitted, 2 packets received, 0% packet loss
round-trip min/avg/max = 0.118/0.157/0.197 ms
/ # ping server1-alias
PING server1-alias (172.17.0.4): 56 data bytes
64 bytes from 172.17.0.4: seq=0 ttl=64 time=0.051 ms
64 bytes from 172.17.0.4: seq=1 ttl=64 time=0.116 ms
^C
--- server1-alias ping statistics ---
2 packets transmitted, 2 packets received, 0% packet loss
round-trip min/avg/max = 0.051/0.083/0.116 ms
/ # ping server1-alias2
PING server1-alias2 (172.17.0.4): 56 data bytes
64 bytes from 172.17.0.4: seq=0 ttl=64 time=0.065 ms
^C
--- server1-alias2 ping statistics ---
1 packets transmitted, 1 packets received, 0% packet loss
round-trip min/avg/max = 0.065/0.065/0.065 ms
4.4 自定义网络
root@ubuntu1804:~# docker network create -d bridge --subnet 172.27.0.0/16 --gateway 172.27.0.1 test-net
5a99e9e544234ae339a2c10a1661f1cbcc39deabf05f1b31a6af32d48cc5d75c

root@ubuntu1804:~# docker network ls
NETWORK ID          NAME                DRIVER              SCOPE
b53116cbcbf7        bridge              bridge              local
104d1dfc1f84        host                host                local
e78c04df27bc        none                null                local
5a99e9e54423        test-net            bridge              local

root@ubuntu1804:~# docker inspect test-net
[
    {
        "Name": "test-net",
        "Id": "5a99e9e544234ae339a2c10a1661f1cbcc39deabf05f1b31a6af32d48cc5d75c",
        "Created": "2021-01-21T14:01:31.834590014+08:00",
        "Scope": "local",
        "Driver": "bridge",
        "EnableIPv6": false,
        "IPAM": {
            "Driver": "default",
            "Options": {},
            "Config": [
                {
                    "Subnet": "172.27.0.0/16",
                    "Gateway": "172.27.0.1"
                }
            ]
        },
        "Internal": false,
        "Attachable": false,
        "Ingress": false,
        "ConfigFrom": {
            "Network": ""
        },
        "ConfigOnly": false,
        "Containers": {},
        "Options": {},
        "Labels": {}
    }
]

root@ubuntu1804:~# ip a
1: lo: <LOOPBACK,UP,LOWER_UP> mtu 65536 qdisc noqueue state UNKNOWN group default qlen 1000
    link/loopback 00:00:00:00:00:00 brd 00:00:00:00:00:00
    inet 127.0.0.1/8 scope host lo
       valid_lft forever preferred_lft forever
    inet6 ::1/128 scope host
       valid_lft forever preferred_lft forever
2: eth0: <BROADCAST,MULTICAST,UP,LOWER_UP> mtu 1500 qdisc fq_codel state UP group default qlen 1000
    link/ether 00:0c:29:b1:12:5e brd ff:ff:ff:ff:ff:ff
    inet 10.0.0.100/24 brd 10.0.0.255 scope global eth0
       valid_lft forever preferred_lft forever
    inet6 fe80::20c:29ff:feb1:125e/64 scope link
       valid_lft forever preferred_lft forever
3: docker0: <BROADCAST,MULTICAST,UP,LOWER_UP> mtu 1500 qdisc noqueue state UP group default
    link/ether 02:42:dd:09:fd:8b brd ff:ff:ff:ff:ff:ff
    inet 172.17.0.1/16 brd 172.17.255.255 scope global docker0
       valid_lft forever preferred_lft forever
    inet6 fe80::42:ddff:fe09:fd8b/64 scope link
       valid_lft forever preferred_lft forever
9: vethad028a3@if8: <BROADCAST,MULTICAST,UP,LOWER_UP> mtu 1500 qdisc noqueue master docker0 state UP group default
    link/ether 4e:b7:56:f4:91:48 brd ff:ff:ff:ff:ff:ff link-netnsid 0
    inet6 fe80::4cb7:56ff:fef4:9148/64 scope link
       valid_lft forever preferred_lft forever
11: veth24828fe@if10: <BROADCAST,MULTICAST,UP,LOWER_UP> mtu 1500 qdisc noqueue master docker0 state UP group default
    link/ether fe:27:63:8a:d4:7f brd ff:ff:ff:ff:ff:ff link-netnsid 1
    inet6 fe80::fc27:63ff:fe8a:d47f/64 scope link
       valid_lft forever preferred_lft forever
13: vethc5754e0@if12: <BROADCAST,MULTICAST,UP,LOWER_UP> mtu 1500 qdisc noqueue master docker0 state UP group default
    link/ether aa:49:1d:ff:c0:1c brd ff:ff:ff:ff:ff:ff link-netnsid 2
    inet6 fe80::a849:1dff:feff:c01c/64 scope link
       valid_lft forever preferred_lft forever
15: veth396059d@if14: <BROADCAST,MULTICAST,UP,LOWER_UP> mtu 1500 qdisc noqueue master docker0 state UP group default
    link/ether a6:b0:8d:b0:82:48 brd ff:ff:ff:ff:ff:ff link-netnsid 3
    inet6 fe80::a4b0:8dff:feb0:8248/64 scope link
       valid_lft forever preferred_lft forever
17: vetheb44698@if16: <BROADCAST,MULTICAST,UP,LOWER_UP> mtu 1500 qdisc noqueue master docker0 state UP group default
    link/ether 6a:18:bd:dc:bb:89 brd ff:ff:ff:ff:ff:ff link-netnsid 4
    inet6 fe80::6818:bdff:fedc:bb89/64 scope link
       valid_lft forever preferred_lft forever
19: veth1e3cc1a@if18: <BROADCAST,MULTICAST,UP,LOWER_UP> mtu 1500 qdisc noqueue master docker0 state UP group default
    link/ether 9e:63:76:4a:66:e4 brd ff:ff:ff:ff:ff:ff link-netnsid 5
    inet6 fe80::9c63:76ff:fe4a:66e4/64 scope link
       valid_lft forever preferred_lft forever

#新添加了一个虚拟网卡
20: br-5a99e9e54423: <NO-CARRIER,BROADCAST,MULTICAST,UP> mtu 1500 qdisc noqueue state DOWN group default
    link/ether 02:42:f1:b3:5e:8d brd ff:ff:ff:ff:ff:ff
    inet 172.27.0.1/16 brd 172.27.255.255 scope global br-5a99e9e54423
       valid_lft forever preferred_lft forever

root@ubuntu1804:~# apt -y install bridge-utils
root@ubuntu1804:~# brctl show
bridge name	bridge id		STP enabled	interfaces
br-5a99e9e54423		8000.0242f1b35e8d	no
docker0		8000.0242dd09fd8b	no		veth1e3cc1a
							veth24828fe
							veth396059d
							vethad028a3
							vethc5754e0
							vetheb44698

root@ubuntu1804:~# route -n
Kernel IP routing table
Destination     Gateway         Genmask         Flags Metric Ref    Use Iface
0.0.0.0         10.0.0.2        0.0.0.0         UG    0      0        0 eth0
10.0.0.0        0.0.0.0         255.255.255.0   U     0      0        0 eth0
172.17.0.0      0.0.0.0         255.255.0.0     U     0      0        0 docker0
172.27.0.0      0.0.0.0         255.255.0.0     U     0      0        0 br-5a99e9e54423

root@ubuntu1804:~# docker run -it --rm --network test-net alpine sh
/ # ip a
1: lo: <LOOPBACK,UP,LOWER_UP> mtu 65536 qdisc noqueue state UNKNOWN qlen 1000
    link/loopback 00:00:00:00:00:00 brd 00:00:00:00:00:00
    inet 127.0.0.1/8 scope host lo
       valid_lft forever preferred_lft forever
21: eth0@if22: <BROADCAST,MULTICAST,UP,LOWER_UP,M-DOWN> mtu 1500 qdisc noqueue state UP
    link/ether 02:42:ac:1b:00:02 brd ff:ff:ff:ff:ff:ff
    inet 172.27.0.2/16 brd 172.27.255.255 scope global eth0
       valid_lft forever preferred_lft forever
/ # route -n
Kernel IP routing table
Destination     Gateway         Genmask         Flags Metric Ref    Use Iface
0.0.0.0         172.27.0.1      0.0.0.0         UG    0      0        0 eth0
172.27.0.0      0.0.0.0         255.255.0.0     U     0      0        0 eth0
/ # cat /etc/resolv.conf
search neteagles.cn239188140 neteagles.com
nameserver 127.0.0.11
options ndots:0
/ # ping -c1 www.baidu.com
PING www.baidu.com (14.215.177.39): 56 data bytes
64 bytes from 14.215.177.39: seq=0 ttl=127 time=45.830 ms

--- www.baidu.com ping statistics ---
1 packets transmitted, 1 packets received, 0% packet loss

#再开一个新终端窗口
root@ubuntu1804:~# docker inspect test-net
[
    {
        "Name": "test-net",
        "Id": "5a99e9e544234ae339a2c10a1661f1cbcc39deabf05f1b31a6af32d48cc5d75c",
        "Created": "2021-01-21T14:01:31.834590014+08:00",
        "Scope": "local",
        "Driver": "bridge",
        "EnableIPv6": false,
        "IPAM": {
            "Driver": "default",
            "Options": {},
            "Config": [
                {
                    "Subnet": "172.27.0.0/16",
                    "Gateway": "172.27.0.1"
                }
            ]
        },
        "Internal": false,
        "Attachable": false,
        "Ingress": false,
        "ConfigFrom": {
            "Network": ""
        },
        "ConfigOnly": false,
        #出现此网络中容器的网络信息
        "Containers": {
            "e52aa1a27e690d7759b3b59bba2c2db45e2c7595d4756cd8f2cf179779eef4a8": {
                "Name": "strange_elion",
                "EndpointID": "97680b86a0f3652615861d9db105ab7a34b185144cf9b0487464535d0cc6cc69",
                "MacAddress": "02:42:ac:1b:00:02",
                "IPv4Address": "172.27.0.2/16",
                "IPv6Address": ""
            }
        },
        "Options": {},
        "Labels": {}
    }
]
4.5 自定义网络中的容器之间通信
root@ubuntu1804:~# docker network ls
NETWORK ID          NAME                DRIVER              SCOPE
b53116cbcbf7        bridge              bridge              local
104d1dfc1f84        host                host                local
e78c04df27bc        none                null                local
5a99e9e54423        test-net            bridge              local

root@ubuntu1804:~# docker run -it --rm --network test-net --name test1 alpine sh
/ # ip a
1: lo: <LOOPBACK,UP,LOWER_UP> mtu 65536 qdisc noqueue state UNKNOWN qlen 1000
    link/loopback 00:00:00:00:00:00 brd 00:00:00:00:00:00
    inet 127.0.0.1/8 scope host lo
       valid_lft forever preferred_lft forever
23: eth0@if24: <BROADCAST,MULTICAST,UP,LOWER_UP,M-DOWN> mtu 1500 qdisc noqueue state UP
    link/ether 02:42:ac:1b:00:03 brd ff:ff:ff:ff:ff:ff
    inet 172.27.0.3/16 brd 172.27.255.255 scope global eth0
       valid_lft forever preferred_lft forever
/ # cat /etc/hosts
127.0.0.1	localhost
::1	localhost ip6-localhost ip6-loopback
fe00::0	ip6-localnet
ff00::0	ip6-mcastprefix
ff02::1	ip6-allnodes
ff02::2	ip6-allrouters
172.27.0.3	d5ff94eb5ec6

root@ubuntu1804:~# docker run -it --rm --network test-net --name test2 alpine sh
/ # ip a
1: lo: <LOOPBACK,UP,LOWER_UP> mtu 65536 qdisc noqueue state UNKNOWN qlen 1000
    link/loopback 00:00:00:00:00:00 brd 00:00:00:00:00:00
    inet 127.0.0.1/8 scope host lo
       valid_lft forever preferred_lft forever
25: eth0@if26: <BROADCAST,MULTICAST,UP,LOWER_UP,M-DOWN> mtu 1500 qdisc noqueue state UP
    link/ether 02:42:ac:1b:00:04 brd ff:ff:ff:ff:ff:ff
    inet 172.27.0.4/16 brd 172.27.255.255 scope global eth0
       valid_lft forever preferred_lft forever
/ # cat /etc/hosts
127.0.0.1	localhost
::1	localhost ip6-localhost ip6-loopback
fe00::0	ip6-localnet
ff00::0	ip6-mcastprefix
ff02::1	ip6-allnodes
ff02::2	ip6-allrouters
172.27.0.4	d75119372ab4
/ # ping -c1 test1
PING test1 (172.27.0.3): 56 data bytes
64 bytes from 172.27.0.3: seq=0 ttl=64 time=0.080 ms

--- test1 ping statistics ---
1 packets transmitted, 1 packets received, 0% packet loss
round-trip min/avg/max = 0.080/0.080/0.080 ms

#在test1容器里
/ # ping -c1 test2
PING test2 (172.27.0.4): 56 data bytes
64 bytes from 172.27.0.4: seq=0 ttl=64 time=0.050 ms

--- test2 ping statistics ---
1 packets transmitted, 1 packets received, 0% packet loss
round-trip min/avg/max = 0.050/0.050/0.050 ms
结论: 自定义网络中的容器之间可以直接利用容器名进行通信
4.6 自定义网络和bridge网络容器之间无法通信的原因
#确认开启ip_forward
root@ubuntu1804:~# cat /proc/sys/net/ipv4/ip_forward
1

#默认网络和自定义网络是两个不同的网桥
root@ubuntu1804:~# brctl show
bridge name	bridge id		STP enabled	interfaces
br-5a99e9e54423		8000.0242f1b35e8d	no
docker0		8000.0242dd09fd8b	no

root@ubuntu1804:~# iptables -vnL
Chain INPUT (policy ACCEPT 51 packets, 3432 bytes)
 pkts bytes target     prot opt in     out     source               destination

Chain FORWARD (policy DROP 0 packets, 0 bytes)
 pkts bytes target     prot opt in     out     source               destination
 2496 1824K DOCKER-USER  all  --  *      *       0.0.0.0/0            0.0.0.0/0
 2496 1824K DOCKER-ISOLATION-STAGE-1  all  --  *      *       0.0.0.0/0            0.0.0.0/0
   15  1563 ACCEPT     all  --  *      br-5a99e9e54423  0.0.0.0/0            0.0.0.0/0            ctstate RELATED,ESTABLISHED
    3   252 DOCKER     all  --  *      br-5a99e9e54423  0.0.0.0/0            0.0.0.0/0
    9   508 ACCEPT     all  --  br-5a99e9e54423 !br-5a99e9e54423  0.0.0.0/0            0.0.0.0/0
    3   252 ACCEPT     all  --  br-5a99e9e54423 br-5a99e9e54423  0.0.0.0/0            0.0.0.0/0
 6646 3576K ACCEPT     all  --  *      docker0  0.0.0.0/0            0.0.0.0/0            ctstate RELATED,ESTABLISHED
  116  6680 DOCKER     all  --  *      docker0  0.0.0.0/0            0.0.0.0/0
  939 1257K ACCEPT     all  --  docker0 !docker0  0.0.0.0/0            0.0.0.0/0
   66  4080 ACCEPT     all  --  docker0 docker0  0.0.0.0/0            0.0.0.0/0

Chain OUTPUT (policy ACCEPT 32 packets, 3328 bytes)
 pkts bytes target     prot opt in     out     source               destination

Chain DOCKER (2 references)
 pkts bytes target     prot opt in     out     source               destination

Chain DOCKER-ISOLATION-STAGE-1 (1 references)
 pkts bytes target     prot opt in     out     source               destination
    9   508 DOCKER-ISOLATION-STAGE-2  all  --  br-5a99e9e54423 !br-5a99e9e54423  0.0.0.0/0            0.0.0.0/0
  939 1257K DOCKER-ISOLATION-STAGE-2  all  --  docker0 !docker0  0.0.0.0/0            0.0.0.0/0
 7728 4842K RETURN     all  --  *      *       0.0.0.0/0            0.0.0.0/0

Chain DOCKER-ISOLATION-STAGE-2 (2 references)
 pkts bytes target     prot opt in     out     source               destination
    0     0 DROP       all  --  *      br-5a99e9e54423  0.0.0.0/0            0.0.0.0/0
    0     0 DROP       all  --  *      docker0  0.0.0.0/0            0.0.0.0/0
  948 1258K RETURN     all  --  *      *       0.0.0.0/0            0.0.0.0/0

Chain DOCKER-USER (1 references)
 pkts bytes target     prot opt in     out     source               destination
 7810 4849K RETURN     all  --  *      *       0.0.0.0/0            0.0.0.0/0

root@ubuntu1804:~# iptables-save > iptables.rule
root@ubuntu1804:~# vim iptables.rule
#修改下面两行的规则
-A DOCKER-ISOLATION-STAGE-2 -o br-5a99e9e54423 -j ACCEPT
-A DOCKER-ISOLATION-STAGE-2 -o docker0 -j ACCEPT
:wq
root@ubuntu1804:~# iptables-restore <iptables.rule

root@ubuntu1804:~# docker run -it --rm --name c1 alpine sh
/ # ip a
1: lo: <LOOPBACK,UP,LOWER_UP> mtu 65536 qdisc noqueue state UNKNOWN qlen 1000
    link/loopback 00:00:00:00:00:00 brd 00:00:00:00:00:00
    inet 127.0.0.1/8 scope host lo
       valid_lft forever preferred_lft forever
27: eth0@if28: <BROADCAST,MULTICAST,UP,LOWER_UP,M-DOWN> mtu 1500 qdisc noqueue state UP
    link/ether 02:42:ac:11:00:02 brd ff:ff:ff:ff:ff:ff
    inet 172.17.0.2/16 brd 172.17.255.255 scope global eth0
       valid_lft forever preferred_lft forever

root@ubuntu1804:~# docker run -it --name c2 --network test-net --rm alpine sh
/ # ip a
1: lo: <LOOPBACK,UP,LOWER_UP> mtu 65536 qdisc noqueue state UNKNOWN qlen 1000
    link/loopback 00:00:00:00:00:00 brd 00:00:00:00:00:00
    inet 127.0.0.1/8 scope host lo
       valid_lft forever preferred_lft forever
29: eth0@if30: <BROADCAST,MULTICAST,UP,LOWER_UP,M-DOWN> mtu 1500 qdisc noqueue state UP
    link/ether 02:42:ac:1b:00:02 brd ff:ff:ff:ff:ff:ff
    inet 172.27.0.2/16 brd 172.27.255.255 scope global eth0
       valid_lft forever preferred_lft forever
/ # ping 172.17.0.2
PING 172.17.0.2 (172.17.0.2): 56 data bytes
64 bytes from 172.17.0.2: seq=0 ttl=63 time=0.152 ms
64 bytes from 172.17.0.2: seq=1 ttl=63 time=0.142 ms
^C
--- 172.17.0.2 ping statistics ---
2 packets transmitted, 2 packets received, 0% packet loss
round-trip min/avg/max = 0.142/0.147/0.152 ms

#在c2容器上ping c2 容器
/ # ping 172.27.0.2
PING 172.27.0.2 (172.27.0.2): 56 data bytes
64 bytes from 172.27.0.2: seq=0 ttl=63 time=0.063 ms
64 bytes from 172.27.0.2: seq=1 ttl=63 time=0.175 ms
^C
--- 172.27.0.2 ping statistics ---
2 packets transmitted, 2 packets received, 0% packet loss
round-trip min/avg/max = 0.063/0.119/0.175 ms
4.7 解决同一个宿主机不同网络的容器间无法通信的问题
可以使用docker network connect命令实现同一个宿主机不同网络的容器间相互通信
4.7.1 上面案例中c1和c2的容器间默认无法通信
root@ubuntu1804:~# vim iptables.rule
#把下面两行再改回去
-A DOCKER-ISOLATION-STAGE-2 -o br-5a99e9e54423 -j DROP
-A DOCKER-ISOLATION-STAGE-2 -o docker0 -j DROP
:wq
root@ubuntu1804:~# iptables-restore <iptables.rule

#每个网络中有属于此网络的容器信息
root@ubuntu1804:~# docker network inspect bridge
[
    {
        "Name": "bridge",
        "Id": "b53116cbcbf7921e0c67f0d5cda395423c680510bddc9927a1698e9adf036905",
        "Created": "2021-01-21T13:30:38.080972689+08:00",
        "Scope": "local",
        "Driver": "bridge",
        "EnableIPv6": false,
        "IPAM": {
            "Driver": "default",
            "Options": null,
            "Config": [
                {
                    "Subnet": "172.17.0.0/16",
                    "Gateway": "172.17.0.1"
                }
            ]
        },
        "Internal": false,
        "Attachable": false,
        "Ingress": false,
        "ConfigFrom": {
            "Network": ""
        },
        "ConfigOnly": false,
        "Containers": {
            "29fb54edef8a8ef4e05f9442ced5129be987e2f8c4e5b7a7a9a0c5e05ef1e102": {
                "Name": "c1",
                "EndpointID": "bafe3c3246f02fdad1ffee29fd252dcfd370fb8fdcce8f6e475f6e02ab55e5f8",
                "MacAddress": "02:42:ac:11:00:02",
                "IPv4Address": "172.17.0.2/16",
                "IPv6Address": ""
            }
        },
        "Options": {
            "com.docker.network.bridge.default_bridge": "true",
            "com.docker.network.bridge.enable_icc": "true",
            "com.docker.network.bridge.enable_ip_masquerade": "true",
            "com.docker.network.bridge.host_binding_ipv4": "0.0.0.0",
            "com.docker.network.bridge.name": "docker0",
            "com.docker.network.driver.mtu": "1500"
        },
        "Labels": {}
    }
]

#每个网络中有属于此网络的容器信息
root@ubuntu1804:~# docker network inspect test-net
[
    {
        "Name": "test-net",
        "Id": "5a99e9e544234ae339a2c10a1661f1cbcc39deabf05f1b31a6af32d48cc5d75c",
        "Created": "2021-01-21T14:01:31.834590014+08:00",
        "Scope": "local",
        "Driver": "bridge",
        "EnableIPv6": false,
        "IPAM": {
            "Driver": "default",
            "Options": {},
            "Config": [
                {
                    "Subnet": "172.27.0.0/16",
                    "Gateway": "172.27.0.1"
                }
            ]
        },
        "Internal": false,
        "Attachable": false,
        "Ingress": false,
        "ConfigFrom": {
            "Network": ""
        },
        "ConfigOnly": false,
        "Containers": {
            "d3ce707d91ca4444fe96bd9e8f462b3d13adbcd0f77576eba3ef59181ec0aa5a": {
                "Name": "c2",
                "EndpointID": "324bbc5eedea276ef6e06c86b59d93cad662315ccc20bbf7e107375f4b3e1a65",
                "MacAddress": "02:42:ac:1b:00:02",
                "IPv4Address": "172.27.0.2/16",
                "IPv6Address": ""
            }
        },
        "Options": {},
        "Labels": {}
    }
]
4.7.2 让默认网络中容器c1可以连通自定义网络的容器c2
root@ubuntu1804:~# docker network connect test-net c1
root@ubuntu1804:~# docker network inspect test-net
[
    {
        "Name": "test-net",
        "Id": "5a99e9e544234ae339a2c10a1661f1cbcc39deabf05f1b31a6af32d48cc5d75c",
        "Created": "2021-01-21T14:01:31.834590014+08:00",
        "Scope": "local",
        "Driver": "bridge",
        "EnableIPv6": false,
        "IPAM": {
            "Driver": "default",
            "Options": {},
            "Config": [
                {
                    "Subnet": "172.27.0.0/16",
                    "Gateway": "172.27.0.1"
                }
            ]
        },
        "Internal": false,
        "Attachable": false,
        "Ingress": false,
        "ConfigFrom": {
            "Network": ""
        },
        "ConfigOnly": false,
        "Containers": {
            "29fb54edef8a8ef4e05f9442ced5129be987e2f8c4e5b7a7a9a0c5e05ef1e102": {
                "Name": "c1",
                "EndpointID": "bdd7b78c02245a7bf1e287b0f34ff725f83e3753dfbba97680d734a7f287645e",
                "MacAddress": "02:42:ac:1b:00:03",
                "IPv4Address": "172.27.0.3/16",
                "IPv6Address": ""
            },
            "d3ce707d91ca4444fe96bd9e8f462b3d13adbcd0f77576eba3ef59181ec0aa5a": {
                "Name": "c2",
                "EndpointID": "324bbc5eedea276ef6e06c86b59d93cad662315ccc20bbf7e107375f4b3e1a65",
                "MacAddress": "02:42:ac:1b:00:02",
                "IPv4Address": "172.27.0.2/16",
                "IPv6Address": ""
            }
        },
        "Options": {},
        "Labels": {}
    }
]

#在c1容器中可以看到新添加了一个网卡,并且分配了test-net网络的IP信息
/ # ip a
1: lo: <LOOPBACK,UP,LOWER_UP> mtu 65536 qdisc noqueue state UNKNOWN qlen 1000
    link/loopback 00:00:00:00:00:00 brd 00:00:00:00:00:00
    inet 127.0.0.1/8 scope host lo
       valid_lft forever preferred_lft forever
27: eth0@if28: <BROADCAST,MULTICAST,UP,LOWER_UP,M-DOWN> mtu 1500 qdisc noqueue state UP
    link/ether 02:42:ac:11:00:02 brd ff:ff:ff:ff:ff:ff
    inet 172.17.0.2/16 brd 172.17.255.255 scope global eth0
       valid_lft forever preferred_lft forever
31: eth1@if32: <BROADCAST,MULTICAST,UP,LOWER_UP,M-DOWN> mtu 1500 qdisc noqueue state UP
    link/ether 02:42:ac:1b:00:03 brd ff:ff:ff:ff:ff:ff
    inet 172.27.0.3/16 brd 172.27.255.255 scope global eth1
       valid_lft forever preferred_lft forever

#c1可以连接c2容器
/ # ping 172.27.0.2
PING 172.27.0.2 (172.27.0.2): 56 data bytes
64 bytes from 172.27.0.2: seq=0 ttl=64 time=0.127 ms
64 bytes from 172.27.0.2: seq=1 ttl=64 time=0.123 ms
^C
--- 172.27.0.2 ping statistics ---
2 packets transmitted, 2 packets received, 0% packet loss
round-trip min/avg/max = 0.123/0.125/0.127 ms

#在c2容器中没有变化,仍然无法连接c1
/ # ip a
1: lo: <LOOPBACK,UP,LOWER_UP> mtu 65536 qdisc noqueue state UNKNOWN qlen 1000
    link/loopback 00:00:00:00:00:00 brd 00:00:00:00:00:00
    inet 127.0.0.1/8 scope host lo
       valid_lft forever preferred_lft forever
29: eth0@if30: <BROADCAST,MULTICAST,UP,LOWER_UP,M-DOWN> mtu 1500 qdisc noqueue state UP
    link/ether 02:42:ac:1b:00:02 brd ff:ff:ff:ff:ff:ff
    inet 172.27.0.2/16 brd 172.27.255.255 scope global eth0
       valid_lft forever preferred_lft forever
/ # ping 172.17.0.2
PING 172.17.0.2 (172.17.0.2): 56 data bytes
^C
--- 172.17.0.2 ping statistics ---
2 packets transmitted, 0 packets received, 100% packet loss
4.7.3 让自定义网络中容器c2可以连通默认网络的容器c1
#将自定义网络中的容器c2也加入到默认网络中,使之和默认网络中的容器c1通信
root@ubuntu1804:~# docker network connect bridge c2
root@ubuntu1804:~# docker network inspect bridge
[
    {
        "Name": "bridge",
        "Id": "b53116cbcbf7921e0c67f0d5cda395423c680510bddc9927a1698e9adf036905",
        "Created": "2021-01-21T13:30:38.080972689+08:00",
        "Scope": "local",
        "Driver": "bridge",
        "EnableIPv6": false,
        "IPAM": {
            "Driver": "default",
            "Options": null,
            "Config": [
                {
                    "Subnet": "172.17.0.0/16",
                    "Gateway": "172.17.0.1"
                }
            ]
        },
        "Internal": false,
        "Attachable": false,
        "Ingress": false,
        "ConfigFrom": {
            "Network": ""
        },
        "ConfigOnly": false,
        "Containers": {
            "29fb54edef8a8ef4e05f9442ced5129be987e2f8c4e5b7a7a9a0c5e05ef1e102": {
                "Name": "c1",
                "EndpointID": "bafe3c3246f02fdad1ffee29fd252dcfd370fb8fdcce8f6e475f6e02ab55e5f8",
                "MacAddress": "02:42:ac:11:00:02",
                "IPv4Address": "172.17.0.2/16",
                "IPv6Address": ""
            },
            "d3ce707d91ca4444fe96bd9e8f462b3d13adbcd0f77576eba3ef59181ec0aa5a": {
                "Name": "c2",
                "EndpointID": "5e3c37c0a41e67912d5895f271c722c5d6de1fb066be7522688b3f524249f600",
                "MacAddress": "02:42:ac:11:00:03",
                "IPv4Address": "172.17.0.3/16",
                "IPv6Address": ""
            }
        },
        "Options": {
            "com.docker.network.bridge.default_bridge": "true",
            "com.docker.network.bridge.enable_icc": "true",
            "com.docker.network.bridge.enable_ip_masquerade": "true",
            "com.docker.network.bridge.host_binding_ipv4": "0.0.0.0",
            "com.docker.network.bridge.name": "docker0",
            "com.docker.network.driver.mtu": "1500"
        },
        "Labels": {}
    }
]

#确认自定义网络的容器c2中添加了新网卡,并设置默认网络的IP信息
/ # ip a
1: lo: <LOOPBACK,UP,LOWER_UP> mtu 65536 qdisc noqueue state UNKNOWN qlen 1000
    link/loopback 00:00:00:00:00:00 brd 00:00:00:00:00:00
    inet 127.0.0.1/8 scope host lo
       valid_lft forever preferred_lft forever
29: eth0@if30: <BROADCAST,MULTICAST,UP,LOWER_UP,M-DOWN> mtu 1500 qdisc noqueue state UP
    link/ether 02:42:ac:1b:00:02 brd ff:ff:ff:ff:ff:ff
    inet 172.27.0.2/16 brd 172.27.255.255 scope global eth0
       valid_lft forever preferred_lft forever
33: eth1@if34: <BROADCAST,MULTICAST,UP,LOWER_UP,M-DOWN> mtu 1500 qdisc noqueue state UP
    link/ether 02:42:ac:11:00:03 brd ff:ff:ff:ff:ff:ff
    inet 172.17.0.3/16 brd 172.17.255.255 scope global eth1
       valid_lft forever preferred_lft forever

#c2可以连接c1容器
/ # ping 172.17.0.2
PING 172.17.0.2 (172.17.0.2): 56 data bytes
64 bytes from 172.17.0.2: seq=0 ttl=64 time=0.122 ms
64 bytes from 172.17.0.2: seq=1 ttl=64 time=0.218 ms
^C
--- 172.17.0.2 ping statistics ---
2 packets transmitted, 2 packets received, 0% packet loss
round-trip min/avg/max = 0.122/0.170/0.218 ms
4.7.4 断开不同网络中容器的通信
#将c1 断开和网络test-net中其它容器的通信
root@ubuntu1804:~# docker network disconnect test-net c1

#在容器c1中无法和c2通信
/ # ip a
1: lo: <LOOPBACK,UP,LOWER_UP> mtu 65536 qdisc noqueue state UNKNOWN qlen 1000
    link/loopback 00:00:00:00:00:00 brd 00:00:00:00:00:00
    inet 127.0.0.1/8 scope host lo
       valid_lft forever preferred_lft forever
27: eth0@if28: <BROADCAST,MULTICAST,UP,LOWER_UP,M-DOWN> mtu 1500 qdisc noqueue state UP
    link/ether 02:42:ac:11:00:02 brd ff:ff:ff:ff:ff:ff
    inet 172.17.0.2/16 brd 172.17.255.255 scope global eth0
       valid_lft forever preferred_lft forever
/ # ping 172.27.0.2
PING 172.27.0.2 (172.27.0.2): 56 data bytes
^C
--- 172.27.0.2 ping statistics ---
2 packets transmitted, 0 packets received, 100% packet loss

#在容器c2中仍能和c1通信
/ # ip a
1: lo: <LOOPBACK,UP,LOWER_UP> mtu 65536 qdisc noqueue state UNKNOWN qlen 1000
    link/loopback 00:00:00:00:00:00 brd 00:00:00:00:00:00
    inet 127.0.0.1/8 scope host lo
       valid_lft forever preferred_lft forever
29: eth0@if30: <BROADCAST,MULTICAST,UP,LOWER_UP,M-DOWN> mtu 1500 qdisc noqueue state UP
    link/ether 02:42:ac:1b:00:02 brd ff:ff:ff:ff:ff:ff
    inet 172.27.0.2/16 brd 172.27.255.255 scope global eth0
       valid_lft forever preferred_lft forever
33: eth1@if34: <BROADCAST,MULTICAST,UP,LOWER_UP,M-DOWN> mtu 1500 qdisc noqueue state UP
    link/ether 02:42:ac:11:00:03 brd ff:ff:ff:ff:ff:ff
    inet 172.17.0.3/16 brd 172.17.255.255 scope global eth1
       valid_lft forever preferred_lft forever
/ # ping 172.17.0.2
PING 172.17.0.2 (172.17.0.2): 56 data bytes
64 bytes from 172.17.0.2: seq=0 ttl=64 time=0.094 ms
64 bytes from 172.17.0.2: seq=1 ttl=64 time=0.131 ms
^C
--- 172.17.0.2 ping statistics ---
2 packets transmitted, 2 packets received, 0% packet loss
round-trip min/avg/max = 0.094/0.112/0.131 ms

#将c2 断开和默认网络中其它容器的通信
root@ubuntu1804:~# docker network disconnect bridge c2

#在容器c2中无法和c1通信
/ # ip a
1: lo: <LOOPBACK,UP,LOWER_UP> mtu 65536 qdisc noqueue state UNKNOWN qlen 1000
    link/loopback 00:00:00:00:00:00 brd 00:00:00:00:00:00
    inet 127.0.0.1/8 scope host lo
       valid_lft forever preferred_lft forever
29: eth0@if30: <BROADCAST,MULTICAST,UP,LOWER_UP,M-DOWN> mtu 1500 qdisc noqueue state UP
    link/ether 02:42:ac:1b:00:02 brd ff:ff:ff:ff:ff:ff
    inet 172.27.0.2/16 brd 172.27.255.255 scope global eth0
       valid_lft forever preferred_lft forever
/ # ping 172.17.0.2
PING 172.17.0.2 (172.17.0.2): 56 data bytes
^C
--- 172.17.0.2 ping statistics ---
2 packets transmitted, 0 packets received, 100% packet loss
4.8 实现跨宿主机的容器之间网络互联
4.8.1 修改各宿主机网段
Docker默认网段是172.17.0.x/24,而且每个宿主机都是一样的,因此要做路由的前提就是各个主机的网
络不能一致
4.8.1.1 第一个宿主机A上更改网段
root@ubuntu1804:~# vim /etc/docker/daemon.json
{
  "bip": "192.168.100.1/24",
  "registry-mirrors": ["https://hzw5xiv7.mirror.aliyuncs.com"]
}
:wq

root@ubuntu1804:~# systemctl restart docker
root@ubuntu1804:~# ip a
1: lo: <LOOPBACK,UP,LOWER_UP> mtu 65536 qdisc noqueue state UNKNOWN group default qlen 1000
    link/loopback 00:00:00:00:00:00 brd 00:00:00:00:00:00
    inet 127.0.0.1/8 scope host lo
       valid_lft forever preferred_lft forever
    inet6 ::1/128 scope host
       valid_lft forever preferred_lft forever
2: eth0: <BROADCAST,MULTICAST,UP,LOWER_UP> mtu 1500 qdisc fq_codel state UP group default qlen 1000
    link/ether 00:0c:29:a5:62:a3 brd ff:ff:ff:ff:ff:ff
    inet 10.0.0.103/24 brd 10.0.0.255 scope global eth0
       valid_lft forever preferred_lft forever
    inet6 fe80::20c:29ff:fea5:62a3/64 scope link
       valid_lft forever preferred_lft forever
3: docker0: <NO-CARRIER,BROADCAST,MULTICAST,UP> mtu 1500 qdisc noqueue state DOWN group default
    link/ether 02:42:c8:1d:06:4d brd ff:ff:ff:ff:ff:ff
    inet 192.168.100.1/24 brd 192.168.100.255 scope global docker0
       valid_lft forever preferred_lft forever

root@ubuntu1804:~# route -n
Kernel IP routing table
Destination     Gateway         Genmask         Flags Metric Ref    Use Iface
0.0.0.0         10.0.0.2        0.0.0.0         UG    0      0        0 eth0
10.0.0.0        0.0.0.0         255.255.255.0   U     0      0        0 eth0
192.168.100.0   0.0.0.0         255.255.255.0   U     0      0        0 docker0
4.8.1.2 第二个宿主机B更改网段
root@ubuntu1804:~# vim /etc/docker/daemon.json
{
  "bip": "192.168.200.1/24",
  "registry-mirrors": ["https://hzw5xiv7.mirror.aliyuncs.com"]
}
:wq
root@ubuntu1804:~# systemctl restart docker
root@ubuntu1804:~# ip a
1: lo: <LOOPBACK,UP,LOWER_UP> mtu 65536 qdisc noqueue state UNKNOWN group default qlen 1000
    link/loopback 00:00:00:00:00:00 brd 00:00:00:00:00:00
    inet 127.0.0.1/8 scope host lo
       valid_lft forever preferred_lft forever
    inet6 ::1/128 scope host
       valid_lft forever preferred_lft forever
2: eth0: <BROADCAST,MULTICAST,UP,LOWER_UP> mtu 1500 qdisc fq_codel state UP group default qlen 1000
    link/ether 00:0c:29:31:92:15 brd ff:ff:ff:ff:ff:ff
    inet 10.0.0.104/24 brd 10.0.0.255 scope global eth0
       valid_lft forever preferred_lft forever
    inet6 fe80::20c:29ff:fe31:9215/64 scope link
       valid_lft forever preferred_lft forever
3: docker0: <NO-CARRIER,BROADCAST,MULTICAST,UP> mtu 1500 qdisc noqueue state DOWN group default
    link/ether 02:42:ef:f3:a5:86 brd ff:ff:ff:ff:ff:ff
    inet 192.168.200.1/24 brd 192.168.200.255 scope global docker0
       valid_lft forever preferred_lft forever
root@ubuntu1804:~# route -n
Kernel IP routing table
Destination     Gateway         Genmask         Flags Metric Ref    Use Iface
0.0.0.0         10.0.0.2        0.0.0.0         UG    0      0        0 eth0
10.0.0.0        0.0.0.0         255.255.255.0   U     0      0        0 eth0
192.168.200.0   0.0.0.0         255.255.255.0   U     0      0        0 docker0
4.8.1.3 在两个宿主机分别启动一个容器
第一个宿主机启动容器server1
root@ubuntu1804:~# docker run -it --name server1 --rm alpine sh
/ # ip a
1: lo: <LOOPBACK,UP,LOWER_UP> mtu 65536 qdisc noqueue state UNKNOWN qlen 1000
    link/loopback 00:00:00:00:00:00 brd 00:00:00:00:00:00
    inet 127.0.0.1/8 scope host lo
       valid_lft forever preferred_lft forever
4: eth0@if5: <BROADCAST,MULTICAST,UP,LOWER_UP,M-DOWN> mtu 1500 qdisc noqueue state UP
    link/ether 02:42:c0:a8:64:02 brd ff:ff:ff:ff:ff:ff
    inet 192.168.100.2/24 brd 192.168.100.255 scope global eth0
       valid_lft forever preferred_lft forever
/ # route -n
Kernel IP routing table
Destination     Gateway         Genmask         Flags Metric Ref    Use Iface
0.0.0.0         192.168.100.1   0.0.0.0         UG    0      0        0 eth0
192.168.100.0   0.0.0.0         255.255.255.0   U     0      0        0 eth0
第二个宿主机启动容器server2
root@ubuntu1804:~# docker run -it --name server2 --rm alpine sh
/ # ip a
1: lo: <LOOPBACK,UP,LOWER_UP> mtu 65536 qdisc noqueue state UNKNOWN qlen 1000
    link/loopback 00:00:00:00:00:00 brd 00:00:00:00:00:00
    inet 127.0.0.1/8 scope host lo
       valid_lft forever preferred_lft forever
4: eth0@if5: <BROADCAST,MULTICAST,UP,LOWER_UP,M-DOWN> mtu 1500 qdisc noqueue state UP
    link/ether 02:42:c0:a8:c8:02 brd ff:ff:ff:ff:ff:ff
    inet 192.168.200.2/24 brd 192.168.200.255 scope global eth0
       valid_lft forever preferred_lft forever
/ # route -n
Kernel IP routing table
Destination     Gateway         Genmask         Flags Metric Ref    Use Iface
0.0.0.0         192.168.200.1   0.0.0.0         UG    0      0        0 eth0
192.168.200.0   0.0.0.0         255.255.255.0   U     0      0        0 eth0
从第一个宿主机的容器server1无法和第二个宿主机的server2相互访问
/ # ping -c1 192.168.200.2
PING 192.168.200.2 (192.168.200.2): 56 data bytes

--- 192.168.200.2 ping statistics ---
1 packets transmitted, 0 packets received, 100% packet loss
4.8.2 添加静态路由和iptables规则
在各宿主机添加静态路由,网关指向对方宿主机的IP
4.8.2.1 在第一台宿主机添加静态路由和iptables规则
#添加路由
root@ubuntu1804:~# ip route add 192.168.200.0/24 via 10.0.0.104

#修改iptables规则
root@ubuntu1804:~# iptables -A FORWARD -s 10.0.0.0/24 -j ACCEPT
4.8.2.2 在第二台宿主机添加静态路由和iptables规则
#添加路由
root@ubuntu1804:~# ip route add 192.168.100.0/24 via 10.0.0.103

#修改iptables规则
root@ubuntu1804:~# iptables -A FORWARD -s 10.0.0.0/24 -j ACCEPT
4.8.3 测试跨宿主机之间容器互联
宿主机A的容器server1访问宿主机B容器server2,同时在宿主机B上tcpdump抓包观察
/ # ping 192.168.200.2
PING 192.168.200.2 (192.168.200.2): 56 data bytes
64 bytes from 192.168.200.2: seq=0 ttl=62 time=0.455 ms
64 bytes from 192.168.200.2: seq=1 ttl=62 time=0.667 ms
64 bytes from 192.168.200.2: seq=2 ttl=62 time=0.815 ms
64 bytes from 192.168.200.2: seq=3 ttl=62 time=0.547 ms
64 bytes from 192.168.200.2: seq=4 ttl=62 time=0.717 ms
64 bytes from 192.168.200.2: seq=5 ttl=62 time=0.784 ms
64 bytes from 192.168.200.2: seq=6 ttl=62 time=0.771 ms

#宿主机B的抓包可以观察到
root@ubuntu1804:~# tcpdump -i eth0 -nn icmp
tcpdump: verbose output suppressed, use -v or -vv for full protocol decode
listening on eth0, link-type EN10MB (Ethernet), capture size 262144 bytes
16:02:43.230965 IP 10.0.0.103 > 192.168.200.2: ICMP echo request, id 2560, seq 0, length 64
16:02:43.231072 IP 192.168.200.2 > 10.0.0.103: ICMP echo reply, id 2560, seq 0, length 64
16:02:44.231152 IP 10.0.0.103 > 192.168.200.2: ICMP echo request, id 2560, seq 1, length 64
16:02:44.231252 IP 192.168.200.2 > 10.0.0.103: ICMP echo reply, id 2560, seq 1, length 64
16:02:45.231471 IP 10.0.0.103 > 192.168.200.2: ICMP echo request, id 2560, seq 2, length 64
16:02:45.231611 IP 192.168.200.2 > 10.0.0.103: ICMP echo reply, id 2560, seq 2, length 64
16:02:46.231707 IP 10.0.0.103 > 192.168.200.2: ICMP echo request, id 2560, seq 3, length 64
16:02:46.231774 IP 192.168.200.2 > 10.0.0.103: ICMP echo reply, id 2560, seq 3, length 64
宿主机B的容器server2访问宿主机B容器server1,同时在宿主机A上tcpdump抓包观察
/ # ping 192.168.100.2
PING 192.168.100.2 (192.168.100.2): 56 data bytes
64 bytes from 192.168.100.2: seq=0 ttl=62 time=0.720 ms
64 bytes from 192.168.100.2: seq=1 ttl=62 time=0.681 ms
64 bytes from 192.168.100.2: seq=2 ttl=62 time=0.928 ms
64 bytes from 192.168.100.2: seq=3 ttl=62 time=0.665 ms
64 bytes from 192.168.100.2: seq=4 ttl=62 time=0.772 ms
64 bytes from 192.168.100.2: seq=5 ttl=62 time=0.502 ms
64 bytes from 192.168.100.2: seq=6 ttl=62 time=0.623 ms
64 bytes from 192.168.100.2: seq=7 ttl=62 time=0.957 ms

#宿主机A的抓包可以观察到
root@ubuntu1804:~# tcpdump -i eth0 -nn icmp
tcpdump: verbose output suppressed, use -v or -vv for full protocol decode
listening on eth0, link-type EN10MB (Ethernet), capture size 262144 bytes
16:04:35.629529 IP 10.0.0.104 > 192.168.100.2: ICMP echo request, id 2048, seq 21, length 64
16:04:35.629642 IP 192.168.100.2 > 10.0.0.104: ICMP echo reply, id 2048, seq 21, length 64
16:04:36.630229 IP 10.0.0.104 > 192.168.100.2: ICMP echo request, id 2048, seq 22, length 64
16:04:36.630343 IP 192.168.100.2 > 10.0.0.104: ICMP echo reply, id 2048, seq 22, length 64
16:04:37.631336 IP 10.0.0.104 > 192.168.100.2: ICMP echo request, id 2048, seq 23, length 64
16:04:37.631455 IP 192.168.100.2 > 10.0.0.104: ICMP echo reply, id 2048, seq 23, length 64
4.8.4 创建第三个容器测试
#在第二个宿主机B上启动第一个提供web服务的nginx容器server3
#注意无需打开端口映射

root@ubuntu1804:~# docker run -d --name server3 nginx
root@ubuntu1804:~# docker exec -it server3 bash
root@29f831ffefb3:/# ifconfig
eth0: flags=4163<UP,BROADCAST,RUNNING,MULTICAST>  mtu 1500
        inet 192.168.200.3  netmask 255.255.255.0  broadcast 192.168.200.255
        ether 02:42:c0:a8:c8:03  txqueuelen 0  (Ethernet)
        RX packets 495  bytes 8702563 (8.2 MiB)
        RX errors 0  dropped 0  overruns 0  frame 0
        TX packets 429  bytes 24703 (24.1 KiB)
        TX errors 0  dropped 0 overruns 0  carrier 0  collisions 0

lo: flags=73<UP,LOOPBACK,RUNNING>  mtu 65536
        inet 127.0.0.1  netmask 255.0.0.0
        loop  txqueuelen 1000  (Local Loopback)
        RX packets 0  bytes 0 (0.0 B)
        RX errors 0  dropped 0  overruns 0  frame 0
        TX packets 0  bytes 0 (0.0 B)
        TX errors 0  dropped 0 overruns 0  carrier 0  collisions 0
root@29f831ffefb3:/# echo Test Page in app > /usr/share/nginx/html/index.html

#从server3容器观察访问日志,可以看到来自于第一个宿主机,而非server1容器
/ # ip a
1: lo: <LOOPBACK,UP,LOWER_UP> mtu 65536 qdisc noqueue state UNKNOWN qlen 1000
    link/loopback 00:00:00:00:00:00 brd 00:00:00:00:00:00
    inet 127.0.0.1/8 scope host lo
       valid_lft forever preferred_lft forever
4: eth0@if5: <BROADCAST,MULTICAST,UP,LOWER_UP,M-DOWN> mtu 1500 qdisc noqueue state UP
    link/ether 02:42:c0:a8:64:02 brd ff:ff:ff:ff:ff:ff
    inet 192.168.100.2/24 brd 192.168.100.255 scope global eth0
       valid_lft forever preferred_lft forever
/ # wget -qO - 192.168.200.3
Test Page in app

#用tcpdump抓包80/tcp的包,可以观察到以下内容
root@ubuntu1804:~# tcpdump -i eth0 -nn port 80
tcpdump: verbose output suppressed, use -v or -vv for full protocol decode
listening on eth0, link-type EN10MB (Ethernet), capture size 262144 bytes
16:22:14.011282 IP 10.0.0.103.59774 > 192.168.200.3.80: Flags [S], seq 273460542, win 64240, options [mss 1460,sackOK,TS val 102695324 ecr 0,nop,wscale 7], length 0
16:22:14.011542 IP 192.168.200.3.80 > 10.0.0.103.59774: Flags [S.], seq 1542369417, ack 273460543, win 65160, options [mss 1460,sackOK,TS val 185689245 ecr 102695324,nop,wscale 7], length 0
16:22:14.011844 IP 10.0.0.103.59774 > 192.168.200.3.80: Flags [.], ack 1, win 502, options [nop,nop,TS val 102695325 ecr 185689245], length 0
16:22:14.011895 IP 10.0.0.103.59774 > 192.168.200.3.80: Flags [P.], seq 1:77, ack 1, win 502, options [nop,nop,TS val 102695325 ecr 185689245], length 76: HTTP: GET / HTTP/1.1
16:22:14.011934 IP 192.168.200.3.80 > 10.0.0.103.59774: Flags [.], ack 77, win 509, options [nop,nop,TS val 185689245 ecr 102695325], length 0
16:22:14.012225 IP 192.168.200.3.80 > 10.0.0.103.59774: Flags [P.], seq 1:232, ack 77, win 509, options [nop,nop,TS val 185689246 ecr 102695325], length 231: HTTP: HTTP/1.1 200 OK
16:22:14.012276 IP 192.168.200.3.80 > 10.0.0.103.59774: Flags [FP.], seq 232:249, ack 77, win 509, options [nop,nop,TS val 185689246 ecr 102695325], length 17: HTTP
16:22:14.013072 IP 10.0.0.103.59774 > 192.168.200.3.80: Flags [.], ack 232, win 501, options [nop,nop,TS val 102695325 ecr 185689246], length 0
16:22:14.013118 IP 10.0.0.103.59774 > 192.168.200.3.80: Flags [F.], seq 77, ack 250, win 501, options [nop,nop,TS val 102695325 ecr 185689246], length 0
16:22:14.013155 IP 192.168.200.3.80 > 10.0.0.103.59774: Flags [.], ack 78, win 509, options [nop,nop,TS val 185689246 ecr 102695325], length 0
五. 单机编排之Docker Compose
5.1 安装Docker Compose
root@ubuntu1804-2:~# mv docker-compose-Linux-x86_64 /usr/bin/docker-compose
root@ubuntu1804-2:~# chmod +x /usr/bin/docker-compose
5.2 创建 docker compose文件
docker compose 文件可在任意目录,创建文件名为docker-compose.yml 配置文件,要注意前后的缩进
root@ubuntu1804-2:/data/docker-compose# vim docker-compose.yml
service-nginx-web:
  image: nginx
  container_name: web1
  expose:
    - 80
    - 443
  ports:
    - "80:80"
    - "443:443"
:wq

root@ubuntu1804-2:/data/docker-compose# docker-compose config -q
5.3 启动容器
注意: 必须要在docker compose文件所在的目录执行
root@ubuntu1804-2:/data/docker-compose# docker-compose up
Pulling service-nginx-web (nginx:)...
latest: Pulling from library/nginx
a076a628af6f: Pull complete
0732ab25fa22: Pull complete
d7f36f6fe38f: Pull complete
f72584a26f32: Pull complete
7125e4df9063: Pull complete
Digest: sha256:10b8cc432d56da8b61b070f4c7d2543a9ed17c2b23010b43af434fd40e2ca4aa
Status: Downloaded newer image for nginx:latest
Creating web1 ... done
Attaching to web1
web1                 | /docker-entrypoint.sh: /docker-entrypoint.d/ is not empty, will attempt to perform configuration
web1                 | /docker-entrypoint.sh: Looking for shell scripts in /docker-entrypoint.d/
web1                 | /docker-entrypoint.sh: Launching /docker-entrypoint.d/10-listen-on-ipv6-by-default.sh
web1                 | 10-listen-on-ipv6-by-default.sh: info: Getting the checksum of /etc/nginx/conf.d/default.conf
web1                 | 10-listen-on-ipv6-by-default.sh: info: Enabled listen on IPv6 in /etc/nginx/conf.d/default.conf
web1                 | /docker-entrypoint.sh: Launching /docker-entrypoint.d/20-envsubst-on-templates.sh
web1                 | /docker-entrypoint.sh: Configuration complete; ready for start up
5.4 验证docker compose执行结果
root@ubuntu1804-2:~# docker ps
CONTAINER ID        IMAGE               COMMAND                  CREATED             STATUS              PORTS                                      NAMES
f512c6171008        nginx               "/docker-entrypoint.…"   45 seconds ago      Up 44 seconds       0.0.0.0:80->80/tcp, 0.0.0.0:443->443/tcp   web1
root@ubuntu1804-2:~# docker images
REPOSITORY          TAG                 IMAGE ID            CREATED             SIZE
nginx               latest              f6d0b4767a6c        5 days ago          133MB


root@ubuntu1804-2:~# curl 10.0.0.101
<!DOCTYPE html>
<html>
<head>
<title>Welcome to nginx!</title>
<style>
    body {
        width: 35em;
        margin: 0 auto;
        font-family: Tahoma, Verdana, Arial, sans-serif;
    }
</style>
</head>
<body>
<h1>Welcome to nginx!</h1>
<p>If you see this page, the nginx web server is successfully installed and
working. Further configuration is required.</p>

<p>For online documentation and support please refer to
<a href="http://nginx.org/">nginx.org</a>.<br/>
Commercial support is available at
<a href="http://nginx.com/">nginx.com</a>.</p>

<p><em>Thank you for using nginx.</em></p>
</body>
</html>

root@ubuntu1804-2:~# cd /data/docker-compose/
root@ubuntu1804-2:/data/docker-compose# docker-compose ps
Name              Command               State                    Ports
----------------------------------------------------------------------------------------
web1   /docker-entrypoint.sh ngin ...   Up      0.0.0.0:443->443/tcp, 0.0.0.0:80->80/tcp
5.5 结束前台执行
root@ubuntu1804-2:/data/docker-compose# docker-compose up -d
Starting web1 ... done

root@ubuntu1804-2:/data/docker-compose# docker-compose down
Stopping web1 ... done
Removing web1 ... done

root@ubuntu1804-2:/data/docker-compose# docker-compose ps
Name   Command   State   Ports
------------------------------
root@ubuntu1804-2:/data/docker-compose# docker ps -a
CONTAINER ID        IMAGE               COMMAND             CREATED             STATUS              PORTS               NAMES
5.6 后台执行
root@ubuntu1804-2:/data/docker-compose# docker-compose up -d
Creating web1 ... done

root@ubuntu1804-2:/data/docker-compose# docker-compose ps
Name              Command               State                    Ports
----------------------------------------------------------------------------------------
web1   /docker-entrypoint.sh ngin ...   Up      0.0.0.0:443->443/tcp, 0.0.0.0:80->80/tcp
root@ubuntu1804-2:/data/docker-compose# docker-compose kill
Killing web1 ... done

root@ubuntu1804-2:/data/docker-compose# docker-compose ps
Name              Command                State     Ports
--------------------------------------------------------
web1   /docker-entrypoint.sh ngin ...   Exit 137
5.7 同时运行多个容器
root@ubuntu1804-2:/data/docker-compose# vim docker-compose.yml
service-nginx-web:
  image: nginx
  container_name: web1
  expose:
    - 80
    - 443
  ports:
    - "80:80"
    - "443:443"

service-tomcat:
  image: tomcat
  ports:
- "8080:8080"
:wq

root@ubuntu1804-2:/data/docker-compose# docker-compose config -q

root@ubuntu1804-2:/data/docker-compose# docker-compose down
Removing web1 ... done

root@ubuntu1804-2:/data/docker-compose# docker-compose up -d
Pulling service-tomcat (tomcat:)...
latest: Pulling from library/tomcat
b9a857cbf04d: Pull complete
d557ee20540b: Pull complete
3b9ca4f00c2e: Pull complete
667fd949ed93: Pull complete
661d3b55f657: Pull complete
511ef4338a0b: Pull complete
a56db448fefe: Pull complete
00612a99c7dc: Pull complete
326f9601c512: Pull complete
c547db74f1e1: Pull complete
Digest: sha256:94cc18203335e400dbafcd0633f33c53663b1c1012a13bcad58cced9cd9d1305
Status: Downloaded newer image for tomcat:latest
Creating docker-compose_service-tomcat_1 ... done
Creating web1                            ... done

root@ubuntu1804-2:/data/docker-compose# docker-compose ps
             Name                            Command               State                    Ports
-------------------------------------------------------------------------------------------------------------------
docker-compose_service-tomcat_1   catalina.sh run                  Up      0.0.0.0:8080->8080/tcp
web1                              /docker-entrypoint.sh ngin ...   Up      0.0.0.0:443->443/tcp, 0.0.0.0:80->80/tcp


# pwd
/usr/local/tomcat
# ls
BUILDING.txt	 LICENSE  README.md	 RUNNING.txt  conf  logs	    temp     webapps.dist
CONTRIBUTING.md  NOTICE   RELEASE-NOTES  bin	      lib   native-jni-lib  webapps  work
# ls -l
total 156
-rw-r--r-- 1 root root 18982 Dec  3 11:48 BUILDING.txt
-rw-r--r-- 1 root root  5409 Dec  3 11:48 CONTRIBUTING.md
-rw-r--r-- 1 root root 57092 Dec  3 11:48 LICENSE
-rw-r--r-- 1 root root  2333 Dec  3 11:48 NOTICE
-rw-r--r-- 1 root root  3257 Dec  3 11:48 README.md
-rw-r--r-- 1 root root  6898 Dec  3 11:48 RELEASE-NOTES
-rw-r--r-- 1 root root 16507 Dec  3 11:48 RUNNING.txt
drwxr-xr-x 2 root root  4096 Jan 13 08:25 bin
drwxr-xr-x 1 root root  4096 Jan 17 15:36 conf
drwxr-xr-x 2 root root  4096 Jan 13 08:25 lib
drwxrwxrwx 1 root root  4096 Jan 17 15:36 logs
drwxr-xr-x 2 root root  4096 Jan 13 08:25 native-jni-lib
drwxrwxrwx 2 root root  4096 Jan 13 08:25 temp
drwxr-xr-x 2 root root  4096 Jan 13 08:25 webapps
drwxr-xr-x 7 root root  4096 Dec  3 11:45 webapps.dist
drwxrwxrwx 2 root root  4096 Dec  3 11:43 work
# ls webapps
# ls webapps.dist
ROOT  docs  examples  host-manager  manager
# mv webapps.dist/* webapps/
5.8 指定同时启动容器的数量
root@ubuntu1804-2:/data/docker-compose# docker-compose down
Stopping docker-compose_service-tomcat_1 ... done
Stopping web1                            ... done
Removing docker-compose_service-tomcat_1 ... done
Removing web1                            ... done


root@ubuntu1804-2:/data/docker-compose# vim docker-compose.yml
service-nginx-web:
  image: nginx
#  container_name: web1
  expose:
    - 80
    - 443
#  ports:
#    - "80:80"
#    - "443:443"

service-tomcat:
  image: tomcat
#  ports:
#    - "8080:8080"
:wq


root@ubuntu1804-2:/data/docker-compose# docker-compose up -d --scale service-nginx-web=2 --scale service-tomcat=3
Creating docker-compose_service-tomcat_1    ... done
Creating docker-compose_service-tomcat_2    ... done
Creating docker-compose_service-tomcat_3    ... done
Creating docker-compose_service-nginx-web_1 ... done
Creating docker-compose_service-nginx-web_2 ... done


root@ubuntu1804-2:/data/docker-compose# docker-compose ps
               Name                             Command               State        Ports
---------------------------------------------------------------------------------------------
docker-compose_service-nginx-web_1   /docker-entrypoint.sh ngin ...   Up      443/tcp, 80/tcp
docker-compose_service-nginx-web_2   /docker-entrypoint.sh ngin ...   Up      443/tcp, 80/tcp
docker-compose_service-tomcat_1      catalina.sh run                  Up      8080/tcp
docker-compose_service-tomcat_2      catalina.sh run                  Up      8080/tcp
docker-compose_service-tomcat_3      catalina.sh run                  Up      8080/tcp

root@ubuntu1804-2:/data/docker-compose# docker-compose  scale service-nginx-web=3
WARNING: The scale command is deprecated. Use the up command with the --scale flag instead.
Creating docker-compose_service-nginx-web_3 ... done
root@ubuntu1804-2:/data/docker-compose# docker-compose ps
               Name                             Command               State        Ports
---------------------------------------------------------------------------------------------
docker-compose_service-nginx-web_1   /docker-entrypoint.sh ngin ...   Up      443/tcp, 80/tcp
docker-compose_service-nginx-web_2   /docker-entrypoint.sh ngin ...   Up      443/tcp, 80/tcp
docker-compose_service-nginx-web_3   /docker-entrypoint.sh ngin ...   Up      443/tcp, 80/tcp
docker-compose_service-tomcat_1      catalina.sh run                  Up      8080/tcp
docker-compose_service-tomcat_2      catalina.sh run                  Up      8080/tcp
docker-compose_service-tomcat_3      catalina.sh run                  Up      8080/tcp

root@ubuntu1804-2:/data/docker-compose# docker-compose  scale service-nginx-web=1
WARNING: The scale command is deprecated. Use the up command with the --scale flag instead.
Stopping and removing docker-compose_service-nginx-web_2 ... done
Stopping and removing docker-compose_service-nginx-web_3 ... done
root@ubuntu1804-2:/data/docker-compose# docker-compose ps
               Name                             Command               State        Ports
---------------------------------------------------------------------------------------------
docker-compose_service-nginx-web_1   /docker-entrypoint.sh ngin ...   Up      443/tcp, 80/tcp
docker-compose_service-tomcat_1      catalina.sh run                  Up      8080/tcp
docker-compose_service-tomcat_2      catalina.sh run                  Up      8080/tcp
docker-compose_service-tomcat_3      catalina.sh run                  Up      8080/tcp
六.Docker之分布式仓库 Harbor
6.1 安装Harbor
6.1.1安装docker
#这里参考“一.Docker一键安装脚本”
6.1.2先安装docker compose
#直接从github下载安装对应版本
https://github.com/docker/compose/releases  下载1.27.4
root@ubuntu1804:~# mv docker-compose-Linux-x86_64-1.27.4 /usr/bin/docker-compose
root@ubuntu1804:~# chmod +x /usr/bin/docker-compose
6.1.3下载Harbor安装包并解压缩
#以下使用 harbor 稳定版本1.10.3 安装包
https://github.com/goharbor/harbor/releases/tag/v1.10.3
root@ubuntu1804:~# ll -h  harbor-offline-installer-v1.10.3.tgz
-rw-r--r-- 1 root root 637M Jan 19 02:15 harbor-offline-installer-v1.10.3.tgz

#解压缩离线包
root@ubuntu1804:~# mkdir /apps
root@ubuntu1804:~# tar xvf harbor-offline-installer-v1.10.3.tgz -C /apps/
6.1.4 编辑配置文件 harbor.yml
root@ubuntu1804:~# vim /apps/harbor/harbor.yml
hostname: 10.0.0.101	#指向当前主机IP 或 FQDN
http:
  port: 80

#注释掉下面几行
#https:
#  port: 443
#  certificate: /your/certificate/path
#  private_key: /your/private/key/path

harbor_admin_password: 123456 	#指定harbor登录用户admin的密码,默认用户/密码:admin/Harbor12345
:wq
6.1.5 运行 harbor 安装脚本
#先安装python
root@ubuntu1804:~# apt -y install python

root@ubuntu1804:~# /apps/harbor/install.sh

[Step 0]: checking if docker is installed ...

Note: docker version: 19.03.14

[Step 1]: checking docker-compose is installed ...

Note: docker-compose version: 1.27.4

[Step 2]: loading Harbor images ...
872a1466e826: Loading layer [==================================================>]   34.5MB/34.5MB
81515ba8952e: Loading layer [==================================================>]  12.21MB/12.21MB
dbec04274cdf: Loading layer [==================================================>]  42.51MB/42.51MB
5fd05def42e8: Loading layer [==================================================>]  5.632kB/5.632kB
7d236f873ba5: Loading layer [==================================================>]  40.45kB/40.45kB
902c21cd8149: Loading layer [==================================================>]  42.51MB/42.51MB
904aafc13829: Loading layer [==================================================>]   2.56kB/2.56kB
Loaded image: goharbor/harbor-core:v1.10.3
574054caad35: Loading layer [==================================================>]  63.57MB/63.57MB
f4887b65ee9e: Loading layer [==================================================>]  62.92MB/62.92MB
1cd3c6c77421: Loading layer [==================================================>]  5.632kB/5.632kB
828eb9c46821: Loading layer [==================================================>]   2.56kB/2.56kB
024b641f6608: Loading layer [==================================================>]   2.56kB/2.56kB
178e8a522254: Loading layer [==================================================>]   2.56kB/2.56kB
b46172f21072: Loading layer [==================================================>]   2.56kB/2.56kB
7a881d6e69d7: Loading layer [==================================================>]  10.75kB/10.75kB
Loaded image: goharbor/harbor-db:v1.10.3
be67e6ec1f3f: Loading layer [==================================================>]  115.3MB/115.3MB
df017829b519: Loading layer [==================================================>]  12.15MB/12.15MB
d46e6321cc90: Loading layer [==================================================>]  3.072kB/3.072kB
30d140a69af1: Loading layer [==================================================>]  49.15kB/49.15kB
037027730945: Loading layer [==================================================>]  3.584kB/3.584kB
f06246392ae1: Loading layer [==================================================>]  13.03MB/13.03MB
Loaded image: goharbor/clair-photon:v1.10.3
17b695b39088: Loading layer [==================================================>]  8.441MB/8.441MB
e0f81c79b7bf: Loading layer [==================================================>]  3.584kB/3.584kB
3f2e72aef8f0: Loading layer [==================================================>]  20.94MB/20.94MB
152907e4ff4e: Loading layer [==================================================>]  3.072kB/3.072kB
f297773e04e0: Loading layer [==================================================>]  8.662MB/8.662MB
ca47c57e00d8: Loading layer [==================================================>]  30.42MB/30.42MB
Loaded image: goharbor/harbor-registryctl:v1.10.3
840eaa67357d: Loading layer [==================================================>]  85.82MB/85.82MB
6cee2ca3272c: Loading layer [==================================================>]  3.072kB/3.072kB
f88b6ac4df7e: Loading layer [==================================================>]   59.9kB/59.9kB
e41010411a8f: Loading layer [==================================================>]  61.95kB/61.95kB
Loaded image: goharbor/redis-photon:v1.10.3
334cd059f255: Loading layer [==================================================>]  10.28MB/10.28MB
Loaded image: goharbor/nginx-photon:v1.10.3
81b7a18e70eb: Loading layer [==================================================>]  8.441MB/8.441MB
fab9cbd8f460: Loading layer [==================================================>]   9.71MB/9.71MB
4459b29c0216: Loading layer [==================================================>]   9.71MB/9.71MB
Loaded image: goharbor/clair-adapter-photon:v1.10.3
0cad3c46a14c: Loading layer [==================================================>]  49.89MB/49.89MB
db307486b52a: Loading layer [==================================================>]  3.584kB/3.584kB
8580019ee9d4: Loading layer [==================================================>]  3.072kB/3.072kB
2aefa35f8123: Loading layer [==================================================>]   2.56kB/2.56kB
8d3dee43ec19: Loading layer [==================================================>]  3.072kB/3.072kB
afac33136fbf: Loading layer [==================================================>]  3.584kB/3.584kB
3c8e146c272b: Loading layer [==================================================>]  12.29kB/12.29kB
c391cbe4d1c4: Loading layer [==================================================>]  5.632kB/5.632kB
Loaded image: goharbor/harbor-log:v1.10.3
a3dd38bf9f54: Loading layer [==================================================>]  8.435MB/8.435MB
13b573c4b6da: Loading layer [==================================================>]  6.239MB/6.239MB
d31d8c814ae1: Loading layer [==================================================>]  16.04MB/16.04MB
651a46ac4457: Loading layer [==================================================>]  28.25MB/28.25MB
203b102bba36: Loading layer [==================================================>]  22.02kB/22.02kB
2c5c31e55a6f: Loading layer [==================================================>]  50.52MB/50.52MB
Loaded image: goharbor/notary-server-photon:v1.10.3
a96d2398fdde: Loading layer [==================================================>]  14.61MB/14.61MB
80e46ca8065d: Loading layer [==================================================>]  28.25MB/28.25MB
1fc2349f18b8: Loading layer [==================================================>]  22.02kB/22.02kB
7964d1f21ecd: Loading layer [==================================================>]  49.09MB/49.09MB
Loaded image: goharbor/notary-signer-photon:v1.10.3
1128dae7cfa7: Loading layer [==================================================>]  332.6MB/332.6MB
46f863385c1b: Loading layer [==================================================>]  135.2kB/135.2kB
Loaded image: goharbor/harbor-migrator:v1.10.3
27120a5a4781: Loading layer [==================================================>]   8.44MB/8.44MB
5909d8619d52: Loading layer [==================================================>]   67.5MB/67.5MB
31df3968e0a6: Loading layer [==================================================>]  3.072kB/3.072kB
2d5e5074dea9: Loading layer [==================================================>]  3.584kB/3.584kB
943105067c90: Loading layer [==================================================>]  68.33MB/68.33MB
Loaded image: goharbor/chartmuseum-photon:v1.10.3
fd97d48c06ea: Loading layer [==================================================>]  81.45MB/81.45MB
d49da9a1a2f7: Loading layer [==================================================>]  48.48MB/48.48MB
d14c35a5c380: Loading layer [==================================================>]   2.56kB/2.56kB
f3fed2ad3ebb: Loading layer [==================================================>]  1.536kB/1.536kB
2fc4711764a8: Loading layer [==================================================>]  157.2kB/157.2kB
92e5c909c250: Loading layer [==================================================>]   2.93MB/2.93MB
Loaded image: goharbor/prepare:v1.10.3
ad577e8cf701: Loading layer [==================================================>]  10.28MB/10.28MB
d7e286cf7248: Loading layer [==================================================>]  7.698MB/7.698MB
243b0572913b: Loading layer [==================================================>]  223.2kB/223.2kB
488097f9bc13: Loading layer [==================================================>]  195.1kB/195.1kB
b239a4076619: Loading layer [==================================================>]  15.36kB/15.36kB
6a322e51a0d3: Loading layer [==================================================>]  3.584kB/3.584kB
Loaded image: goharbor/harbor-portal:v1.10.3
d696172c1900: Loading layer [==================================================>]  12.21MB/12.21MB
8cd17afb16ad: Loading layer [==================================================>]  49.37MB/49.37MB
Loaded image: goharbor/harbor-jobservice:v1.10.3
0c5a551b5205: Loading layer [==================================================>]  8.441MB/8.441MB
2cb1c65cca19: Loading layer [==================================================>]  3.584kB/3.584kB
1ffb459ff5de: Loading layer [==================================================>]  3.072kB/3.072kB
9b83b2a51e11: Loading layer [==================================================>]  20.94MB/20.94MB
7a1d64b0bccd: Loading layer [==================================================>]  21.76MB/21.76MB
Loaded image: goharbor/registry-photon:v1.10.3


[Step 3]: preparing environment ...

[Step 4]: preparing harbor configs ...
prepare base dir is set to /apps/harbor
WARNING:root:WARNING: HTTP protocol is insecure. Harbor will deprecate http protocol in the future. Please make sure to upgrade to https
Generated configuration file: /config/log/logrotate.conf
Generated configuration file: /config/log/rsyslog_docker.conf
Generated configuration file: /config/nginx/nginx.conf
Generated configuration file: /config/core/env
Generated configuration file: /config/core/app.conf
Generated configuration file: /config/registry/config.yml
Generated configuration file: /config/registryctl/env
Generated configuration file: /config/db/env
Generated configuration file: /config/jobservice/env
Generated configuration file: /config/jobservice/config.yml
Generated and saved secret to file: /secret/keys/secretkey
Generated certificate, key file: /secret/core/private_key.pem, cert file: /secret/registry/root.crt
Generated configuration file: /compose_location/docker-compose.yml
Clean up the input dir


[Step 5]: starting Harbor ...
Creating network "harbor_harbor" with the default driver
Creating harbor-log ... done
Creating registry      ... done
Creating harbor-portal ... done
Creating registryctl   ... done
Creating harbor-db     ... done
Creating redis         ... done
Creating harbor-core   ... done
Creating harbor-jobservice ... done
Creating nginx             ... done
✔ ----Harbor has been installed and started successfully.----

#安装harbor后会自动开启很多相关容器
root@ubuntu1804:~# docker ps
CONTAINER ID        IMAGE                                 COMMAND                  CREATED              STATUS                        PORTS                       NAMES
d9032d3c60bc        goharbor/nginx-photon:v1.10.3         "nginx -g 'daemon of…"   About a minute ago   Up About a minute (healthy)   0.0.0.0:80->8080/tcp        nginx
e32ca3e4afba        goharbor/harbor-jobservice:v1.10.3    "/harbor/harbor_jobs…"   About a minute ago   Up About a minute (healthy)                               harbor-jobservice
a80e23a889b5        goharbor/harbor-core:v1.10.3          "/harbor/harbor_core"    About a minute ago   Up About a minute (healthy)                               harbor-core
a4bb2cf5fbf4        goharbor/redis-photon:v1.10.3         "redis-server /etc/r…"   About a minute ago   Up About a minute (healthy)   6379/tcp                    redis
ab8787d726bc        goharbor/registry-photon:v1.10.3      "/home/harbor/entryp…"   About a minute ago   Up About a minute (healthy)   5000/tcp                    registry
14cf5b2b5775        goharbor/harbor-db:v1.10.3            "/docker-entrypoint.…"   About a minute ago   Up About a minute (healthy)   5432/tcp                    harbor-db
4e27cffc20cf        goharbor/harbor-portal:v1.10.3        "nginx -g 'daemon of…"   About a minute ago   Up About a minute (healthy)   8080/tcp                    harbor-portal
903cdf0c597c        goharbor/harbor-registryctl:v1.10.3   "/home/harbor/start.…"   About a minute ago   Up About a minute (healthy)                               registryctl
cdaea78fa263        goharbor/harbor-log:v1.10.3           "/bin/sh -c /usr/loc…"   About a minute ago   Up About a minute (healthy)   127.0.0.1:1514->10514/tcp   harbor-log
6.1.6 实现开机自动启动 harbor
root@ubuntu1804:~# vim /lib/systemd/system/harbor.service
[Unit]
Description=Harbor
After=docker.service systemd-networkd.service systemd-resolved.service
Requires=docker.service
Documentation=http://github.com/vmware/harbor

[Service]
Type=simple
Restart=on-failure
RestartSec=5
ExecStart=/usr/bin/docker-compose -f /apps/harbor/docker-compose.yml up
ExecStop=/usr/bin/docker-compose -f /apps/harbor/docker-compose.yml down

[Install]
WantedBy=multi-user.target
:wq

root@ubuntu1804:~# systemctl daemon-reload ;systemctl restart docker
6.1.7 登录 harbor 主机网站
用浏览器访问: http://10.0.0.101
用户名: admin
密码: 即前面harbor.yml中指定的密码
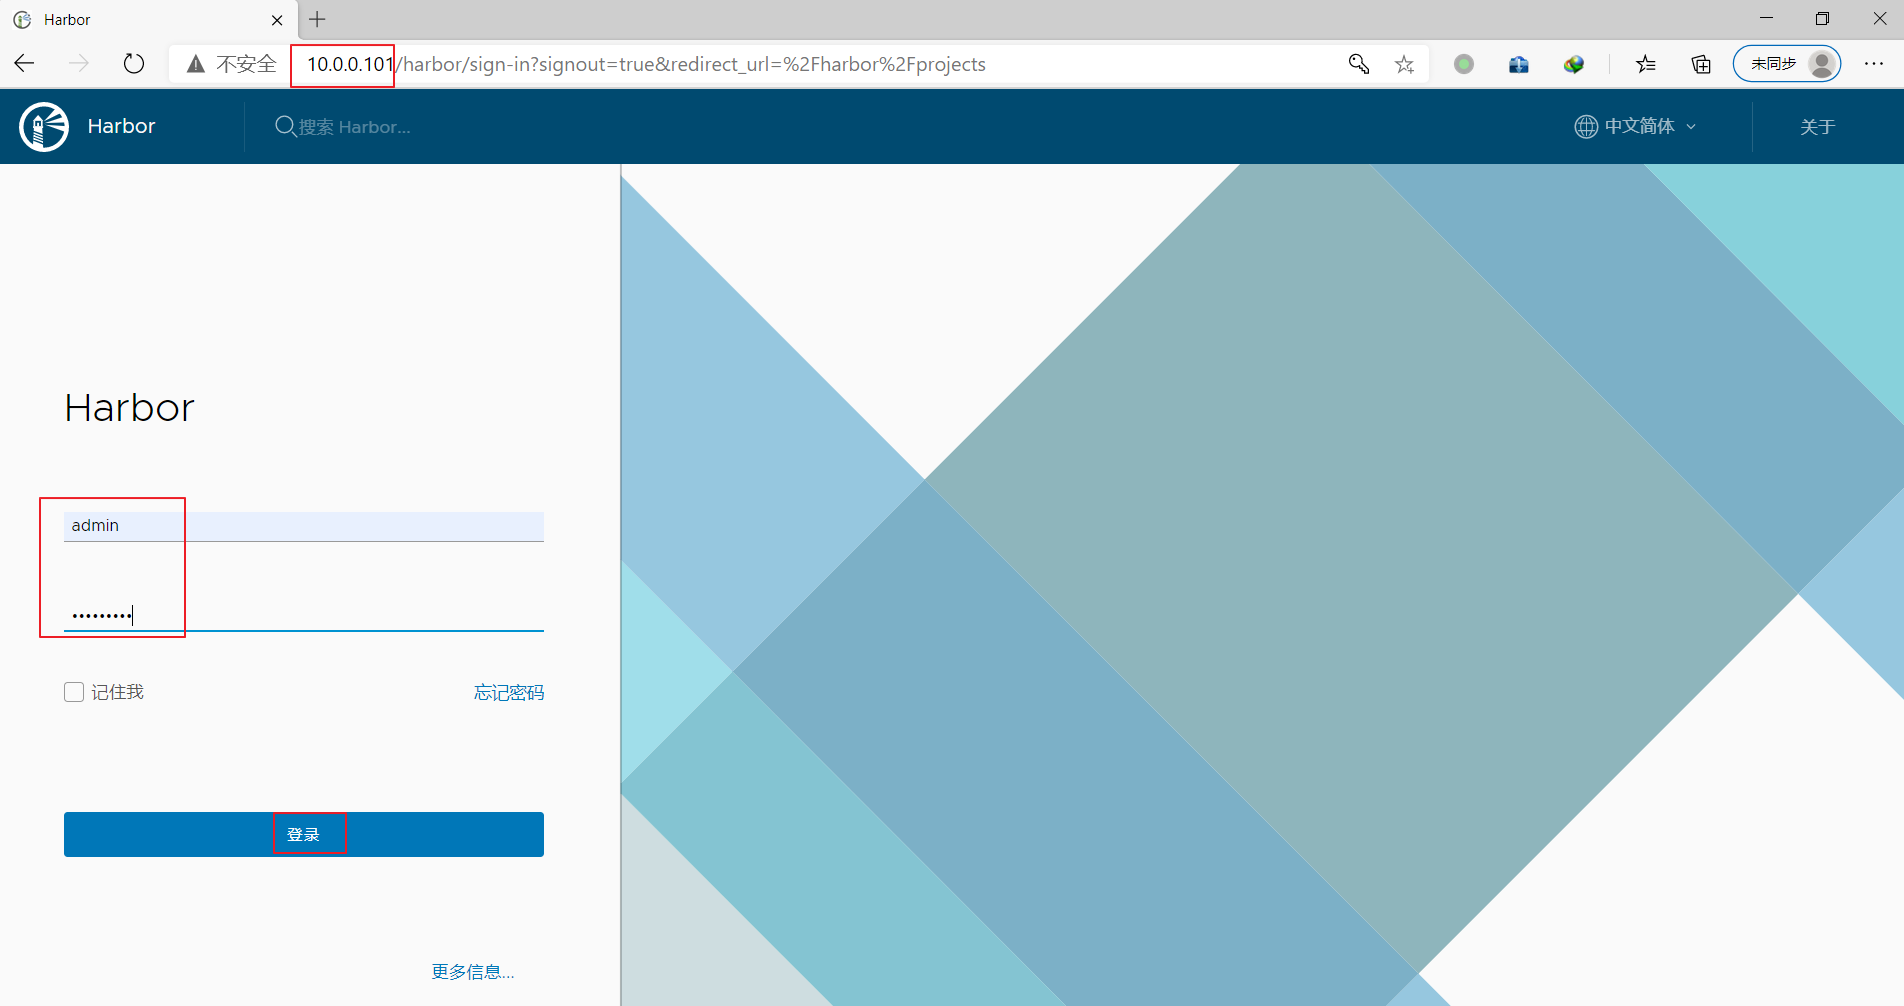

6.1.8 一键安装Harbor脚本
root@uguntu1804-3:~# cat install_harbor1.10.3_for_ubuntu1804.sh
#!/bin/bash
#
#******************************************************************************
#Author:            zhanghui
#QQ:                19661891
#Date:              2021-01-18
#FileName:          install_harbor1.10.3_for_ubuntu1804.sh
#URL:               www.neteagles.cn
#Description:       The test script
#Copyright (C):     2021 All rights reserved
#******************************************************************************
SRC=/usr/local/src
COLOR="echo -e \\033[1;31m"
END="\033[m"
IPADDR=`hostname -I|awk '{print $1}'`
HARBOR_ADMIN_PASSWORD=123456
DOCKER_COMPOSE_VERSION=1.27.4
HARBOR_VERSION=1.10.3
HARBOR_INSTALL_DIR=/apps

os(){
    OS_CODENAME=`lsb_release -cs`
}

install_docker(){
    dpkg -s docker-ce &> /dev/null && ${COLOR}"Docker已安装,退出"${END} && exit
    DOCKER_VERSION="5:19.03.15~3-0~ubuntu-${OS_CODENAME}"

    ${COLOR}"开始安装DOCKER依赖包"${END}
    apt update &> /dev/null
    apt-get -y install apt-transport-https ca-certificates curl software-properties-common &> /dev/null
    curl -fsSL https://mirrors.aliyun.com/docker-ce/linux/ubuntu/gpg | sudo apt-key add - &> /dev/null
    add-apt-repository "deb [arch=amd64] https://mirrors.aliyun.com/docker-ce/linux/ubuntu ${OS_CODENAME} stable" &> /dev/null
    apt update &> /dev/null

    ${COLOR}"Docker有以下版本"${END}
    apt-cache madison docker-ce
    ${COLOR}"10秒后即将安装: docker-"${DOCKER_VERSION}" 版本....."${END}
    ${COLOR}"如果想安装其它Docker版本,请按ctrl+c键退出,修改版本再执行"${END}
    sleep 10

    ${COLOR}"开始安装DOCKER"${END}
    apt -y install docker-ce=${DOCKER_VERSION} docker-ce-cli=${DOCKER_VERSION} &> /dev/null

    mkdir -p /etc/docker
    tee /etc/docker/daemon.json <<-'EOF'
{
    "registry-mirrors": ["https://hzw5xiv7.mirror.aliyuncs.com"]
}
EOF

    systemctl daemon-reload
    systemctl enable --now docker &> /dev/null
    docker version && ${COLOR}"Docker 安装成功"${END} || ${COLOR}"Docker 安装失败"${END}
}

install_docker_compose(){
    ${COLOR}"开始安装 Docker compose....."${END}
    sleep 1
    mv ${SRC}/docker-compose-Linux-x86_64-${DOCKER_COMPOSE_VERSION} /usr/bin/docker-compose
    chmod +x /usr/bin/docker-compose
    docker-compose --version &&  ${COLOR}"Docker Compose 安装完成"${END} || ${COLOR}"Docker compose 安装失败"${END}
}

install_harbor(){
    ${COLOR}"开始安装 Harbor....."${END}
    sleep 1
    [ -d ${HARBOR_INSTALL_DIR} ] || mkdir ${HARBOR_INSTALL_DIR}
    tar -xvf ${SRC}/harbor-offline-installer-v${HARBOR_VERSION}.tgz -C ${HARBOR_INSTALL_DIR}/
    sed -i.bak -e 's/^hostname: .*/hostname: '''$IPADDR'''/' -e 's/^harbor_admin_password: .*/harbor_admin_password: '''$HARBOR_ADMIN_PASSWORD'''/' -e 's/^https:/#https:/' -e 's/  port: 443/  #port: 443/' -e 's@  certificate: /your/certificate/path@  #certificate: /your/certificate/path@' -e 's@  private_key: /your/private/key/path@  #private_key: /your/private/key/path@' ${HARBOR_INSTALL_DIR}/harbor/harbor.yml
    apt -y install python &> /dev/null
    ${HARBOR_INSTALL_DIR}/harbor/install.sh && ${COLOR}"Harbor 安装完成"${END} ||  ${COLOR}"Harbor 安装失败"${END}
}

harbor_service (){
    cat > /lib/systemd/system/harbor.service <<-EOF
[Unit]
Description=Harbor
After=docker.service systemd-networkd.service systemd-resolved.service
Requires=docker.service
Documentation=http://github.com/vmware/harbor

[Service]
Type=simple
Restart=on-failure
RestartSec=5
ExecStart=/usr/bin/docker-compose -f /apps/harbor/docker-compose.yml up
ExecStop=/usr/bin/docker-compose -f /apps/harbor/docker-compose.yml down

[Install]
WantedBy=multi-user.target
EOF

    systemctl daemon-reload
    systemctl enable harbor &>/dev/null && ${COLOR}"Harbor已配置为开机自动启动"${END}
}

main(){
    os
    dpkg -s docker-ce &> /dev/null && ${COLOR}"Docker已安装"${END} || install_docker
    docker-compose --version &> /dev/null && ${COLOR}"Docker Compose已安装"${END} || install_docker_compose
    install_harbor
    harbor_service
}

main
6.2 使用 harbor
6.2.1 建立项目
harbor上必须先建立项目,才能上传镜像

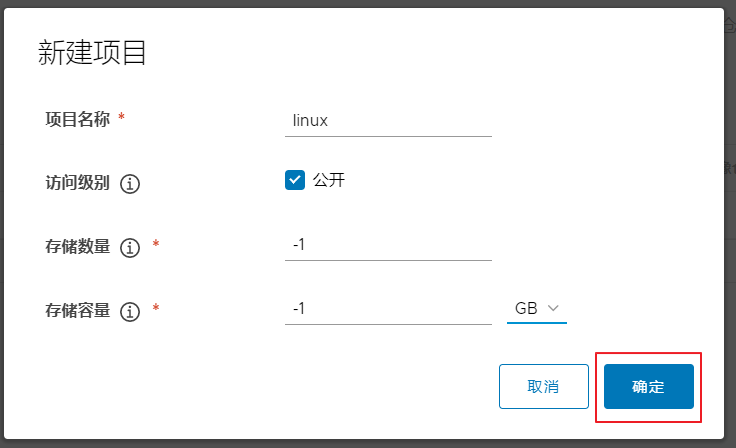

6.2.2 在客户端主机上命令行登录 harbor
root@uguntu1804:~# vim /lib/systemd/system/docker.service
ExecStart=/usr/bin/dockerd -H fd:// --containerd=/run/containerd/containerd.sock --insecure-registry 10.0.0.101 --insecure-registry 10.0.0.102
:wq

root@uguntu1804:~# systemctl daemon-reload ;systemctl restart docker

root@ubuntu1804:~# docker login 10.0.0.101
Username: admin
Password:
WARNING! Your password will be stored unencrypted in /root/.docker/config.json.
Configure a credential helper to remove this warning. See
https://docs.docker.com/engine/reference/commandline/login/#credentials-store

Login Succeeded


#查看进程是否添加上面设置
root@ubuntu1804:~# ps aux |grep dockerd
root      12419  0.1  4.1 904932 83308 ?        Ssl  16:19   0:00 /usr/bin/dockerd -H fd:// --containerd=/run/containerd/containerd.sock --insecure-registry 10.0.0.101 --insecure-registry 10.0.0.102
root      12604  0.0  0.0  14428  1076 pts/1    S+   16:21   0:00 grep --color=auto dockerd


root@ubuntu1804:~# cat .docker/config.json
{
	"auths": {
		"10.0.0.101": {
			"auth": "YWRtaW46YTEyMzQ1NjdC"
		}
	},
	"HttpHeaders": {
		"User-Agent": "Docker-Client/19.03.14 (linux)"
	}
}root@ubuntu1804:~#
6.2.3 给本地镜像打标签并上传到harbor
root@ubuntu1804:~# docker pull alpine
Using default tag: latest
latest: Pulling from library/alpine
596ba82af5aa: Pull complete
Digest: sha256:d9a7354e3845ea8466bb00b22224d9116b183e594527fb5b6c3d30bc01a20378
Status: Downloaded newer image for alpine:latest
docker.io/library/alpine:latest

root@ubuntu1804:~# docker tag alpine:latest 10.0.0.101/linux/alpine:v1.0
root@ubuntu1804:~# docker images
REPOSITORY                TAG                 IMAGE ID            CREATED             SIZE
10.0.0.101/linux/alpine   v1.0                7731472c3f2a        4 days ago          5.61MB
alpine                    latest              7731472c3f2a        4 days ago          5.61MB

root@ubuntu1804:~# docker push 10.0.0.101/linux/alpine:v1.0
The push refers to repository [10.0.0.101/linux/alpine]
c04d1437198b: Pushed
v1.0: digest: sha256:d0710affa17fad5f466a70159cc458227bd25d4afb39514ef662ead3e6c99515 size: 528
访问harbor网站验证上传镜像成功
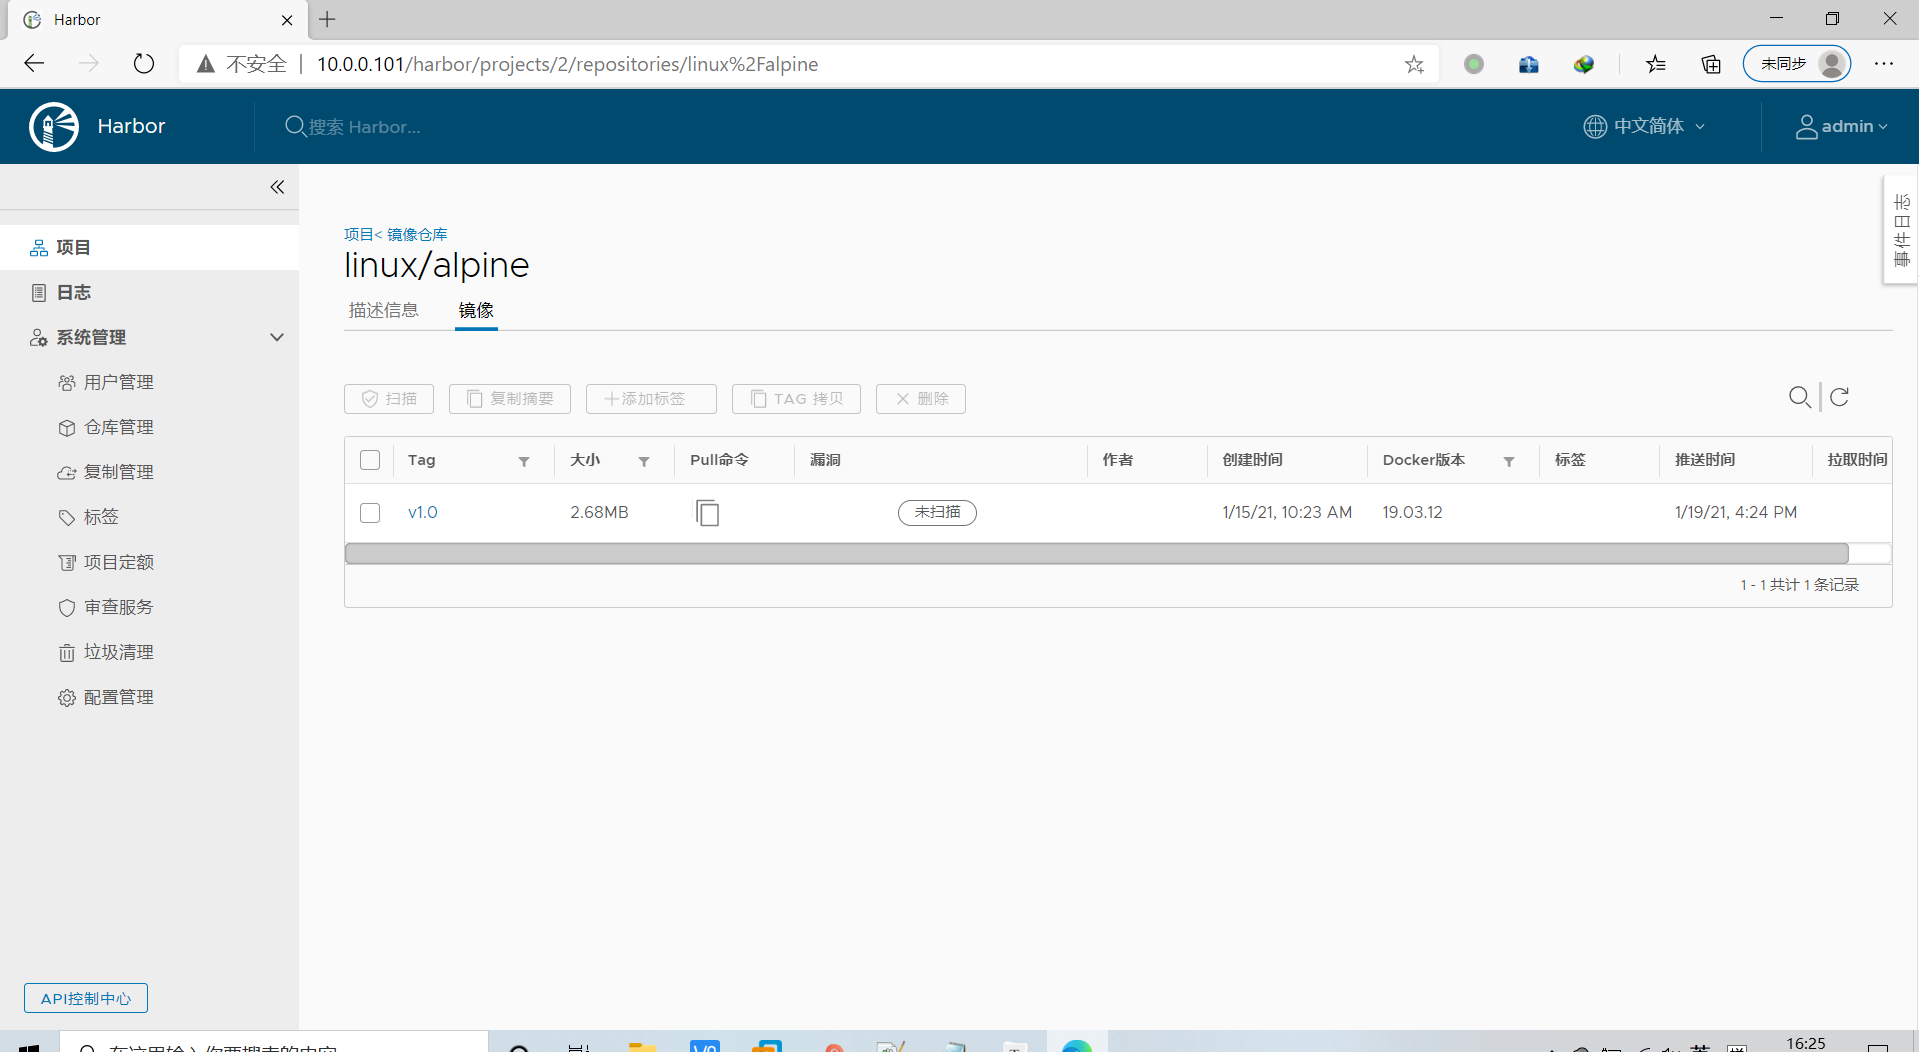
可以看到操作的日志记录
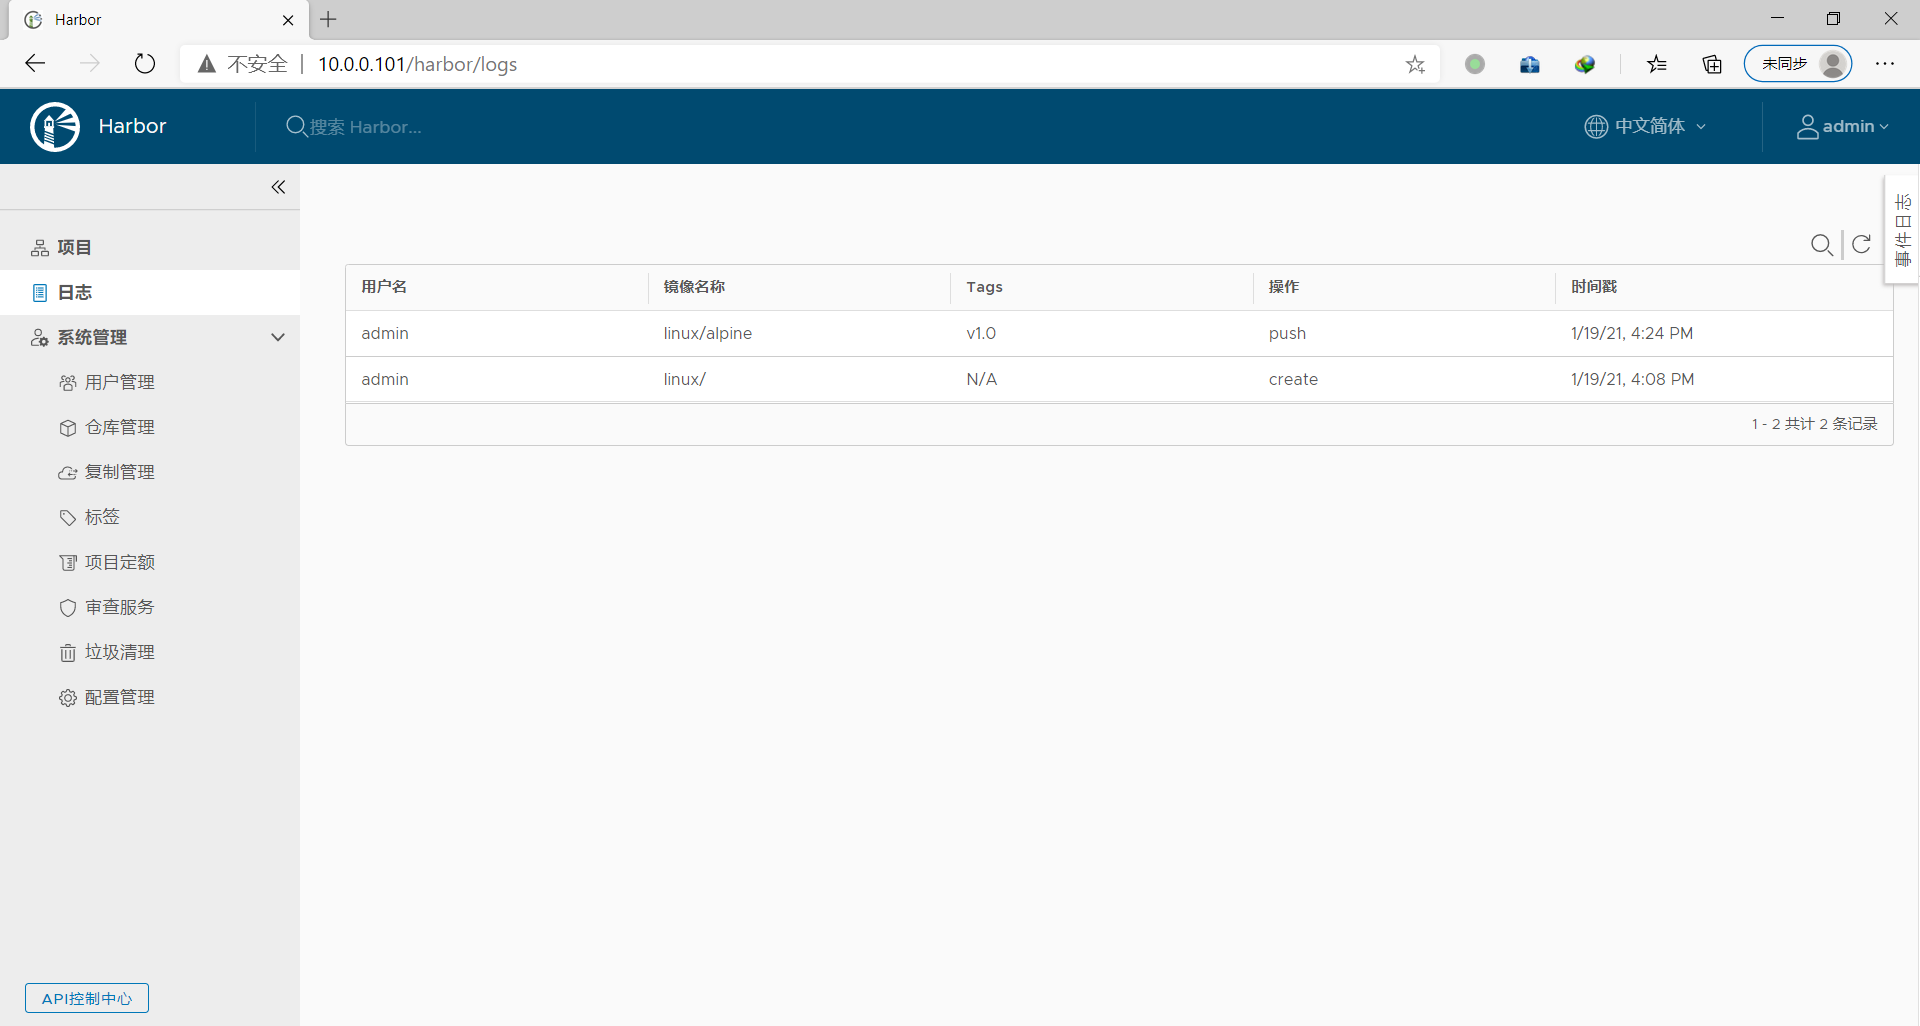
6.2.4 下载harbor的镜像
在10.0.0.7的CentOS 7 的主机上无需登录,即可下载镜像
下载前必须修改docker的service 文件,加入harbor服务器的地址才可以下载
[root@centos7 ~]# docker pull 10.0.0.101/linux/alpine:v1.0
Error response from daemon: Get https://10.0.0.101/v2/: dial tcp 10.0.0.101:443: connect: connection refused
[root@centos7 ~]# vim /lib/systemd/system/docker.service
ExecStart=/usr/bin/dockerd -H fd:// --containerd=/run/containerd/containerd.sock --insecure-registry 10.0.0.101 --insecure-registr
y 10.0.0.102
:wq
[root@centos7 ~]# systemctl daemon-reload ;systemctl restart docker
[root@centos7 ~]# docker images
REPOSITORY          TAG                 IMAGE ID            CREATED             SIZE
[root@centos7 ~]# docker pull 10.0.0.101/linux/alpine:v1.0
v1.0: Pulling from linux/alpine
596ba82af5aa: Pull complete
Digest: sha256:d0710affa17fad5f466a70159cc458227bd25d4afb39514ef662ead3e6c99515
Status: Downloaded newer image for 10.0.0.101/linux/alpine:v1.0
10.0.0.101/linux/alpine:v1.0
[root@centos7 ~]# docker images
REPOSITORY                TAG                 IMAGE ID            CREATED             SIZE
10.0.0.101/linux/alpine   v1.0                7731472c3f2a        4 days ago          5.61MB
6.2.5 修改 harbor 配置
后期如果修改harbor配置,比如: 修改IP地址等,可执行以下步骤生效
root@ubuntu1804-2:/apps/harbor# docker-compose stop
Stopping nginx             ... done
Stopping harbor-jobservice ... done
Stopping harbor-core       ... done
Stopping registry          ... done
Stopping harbor-portal     ... done
Stopping redis             ... done
Stopping harbor-db         ... done
Stopping registryctl       ... done
Stopping harbor-log        ... done

#看不到容器了
root@ubuntu1804-2:/apps/harbor# docker ps
CONTAINER ID        IMAGE               COMMAND             CREATED             STATUS              PORTS               NAMES
root@ubuntu1804-2:/apps/harbor# docker ps -a
CONTAINER ID        IMAGE               COMMAND             CREATED             STATUS              PORTS               NAMES
root@ubuntu1804-2:/apps/harbor# docker-compose ps
Name   Command   State   Ports
------------------------------
root@ubuntu1804-2:/apps/harbor# docker-compose ps -a
Name   Command   State   Ports
------------------------------

#修改harbor配置
root@ubuntu1804-2:/apps/harbor# vim harbor.yml
harbor_admin_password: 12345678
:wq

root@ubuntu1804-2:/apps/harbor# ./install.sh

[Step 0]: checking if docker is installed ...

Note: docker version: 19.03.14

[Step 1]: checking docker-compose is installed ...

Note: docker-compose version: 1.27.4

[Step 2]: loading Harbor images ...
Loaded image: goharbor/harbor-core:v1.10.3
Loaded image: goharbor/harbor-db:v1.10.3
Loaded image: goharbor/clair-photon:v1.10.3
Loaded image: goharbor/harbor-registryctl:v1.10.3
Loaded image: goharbor/redis-photon:v1.10.3
Loaded image: goharbor/nginx-photon:v1.10.3
Loaded image: goharbor/clair-adapter-photon:v1.10.3
Loaded image: goharbor/harbor-log:v1.10.3
Loaded image: goharbor/notary-server-photon:v1.10.3
Loaded image: goharbor/notary-signer-photon:v1.10.3
Loaded image: goharbor/harbor-migrator:v1.10.3
Loaded image: goharbor/chartmuseum-photon:v1.10.3
Loaded image: goharbor/prepare:v1.10.3
Loaded image: goharbor/harbor-portal:v1.10.3
Loaded image: goharbor/harbor-jobservice:v1.10.3
Loaded image: goharbor/registry-photon:v1.10.3


[Step 3]: preparing environment ...

[Step 4]: preparing harbor configs ...
prepare base dir is set to /apps/harbor
WARNING:root:WARNING: HTTP protocol is insecure. Harbor will deprecate http protocol in the future. Please make sure to upgrade to https
Clearing the configuration file: /config/registry/config.yml
Clearing the configuration file: /config/nginx/nginx.conf
Clearing the configuration file: /config/log/logrotate.conf
Clearing the configuration file: /config/log/rsyslog_docker.conf
Clearing the configuration file: /config/registryctl/config.yml
Clearing the configuration file: /config/registryctl/env
Clearing the configuration file: /config/core/env
Clearing the configuration file: /config/core/app.conf
Clearing the configuration file: /config/jobservice/config.yml
Clearing the configuration file: /config/jobservice/env
Clearing the configuration file: /config/db/env
Generated configuration file: /config/log/logrotate.conf
Generated configuration file: /config/log/rsyslog_docker.conf
Generated configuration file: /config/nginx/nginx.conf
Generated configuration file: /config/core/env
Generated configuration file: /config/core/app.conf
Generated configuration file: /config/registry/config.yml
Generated configuration file: /config/registryctl/env
Generated configuration file: /config/db/env
Generated configuration file: /config/jobservice/env
Generated configuration file: /config/jobservice/config.yml
loaded secret from file: /secret/keys/secretkey
Generated configuration file: /compose_location/docker-compose.yml
Clean up the input dir


[Step 5]: starting Harbor ...
Creating network "harbor_harbor" with the default driver
Creating harbor-log ... done
Creating harbor-db     ... done
Creating redis         ... done
Creating registry      ... done
Creating registryctl   ... done
Creating harbor-portal ... done
Creating harbor-core   ... done
Creating harbor-jobservice ... done
Creating nginx             ... done
✔ ----Harbor has been installed and started successfully.----
root@ubuntu1804-2:/apps/harbor# docker ps
CONTAINER ID        IMAGE                                 COMMAND                  CREATED             STATUS                             PORTS                       NAMES
119e43fee845        goharbor/harbor-jobservice:v1.10.3    "/harbor/harbor_jobs…"   26 seconds ago      Up 23 seconds (health: starting)                               harbor-jobservice
4d835a4f5e42        goharbor/nginx-photon:v1.10.3         "nginx -g 'daemon of…"   26 seconds ago      Up 24 seconds (health: starting)   0.0.0.0:80->8080/tcp        nginx
0c7d6d0c4f24        goharbor/harbor-core:v1.10.3          "/harbor/harbor_core"    27 seconds ago      Up 25 seconds (health: starting)                               harbor-core
cd90c20cb262        goharbor/harbor-portal:v1.10.3        "nginx -g 'daemon of…"   31 seconds ago      Up 29 seconds (health: starting)   8080/tcp                    harbor-portal
c8ff8eeb64f4        goharbor/harbor-registryctl:v1.10.3   "/home/harbor/start.…"   31 seconds ago      Up 27 seconds (health: starting)                               registryctl
a3ee3a94cc74        goharbor/registry-photon:v1.10.3      "/home/harbor/entryp…"   31 seconds ago      Up 26 seconds (health: starting)   5000/tcp                    registry
726368aa2684        goharbor/redis-photon:v1.10.3         "redis-server /etc/r…"   31 seconds ago      Up 28 seconds (health: starting)   6379/tcp                    redis
79a50220dcd2        goharbor/harbor-db:v1.10.3            "/docker-entrypoint.…"   31 seconds ago      Up 30 seconds (healthy)            5432/tcp                    harbor-db
45094d2ef3a1        goharbor/harbor-log:v1.10.3           "/bin/sh -c /usr/loc…"   32 seconds ago      Up 31 seconds (healthy)            127.0.0.1:1514->10514/tcp   harbor-log

#改密码不生效,只能使用第一次设置的密码
6.3实现 harbor 高可用
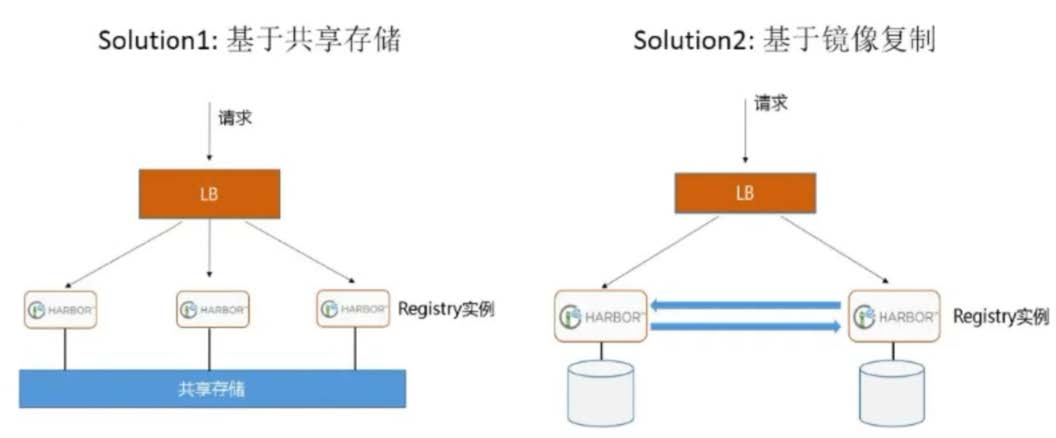
6.3.1 安装第二台 harbor主机
参考6.1的过程,在第二台主机上安装部署好harbor,并登录系统
注意: harbor.yml中配置 hostname: 10.0.0.102
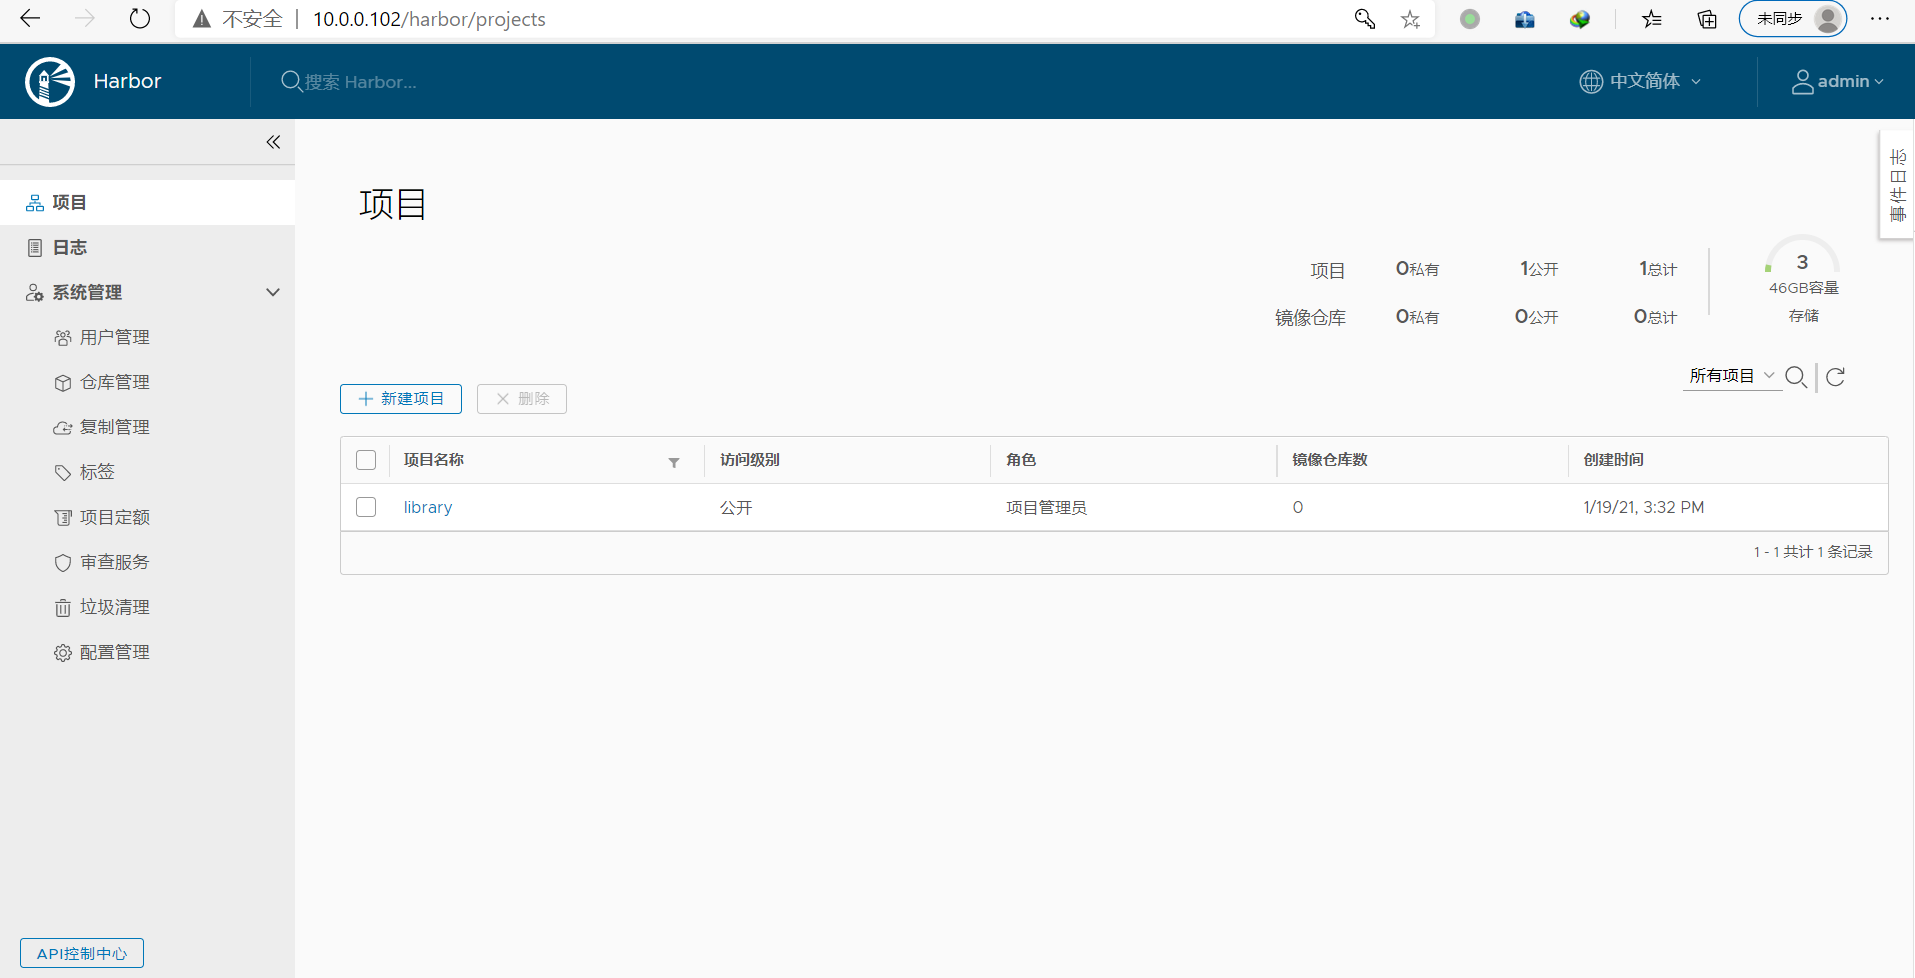
6.3.2 第二台harbor上新建项目
参考第一台harbor服务器的项目名称,在第二台harbor服务器上新建与之同名的项目
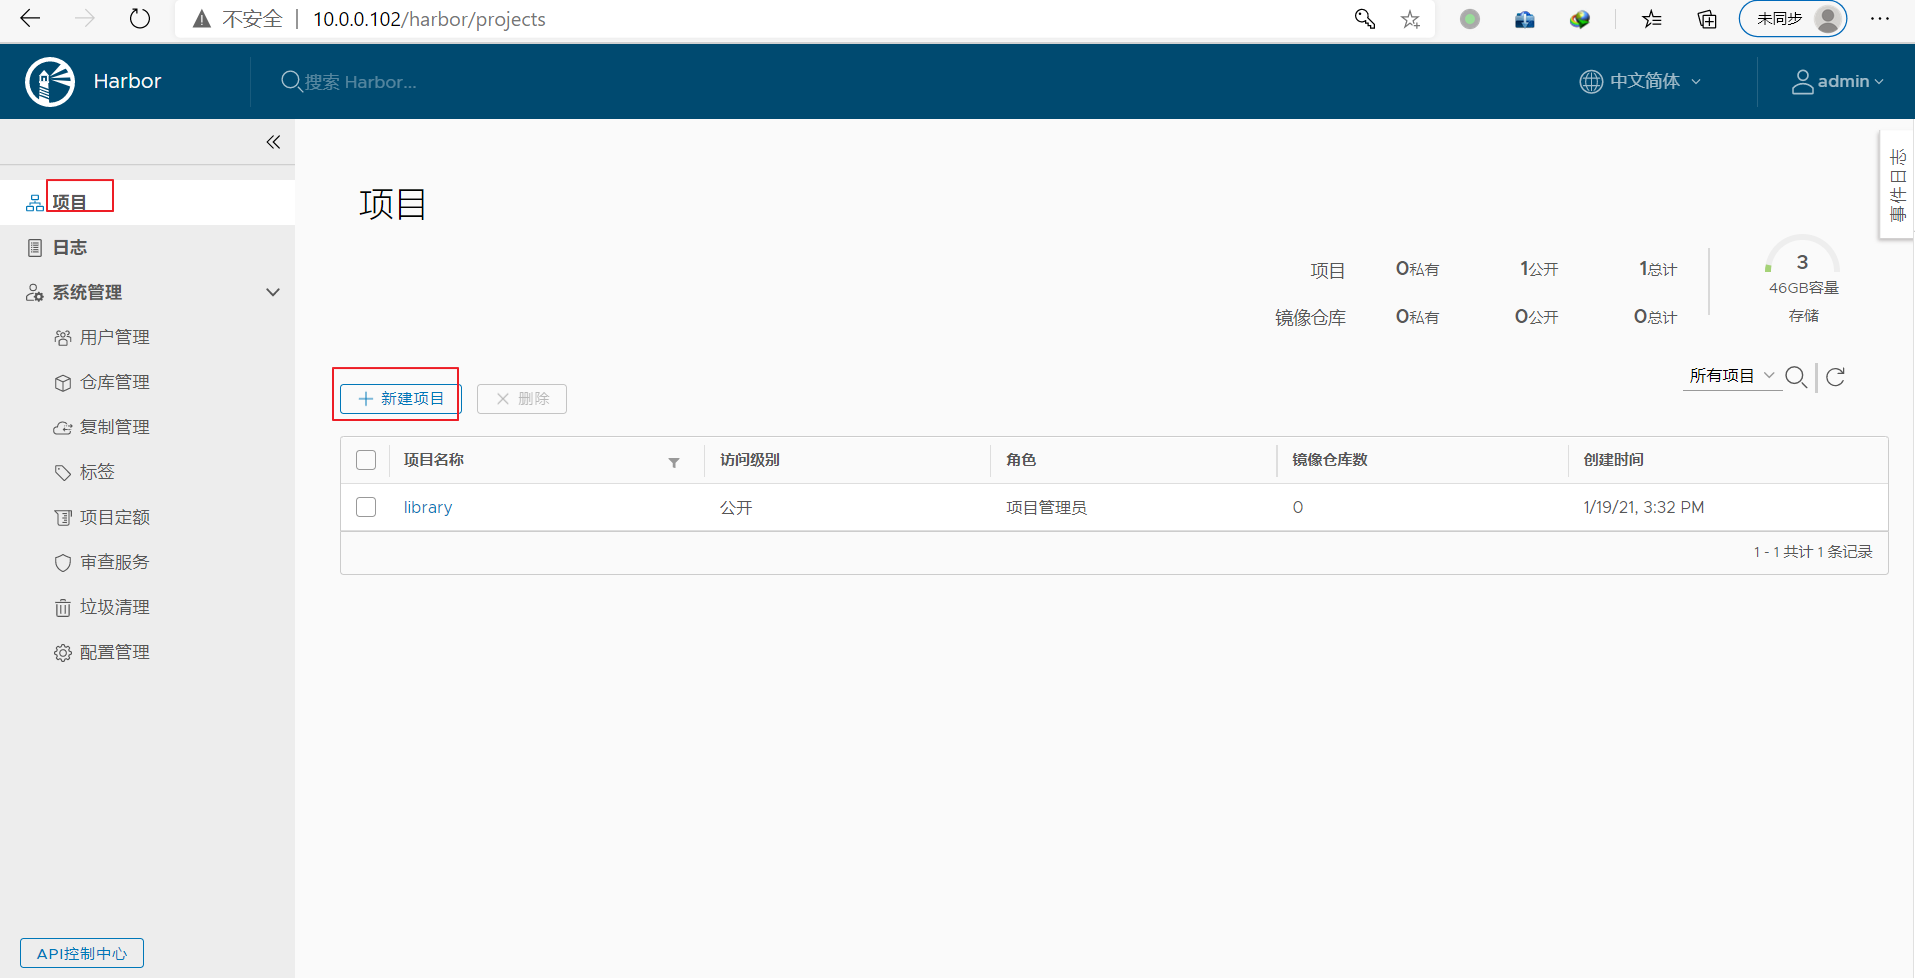
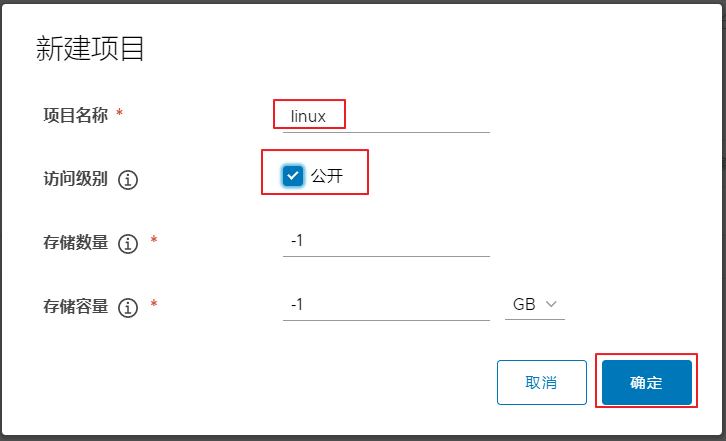
6.3.3 第二台harbor上仓库管理中新建目标
参考第一台主机信息,新建复制(同步)目标信息,将第一台主机设为复制的目标
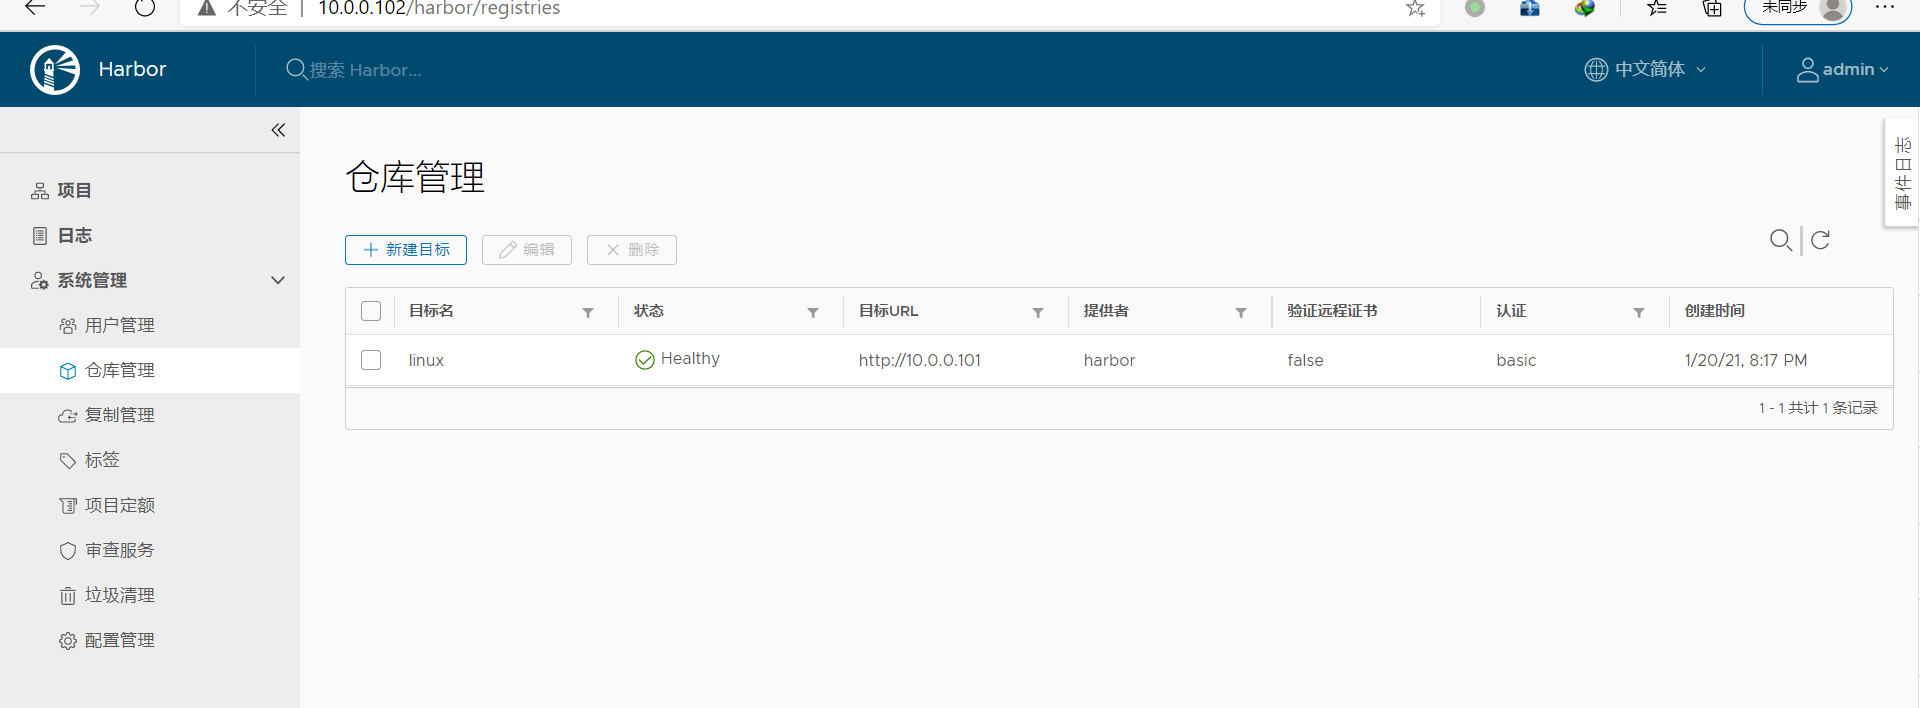
输入第一台harbor服务器上的用户信息

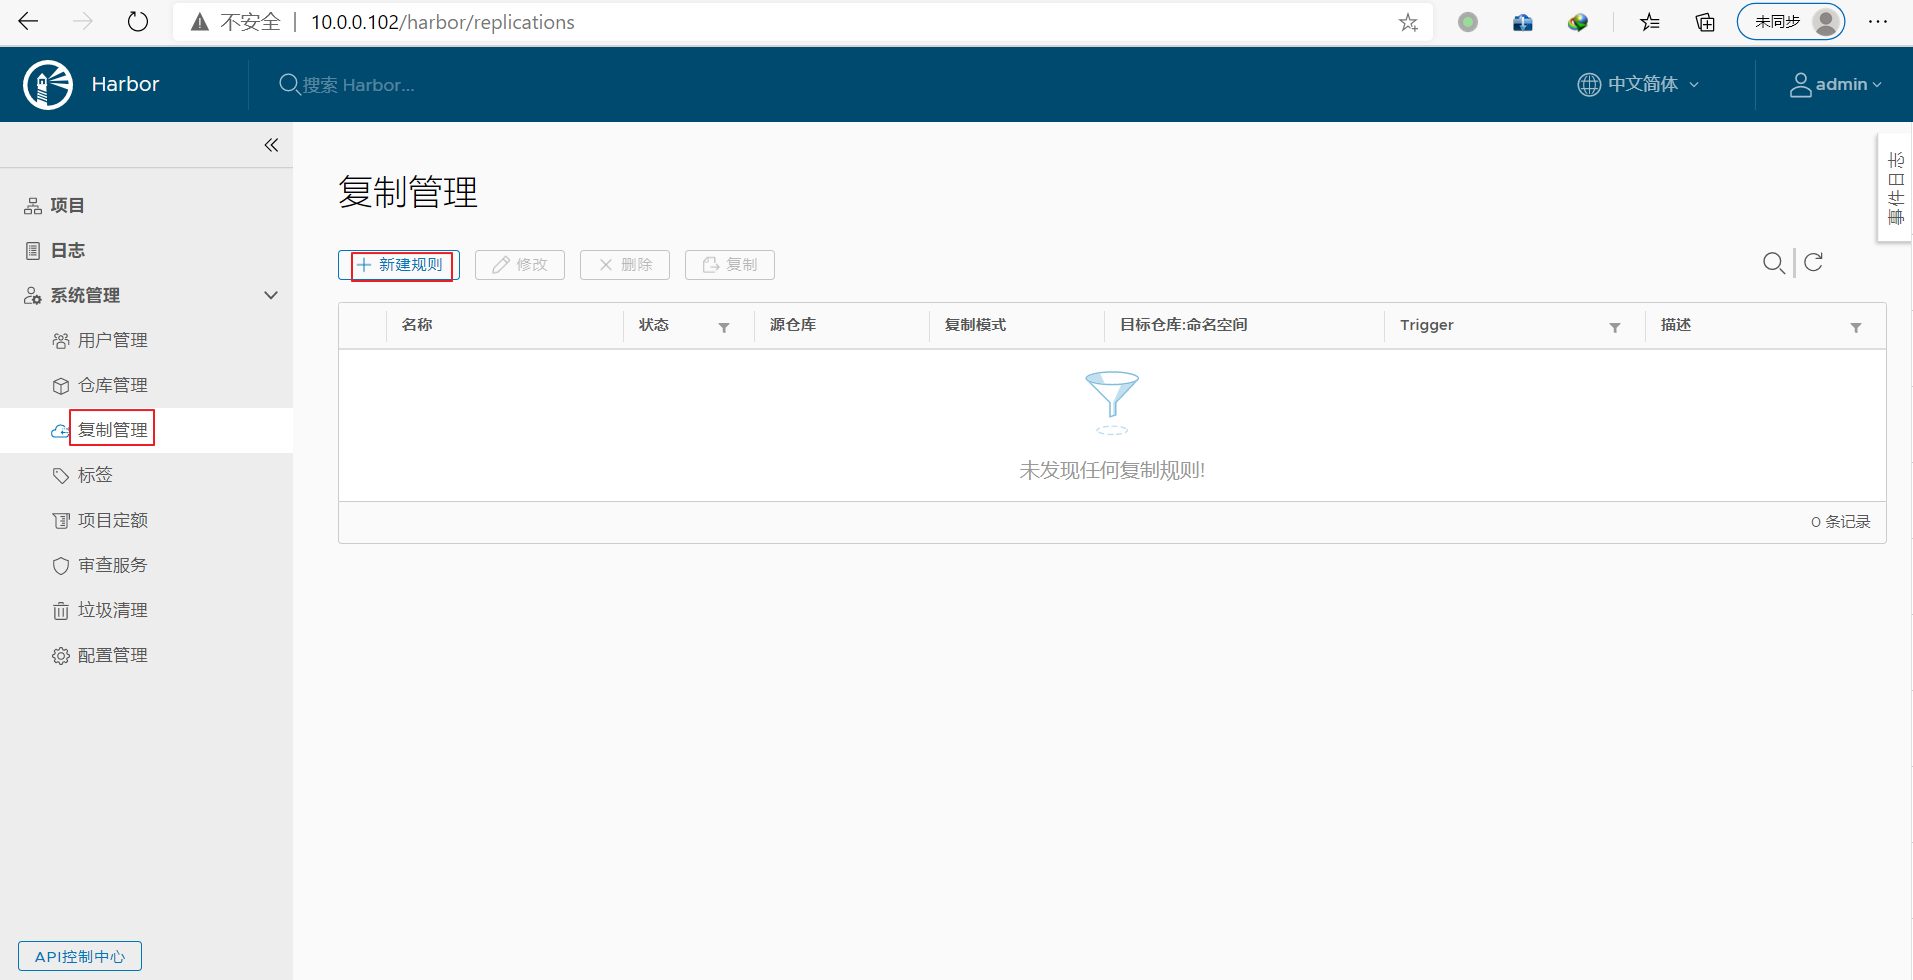
6.3.4 第二台harbor上新建复制规则实现到第一台harbor的单向复制
在第二台harbor上建立复制的目标主机,将第二台harbor上面的镜像复制到第一台harbor上

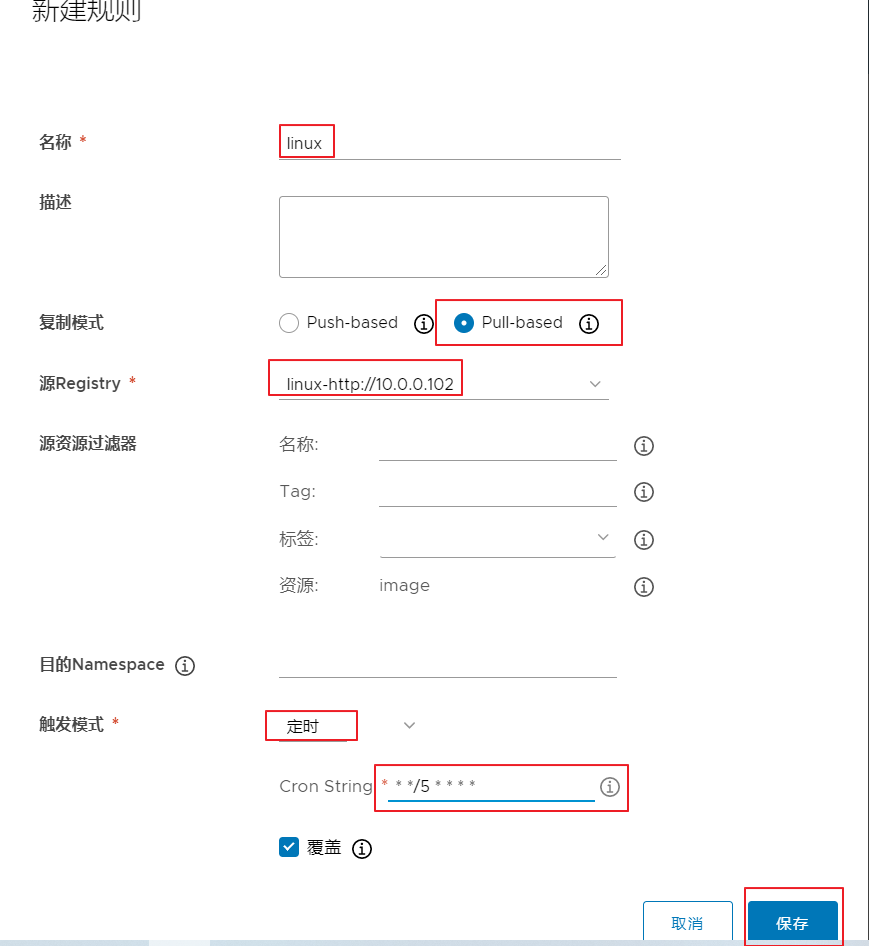
6.3.5 在第一台harbor主机上重复上面操作
以上操作,只是实现了从第二台harbor主机10.0.0.102到第一台harbor主机10.0.101的单向同步
在第一台harbor上再执行下面操作,才实现双向同步


6.3.6 确认同步成功
在第二台harbor主机上可以查看到从第一台主机同步过来的镜像
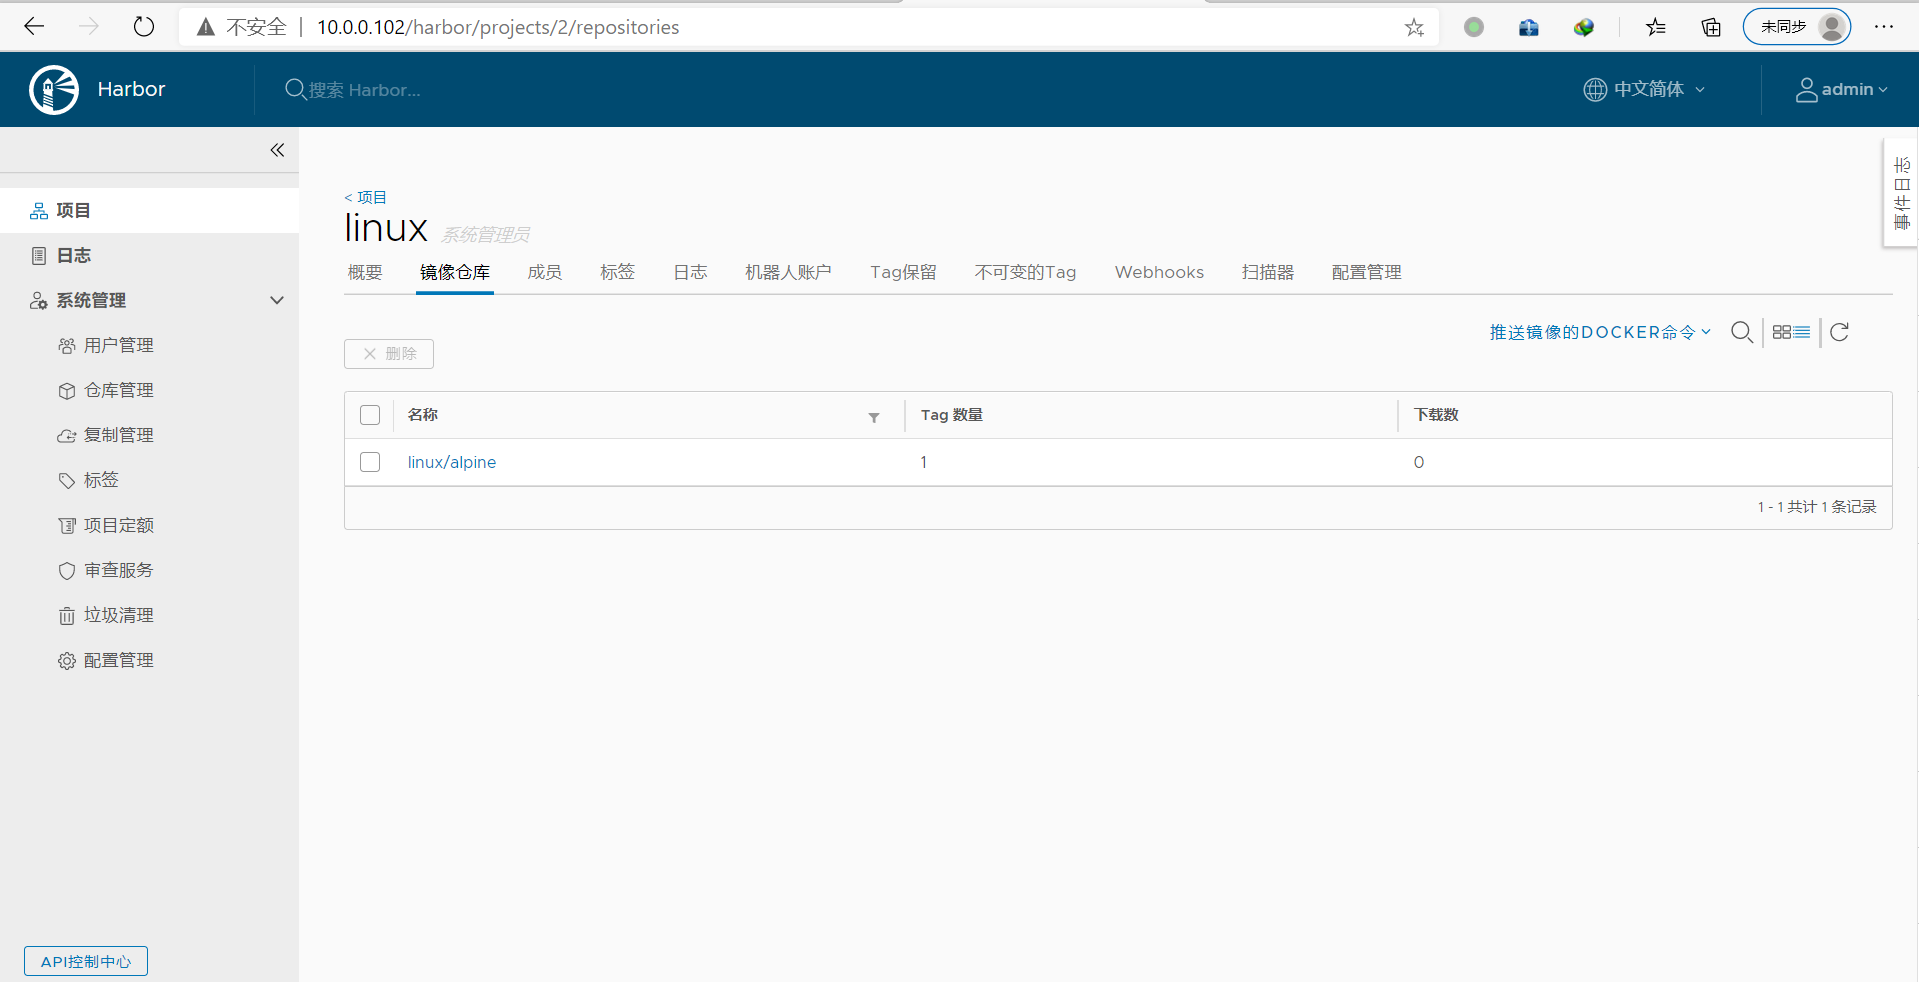
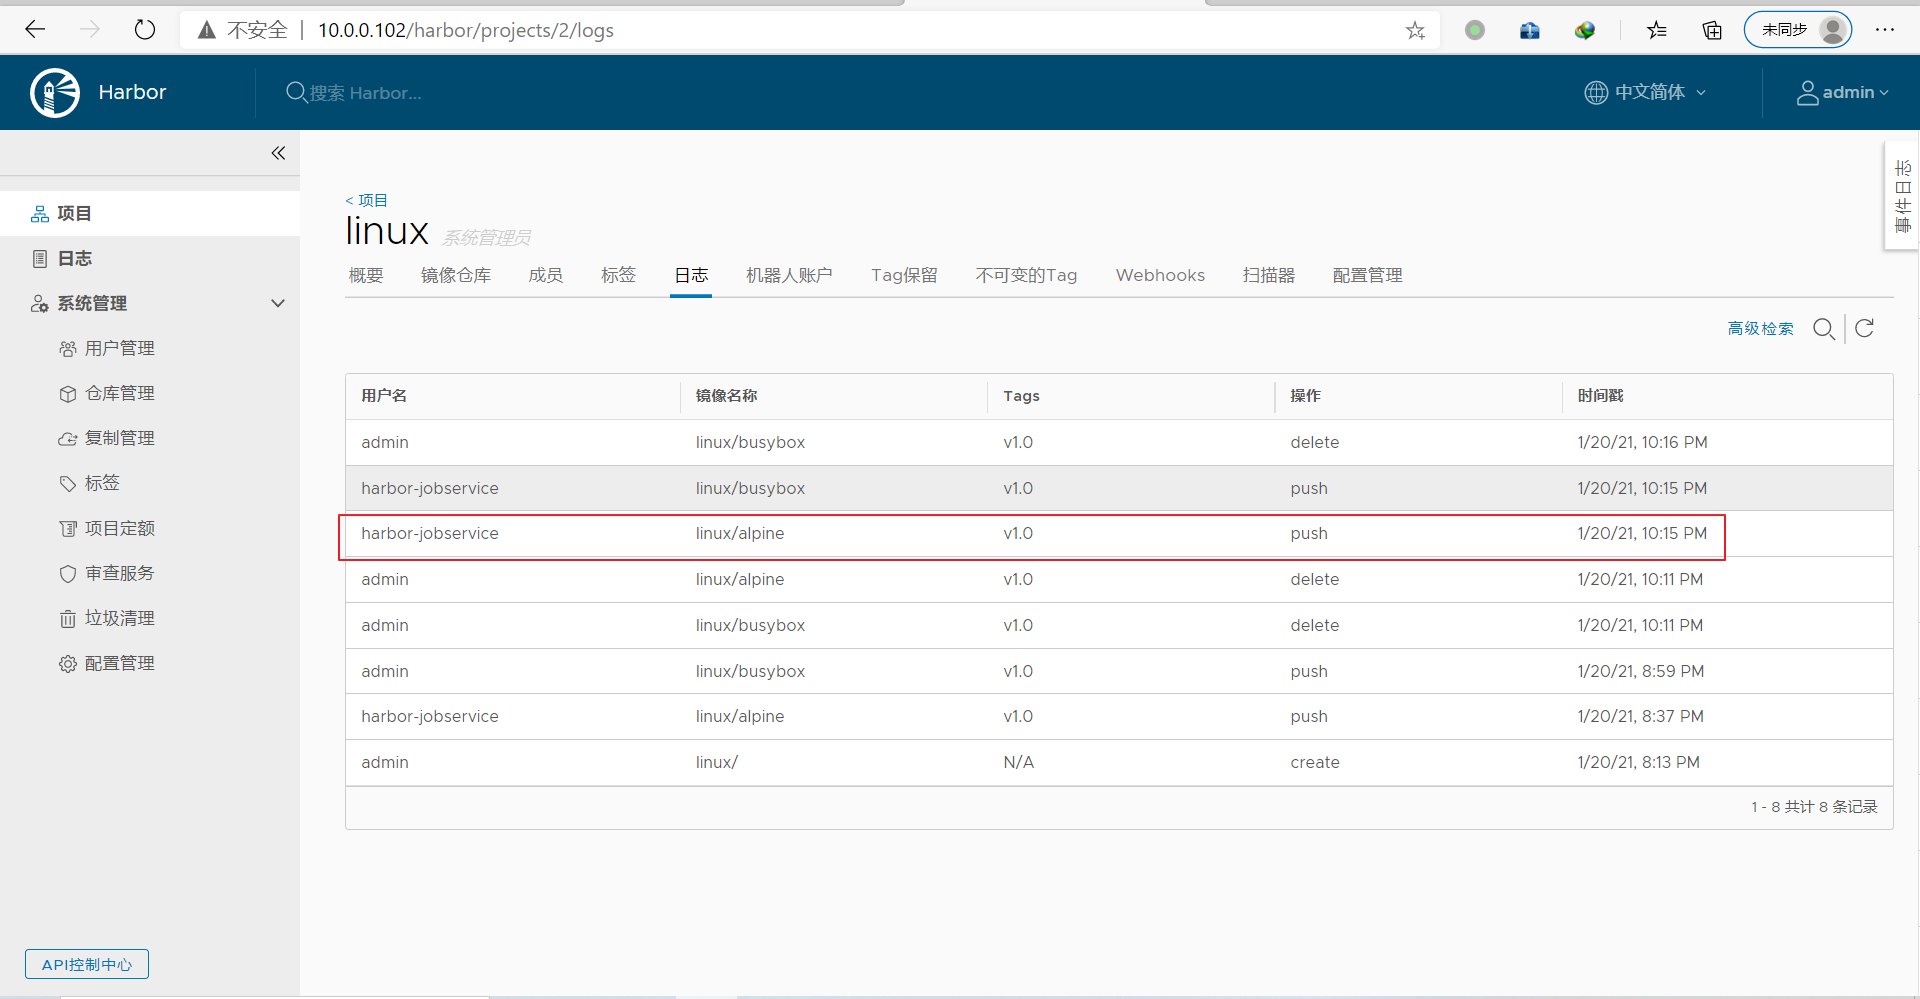
6.3.7 上传镜像观察是否可以双向同步
root@ubuntu1804:~# docker pull busybox
root@ubuntu1804:~# docker tag busybox:latest 10.0.0.102/linux/busybox:v1.0
root@ubuntu1804:~# docker images
REPOSITORY                 TAG                 IMAGE ID            CREATED             SIZE
10.0.0.101/linux/alpine    v1.0                7731472c3f2a        5 days ago          5.61MB
alpine                     latest              7731472c3f2a        5 days ago          5.61MB
10.0.0.102/linux/busybox   v1.0                b97242f89c8a        7 days ago          1.23MB
busybox                    latest              b97242f89c8a        7 days ago          1.23MB

root@ubuntu1804:~# docker login 10.0.0.102
Username: admin
Password:
WARNING! Your password will be stored unencrypted in /root/.docker/config.json.
Configure a credential helper to remove this warning. See
https://docs.docker.com/engine/reference/commandline/login/#credentials-store

Login Succeeded

root@ubuntu1804:~# docker push 10.0.0.102/linux/busybox:v1.0
The push refers to repository [10.0.0.102/linux/busybox]
0064d0478d00: Pushed
v1.0: digest: sha256:0415f56ccc05526f2af5a7ae8654baec97d4a614f24736e8eef41a4591f08019 size: 527

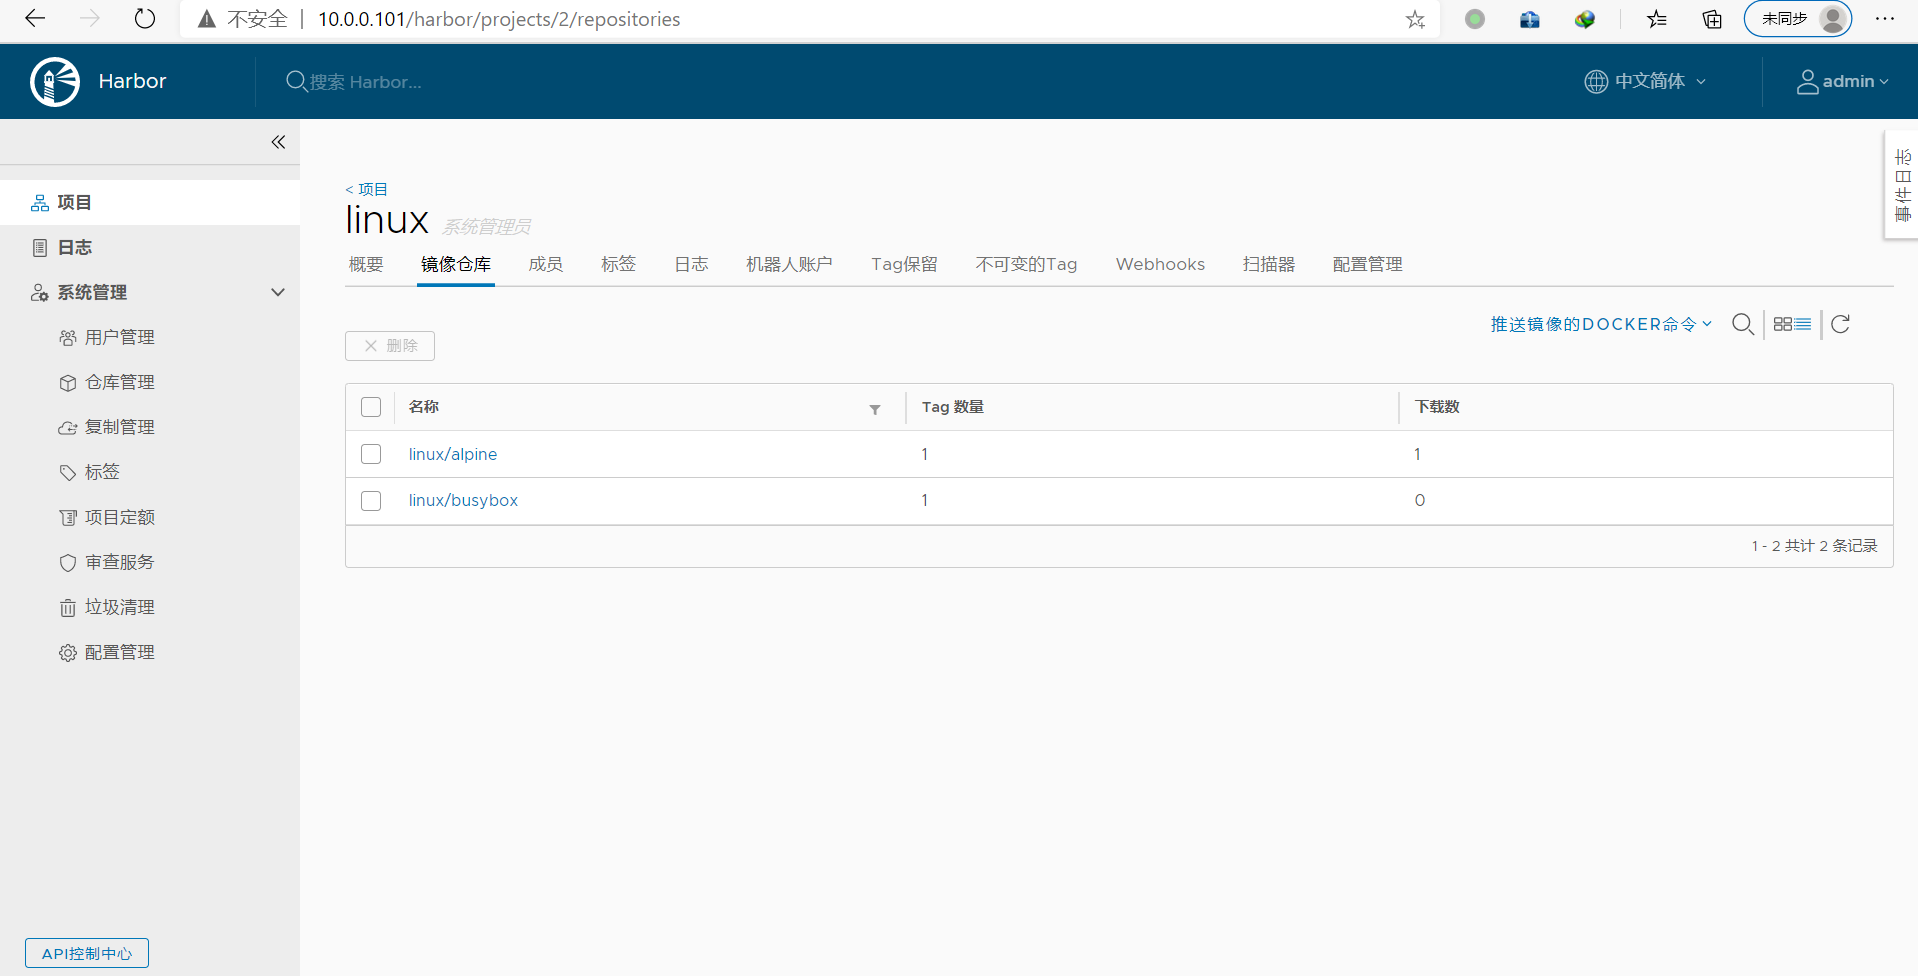
6.3.8 删除镜像观察是否可自动同步

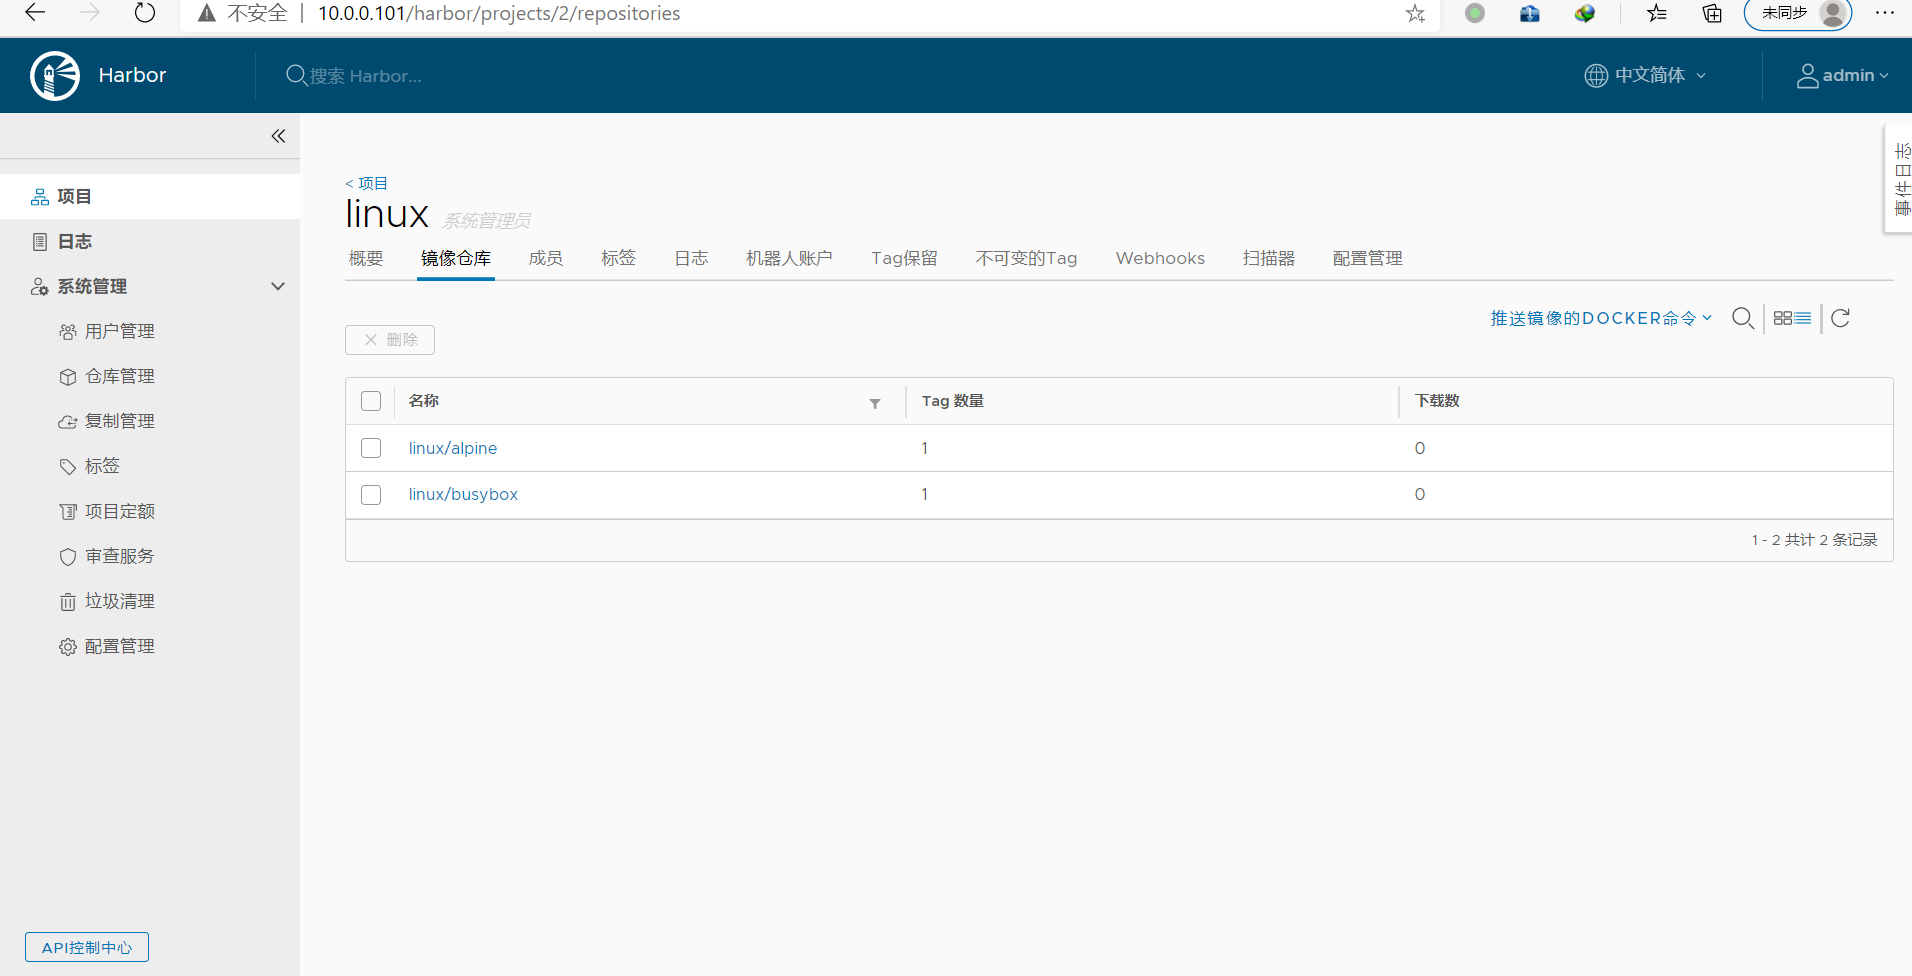
harbor1.10.3 删除镜像 不能双向删除 ,设置的5分钟定时同步,会把10.0.0.102的包再同步过来
6.4 harbor 安全 https 配置
harbor默认使用http,为了安全,可以使用https
6.4.1 实现Harbor的 https 认证
#安装docker
root@ubuntu1804-4:~# bash install_docker_for_docker190314.sh

#安装docker compose
root@ubuntu1804-4:~# mv docker-compose-Linux-x86_64-1.27.4 /usr/bin/docker-compose
root@ubuntu1804-4:~# chmod +x /usr/bin/docker-conpose
root@ubuntu1804-4:~# docker-conpose --version
docker-compose version 1.27.4, build 40524192

#安装harbor离线安装包
root@ubuntu1804-4:~# mkdir /apps
root@ubuntu1804-4:~# tar xvf harbor-offline-installer-v1.10.3.tgz -C /apps
harbor/harbor.v1.10.3.tar.gz
harbor/prepare
harbor/LICENSE
harbor/install.sh
harbor/common.sh
harbor/harbor.yml

#生成私钥和证书
root@ubuntu1804-4:~# touch /root/.rnd
root@ubuntu1804-4:~# mkdir /apps/harbor/certs/
root@ubuntu1804-4:~# cd /apps/harbor/certs/

#生成CA证书
root@ubuntu1804-4:/apps/harbor/certs# openssl req -newkey rsa:4096 -nodes -sha256 -keyout ca.key -x509 -subj "/CN=ca.neteagles.vip" -days 365 -out ca.crt
Generating a RSA private key
............................................++++
......................................++++
writing new private key to 'ca.key'
-----

#生成harbor主机的证书申请
root@ubuntu1804-4:/apps/harbor/certs# openssl req -newkey rsa:4096 -nodes -sha256  -subj "/CN=harbor.neteagles.vip" -keyout harbor.neteagles.vip.key -out harbor.neteagles.vip.csr
Generating a RSA private key
..............................++++
.........................................................++++
writing new private key to 'harbor.neteagles.vip.key'
-----

#给harbor主机颁发证书
root@ubuntu1804-4:/apps/harbor/certs# openssl x509 -req -in harbor.neteagles.vip.csr -CA ca.crt -CAkey ca.key -CAcreateserial -out harbor.neteagles.vip.crt
Signature ok
subject=CN = harbor.neteagles.vip
Getting CA Private Key

root@ubuntu1804-4:/apps/harbor/certs# tree
.
├── ca.crt
├── ca.key
├── ca.srl
├── harbor.neteagles.vip.crt
├── harbor.neteagles.vip.csr
└── harbor.neteagles.vip.key

0 directories, 6 files

root@ubuntu1804-4:/apps/harbor/certs# vim /apps/harbor/harbor.yml
hostname: harbor.neteagles.vip
#注释掉下面两行
#http:
#  port: 80
https:
  port: 443
  certificate: /apps/harbor/certs/harbor.neteagles.vip.crt
  private_key: /apps/harbor/certs/harbor.neteagles.vip.key
harbor_admin_password: 123456
:wq

root@ubuntu1804-4:/apps/harbor/certs# apt -y install python
root@ubuntu1804-4:/apps/harbor/certs# cd ..
root@ubuntu1804-4:/apps/harbor# ./install.sh
6.4.2 用https方式访问harbor网站
在windows系统C:\Windows\System32\drivers\etc\hosts文件里,添加下面内容
10.0.0.103 harbor.neteagles.vip
打开浏览器,访问https://harbor.neteagles.vip/ ,可以看到以下界面


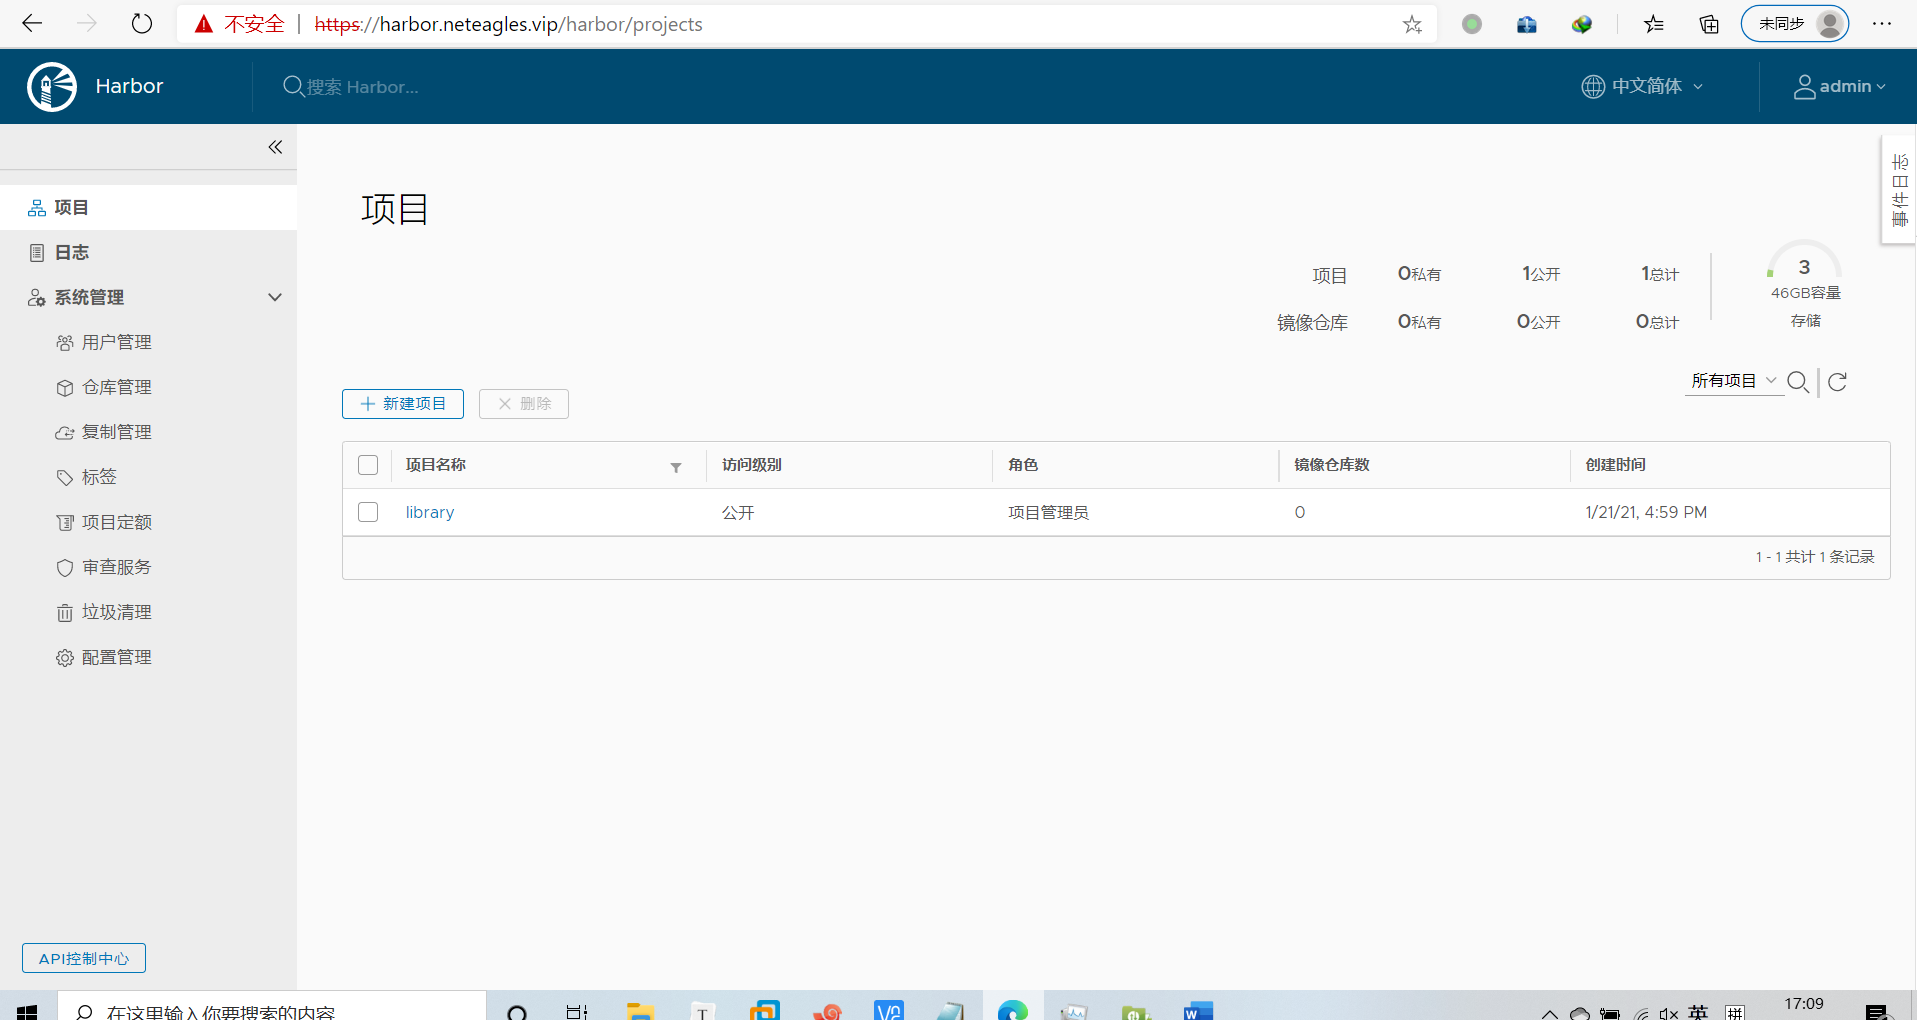
查看证书
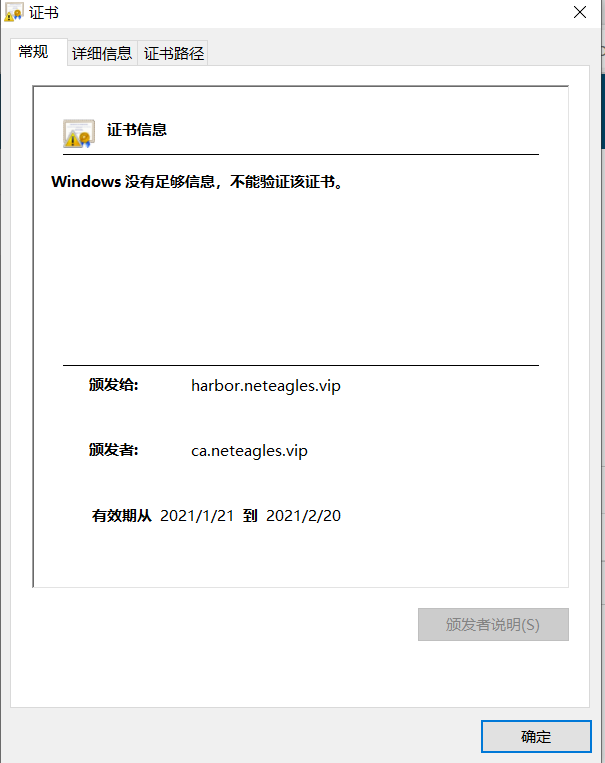
6.4.3 在harbor网站新建项目
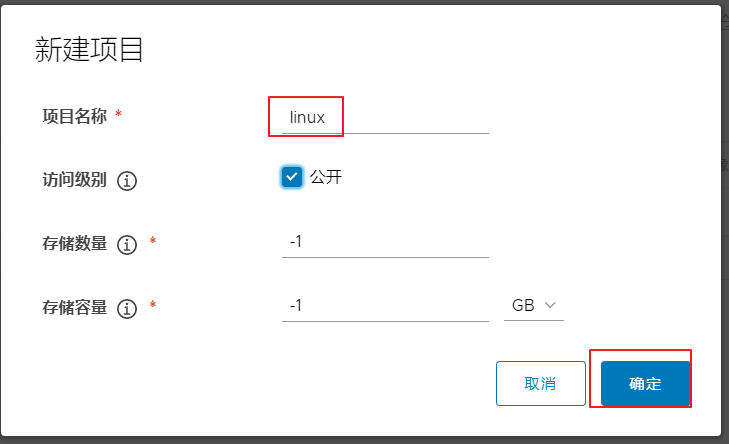
6.4.4 在客户端下载CA的证书
直接上传镜像会报错
root@ubuntu1804:~# vim /etc/hosts
10.0.0.103 harbor.neteagles.vip
:wq

root@ubuntu1804:~# docker login harbor.neteagles.vip
Username: admin
Password:
Error response from daemon: Get https://harbor.neteagles.vip/v2/: x509: certificate signed by unknown authority
在客户端下载ca的证书
root@ubuntu1804:~# mkdir -pv /etc/docker/certs.d/harbor.neteagles.vip
mkdir: created directory '/etc/docker/certs.d'
mkdir: created directory '/etc/docker/certs.d/harbor.neteagles.vip'
root@ubuntu1804:~# scp -r harbor.neteagles.vip:/apps/harbor/certs/ca.crt /etc/docker/certs.d/harbor.neteagles.vip/
The authenticity of host 'harbor.neteagles.vip (10.0.0.103)' can't be established.
ECDSA key fingerprint is SHA256:xH9+hx1G0I8HlYUznIqYjiMZw7Ep8xptc2rpnsDIV/Y.
Are you sure you want to continue connecting (yes/no)? yes
Warning: Permanently added 'harbor.neteagles.vip,10.0.0.103' (ECDSA) to the list of known hosts.
root@harbor.neteagles.vip's password:
ca.crt                                                                                          100% 1826     1.5MB/s   00:00

root@ubuntu1804:~# tree /etc/docker/certs.d/
/etc/docker/certs.d/
└── harbor.neteagles.vip
    └── ca.crt

1 directory, 1 file
6.4.5 从客户端上传镜像
#先登录系统
root@ubuntu1804:~# docker login harbor.neteagles.vip
Username: admin
Password:
WARNING! Your password will be stored unencrypted in /root/.docker/config.json.
Configure a credential helper to remove this warning. See
https://docs.docker.com/engine/reference/commandline/login/#credentials-store

Login Succeeded

root@ubuntu1804:~# docker tag alpine:latest harbor.neteagles.vip/linux/alpine:v1.0
root@ubuntu1804:~# docker images
REPOSITORY                          TAG                 IMAGE ID            CREATED             SIZE
harbor.neteagles.vip/linux/alpine   v1.0                7731472c3f2a        6 days ago          5.61MB

root@ubuntu1804:~# docker push harbor.neteagles.vip/linux/alpine:v1.0
The push refers to repository [harbor.neteagles.vip/linux/alpine]
c04d1437198b: Pushed
v1.0: digest: sha256:d0710affa17fad5f466a70159cc458227bd25d4afb39514ef662ead3e6c99515 size: 528
在harbor网站上验证上传的镜像
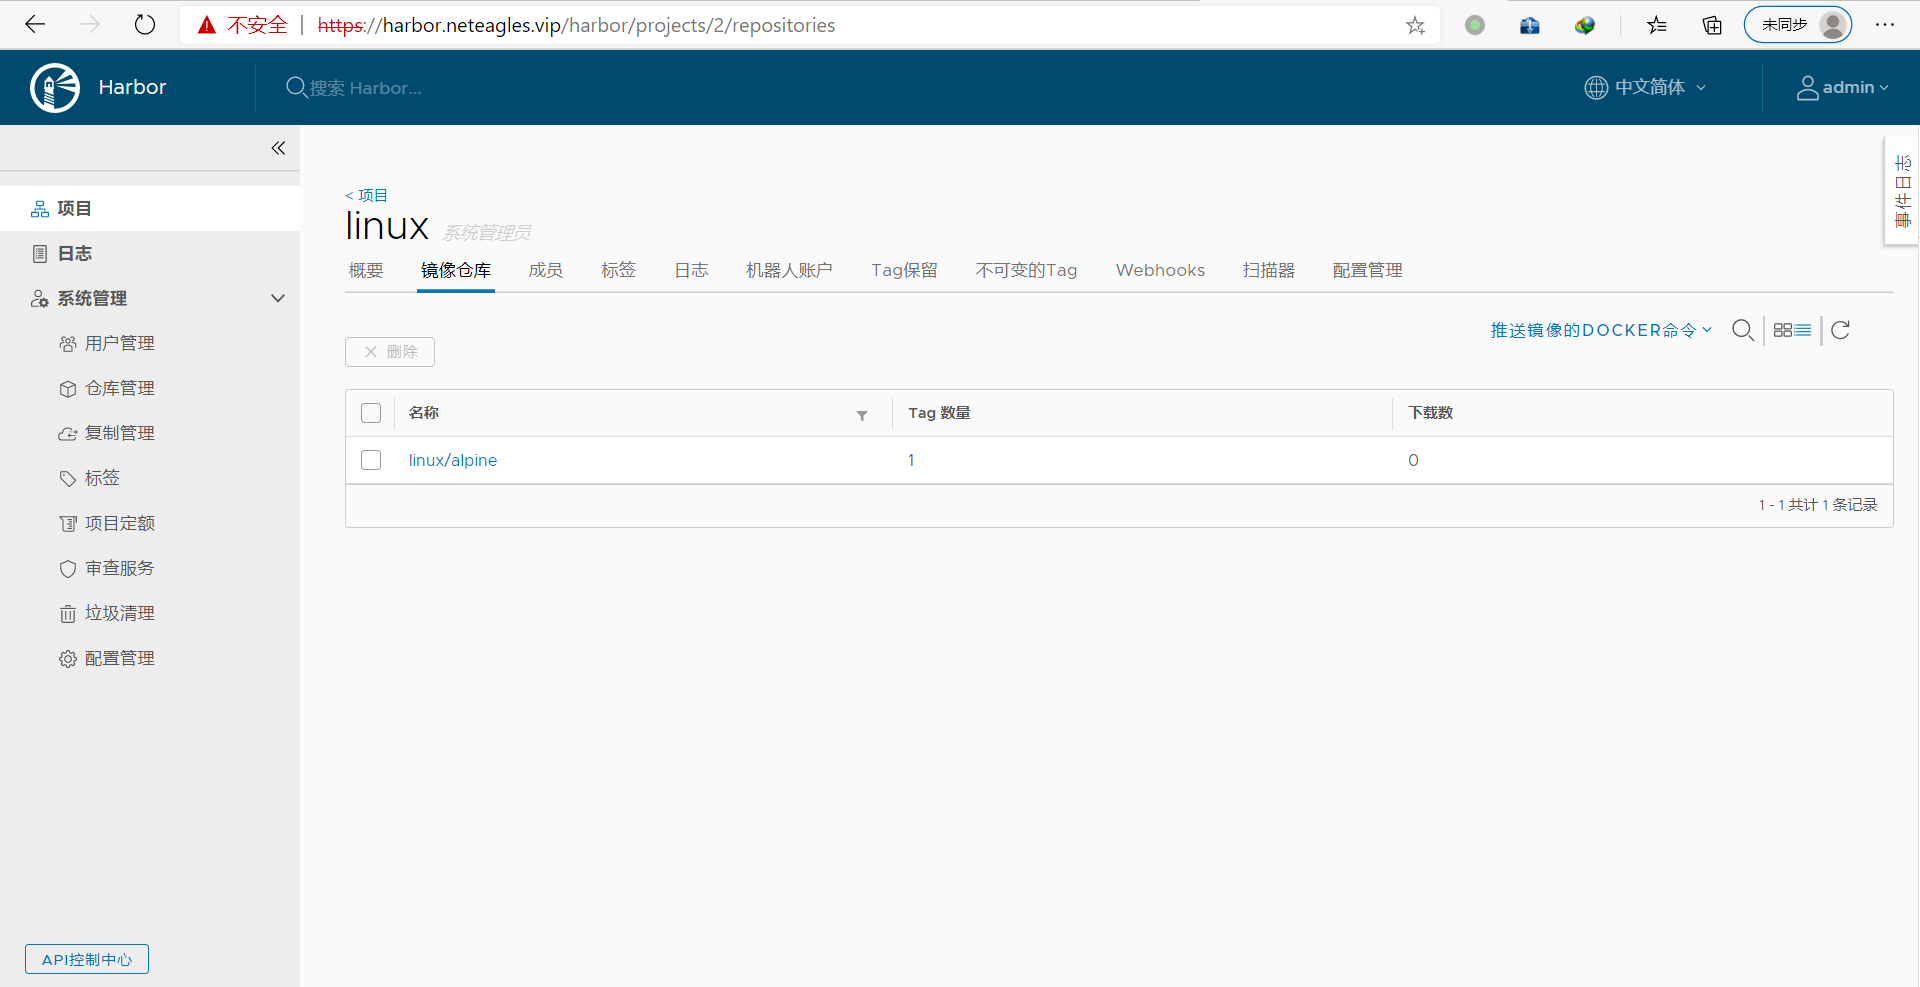
6.4.6 从客户端下载镜像
root@ubuntu1804-5:~# vim /etc/hosts
10.0.0.103 harbor.neteagles.vip
:wq

root@ubuntu1804-5:~# docker pull harbor.magedu.org/example/alpine:3.11
Error response from daemon: Get https://harbor.magedu.org/v2/: x509: certificate
signed by unknown authority
root@ubuntu1804-5:~# mkdir -pv/etc/docker/certs.d/harbor.magedu.org/
root@ubuntu1804-5:~# scp -r harbor.neteagles.vip:/apps/harbor/certs/ca.crt /etc/docker/certs.d/harbor.neteagles.vip/
The authenticity of host 'harbor.neteagles.vip (10.0.0.103)' can't be established.
ECDSA key fingerprint is SHA256:xH9+hx1G0I8HlYUznIqYjiMZw7Ep8xptc2rpnsDIV/Y.
Are you sure you want to continue connecting (yes/no)? yes
Warning: Permanently added 'harbor.neteagles.vip,10.0.0.103' (ECDSA) to the list of known hosts.
root@harbor.neteagles.vip's password:
ca.crt                                                                                          100% 1826     1.5MB/s   00:00

root@ubuntu1804-5:~# tree /etc/docker/certs.d/
/etc/docker/certs.d/
└── harbor.magedu.org
└── ca.crt
1 directory, 1 file
root@ubuntu1804-5:~# docker images
REPOSITORY TAG IMAGE ID CREATED
SIZE
root@ubuntu1804-5:~# docker pull harbor.neteagles.vip/linux/alpine:v1.0
v1.0: Pulling from linux/alpine
596ba82af5aa: Pull complete
Digest: sha256:d0710affa17fad5f466a70159cc458227bd25d4afb39514ef662ead3e6c99515
Status: Downloaded newer image for harbor.neteagles.vip/linux/alpine:v1.0
harbor.neteagles.vip/linux/alpine:v1.0

root@ubuntu1804-5:~# docker images
REPOSITORY                          TAG                 IMAGE ID            CREATED             SIZE
harbor.neteagles.vip/linux/alpine   v1.0                7731472c3f2a        6 days ago          5.61MB
6.5 harbor1.7.6 一键安装脚本
root@ubuntu1804:~# cat install_harbor1.7.6_for_ubuntu1804.sh
#!/bin/bash
#
#******************************************************************************
#Author:            zhanghui
#QQ:                19661891
#Date:              2021-01-18
#FileName:          install_harbor1.7.6_for_ubuntu1804.sh
#URL:               www.neteagles.cn
#Description:       The test script
#Copyright (C):     2021 All rights reserved
#******************************************************************************
SRC=/usr/local/src
COLOR="echo -e \\033[01;31m"
END='\033[0m'
IPADDR=`hostname -I|awk '{print $1}'`
HARBOR_ADMIN_PASSWORD=123456
DOCKER_COMPOSE_VERSION=1.27.4
HARBOR_VERSION=1.7.6
HARBOR_INSTALL_DIR=/apps

os(){
    OS_CODENAME=`lsb_release -cs`
}

install_docker(){
    dpkg -s docker-ce &> /dev/null && ${COLOR}"Docker已安装,退出"${END} && exit
    DOCKER_VERSION="5:19.03.15~3-0~ubuntu-${OS_CODENAME}"

    ${COLOR}"开始安装DOCKER依赖包"${END}
    apt update &> /dev/null
    apt -y install apt-transport-https ca-certificates curl software-properties-common &> /dev/null
    curl -fsSL https://mirrors.tuna.tsinghua.edu.cn/docker-ce/linux/ubuntu/gpg | sudo apt-key add - &> /dev/null
    add-apt-repository  "deb [arch=amd64] https://mirrors.tuna.tsinghua.edu.cn/docker-ce/linux/ubuntu  ${OS_CODENAME} stable" &> /dev/null
    apt update &> /dev/null

    ${COLOR}"Docker有以下版本"${END}
    apt-cache madison docker-ce
    ${COLOR}"10秒后即将安装:Docker-"${DOCKER_VERSION}"版本......"${END}
    ${COLOR}"如果想安装其它Docker版本,请按Ctrl+c键退出,修改版本再执行"${END}
    sleep 10

    ${COLOR}"开始安装DOCKER"${END}
    apt -y install docker-ce=${DOCKER_VERSION} docker-ce-cli=${DOCKER_VERSION} &> /dev/null

    mkdir -p /etc/docker
    tee /etc/docker/daemon.json <<-'EOF'
{
    "registry-mirrors": ["https://si7y70hh.mirror.aliyuncs.com"]
}
EOF

    systemctl daemon-reload
    systemctl enable --now docker &> /dev/null
    docker version && ${COLOR}"Docker 安装成功"${END} || ${COLOR}"Docker 安装失败"${END}
}

install_docker_compose(){
    ${COLOR}"开始安装 Docker compose....."${END}
    sleep 1
    mv ${SRC}/docker-compose-Linux-x86_64-${DOCKER_COMPOSE_VERSION} /usr/bin/docker-compose
    chmod +x /usr/bin/docker-compose
    docker-compose --version &&  ${COLOR}"Docker Compose 安装完成"${END} || ${COLOR}"Docker compose 安装失败"${END}
}

install_harbor(){
    ${COLOR}"开始安装 Harbor....."${END}
    sleep 1
    [ -d ${HARBOR_INSTALL_DIR} ] || mkdir ${HARBOR_INSTALL_DIR}
    tar -xvf ${SRC}/harbor-offline-installer-v${HARBOR_VERSION}.tgz -C ${HARBOR_INSTALL_DIR}/
    sed -i.bak -e 's/^hostname =.*/hostname = '''$IPADDR'''/' -e 's/^harbor_admin_password =.*/harbor_admin_password = '''$HARBOR_ADMIN_PASSWORD'''/' ${HARBOR_INSTALL_DIR}/harbor/harbor.cfg
    apt -y install python &> /dev/null
    ${HARBOR_INSTALL_DIR}/harbor/install.sh && ${COLOR}"Harbor 安装完成"${END} ||  ${COLOR}"Harbor 安装失败"${END}
}

harbor_service (){
    cat > /lib/systemd/system/harbor.service <<-EOF
[Unit]
Description=Harbor
After=docker.service systemd-networkd.service systemd-resolved.service
Requires=docker.service
Documentation=http://github.com/vmware/harbor

[Service]
Type=simple
Restart=on-failure
RestartSec=5
ExecStart=/usr/bin/docker-compose -f /apps/harbor/docker-compose.yml up
ExecStop=/usr/bin/docker-compose -f /apps/harbor/docker-compose.yml down

[Install]
WantedBy=multi-user.target
EOF

    systemctl daemon-reload
    systemctl enable harbor &>/dev/null && ${COLOR}"Harbor已配置为开机自动启动"${END}
}

main(){
    os
    dpkg -s docker-ce &> /dev/null && ${COLOR}"Docker已安装"${END} || install_docker
    docker-compose --version &> /dev/null && ${COLOR}"Docker Compose已安装"${END} || install_docker_compose
    install_harbor
    harbor_service
}

main
6.6 harbor2.0.4 一键安装脚本
root@ubuntu1804:~# cat install_harbor2.0.4_for_ubuntu1804.sh
#!/bin/bash
#
#******************************************************************************
#Author:            zhanghui
#QQ:                19661891
#Date:              2021-01-18
#FileName:          install_harbor2.0.4_for_ubuntu1804.sh
#URL:               www.neteagles.cn
#Description:       The test script
#Copyright (C):     2021 All rights reserved
#******************************************************************************
SRC=/usr/local/src
COLOR="echo -e \\033[1;31m"
END="\033[m"
IPADDR=`hostname -I|awk '{print $1}'`
HARBOR_ADMIN_PASSWORD=123456
DOCKER_COMPOSE_VERSION=1.27.4
HARBOR_VERSION=2.0.4
HARBOR_INSTALL_DIR=/apps

os(){
    OS_CODENAME=`lsb_release -cs`
}

install_docker(){
    dpkg -s docker-ce &> /dev/null && ${COLOR}"Docker已安装,退出"${END} && exit
    DOCKER_VERSION="5:19.03.15~3-0~ubuntu-${OS_CODENAME}"

    ${COLOR}"开始安装DOCKER依赖包"${END}
    apt update &> /dev/null
    apt-get -y install apt-transport-https ca-certificates curl software-properties-common &> /dev/null
    curl -fsSL https://mirrors.tuna.tsinghua.edu.cn/docker-ce/linux/ubuntu/gpg | sudo apt-key add - &> /dev/null
    add-apt-repository "deb [arch=amd64] https://mirrors.tuna.tsinghua.edu.cn/docker-ce/linux/ubuntu ${OS_CODENAME} stable" &> /dev/null
    apt update &> /dev/null

    ${COLOR}"Docker有以下版本"${END}
    apt-cache madison docker-ce
    ${COLOR}"10秒后即将安装: docker-"${DOCKER_VERSION}" 版本....."${END}
    ${COLOR}"如果想安装其它Docker版本,请按ctrl+c键退出,修改版本再执行"${END}
    sleep 10

    ${COLOR}"开始安装DOCKER"${END}
    apt -y install docker-ce=${DOCKER_VERSION} docker-ce-cli=${DOCKER_VERSION} &> /dev/null

    mkdir -p /etc/docker
    tee /etc/docker/daemon.json <<-'EOF'
{
    "registry-mirrors": ["https://hzw5xiv7.mirror.aliyuncs.com"]
}
EOF

    systemctl daemon-reload
    systemctl enable --now docker &> /dev/null
    docker version && ${COLOR}"Docker 安装成功"${END} || ${COLOR}"Docker 安装失败"${END}
}

install_docker_compose(){
    ${COLOR}"开始安装 Docker compose....."${END}
    sleep 1
    mv ${SRC}/docker-compose-Linux-x86_64-${DOCKER_COMPOSE_VERSION} /usr/bin/docker-compose
    chmod +x /usr/bin/docker-compose
    docker-compose --version &&  ${COLOR}"Docker Compose 安装完成"${END} || ${COLOR}"Docker compose 安装失败"${END}
}

install_harbor(){
    ${COLOR}"开始安装 Harbor....."${END}
    sleep 1
    [ -d ${HARBOR_INSTALL_DIR} ] || mkdir ${HARBOR_INSTALL_DIR}
    tar -xvf ${SRC}/harbor-offline-installer-v${HARBOR_VERSION}.tgz -C ${HARBOR_INSTALL_DIR}/
    mv ${HARBOR_INSTALL_DIR}/harbor/harbor.yml.tmpl ${HARBOR_INSTALL_DIR}/harbor/harbor.yml
    sed -i.bak -e 's/^hostname: .*/hostname: '''$IPADDR'''/' -e 's/^harbor_admin_password: .*/harbor_admin_password: '''$HARBOR_ADMIN_PASSWORD'''/' -e 's/^https:/#https:/' -e 's/  port: 443/  #port: 443/' -e 's@  certificate: /your/certificate/path@  #certificate: /your/certificate/path@' -e 's@  private_key: /your/private/key/path@  #private_key: /your/private/key/path@' ${HARBOR_INSTALL_DIR}/harbor/harbor.yml
    apt -y install python	&> /dev/null
    ${HARBOR_INSTALL_DIR}/harbor/install.sh && ${COLOR}"Harbor 安装完成"${END} ||  ${COLOR}"Harbor 安装失败"${END}
}

harbor_service (){
    cat > /lib/systemd/system/harbor.service <<-EOF
[Unit]
Description=Harbor
After=docker.service systemd-networkd.service systemd-resolved.service
Requires=docker.service
Documentation=http://github.com/vmware/harbor

[Service]
Type=simple
Restart=on-failure
RestartSec=5
ExecStart=/usr/bin/docker-compose -f /apps/harbor/docker-compose.yml up
ExecStop=/usr/bin/docker-compose -f /apps/harbor/docker-compose.yml down

[Install]
WantedBy=multi-user.target
EOF
    systemctl daemon-reload
    systemctl enable harbor &>/dev/null && ${COLOR}"Harbor已配置为开机自动启动"${END}
}

main(){
    os
    dpkg -s docker-ce &> /dev/null && ${COLOR}"Docker已安装"${END} || install_docker
    docker-compose --version &> /dev/null && ${COLOR}"Docker Compose已安装"${END} || install_docker_compose
    install_harbor
    harbor_service
}

main
由于国外资源下载很慢,最后附上 harbor1.7.6、1.10.3、2.0.4和docker-compose 1.27.4工具
链接:https://pan.baidu.com/s/1nJoSSHCYUeGysHEnsiM7xQ
提取码:hawy


