pytest进阶使用
1. pytest介绍

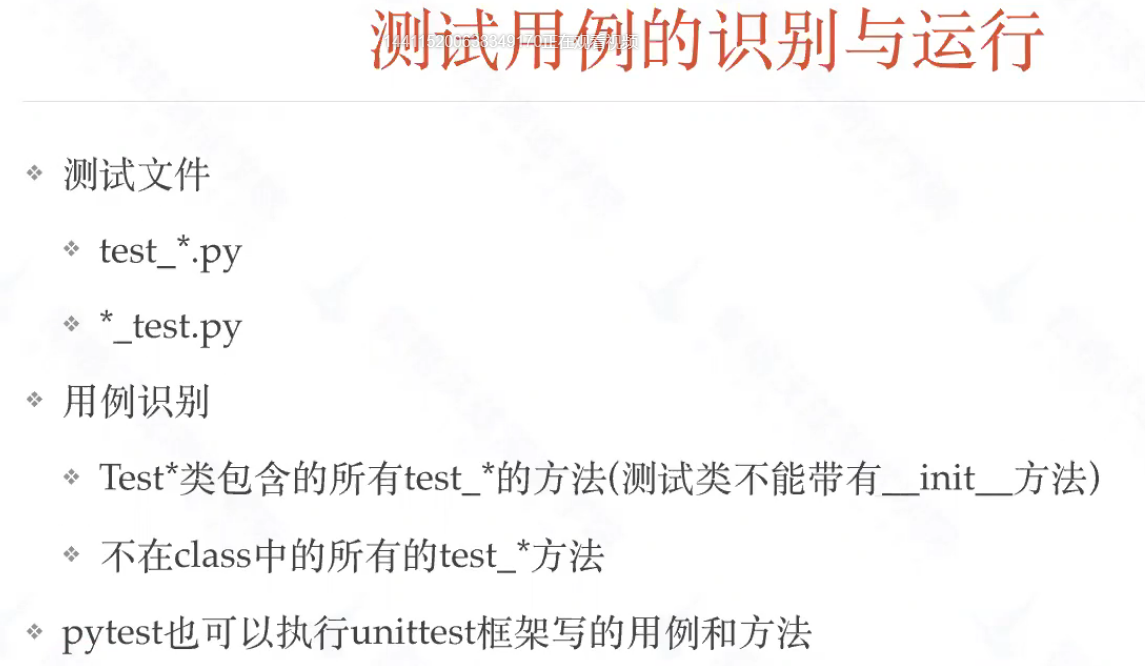
带有init方法的类,被认为是带有特殊功能的类,就不是测试用例类
2. pytest配置
要想打印log日志,必须配置pytest.ini:pytest会捕获日志,导致运行时未显示日志
[pytest]
addopts = -sv  --log-cli-level=INFO
3. pytest进阶使用
3.1 命令行参数
3.1.1 运行参数
Pytest的执行有很多参数,使用帮助查看:
pytest -h
常用参数:
| 参数 | 说明 |
|---|---|
| -v | 可以输出用例更加详细的执行信息,比如用例所在的文件及用例名称 |
| -s | 输入我们用例中的调式信息,比如print的打印信息等 |
| -x | 遇到失败的用例立即停止 |
| -maxfail | 用例失败达到一定个数时停止运行pytest --maxfail=num |
| -m | 运行有@pytest.mark.标记名 的测试用例 |
| -k | 选择部分测试,匹配给出的表达式;eg: pytest -k “raises and not delete”(运行所有名字中包含 raises但不包含delete的测试) |
| –collect-only | 只收集用例 |
pytest -sv test_demo.py
3.1.2 Mark标签
可以对测试用例打标签,在运行测试用例的时候,可根据标签名来过滤要运行的用例
方式:在测试用例/测试类前加上:@pytest.mark.标记名
import pytest
class Test_Demo():
    @pytest.mark.demo
    def test_demo(self):
        a = 5
        b = -1
        assert a != b
        print("我的第一个测试用例")
    @pytest.mark.smoke
    def test_two(self):
        a = 2
        b = -1
        assert a != b
        print("我的第二个测试用例")
也可以在一个用例上打多个标签,多次使用@pytest.mark.标签名
@pytest.mark.demo
@pytest.mark.smoke
def test_add_02():
    b = 1 + 2
    assert 0 == b
运行:
pytest -m 标签名
注册标签消除运行warning:
- 创建pytest.ini文件,在文件中按如下方式添加标签名:
[pytest]
markers = demo
          smoke
3.2 数据驱动入门
3.2.1 参数化
在测试用例的前面加上:
@pytest.mark.parametrize("参数名",列表数据)
- 参数名:作为测试用例的参数. 字符串格式,多个参数中间用逗号隔开。
- 列表数据:一组测试数据。list格式,多组数据用元组类型,list的每个元素都是一个元组,元组里的每个元素和按参数顺序一一对应。
3.2.2 参数化演练
import pytest
def add_function(a,b):
    return a+b
@pytest.mark.parametrize("a,b,expected",
                         [(3,5,8),
                           (-1,-2,-3),
                           (100,200,300),
                         ])
def test_add(a,b,expected):
    assert add_function(a,b) == expected
3.2.3 参数加别名
pytest执行后,会使用输入数据来作为用例的标题,但是这样不便于我们查看。可以添加ids参数指定用例说明。
import pytest
def add_function(a,b):
    return a+b
@pytest.mark.parametrize("a,b,expected",
                         [(3,5,8),
                           (-1,-2,-3),
                           (100,200,300),
                         ],ids=["int","minus","bigint"])
def test_add(a,b,expected):
    assert add_function(a,b) == expected
3.2.4 参数组合
若要获得多个参数化参数的所有组合,可以堆叠参数化装饰器
import pytest
@pytest.mark.parametrize("a", [0, 1])
@pytest.mark.parametrize("b", [2, 3])
def test_foo(a, b):
    print("测试数据组合:a->%s, b->%s" % (a, b))
运行结果
test_demo.py::test_foo[2-0] 测试数据组合:a->0, b->2 PASSED
test_demo.py::test_foo[2-1] 测试数据组合:a->1, b->2 PASSED
test_demo.py::test_foo[3-0] 测试数据组合:a->0, b->3 PASSED
test_demo.py::test_foo[3-1] 测试数据组合:a->1, b->3 PASSED
3.2.5 使用yaml文件实现用例数据参数化
注意:使用之前需要在pycharm中安装PyYAML
加载yaml文件:
yaml.safe_load(open("./data.yml"))
import pytest
import yaml
def add_function(a,b):
    return a+b
@pytest.mark.parametrize("a,b,expected",
                         yaml.safe_load(open("./data.yml"))["datas"],
                         ids=yaml.safe_load(open("./data.yml"))["myid"])
def test_add(a,b,expected):
    assert add_function(a,b) == expected
data.yml文件:
datas:
  -
    - 3
    - 5
    - 8
  -
    - -1
    - -2
    - -3
  -
    - 100
    - 200
    - 300
myid:
  - "int"
  - "minus"
  - "bigint"
读取数据抽离出来改造:
import pytest
import yaml

def get_datas():
    with open("./data.yml") as f:
        datas = yaml.safe_load(f)
        print(datas)
        add_datas=datas["datas"]
        add_ids=datas["myid"]
        return [add_datas,add_ids]

def add_function(a,b):
    return a+b
@pytest.mark.parametrize("a,b,expected",
                         get_datas()[0],
                         ids=get_datas()[1])
def test_add(a,b,expected):
    assert add_function(a,b) == expected
3.2.6 使用yaml文件实现用例步骤参数化
steps.yml
- step1
- step2
- step3
import pytest
import yaml

def step1():
    print("打开浏览器")
def step2():
    print("注册新账号")
def step3():
    print("登录新账号")
# 解析测试步骤文件
def steps(path):
    with open(path) as f:
        steps = yaml.safe_load(f)
    for step in steps:
        if "step1" in step:
            step1()
        elif "step2" in step:
            step2()
        elif "step3" in step:
            step3()

def test_foo():
    steps("./steps.yml")
https://github.com/ceshiren/HogwartsSDET12/blob/master/appium_xueqiu/page/base_page.py 1
3.3 fixture装置的使用
3.3.1 fixture使用背景
前面讲了setup、teardown可以实现在执行用例前或结束后加入一些操作,但这种都是针对整个脚本全局生效的。(注释:setup相当于这个个文件使用,每个文件里用;fixtire是对每个用例)
如果有以下场景:用例 1 需要先登录,用例 2 不需要登录,用例 3 需要先登录。很显然无法用 setup 和 teardown 来实现。fixture可以让我们自定义测试用例的前置条件,并且可以跨文件使用。
3.3.2 fixture的优势
- 命名方式灵活,不局限于 setup 和teardown 这几个命名
- conftest.py 配置里可以实现数据共享,不需要 import 就能自动找到fixture
- scope=“session” 以实现多个.py 跨文件共享
3.3.3 @pytest.fixtrue()快速体验
- 直接使用
import pytest
@pytest.fixture()
def myfixture():
    print("执行myfixture")

class Test_firstFile():

    def test_one(self):
        print("执行test_one")
        assert 2+3==5

    def test_two(self,myfixture):
        print("执行test_two")
        assert 1==1

    def test_three(self):
        print("执行test_three")
        assert 1+1==2
- 通过conftest.py文件
conftest.py这个文件名是固定的,不可以更改。
使用的时候不需要导入conftest.py,会自动寻找.
演练:创建一个conftest.py文件
import pytest
@pytest.fixture()
def myfixture():
    print("执行myfixture")

@pytest.fixture()
def connectdb():
    print("执行myfixture---connectdb")
这是使用多个fixture,在被引用时,直接传入方法名称
3.3.4 fixture中使用autouse
如果我们想要模块中每个测试函数都是用声明好的前置函数,每个测试函数都传入参数或添加装饰器,是不是很不方便?这时我们可以使用@pytest.fixture()中的参数autouse(自动使用),将其设为true(默认为false),这样每个测试函数都会自动调用该前置函数了。
语法:
@pytest.fixture(autouse="true")
3.3.5 fixture中使用作用域
语法:
@pytest.fixture(scope ="class")
scope参数有四种选择:function(测试函数级别),class(测试类级别),module(测试模块“.py”级别),session(多个文件级别)。默认是function级别。
3.3.6 fixture中使用参数
fixture函数可以参数化,在这种情况下,它们将被多次调用,每次执行一组相关测试,即依赖于这个fixture的测试,测试函数通常不需要知道它们的重新运行。
fixture函数需要传入特殊的request对象
函数里面可通过request.param访问每个参数的值
也可加ids指定参数名字
import pytest
@pytest.fixture(params=["参数1","参数2"])
def myfixture(request):
    print("执行testPytest里的前置函数,%s" % request.param)
3.3.7 fixture中返回参数
import pytest
@pytest.fixture(params=["参数1","参数2"])
def myfixture(request):
    return request.param
def test_print_param(myfixture):
    print("执行test_two")
    print(myfixture)
    assert 1==1
输出:
PASSED                    [ 50%]执行test_two
参数1
PASSED                    [100%]执行test_two
参数2
3.3.8 fixture中使用yield实现teardown
fixture里面的teardown用yield来唤醒teardown的执行
import pytest
@pytest.fixture(params=["参数1","参数2"])
def connect_db(request):
    print("开始连接数据库!")
    yield request.param                  #相当于return,只是return后函数就结束了,yield返回值后,仍能继续执行后续
    print("执行teardown,关闭数据库连接")

def test_print_param(connect_db):
    print("执行test_two")
    print(connect_db)
    assert 1==1
yield 是python特有的功能,yield 前相当于tear up,yield 前相当于tear down(执行的顺序相当于:fixture-->test-->yiled-->teardown)
3.4 给pytest.ini添加更多配置
[pytest]
markers = demo
          smoke
addopts = -sv
;自定义测试文件命名规则
python_files = check*
;自定义测试类命名规则
python_classes = Test*
;自定义测试方法命名规则
python_functions = test_* check_* assert*

打印info日志配置:
[pytest]
addopts = -sv --log-cli-level=INFO
4 pytest实用插件介绍
可在这里搜索使用方式:
##4.1. 用例失败后自动重新运行:pytest-rerunfailures
安装插件:
pip install pytest-rerunfailures
使用方法:(对整个文件)
pytest test_x.py --reruns=n #失败后重运行的次数
pytest test_x.py --reruns=n--reruns-delay m #失败后重跑n次,每次停m秒
同时也可以在脚本中(对某一个用例)指定定义重跑的次数,这个时候在运行的时候,就无需加上 --reruns 这个参数
@pytest.mark.flaky(reruns=6, reruns_delay=2)
    def test_example(self):
        print(3)
        assert random.choice([True, False])
4.2 多重校验:pytest-assume
pytest中可以用python的assert断言,也可以写多个断言,但一个失败,后面的断言将不再执行。
使用pytest-assume就会执行所有的断言,如果有失败,依然会执行后面的断言(应用于自动化测试时校验多个值)
安装插件:
pip install pytest-assume
使用方法:
def test_simple_assume(x, y):
    pytest.assume(x == y)
    pytest.assume(True)
    pytest.assume(False)
4.3 分布式并发执行:pytest-xdist
pytest-xdist的出现就是为了让自动化测试用例可以分布式执行,从而节省自动化测试时间
分布式执行用例的设计原则:
- 用例之间是独立的,用例之间没有依赖关系,用例可以完全独立运行【独立运行】
- 用例执行没有顺序,随机顺序都能正常执行【随机执行】
- 每个用例都能重复运行,运行结果不会影响其他用例【不影响其他用例】
安装插件:
pip install pytest-xdist
使用方法:
多cpu并行执行用例,直接加个-n参数即可,后面num参数就是并行数量,比如num设置为3
pytest -n 3
4.4 控制用例的执行顺序:pytest-ordering
安装插件:
pip install pytest-ordering
使用方法:
import pytest

@pytest.mark.run(order=2)
def test_foo():
    assert True

@pytest.mark.run(order=1)
def test_bar():
    assert True
注意:尽量不要让测试用例有顺序,尽量不要让测试用例有依赖!
4.5 hook(钩子)函数定制和扩展插件【了解】
官网:https://docs.pytest.org/en/latest/_modules/_pytest/hookspec.html
pytest_collection_modifyitems
Pytest在收集完所有测试用例后调用该钩子方法。我们可以定制化功能实现:
- 自定义用例执行顺序
- 解决编码问题(中文测试用例名称)
- 自动添加标签
例如:
conftest.py里面:
添加:
def pytest_collection_modifyitems(session, config, items):
    print(type(items))                #items是一个列表
    items.reverse()
    for item in items:
        item.name = item.name.encode('utf-8').decode('unicode-escape')
        item._nodeid = item.nodeid.encode('utf-8').decode('unicode-escape')

        if "add" in item._nodeid:
            item.add_marker(pytest.mark.add)
        if "div" in item._nodeid:
            item.add_marker(pytest.mark.div)
5 Allure
安装:https://repo.maven.apache.org/maven2/io/qameta/allure/allure-commandline/2.13.7/
- mac直接
brew install allure安装 - windows直接下载zip包,解压后把bin路径配置到path里面,使用allure.bat
- 命令行输入allure查看安装是否成功。
pytest里面安装allure-pytest
使用allure:
pytest --alluredir ./report
生成的result记录详细结果,中间结果。最终结果:
allure serve ./report
起了一个服务,后续会进阶学习。
暂时服务,长期服务用jenkins,或者在本地搭建网站服务:Django。
python mange.py runserver (http://127.0.0.1:8000)
生成html文件:
allure generate ./report
生成html文件,open in chrome

 浙公网安备 33010602011771号