
部署你的VUE+Nodejs服务全栈项目(腾讯云Centos7.6)
由于我是第一次安装和部署,跟着教程一次成功了,这里我就不重置服务器也不重新上传截图演示了
这里我把我FinalShell操作记录搬过来,加了一些说明
网页部署到服务器上
服务器安装Nginx
看看装了没
oot@VM-24-7-centos ~]# whereis nginx
安装nginx
nginx:[root@VM-24-7-centos ~]# yum install -y nginx
完毕!
查看nginx安装目录
[root@VM-24-7-centos ~]# whereis nginx
nginx: /usr/sbin/nginx /usr/lib64/nginx /etc/nginx /usr/share/nginx /usr/share/man/man3/nginx.3pm.gz /usr/share/man/man8/nginx.8.gz
启动nginx
[root@VM-24-7-centos ~]# nginx
然后去你的浏览器,访问服务器地址,出现nginx欢迎界面则代表启动成功。
如果没访问成功 去控制台看看你开放了80端口没
停止nginx服务命令
[root@VM-24-7-centos ~]# nginx -s stop
重启nginx服务命令,一般我们前端项目做完重新上传dist包不用重启,改了nainx配置文件才需要重启
[root@VM-24-7-centos ~]# nginx -s reload
nginx: [error] open() "/run/nginx.pid" failed (2: No such file or directory)
修改nginx配置
刚刚停了 启动下
[root@VM-24-7-centos ~]# nginx
去到nginx配置文件存放位置
[root@VM-24-7-centos ~]# cd /etc/nginx
看下list

[root@VM-24-7-centos nginx]# ll
总用量 76
drwxr-xr-x 2 root root 4096 10月 19 07:58 conf.d
drwxr-xr-x 2 root root 4096 10月 19 07:58 default.d
-rw-r--r-- 1 root root 1077 10月 19 07:58 fastcgi.conf
-rw-r--r-- 1 root root 1077 10月 19 07:58 fastcgi.conf.default
-rw-r--r-- 1 root root 1007 10月 19 07:58 fastcgi_params
-rw-r--r-- 1 root root 1007 10月 19 07:58 fastcgi_params.default
-rw-r--r-- 1 root root 2837 10月 19 07:58 koi-utf
-rw-r--r-- 1 root root 2223 10月 19 07:58 koi-win
-rw-r--r-- 1 root root 5231 10月 19 07:58 mime.types
-rw-r--r-- 1 root root 5231 10月 19 07:58 mime.types.default
-rw-r--r-- 1 root root 2336 10月 19 07:58 nginx.conf
-rw-r--r-- 1 root root 2656 10月 19 07:58 nginx.conf.default
-rw-r--r-- 1 root root  636 10月 19 07:58 scgi_params
-rw-r--r-- 1 root root  636 10月 19 07:58 scgi_params.default
-rw-r--r-- 1 root root  664 10月 19 07:58 uwsgi_params
-rw-r--r-- 1 root root  664 10月 19 07:58 uwsgi_params.default
-rw-r--r-- 1 root root 3610 10月 19 07:58 win-utf
nginx.conf为我们需要修改的配置文件,vim进入
[root@VM-24-7-centos nginx]# vim nginx.conf
找到这个server对象,默认http为80不改,把root改为
/home/www/dist
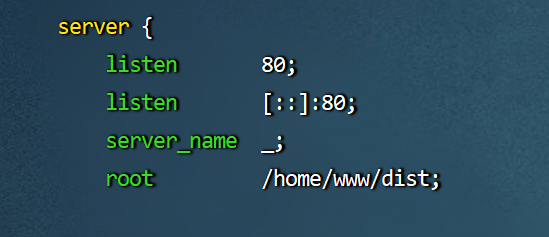
:wq保存退出,重启下nginx
nginx -s reload
去到home下,创建个www用来存放前端打包好的网页
[root@VM-24-7-centos nginx]# cd /home
[root@VM-24-7-centos home]# mkdir www
前端打包好npm run build --prod
在dist目录下点击git Bash
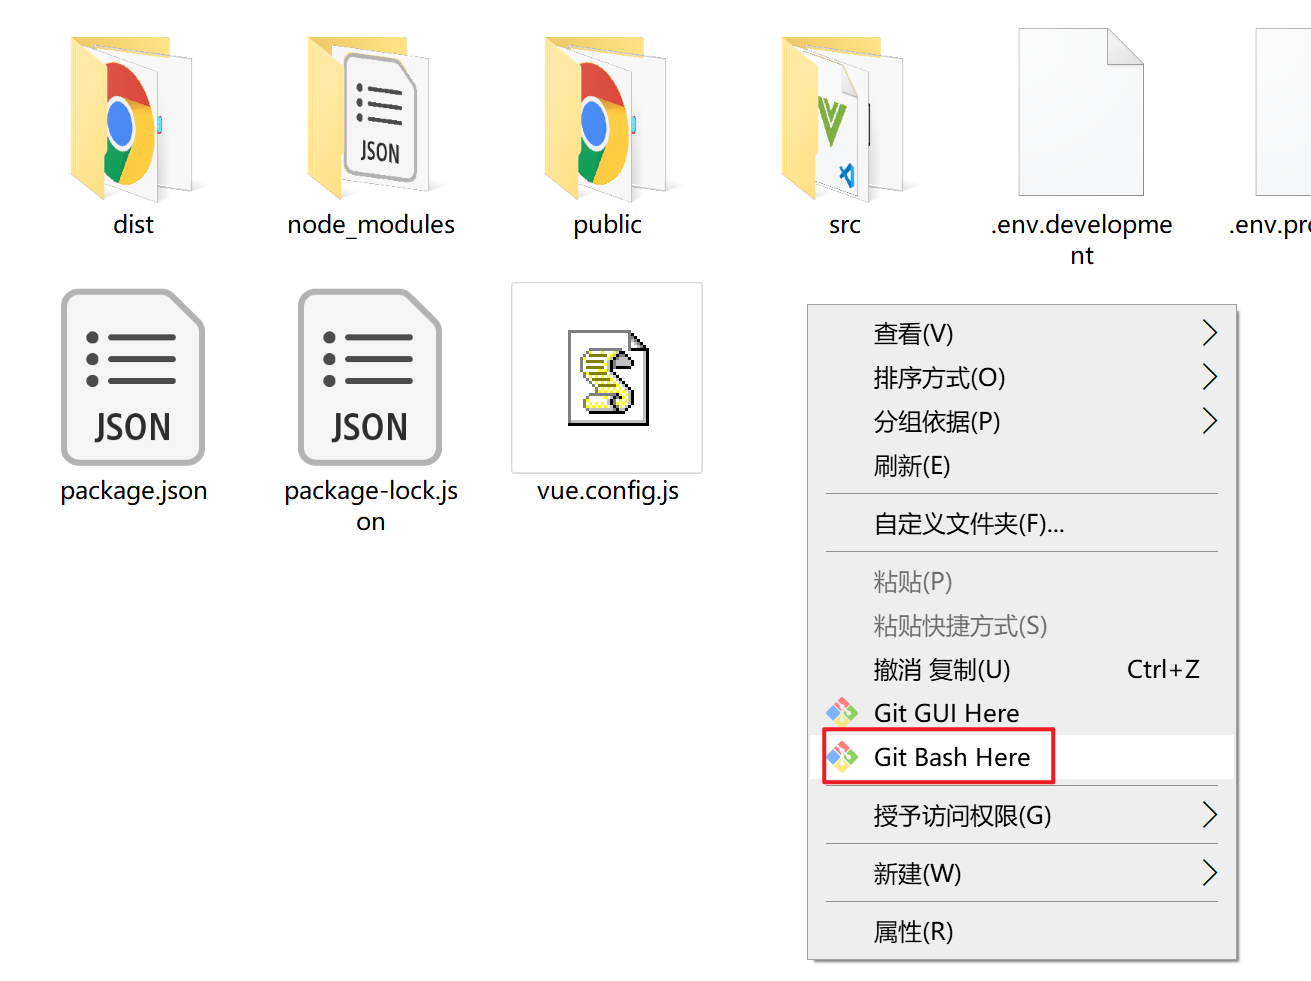
上传你的dist到远程服务器指定路径
scp -r dist/ root@你的服务器地址:/home/www
这个时候我们就已经部署好我们的前端网页到服务器了,直接去浏览器访问就有了
vue配置了history产生404,修改配置文件
location / {
  try_files $uri $uri/ /index.html; ---解决页面刷新404问题
}
nodejs部署服务
安装wget,是一个下载文件的工具,一般镜像都自带了
[root@VM-24-7-centos ~]# yum install -y wget
软件包 wget-1.14-18.el7_6.1.x86_64 已安装并且是最新版本
从nodejs官网拿到Linux二进制安装包,可以在下载页面https://nodejs.org/en/download/中找到下载地址。然后执行指令
[root@VM-24-7-centos ~]# wget https://npmmirror.com/mirrors/node/v16.14.0/node-v16.14.0-linux-x64.tar.xz
2022-02-21 19:27:26 (19.0 MB/s) - 已保存 “node-v16.14.0-linux-x64.tar.xz” [21918532/21918532])
看下文件
[root@VM-24-7-centos ~]# ll
-rw-r--r-- 1 root root 21918532 2月   9 03:44 node-v16.14.0-linux-x64.tar.xz
解压包
[root@VM-24-7-centos ~]# xz -d node-v16.14.0-linux-x64.tar.xz
[root@VM-24-7-centos ~]# tar -xf node-v16.14.0-linux-x64.tar
部署bin文件
先确认你nodejs的路径,我这里的路径为~/node-v16.14.0-linux-x64/bin。确认后依次执行
[root@VM-24-7-centos ~]# ln -s ~/node-v16.14.0-linux-x64/bin/node /usr/bin/node
[root@VM-24-7-centos ~]# ln -s ~/node-v16.14.0-linux-x64/bin/npm /usr/bin/npm
[root@VM-24-7-centos ~]# ln -s ~/node-v16.14.0-linux-x64/bin/npm /usr/bin/npx
看下有无版本号
[root@VM-24-7-centos ~]# node -v
v16.14.0
[root@VM-24-7-centos ~]# npm -v
8.3.1
安装pm2
[root@VM-24-7-centos ~]# npm install pm2 -g
查看版本
[root@VM-24-7-centos ~]# pm2 -v
-bash: pm2: 未找到命令
由于我们是在根目录下二进制安装的node,我们安装完pm2后全局找不到,不和window一样安装nodejs程序时候就帮我们弄好了环境变量,这边还需要配置下软连接(第一次弄折腾了我好久)
回到我们node包下载好的路径
cd ~
[root@VM-24-7-centos ~]# ll
总用量 93000
drwxr-xr-x 6 1001 1001     4096 2月   8 20:49 node-v16.14.0-linux-x64
-rw-r--r-- 1 root root 96522240 2月   9 03:44 node-v16.14.0-linux-x64.tar
进入并复制node的bin路径
[root@VM-24-7-centos ~]# cd node-v16.14.0-linux-x64/
[root@VM-24-7-centos node-v16.14.0-linux-x64]# ls
bin  CHANGELOG.md  include  lib  LICENSE  README.md  share
[root@VM-24-7-centos node-v16.14.0-linux-x64]# cd bin
[root@VM-24-7-centos bin]# ls
corepack  node  npm  npx  pm2  pm2-dev  pm2-docker  pm2-runtime
[root@VM-24-7-centos bin]# pwd
/root/node-v16.14.0-linux-x64/bin
将上面的pwd路径复制出来
/root/node-v16.14.0-linux-x64/bin
回到根
cd ~
进入这个配置文件
vim .bashrc
将刚才复制的路径粘贴到这里,如图所示,ails pm2那一行
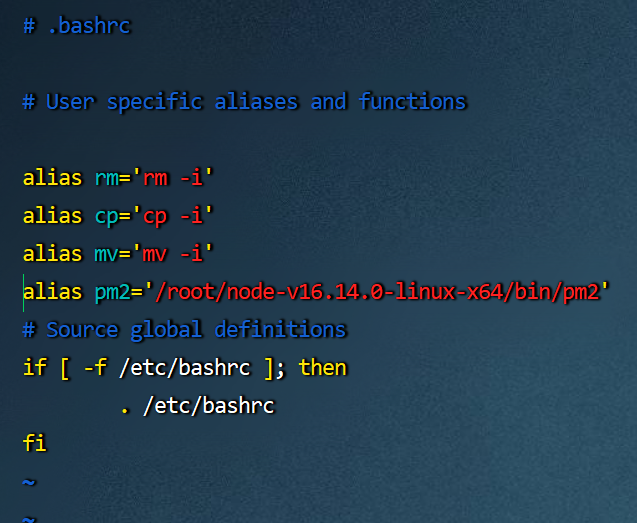
然后立刻加载刚刚修改好的配置
source .bashrc
此时,我们在一次pm2 -v
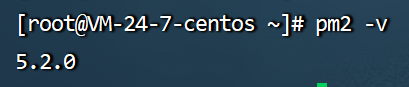
有了!!!!!!!!!!!!!!!!!!反正就和windows一样搞下环境变量一样,配置才能在全局dos使用到你bin下的程序
安装git
yum install -y git
[root@VM-24-7-centos ~]# cd /home
我是在home下拉取我的代码到这里的
git clone 你的仓库地址
到你的server文件夹npm i下先
然后运行开启服务
pm2 start server.js
出现这个标识成功
[PM2] Starting /home/chatrom/server/server.js in fork_mode (1 instance)
[PM2] Done.
┌─────┬───────────┬─────────────┬─────────┬─────────┬──────────┬────────┬──────┬───────────┬──────────┬──────────┬──────────┬──────────┐
│ id  │ name      │ namespace   │ version │ mode    │ pid      │ uptime │ ↺    │ status    │ cpu      │ mem      │ user     │ watching │
├─────┼───────────┼─────────────┼─────────┼─────────┼──────────┼────────┼──────┼───────────┼──────────┼──────────┼──────────┼──────────┤
│ 0   │ server    │ default     │ 1.0.0   │ fork    │ 10711    │ 0s     │ 0    │ online    │ 0%       │ 16.6mb   │ root     │ disabled │
└─────┴───────────┴─────────────┴─────────┴─────────┴──────────┴────────┴──────┴───────────┴──────────┴──────────┴──────────┴──────────┘
我常用的pm2命令
开启
pm2 start server.js
查看运行中
pm2 list
关闭并清除所有服务
pm2 delete all
停止
pm2 stop server.js
开启一个不断连的后台服务
npm i -g peer 安装
peerjs --port 3001 windows的dos运行
nohup peerjs --port 3001 & 持久不断连运行
netstat -ntlp
注意,运行上面光标在闪后别直接ctrl+c,虽然去查端口程序还在运行着,测试过nohup peerjs --port 3001 &直接ctrl+c后过几个钟后就停止运行了
按一次回车,然后直接exit退出就不会了,别直接把FinalShell关了,也会停
常用快捷命令截图

nginx.config配置文件
1代表部署了多个项目
upload文件夹是放置静态资源
server {
        listen       80;
        #listen       [::]:80;
        #server_name  _;
        #root         /home/www/dist;

        # Load configuration files for the default server block.
        location / {
                root  /home/www/dist;
                index index.html;
        }

        location /1 {
                alias /home/www/shuzhi;
                index index.html;
        }
        location /upload{
                alias /home/www/upload;
                autoindex on;
        }
        include /etc/nginx/default.d/*.conf;

        error_page 404 /404.html;
        location = /404.html {
        }
}
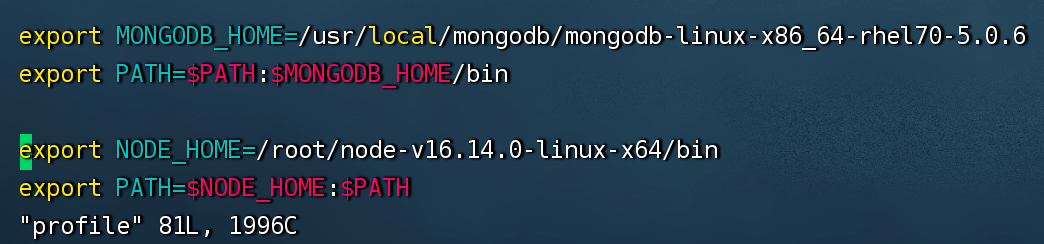
cd /etc
vim profile
配置如下
export MONGODB_HOME=/usr/local/mongodb/mongodb-linux-x86_64-rhel70-5.0.6
export PATH=$PATH:$MONGODB_HOME/bin

export NODE_HOME=/root/node-v16.14.0-linux-x64/bin
export PATH=$NODE_HOME:$PATH


【推荐】国内首个AI IDE,深度理解中文开发场景,立即下载体验Trae
【推荐】编程新体验,更懂你的AI,立即体验豆包MarsCode编程助手
【推荐】抖音旗下AI助手豆包,你的智能百科全书,全免费不限次数
【推荐】轻量又高性能的 SSH 工具 IShell:AI 加持,快人一步
· TypeScript + Deepseek 打造卜卦网站:技术与玄学的结合
· 阿里巴巴 QwQ-32B真的超越了 DeepSeek R-1吗?
· 【译】Visual Studio 中新的强大生产力特性
· 张高兴的大模型开发实战:(一)使用 Selenium 进行网页爬虫
· 【设计模式】告别冗长if-else语句:使用策略模式优化代码结构
2021-02-21 解决Chrome浏览器“崩溃啦”的问题!