数据采集与融合技术实践作业三
数据采集与融合技术实践作业三
gitee链接:https://gitee.com/wei-yuxuan6/myproject/tree/master/作业3
作业①
Scrapy爬取图片实验
-
要求:指定一个网站,爬取这个网站中的所有的所有图片,例如:中国气象网(http://www.weather.com.cn)。使用scrapy框架分别实现单线程和多线程的方式爬取。
-
务必控制总页数(学号尾数2位)、总下载的图片数量(尾数后3位)等限制爬取的措施。
-
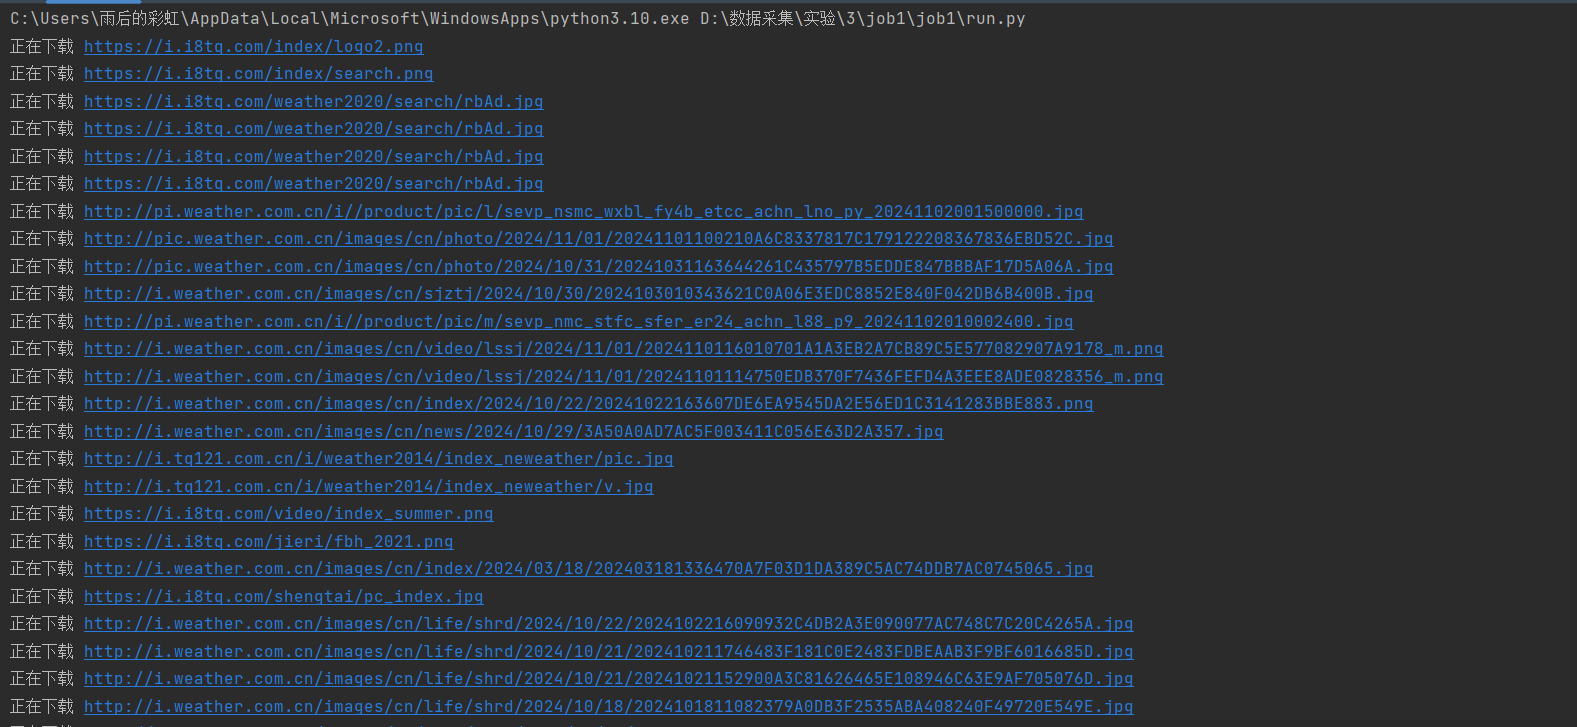
输出信息: 将下载的Url信息在控制台输出,并将下载的图片存储在images子文件中,并给出截图。
-
过程
通过在网页HTML中查找图片元素发现图片的链接都在<img>元素的src属性中(这个网站的格式比较统一)
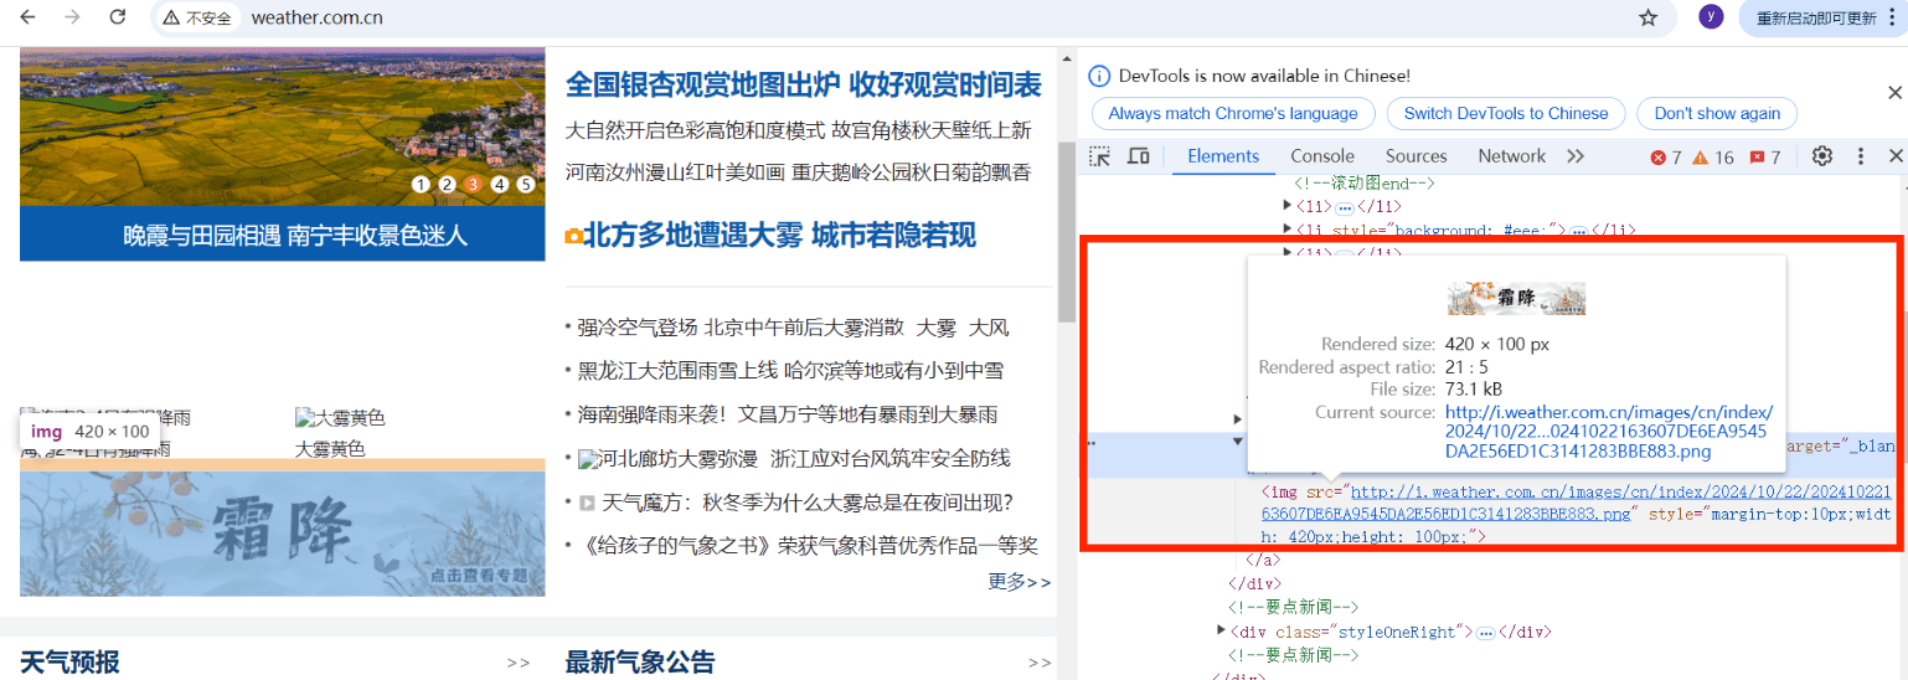
就可以直接使用 Selector 类解析 HTML 并使用XPATH定位<img>和获取属性src
pics = selector.xpath("//img/@src")
使用extract()提取图片URL
picurl = pic.extract()
使用Scrapy需要使用命令创建爬虫,scrapy startproject命令创建爬虫项目

scrapy genspider <爬虫名称> <域名>创建爬虫程序

可以在本地文件夹中查看是否创建成功

至于实现多线程和单线程,Scrapy本身并不直接支持多线程,因为它是基于异步IO的。但是可以通过改变settings中CONCURRENT_REQUESTS的值实现类似多线程的效果,设置并发请求数,为1近似单线程,也可以设置成其他值近似多线程(默认16)CONCURRENT_REQUESTS = 1 -
部分代码
1)先写items.py文件定义数据格式和字段个数import scrapy class Job1Item(scrapy.Item): num=scrapy.Field() #图片编号 picurl = scrapy.Field() #图片URL2)再写爬虫程序picspider.py文件
必须导入定义的Item类from job1.items import Job1Item构造初始URL并解析响应,Job1Item 是用于存储爬取结果的对象,通过 yield 将每个包含图片 URL 和编号的 item 传递给 ItemPipelines处理
# 定义一个爬虫类,继承自scrapy.Spider
class PicspiderSpider(scrapy.Spider):
  name = "picspider"  # 爬虫的名称,用于命令行启动
  start_urls = ["http://www.weather.com.cn"]  # 初始请求的URL列表
  num = 0  # 用于计数图片的编号

  # 解析响应的方法
  def parse(self, response):
      try:
          # 使用UnicodeDammit来处理响应体的编码,自动检测并转换为合适的编码
          dammit = UnicodeDammit(response.body, ["utf-8", "gbk"])
          data = dammit.unicode_markup  # 获取转换后的HTML内容

          # 使用Selector解析转换后的HTML数据
          selector = Selector(text=data)

          # 使用XPath选择所有图片的src属性
          pics = selector.xpath("//img/@src")

          # 遍历所有图片的src
          for pic in pics:
              self.num += 1  # 每次循环编号加1
              picurl = pic.extract()  # 提取图片URL
              item = Job1Item()  # 创建一个Item实例
              item['num'] = self.num  # 设置Item的num属性
              item['picurl'] = picurl  # 设置Item的picurl属性

              # 使用yield生成Item对象
              yield item

      # 异常处理,打印错误信息
      except Exception as e:
          print(e)
3)写pipelines.py文件(如何处理scrapy爬取到的数据)
这里使用了urllib.request.urlretireve方法从获取到的图片URL下载图片并保存到本地class Job1Pipeline(): def process_item(self, item, spider): print("正在下载 "+item['picurl']) urllib.request.urlretrieve(item['picurl'], f'./images/第{item["num"]}张图片.jpg')4)配置settings.py文件
添加浏览器代理USER_AGENT = "Mozilla/5.0 (Windows NT 10.0; Win64; x64) AppleWebKit/537.36 (KHTML, like Gecko) Chrome/128.0.0.0 " \ "Safari/537.36"不遵守robots.txt
ROBOTSTXT_OBEY = FalseCONCURRENT_REQUESTS = 1设置download_delay,防止访问过快被拒绝访问
DOWNLOAD_DELAY = 3打开item_pipelines
4)run.py文件
使得scrapy可以直接在Pycharm中输出from scrapy import cmdline cmdline.execute("scrapy crawl picspider -s LOG_ENABLED=False".split()) -
结果
gitee链接:https://gitee.com/wei-yuxuan6/myproject/tree/master/作业3/job1

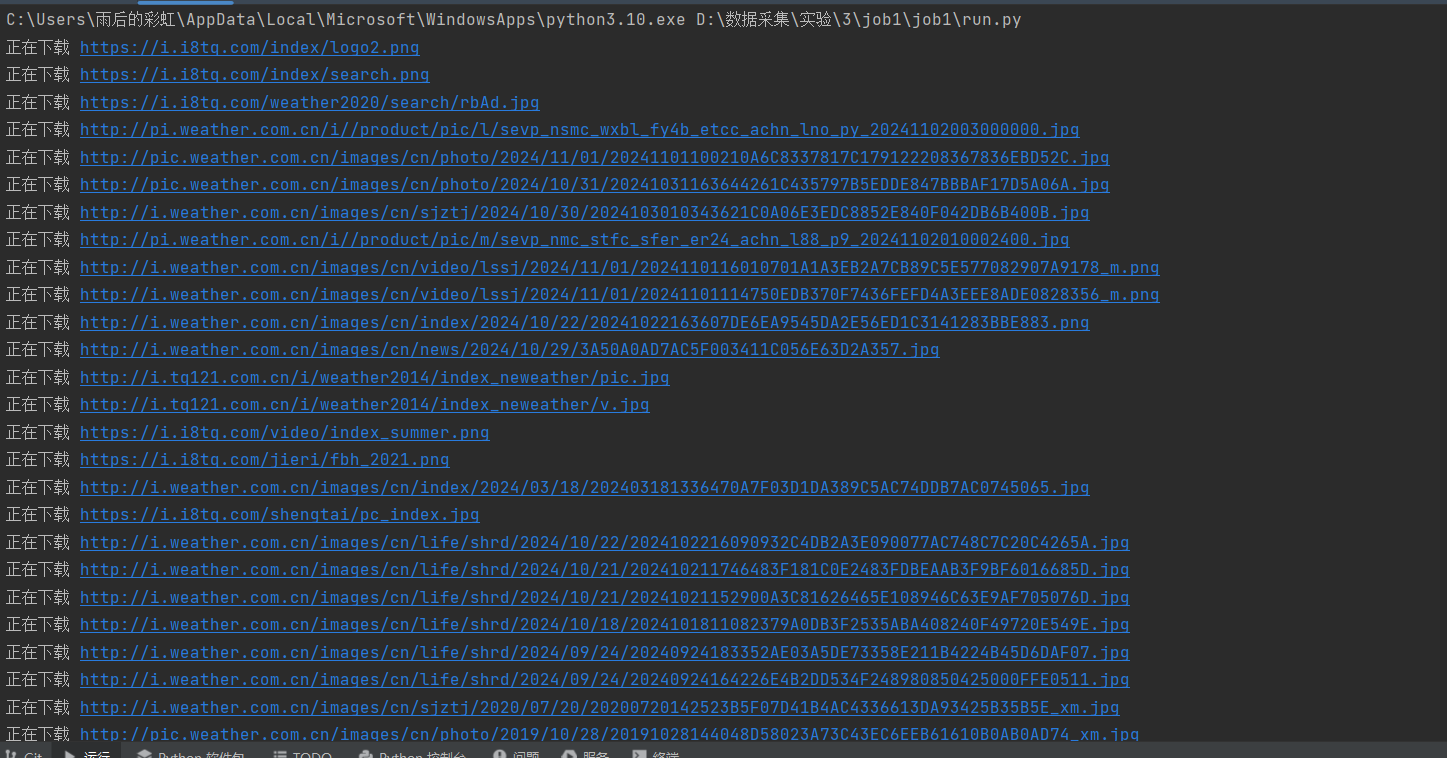
还尝试在pipelines.py中继承ImagesPipeline,并重写get_media_requests、file_path 和 item_completed方法,以实现自定义的图片下载逻辑和文件存储路径class Job1Pipeline(ImagesPipeline): def get_media_requests(self, item, info): yield scrapy.Request(item['picurl']) def file_path(self, request, response=None, info=None, *, item=None): print("正在下载 "+request.url) num = item['num'] return f'第{num}张图片.jpg' def item_completed(self, results, item, info): return item在settings.py中指定图片保存文件夹
# 指定文件保存位置 IMAGES_STORE = "./images2"可以看到它不会再次访问已经访问过的URL,即重复的图片只下载一次
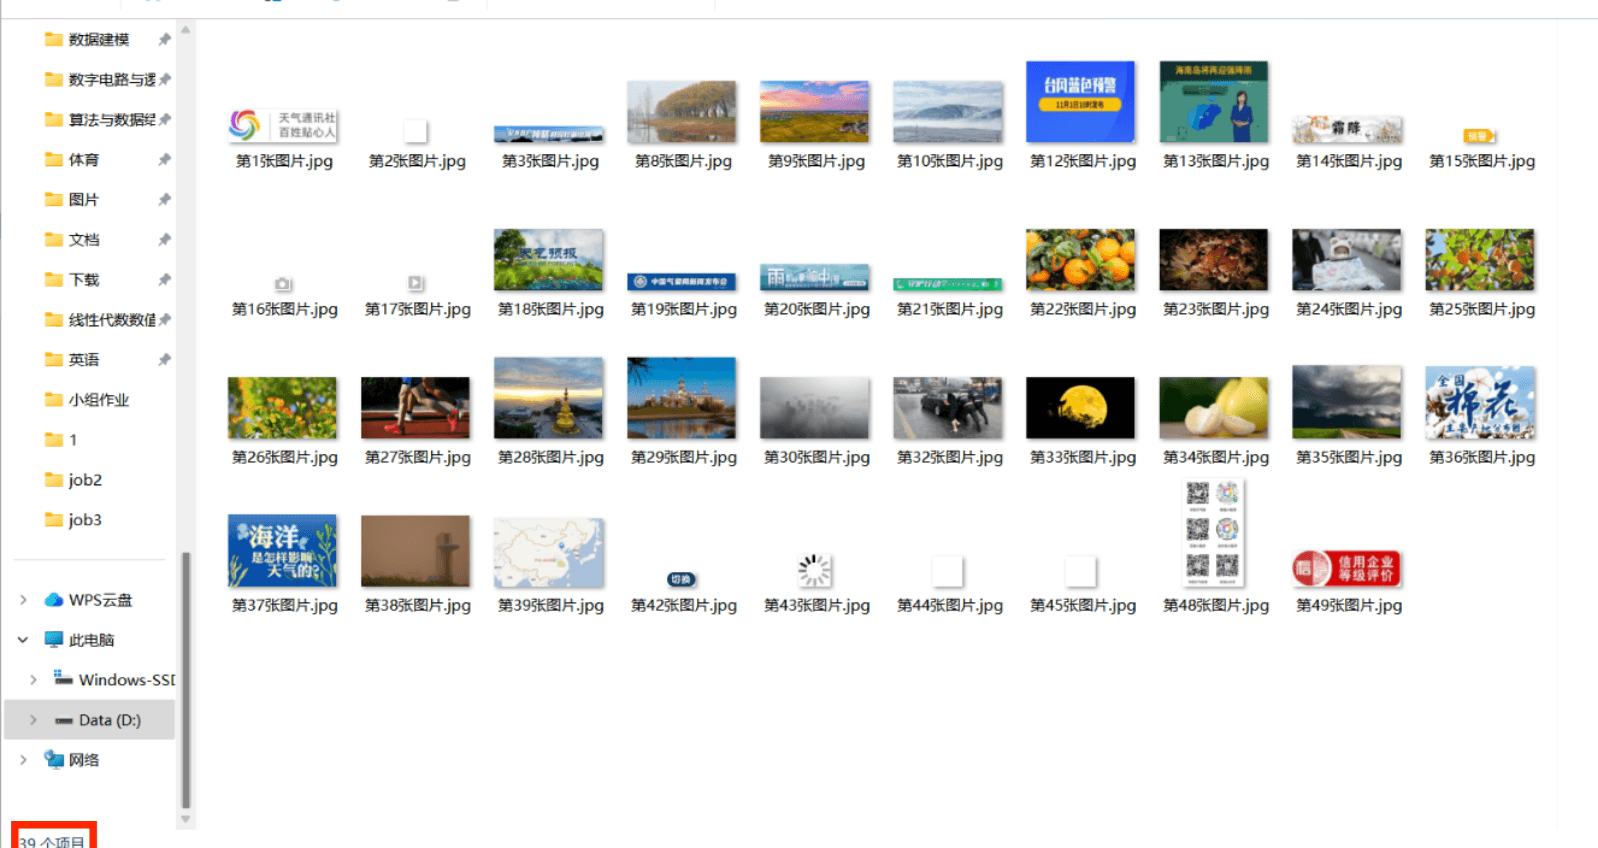
但是比使用urllib.request爬取到的图片还少了几张,主要是云图、雷达、降水量预报图(不知道是什么原因,尝试了很多次都是少这几张)
-
爬取京东的商品图片实现翻页,从第50页开始爬取150项
gitee链接:https://gitee.com/wei-yuxuan6/myproject/tree/master/作业3/jdpic
京东图片URL不仅在元素的src属性中,还有部分在data-lazy-img中,所以需要分别提取这两个属性的值,需要在访问完一页后构造新的URL并发出请求
class SpiderJdSpider(scrapy.Spider):
  name = "picspider"  # 爬虫名称
  source_url = "https://search.jd.com/"  # JD商品搜索的基础URL
  q = "电脑"  # 要搜索的商品关键词
  num = 150  # 用户输入的商品数量
  # 计算需要抓取的页面数量,每页显示30个商品
  if num % 30 == 0 and num != 0:
      page = num // 30  # 如果num是30的倍数
  else:
      page = num // 30 + 1  # 否则,加一页

  begin = 50  # 初始化页面计数器,表示当前抓取的页面(从第50页开始)
  i = 0  # 初始化抓取页数计数器
  count = 0  # 初始化商品计数器,记录成功抓取的商品数量

  def start_requests(self):
      # 构建请求URL,包含搜索关键词和其他参数
      url = self.source_url + "Search?keyword=" + urllib.parse.quote(self.q) + \
            "&wq=" + urllib.parse.quote(self.q) + \
            " f731e1b710764540abce5caf912eeb7a & isList = 0 & page = " + \
            str(self.begin) + "&s = 56 & click = 0 & log_id = 1730513540494.9221"

      yield scrapy.Request(url=url, callback=self.parse)  # 发送请求,回调解析函数

  def parse(self, response):
      print(response.url)  # 打印当前请求的URL
      dammit = UnicodeDammit(response.body, ["utf-8", "gbk"])  # 处理响应体的编码
      data = dammit.unicode_markup  # 获取处理后的HTML内容
      selector = Selector(text=data)  # 使用Selector解析HTML
      items = selector.xpath("//ul[@class='gl-warp clearfix']/li")  # 选择商品列表项

      for item in items:
          url = item.xpath(".//div[@class='p-img']//img/@src").extract_first()
          if not url:
              url = item.xpath(".//div[@class='p-img']//img/@data-lazy-img").extract_first()
          picurl="https:"+url
          picurl = re.sub(r'\.avif$', '', picurl)
          self.count += 1  # 商品计数器加1
          item = JdpicItem()  # 创建JdItem实例
          item['num'] = self.count
          item['picurl'] = picurl

          yield item  # 发送抓取到的商品信息

          if self.count == self.num:  # 如果已抓取到所需数量
              break  # 退出循环

      self.i += 1  # 页数计数器加1
      if self.i < self.page:  # 如果还有页面需要抓取
          # 构建下一页的请求URL
          url = self.source_url + "Search?keyword=" + urllib.parse.quote(self.q) + \
                "&wq=" + urllib.parse.quote(self.q) + \
                " f731e1b710764540abce5caf912eeb7a & isList = 0 & page = " + \
                str(self.begin+self.i) + "&s = 56 & click = 0 & log_id = 1730513540494.9221"
          yield scrapy.Request(url=url, callback=self.parse)  # 发送请求,继续抓取下一页
在settings中设置
COOKIES_ENABLED = False爬取京东的pipelines.py,还是使用urllib.request
因为尝试使用继承ImagePipelines只能下载30张图片,可能被限制访问了
150张图片使用urllib.request.urlretrieve下载很慢,要十几分钟,所以可以在这里使用多线程下载class JdpicPipeline: def __init__(self): # 创建线程池,线程数量可根据需要调整 self.executor = ThreadPoolExecutor(max_workers=5) # 5 个线程并发下载 def process_item(self, item, spider): # 提交下载任务到线程池 self.executor.submit(self.download_image, item) return item def download_image(self, item): try: print(f"正在下载 {item['picurl']}") urllib.request.urlretrieve(item['picurl'], f'./images3/第{item["num"]}张图片.jpg') print(f"下载完成 {item['picurl']}") except Exception as e: print(f"下载失败 {item['picurl']} - 错误: {e}") def close_spider(self, spider): # 关闭线程池并等待所有线程完成 self.executor.shutdown(wait=True) print("所有下载任务已完成")结果:
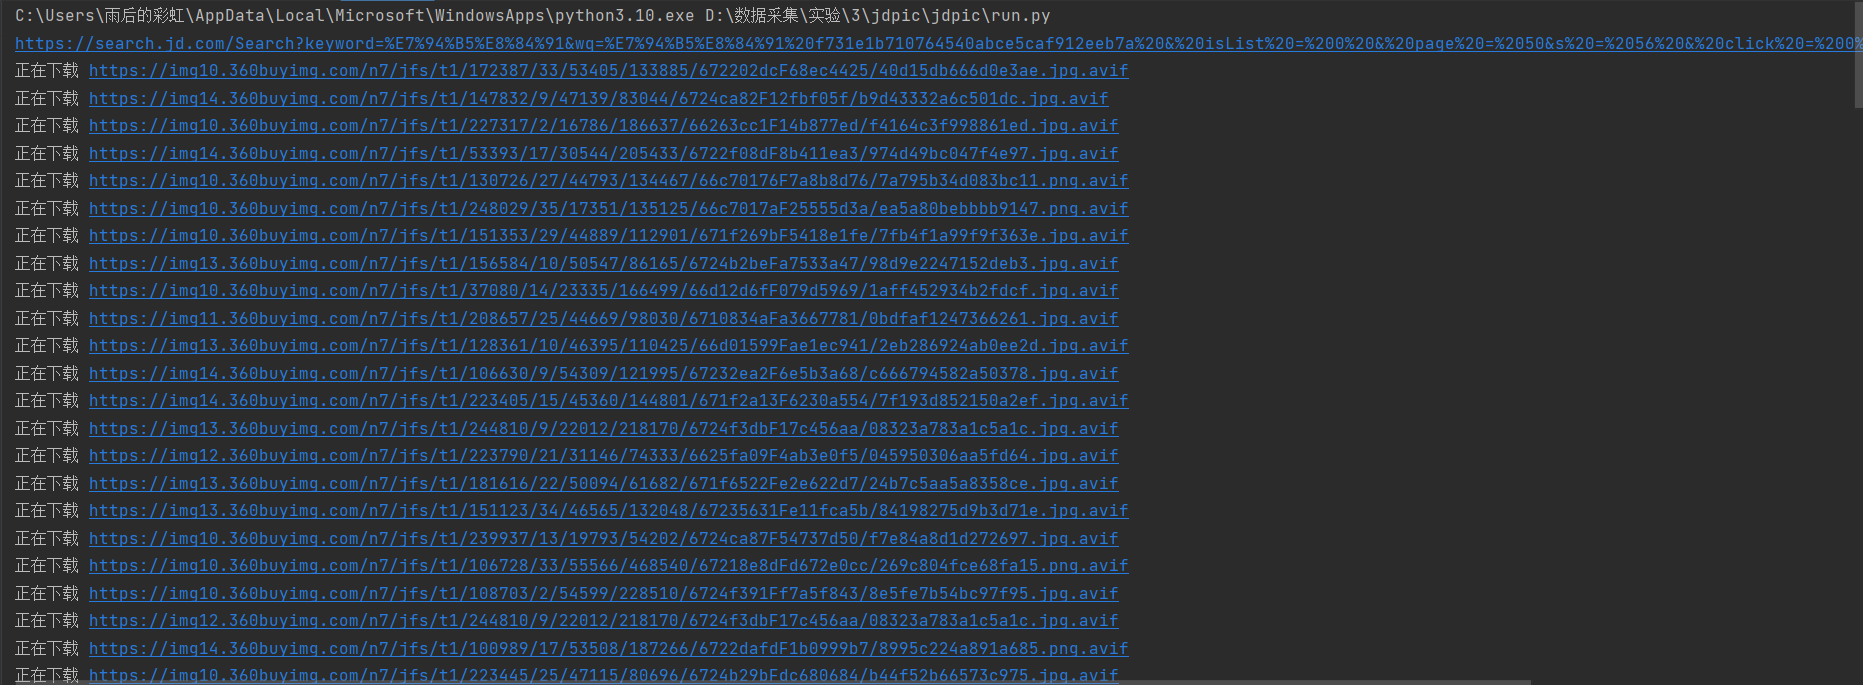
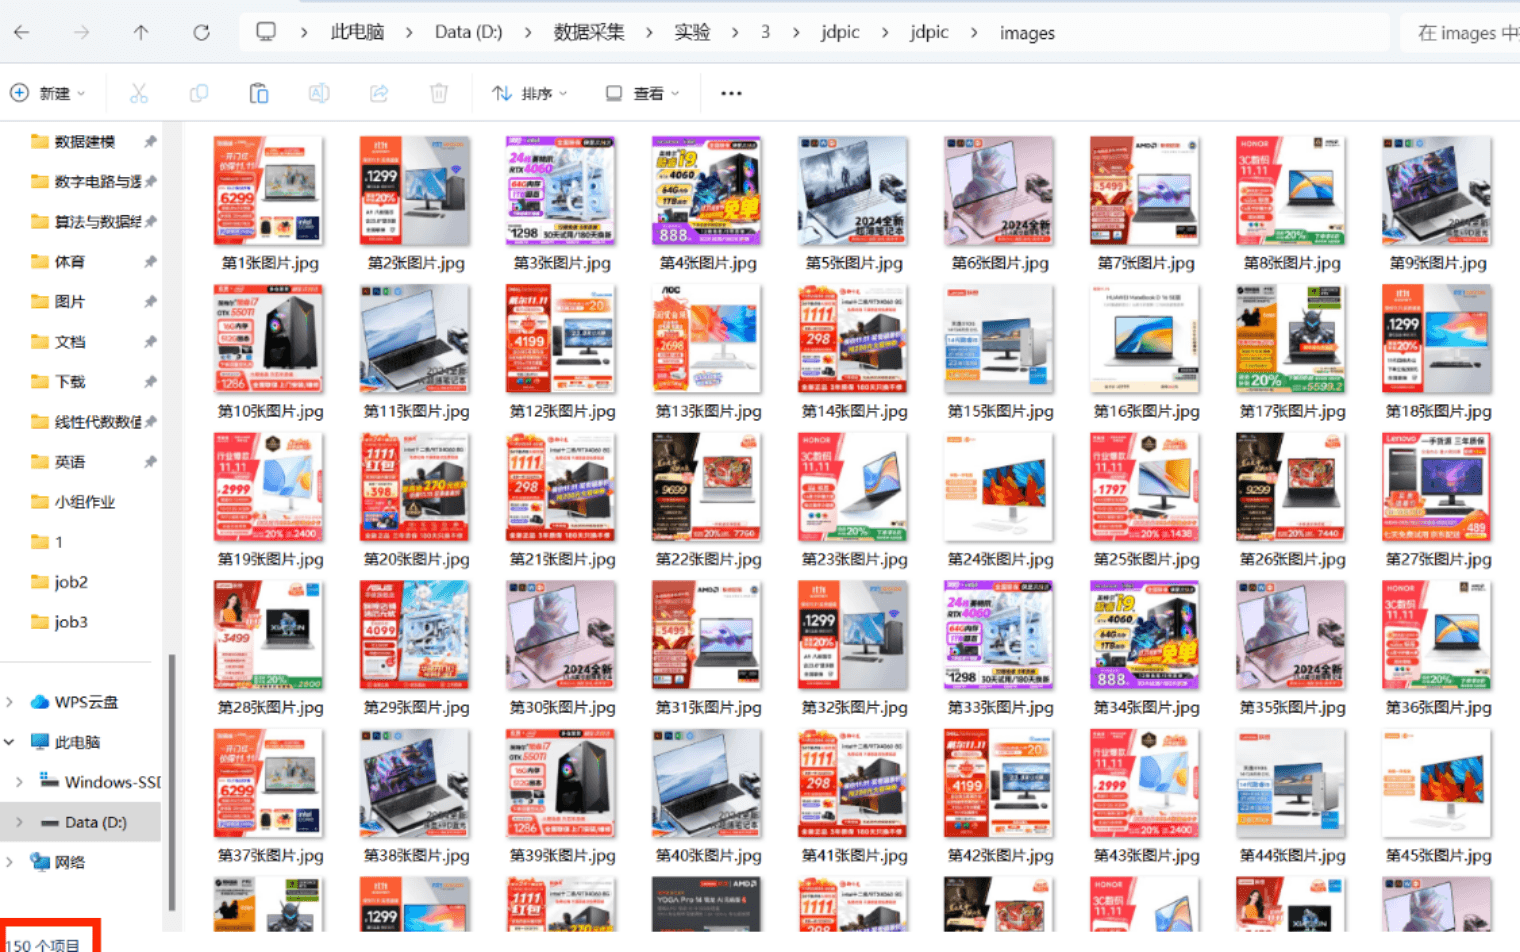
一共150张图片
心得体会
初步实践了使用Scrapy下载图片,在Scrapy框架中传递图片URL数据并在ItemPipelines实现图片下载
巩固了翻页访问网页,以及在spider中构造新的URL请求并获得和解析响应,还有Scrapy的工作流程
两个实践都想采用继承ImagePipelines的方式下载图片但是都没有得到很好的结果,可能是对该方法的掌握和理解还不够深入,需要进一步加强学习。
而且在爬取天气网的图片时还有一些图片url在html中没有被访问和下载,可能是因为这些图片是动态的需要动态加载。
作业②
动态爬取股票相关信息实验
-
要求:熟练掌握 scrapy 中 Item、Pipeline 数据的序列化输出方法;使用scrapy框架+Xpath+MySQL数据库存储技术路线爬取股票相关信息。
-
候选网站:东方财富网:https://www.eastmoney.com/
-
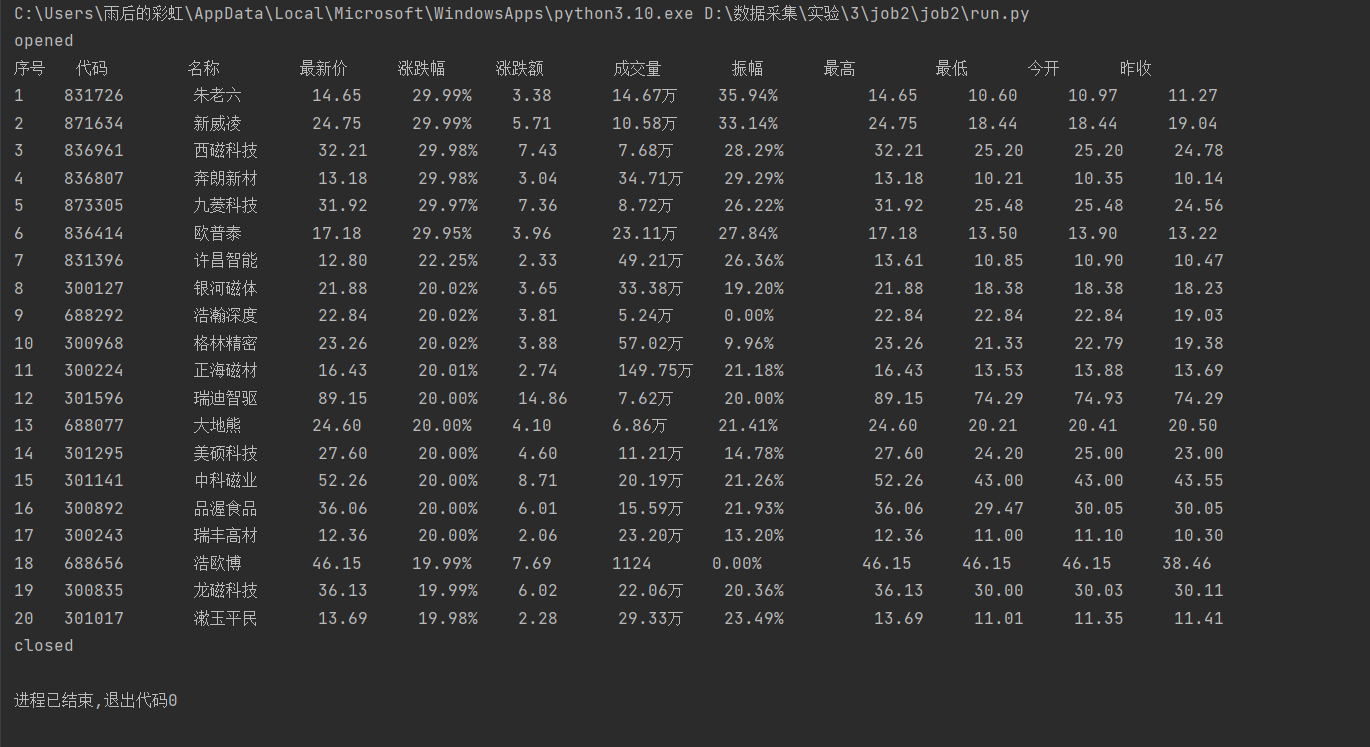
输出信息:MySQL数据库存储和输出格式如下:

-
过程
访问东方财富网,找到需要爬取的股票html,看到股票信息都在表格<tbody>中,每个股票在一个<tr>元素中,字段分别在不同的<td>中,需要找到自己需要的字段(如序号在第一个td中……)
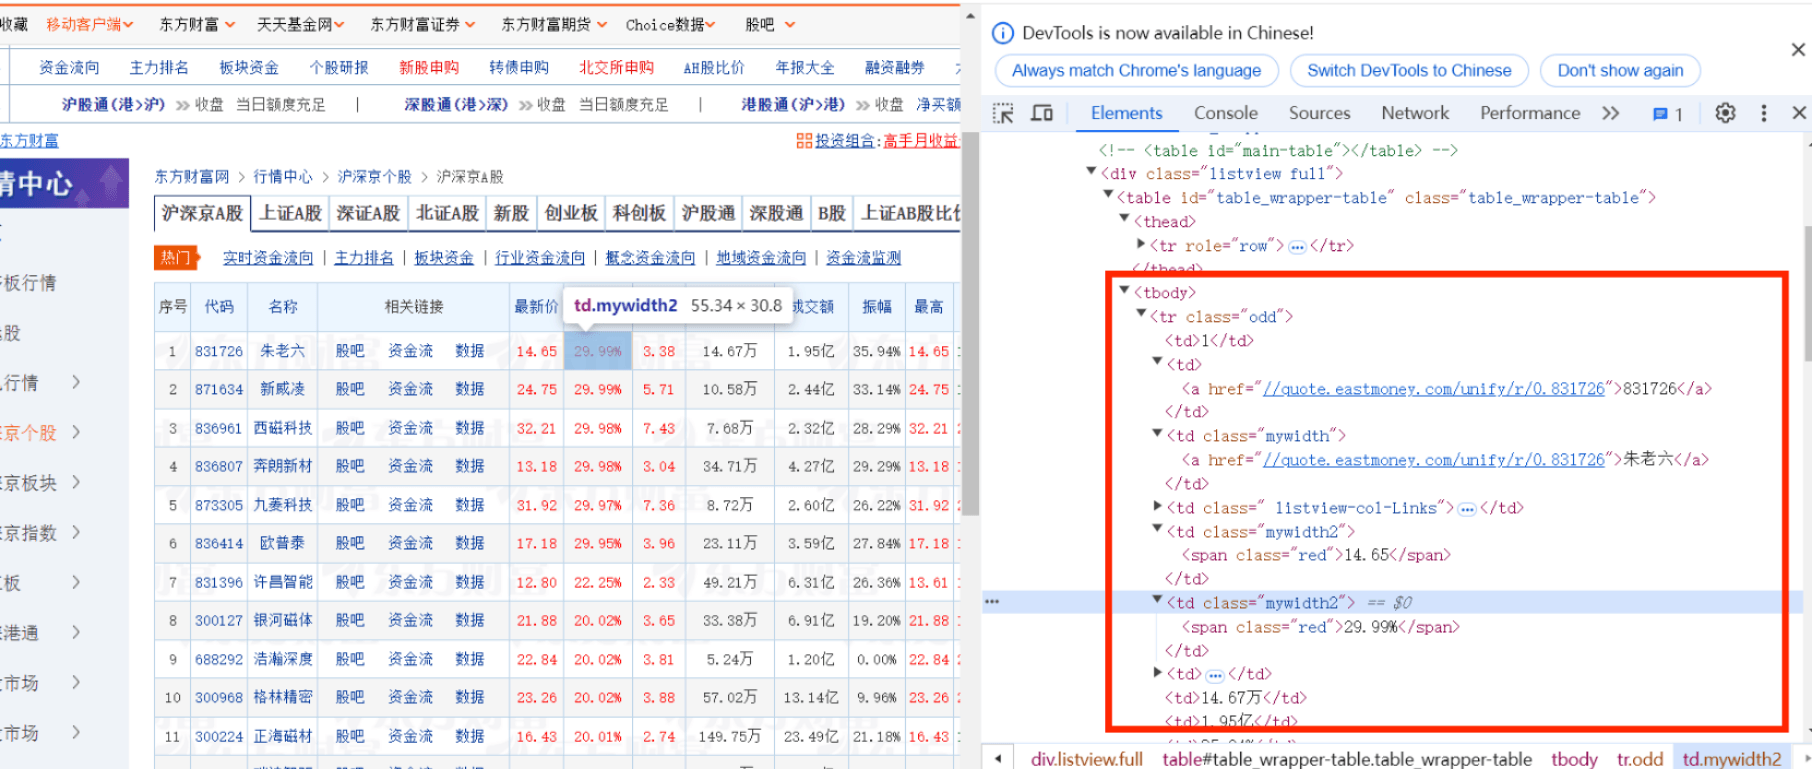
而且因为这个网站的数据是实时加载的,但是Scrapy是静态的,不能获取JavaScript执行过的html,所以如果不与Selenium配合使用就不能获得数据,而且Selenium相关的处理程序需要写在中间件中,因为downloader会得到spider请求响应的html,需要在中间件中使用Selenium重新处理html使得是JavaScript执行过的,并封装成新的响应发送给spider解析from scrapy.http import HtmlResponse from selenium import webdriver class SeleniumMiddleware(object): def process_request(self,request,spider): url = request.url browser = webdriver.Chrome() browser.get(url) time.sleep(5) html = browser.page_source browser.close() return HtmlResponse(url=url, body=html, request=request, encoding="utf-8", status=200)同时需要在settings.py中配置这个中间件
SELENIUM_ENABLED = True
DOWNLOADER_MIDDLEWARES = {
  "job2.middlewares.SeleniumMiddleware": 543,
}
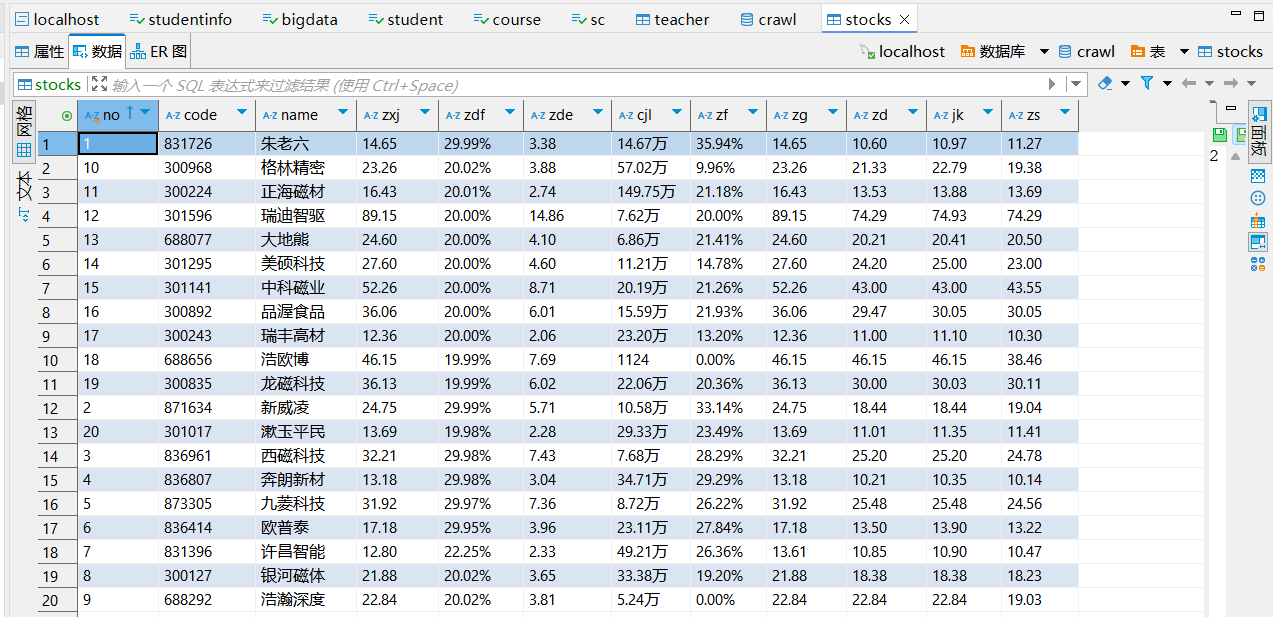
而且题目要求将爬取到的数据存储到MySQL数据库中,所以新建一个数据库crawl,再在其中建一个表stocks
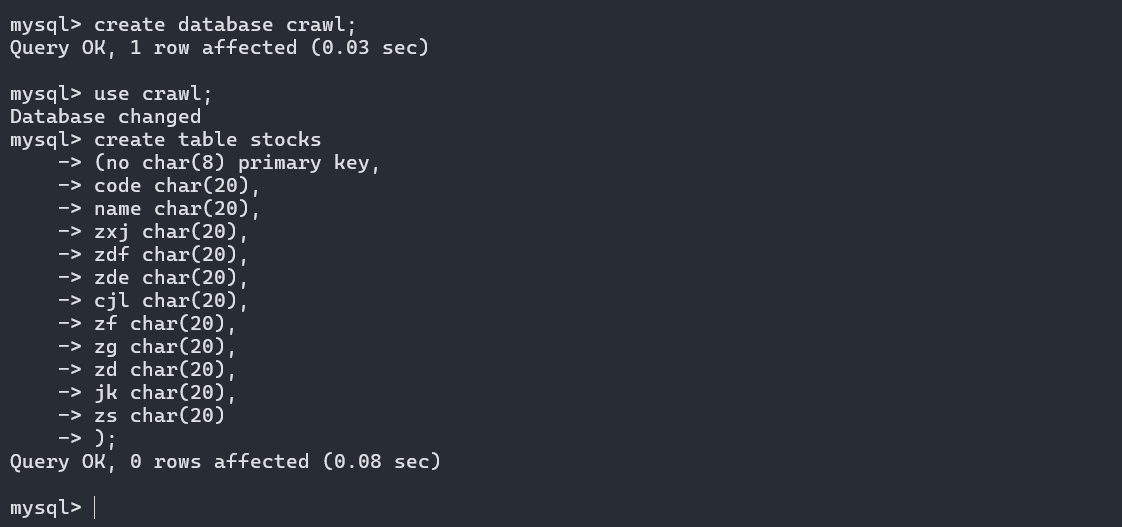
-
部分代码
items.py设置字段class Job2Item(scrapy.Item): # define the fields for your item here like: no = scrapy.Field() code= scrapy.Field() name = scrapy.Field() zxj = scrapy.Field() zdf = scrapy.Field() zde = scrapy.Field() cjl = scrapy.Field() zf = scrapy.Field() zg = scrapy.Field() zd = scrapy.Field() jk = scrapy.Field() zs = scrapy.Field()spi_stock.py
主要是解析响应部分,因为获得的是JavaScript处理过的html所以可以直接使用Xpath获取所需文本,使用position定位需要字段对应的<td>标签下的文本,再使用extract_first提取出文本值def parse(self, response): try: dammit=UnicodeDammit(response.body,["utf-8","gbk"]) data=dammit.unicode_markup selector=Selector(text=data) items = selector.xpath("//table[@id='table_wrapper-table']//tbody/tr") for i in items: no = i.xpath(".//td[position()=1]//text()") name = i.xpath(".//td[position()=3]//text()") code = i.xpath(".//td[position()=2]//text()") zxj = i.xpath(".//td[position()=5]//text()") zdf = i.xpath(".//td[position()=6]//text()") zde = i.xpath(".//td[position()=7]//text()") cjl = i.xpath(".//td[position()=8]//text()") zf = i.xpath(".//td[position()=10]//text()") zg = i.xpath(".//td[position()=11]//text()") zd = i.xpath(".//td[position()=12]//text()") jk = i.xpath(".//td[position()=13]//text()") zs = i.xpath(".//td[position()=14]//text()") item=Job2Item() item["no"]=no.extract_first() item["code"]=code.extract_first() item["name"]=name.extract_first() item["zxj"]=zxj.extract_first() item["zdf"]=zdf.extract_first() item["zde"]=zde.extract_first() item["cjl"]=cjl.extract_first() item["zf"]=zf.extract_first() item["zg"]=zg.extract_first() item["zd"]=zd.extract_first() item["jk"]=jk.extract_first() item["zs"]=zs.extract_first() yield item except Exception as e: print(e)pipelines.py
也是一个重要的部分,在这里需要打开数据库,将解析后的数据存储到数据库,最后还要关闭数据库
open_spider在开启爬虫时执行,连接MySQL数据库def open_spider(self, spider): print("opened") # 打印"opened",表示爬虫已启动 try: # 连接到 MySQL 数据库 self.con = pymysql.connect(host="127.0.0.1", port=3306, user="root", passwd="Tnt191123!", db="crawl", charset="utf8") self.cursor = self.con.cursor(pymysql.cursors.DictCursor) # 创建一个游标,使用字典游标以便返回字典格式的数据 self.cursor.execute("delete from stocks") # 清空 stocks 表 self.opened = True # 设置状态为已打开 # 打印表头 print("{:<5}{:<10}{:<10}{:<8}{:<8}{:<10}{:<10}{:<8}{:<10}{:<8}{:<8}{:<8}".format( "序号", "代码", "名称", "最新价", "涨跌幅", "涨跌额", "成交量", "振幅", "最高", "最低", "今开", "昨收")) except Exception as e: print(e) # 打印异常信息 self.opened = False # 如果出错,设置状态为未打开close_spider在爬虫结束时执行,关闭数据库
   def close_spider(self, spider):
      if self.opened:  # 检查爬虫是否已打开
          self.con.commit()  # 提交数据库事务
          self.con.close()  # 关闭数据库连接
          self.opened = False  # 设置状态为未打开
      print("closed")  # 打印"closed",表示爬虫已关闭
process_item在每次接收到spider解析后的数据执行,先打印出数据再将数据插入到stocks表中
def process_item(self, item, spider): try: # 格式化并打印每个项的内容 print("{:<5}{:<13}{:<10}{:<10}{:<10}{:<10}{:<10}{:<15}{:<10}{:<10}{:<10}{:<10}".format( item["no"], item["code"], item["name"], item["zxj"], item["zdf"], item["zde"], item["cjl"], item["zf"], item["zg"], item["zd"], item["jk"], item["zs"])) if self.opened: # 检查爬虫是否已打开 # 执行插入操作,将项数据插入到 stocks 表中 self.cursor.execute( "insert into stocks(no,code,name,zxj,zdf,zde,cjl,zf,zg,zd,jk,zs) values(%s,%s,%s,%s,%s,%s,%s,%s,%s,%s,%s,%s)", (item["no"], item["code"], item["name"], item["zxj"], item["zdf"], item["zde"], item["cjl"], item["zf"], item["zg"], item["zd"], item["jk"], item["zs"])) except Exception as e: print(e) # 打印异常信息 return item # 返回处理后的项 -
结果
gitee链接:https://gitee.com/wei-yuxuan6/myproject/tree/master/作业3/job2
在运行时会出现一个浏览器窗口,加载网页
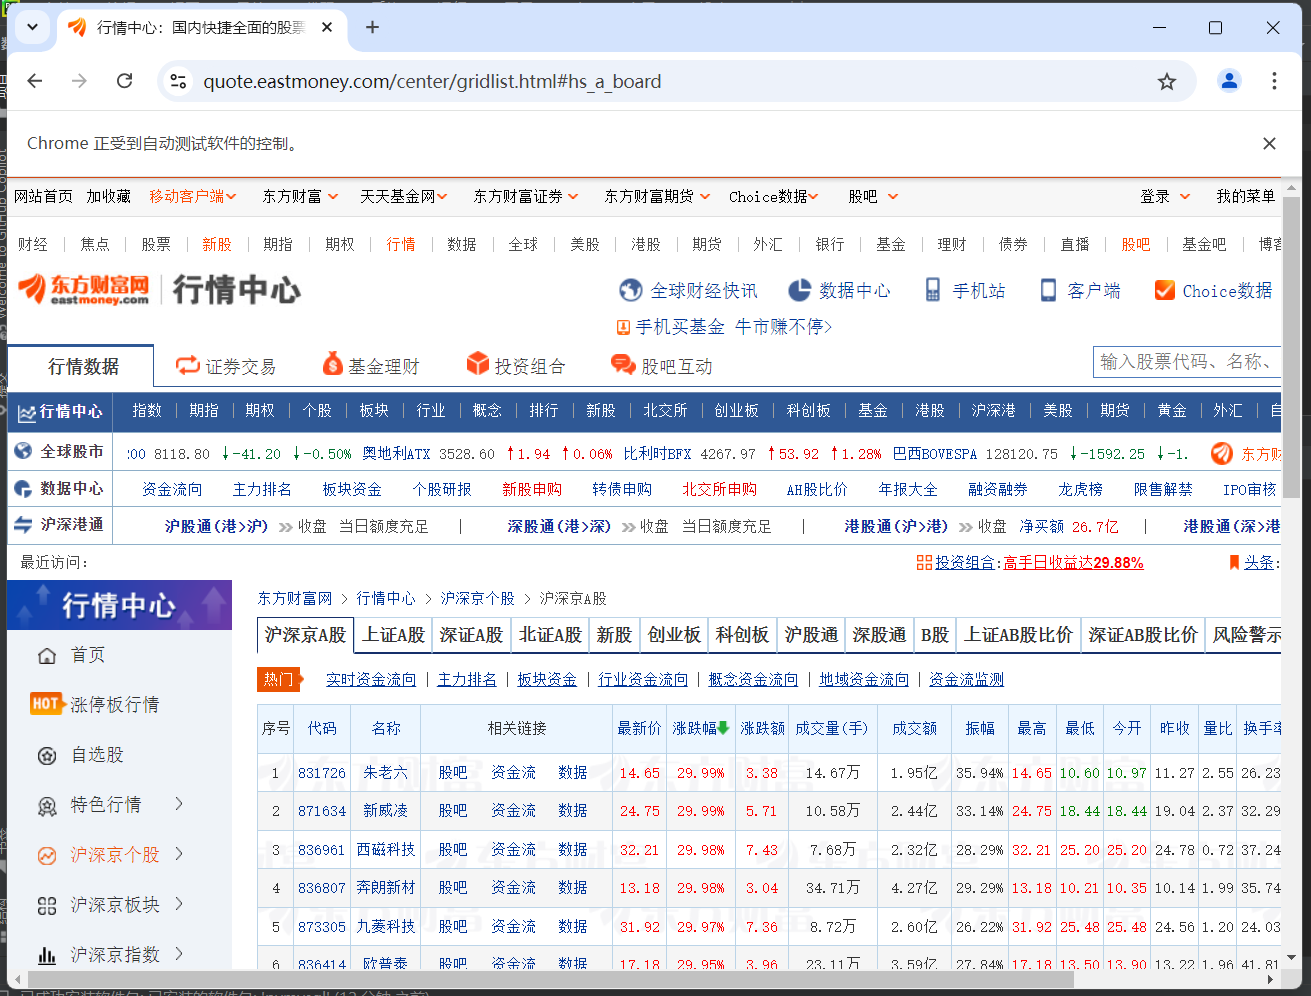
打印出的数据
存入数据库的数据
心得体会
学会了将Selenium与Scrapy结合爬取动态网页,在处理JavaScript动态渲染页面时,需要提前使用Selenium加载页面,使Scrapy能够抓取到完整的HTML内容,这样在Scrapy接收到响应时,页面已经被完全渲染。还学会了在Scrapy框架中将爬取到的数据存入MySQL数据库,进一步掌握了Scrapy与数据库交互的方式。
作业③
爬取银行外汇网站并存储实验
-
要求:熟练掌握 scrapy 中 Item、Pipeline 数据的序列化输出方法;使用scrapy框架+Xpath+MySQL数据库存储技术路线爬取外汇网站数据。
-
候选网站:中国银行网:https://www.boc.cn/sourcedb/whpj/
-
输出信息:

-
过程
分析网页发现数据都在表格中,在<table>下的<tbody>中,每一行数据在<tr>中,每个字段在不同的<td>中,其实后面spider获取的响应没有<tbody>元素。
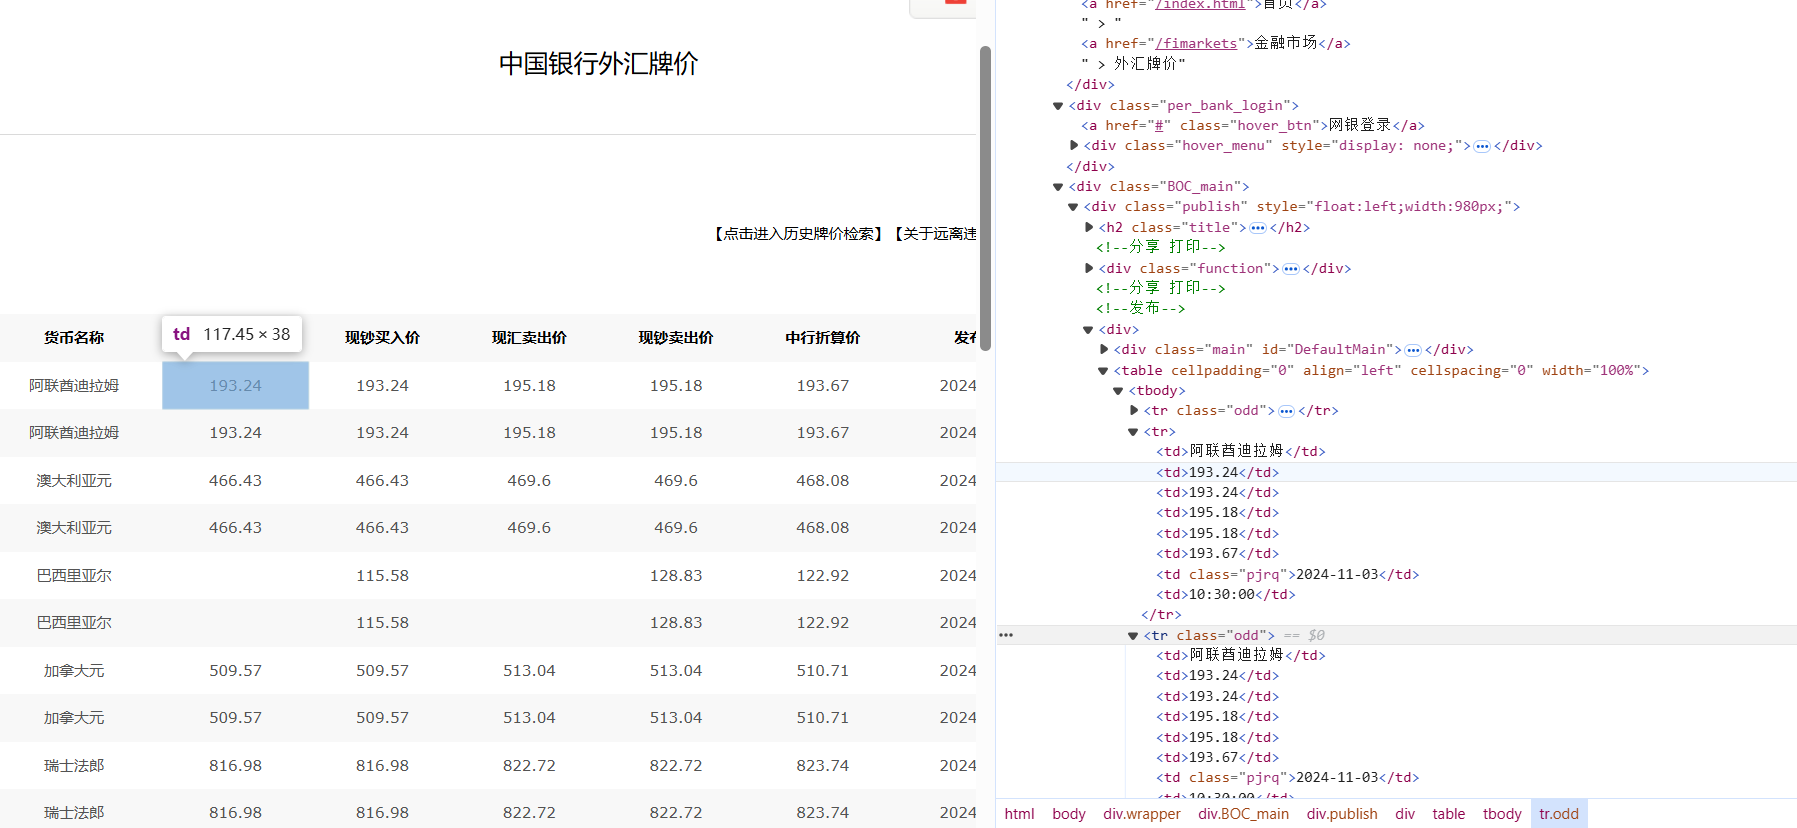
在MySQL创建一个新的表currency

-
部分代码
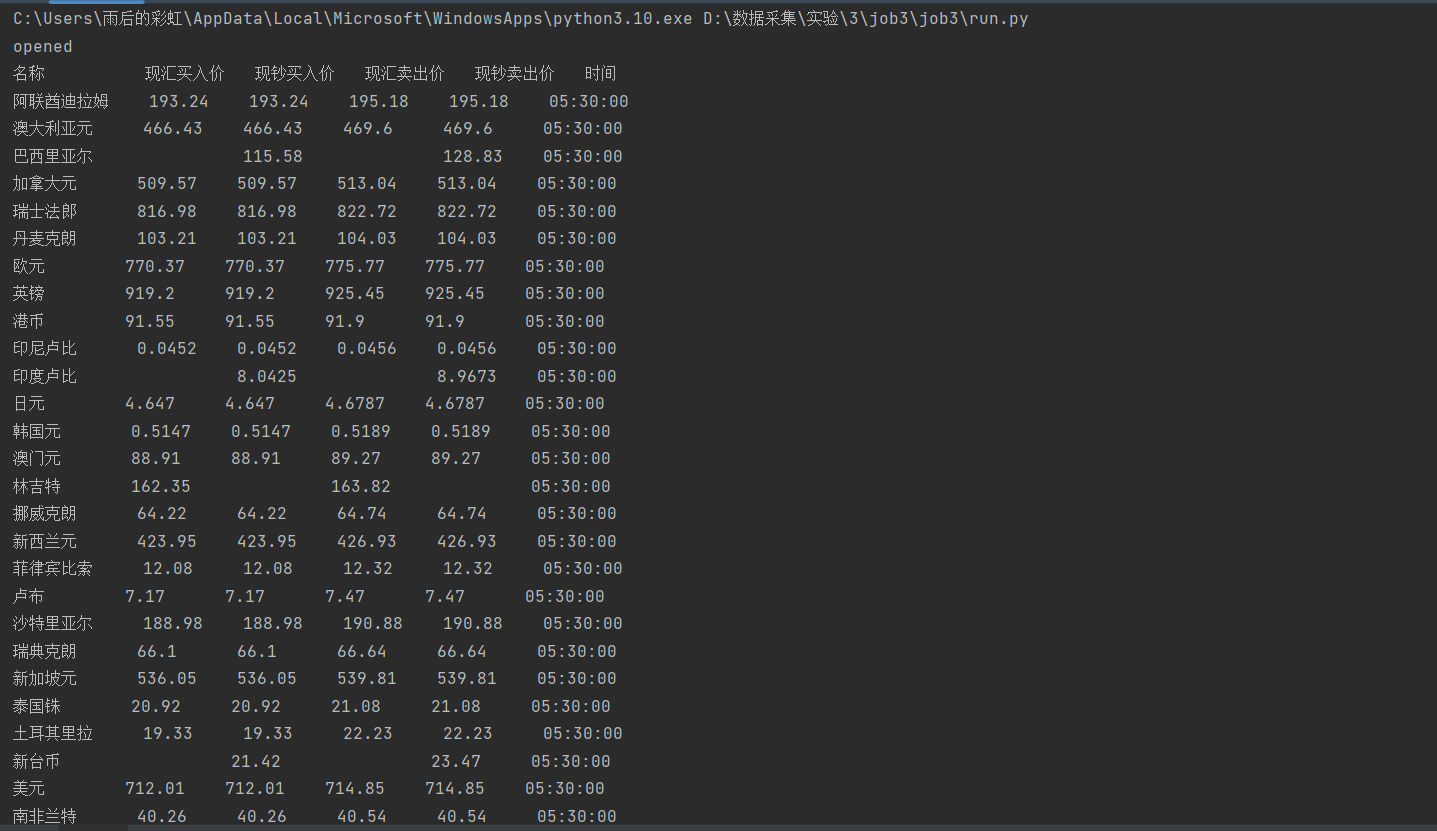
爬虫程序spi_bank.py,解析html获取数据,这里限定爬取100个数据,在后面执行了翻页操作class SpiBankSpider(scrapy.Spider): name = "spi_bank" start_urls = ["https://www.boc.cn/sourcedb/whpj/"] num=100 count=0 def parse(self, response): dammit = UnicodeDammit(response.body, ["utf-8", "gbk"]) data = dammit.unicode_markup selector = Selector(text=data) items = selector.xpath("//table[position()=1]/tr[position()>1]") for i in items: item=Job3Item() name = i.xpath("./td[position()=1]/text()") tbp = i.xpath("./td[position()=2]/text()") cbp = i.xpath("./td[position()=3]/text()") tsp = i.xpath("./td[position()=4]/text()") csp = i.xpath("./td[position()=5]/text()") time = i.xpath("./td[position()=8]/text()") item["name"]=name.extract_first() if name else "" item["tbp"]=tbp.extract_first() if tbp else "" item["cbp"]=cbp.extract_first() if cbp else "" item["tsp"]=tsp.extract_first() if tsp else "" item["csp"]=csp.extract_first() if csp else "" item["time"]=time.extract_first() if time else "" yield item self.count+=1 if self.count==self.num: break if self.count%27==0 and self.count!=self.num: url="https://www.boc.cn/sourcedb/whpj/index_"+str(self.count//27)+".html" yield scrapy.Request(url=url, callback=self.parse)pipelines.py的代码与上题基本一致,都是打开、插入和关闭数据库
-
结果
gitee链接:https://gitee.com/wei-yuxuan6/myproject/tree/master/作业3/job3
直接输出结果
数据库数据,共100项


心得体会
遇到了网页上的html与获取到的响应的html元素不一致的情况,响应到的html没有<tbody>元素,所以刚开始使用<tobody>定位,没有输出但是又不知道错误在哪里……
还学会了使用position()>1,position不仅可以等于,因为第一个tr是表头,而position()>1可以直接获取后面所有的tr
巩固了使用scrapy框架+Xpath+MySQL数据库存储技术路线

