
Aidlux智慧社区AI实战训练营》大作业总结及心得
1.训练营课程
(1)本节课主要学习智慧社区的AI实战训练营的课程,课程详情见链接:
https://mp.weixin.qq.com/s/ASnaFA7D4jfHWoO_IqQ6aQ
(2)学习目的
作为一名算法工程师,我深刻理解到学习是一个不断前行的过程。在这个行业,内卷竞争越来越激烈,我们需要不断地学习和提升自己,才能在激烈的竞争中脱颖而出。同时,作为算法工程师,我们需要具备敏锐的洞察力和对新技术的兴趣和热情,才能快速成长。
我非常感谢大白老师提供的学习机会,也非常感谢大刀老师的悉心教导。每次参加大白老师组织的训练营,都让我受益匪浅,而且每次都能带着满满的收获离开。同时,Aidlux的出现让算法工程师的工作更加方便和高效,可以通过python实现模型的训练和部署,而且能够快速部署到ARM架构的手机、平板、电脑等设备上,这无疑是对我们工作的巨大助力。
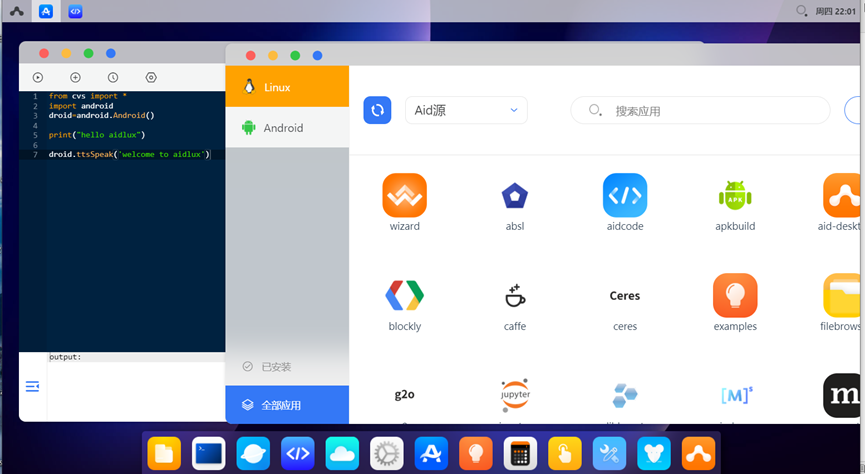
如下是两张通过电脑登录到手机Aidlux的截图:

2.小作业
通过修改参数在aidlux手机端实现对抛洒物的跟踪,可以通过修改knnDetector背景重建参数、sort跟踪算子参数等等来观察不同的跟踪效果。
主要代码如下:
from cvs import *
import cv2
import os
import numpy as np
from knnDetector import knnDetector
from sort import Sort
import time
import adjuster

def start_detect():
    path = "IMG_4550.MOV"
    capture = cvs.VideoCapture(path) # 获取视频
    # capture.set(cv2.CAP_PROP_POS_FRAMES, 200) # 设置视频从第几帧开始读取
    # fourcc = cv2.VideoWriter_fourcc(*'XVID') # 设置写入视频的编码类型
    # fps = capture.get(cv2.CAP_PROP_FPS) # 读取视频的fps
    # size = (int(capture.get(cv2.CAP_PROP_FRAME_WIDTH)), int(capture.get(cv2.CAP_PROP_FRAME_HEIGHT))) # 读取视频图谱的宽和长
    # out = cv2.VideoWriter('highThrow-result.avi', fourcc, 25, size) # 写入视频的格式设置

    detector = knnDetector(500, 400, 10) # 背景重建
    # cv2.destroyAllWindows() # 删除所有窗口
    # cv2.namedWindow("frame", cv2.WINDOW_NORMAL) # 创建三个窗口
    # cv2.namedWindow("history", cv2.WINDOW_NORMAL) #
    # cv2.namedWindow("mask", cv2.WINDOW_NORMAL) #

    flag = False

    # 不能忍受漏检,需要预测成功十次才返回预测框,IOU最少0.1

    # max_age=1, min_hits=3, iou_threshold=0.3
    """
    max_age:
    目标所对应的轨迹停止更新状态的最大帧数
    如果一个当前帧的目标在下一帧中没被检测出来,
    那么该目标的kalman滤波的先验状态预测将会失去与下一帧目标检测值的匹配的机会(因为下一帧这个目标没被检测出来),
    此时轨迹的kalman滤波器状态不会更新,将先验预测作为下一帧该目标的状态,然后重点来了!如果此时max_age设置为1,
    则在下下一帧中,如果该目标得轨迹还是没有得到匹配和更新,则它就会被删除,在后续的帧中,就不会跟踪到该目标,跟踪器认为该目标已经走出了帧外,或者该目标被遮挡。

    min_hits:
    代表持续多少帧检测到,生成trackers
    上一帧和下一帧目标之间的iou阈值,大于iou阈值认为是一个目标

    iou_threshold

    """
    sort = Sort(3, 5, 0.1)

    # 读取初始视频帧
    frame = capture.read()
    # frame = cv2.flip(frame,0)

    # adjuster

    adjust = adjuster.Adjuster(frame, (120, 60)) # 基于截帧图片初始化定位关键点

    index = 0
    while True:
        frame = capture.read()
        if frame is None:
            break

        # frame = cv2.flip(frame,0)
        frame_start = time.time()

        frame = adjust.debouncing(frame, index) # 图片去抖动后找到差分图
        print(f"debouncing image take {time.time() - frame_start} s")

        start = time.time()
        mask, bboxs = detector.detectOneFrame(frame, index) # 基于差分图寻找动态目标
        print(f"detectOneFrame image take {time.time() - start} s")

        start = time.time()
        if bboxs != []:
            bboxs = np.array(bboxs)
            bboxs[:, 2:4] += bboxs[:, 0:2]
            trackBox = sort.update(bboxs) # 基于动态目标,通过sort 追踪
        else:
            # test
            trackBox = sort.update()

        print(f"track image take {time.time() - start} s")

        # test
        for bbox in trackBox:
            bbox = [int(bbox[i]) for i in range(5)]
            cv2.rectangle(frame, (bbox[0], bbox[1]), (bbox[2], bbox[3]), (0, 0, 255), 6)
            cv2.putText(frame, str(bbox[4]), (bbox[0], bbox[1]), cv2.FONT_HERSHEY_SIMPLEX, 1, (0, 0, 255))

        # out.write(frame)
        #
        # if index% 10 == 0 :
        #    cv2.imwrite(os.path.join(r"C:\Users\shime\Desktop\highthrow(1)\images", "mask_result_{index}.jpg".format(index=index)), mask)
        #    cv2.imwrite(os.path.join(r"C:\Users\shime\Desktop\highthrow(1)\images", "frame_process_{index}.jpg".format(index=index)), frame)
        # cv2.imshow("mask", mask)
        cvs.imshow(frame)
        # if flag:
        #     if cv2.waitKey(0) == 27:
        #         flag = False
        # else:
        #     if cv2.waitKey(1) == 27:
        #         flag = True
        end = time.time()
        print("one frame cost : ", end - frame_start)
        print(index)
        index += 1
    # out.release()
    capture.release()
    cv2.destroyAllWindows()


if __name__ == '__main__':
    start_detect()
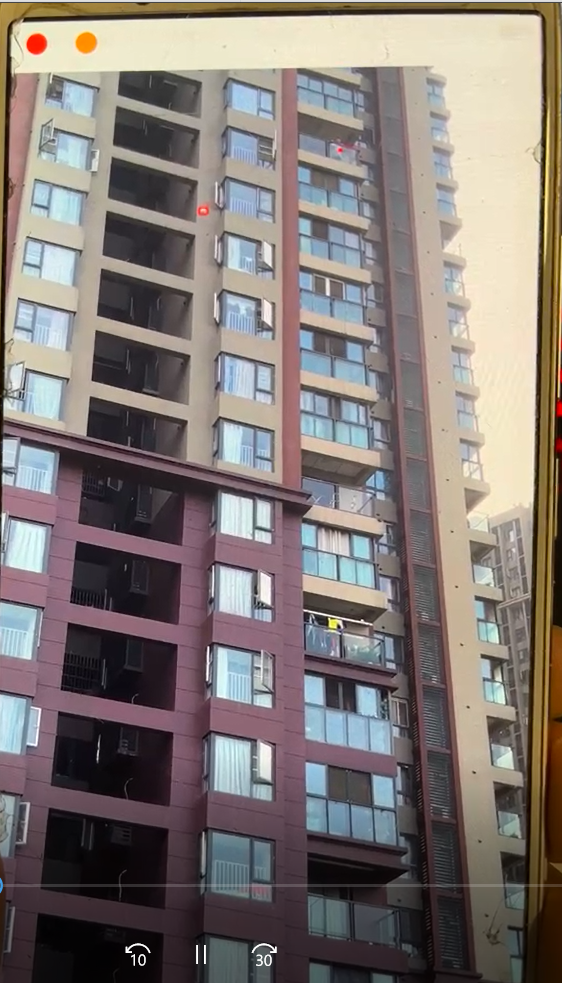
下图中红色小框就是被跟踪到的抛洒物(aidlux手机端显示图)
3.大作业
3.1实现功能
课程中详细介绍了模型的搭建训练和使用的整个过程,课程文档可到下边的百度云盘里获得;这里主要将车牌检测和识别部署到android手机端实现对视频中车辆车牌的检测和识别。
3.2 车牌检测+识别模型的tflite的轻量化
因为模型需要部署在移动端,所以还需要将模型轻量化,同时考虑后面我们使用的aidlux对tflite的支持,所以选用tflite框架,对模型轻量化。车牌检测是使用yolov5来实现的,车牌识别是使用LPRNET实现的,直接将转换好的onnx导出成tflite模型即可,但tflite推理过程中需要注意调整代码中outputs的顺序,因为onnx最后特征层输出的排序是20,40,80,而tflite最后特征层输出的排序是40,20,80。
3.3 代码实现及结果分析
使用Aidlux手机端运行视频并显示中文车牌需要:
1.运行aidlux端的视频读取方式,cvs.VideoCapture(video_path)
2.使用PIL写入中文字符,具体实现见aidlux/utils.py
整体代码如下:
# aidlux相关
from cvs import *
import aidlite_gpu
from utils import *
import time
import cv2
import os

anchor = [[10, 13, 16, 30, 33, 23], [30, 61, 62, 45, 59, 119], [116, 90, 156, 198, 373, 326]]
source ="/home/code_plate_detection_recognization_1/demo/images"
det_model_path = "/home/code_plate_detection_recognization_1/weights/yolov5.tflite"
recog_model_path = "/home/code_plate_detection_recognization_1/weights/LPRNet_Simplified.tflite"
save_dir = "/home/code_plate_detection_recognization_1/demo/output"

video_path = "/home/code_plate_detection_recognization_1/aidlux/1.mp4"

imgsz =640
# AidLite初始化:调用AidLite进行AI模型的加载与推理,需导入aidlite
aidlite = aidlite_gpu.aidlite()
# Aidlite模型路径
# 定义输入输出shape
# 加载Aidlite检测模型:支持tflite, tnn, mnn, ms, nb格式的模型加载
aidlite.set_g_index(0)
in_shape0 = [1 * 3* 640 * 640 * 4]
out_shape0 = [1 * 3*40*40 * 6 * 4,1 * 3*20*20 * 6 * 4,1 * 3*80*80 * 6 * 4]
aidlite.ANNModel(det_model_path, in_shape0, out_shape0, 4, 0)
# 识别模型
aidlite.set_g_index(1)
inShape1 =[1 * 3 * 24 *94*4]
outShape1= [1 * 68*18*4]
aidlite.ANNModel(recog_model_path,inShape1,outShape1,4,-1)

cap = cvs.VideoCapture(video_path)
#for img_name in os.listdir(source):
while True:
    image_ori = cap.read()
    if image_ori is None:
        print("Camera cap over!")
        break

    # print(img_name)
    # image_ori = cv2.imread(os.path.join(source, img_name))
    # frame = cv2.imread("/home/code_plate_detection_recognization_1/demo/images/003748802682-91_84-220&469_341&511-328&514_224&510_224&471_328&475-10_2_5_22_31_31_27-103-12.jpg")
    # img = preprocess_img(frame, target_shape=(640, 640), div_num=255, means=None, stds=None)
    img,  scale, left, top = det_preprocess(image_ori, imgsz=640)
    # 数据转换:因为setTensor_Fp32()需要的是float32类型的数据,所以送入的input的数据需为float32,大多数的开发者都会忘记将图像的数据类型转换为float32
    aidlite.set_g_index(0)
    aidlite.setInput_Float32(img, 640, 640)
    # 模型推理API
    aidlite.invoke()
    # 读取返回的结果
    outputs = [0,0,0]
    for i in range(len(anchor)):
        pred = aidlite.getOutput_Float32(i)
    # 数据维度转换
        if pred.shape[0] ==28800:
           pred = pred.reshape(1, 3,40,40, 6)
           outputs[1] = pred
        if pred.shape[0] ==7200:
           pred = pred.reshape(1, 3,20,20, 6)
           outputs[0] = pred
        if pred.shape[0]==115200:
           pred = pred.reshape(1,3,80,80, 6)
           outputs[2] = pred
    # 模型推理后处理
    boxes, confs, classes = det_poseprocess(outputs, imgsz, scale, left, top,conf_thresh=0.3, iou_thresh =0.5)
    pred = np.hstack((boxes, confs,classes)).astype(np.float32, copy=False)

    for i, det in enumerate(pred):  # detections per image
        if len(det):
            xyxy,conf, cls= det[:4],det[4],det[5:]
            if xyxy.min()<0:
                continue
            # filter
            xyxy = np.reshape(xyxy, (1, 4))
            xyxy_ = np.copy(xyxy).tolist()[0]
            xyxy_ = [int(i) for i in xyxy_]
            if (xyxy_[2] -xyxy_[0])/(xyxy_[3]-xyxy_[1])>6 or (xyxy_[2] -xyxy_[0])<100:
                continue
            # image_crop = np.array(image_ori[xyxy_[1]:xyxy_[3], xyxy_[0]:xyxy_[2]])
            # image_crop = np.asarray(image_crop)
            img_crop = np.array(image_ori[xyxy_[1]:xyxy_[3], xyxy_[0]:xyxy_[2]])
            image_recog = reg_preprocess(img_crop)
            print(image_recog.max(), image_recog.min(),type(image_recog),image_recog.shape)
            # recognization inference
            aidlite.set_g_index(1)
            aidlite.setInput_Float32(image_recog,94,24)
            aidlite.invoke()
            #取得模型的输出数据
            probs = aidlite.getOutput_Float32(0)
            print(probs.shape)
            probs = np.reshape(probs, (1, 68, 18))

            print("------",probs)
            # proprocess
            probs = reg_postprocess(probs)
            # print("pred_str", probs)
            for prob in probs:
                lb = ""
                for i in prob:
                    lb += CHARS[i]
                cls = lb

            # result show


            label = f'names{[str(cls)]} {conf:.2f}'
            print(label)
            # plot_one_box(xyxy, im0, label=label, color=colors[int(cls)], line_thickness=3)
            image_ori = plot_one_box_class(xyxy_, image_ori, label=label, predstr=cls,
                                line_thickness=3)

        # Save results (image with detections)
            # img_path = os.path.join(save_dir, img_name)
            # cv2.imwrite(img_path, image_ori)
            cvs.imshow(image_ori)
cap.release()
3.4 输出结果及B站演示视频链接如下:

https://www.bilibili.com/video/BV1pv4y1a7Hq/
https://www.bilibili.com/video/BV1Xb411Q7Hj/
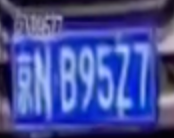
第一段中在车牌较小时文字识别效果较差
第二段在车牌较大之后,可以清晰的看到车牌的识别效果
4.致谢
再次感谢大白老师和大刀老师的辛勤指导和支持,他们的专业知识和经验让我受益匪浅,对于我未来的AI工作和学习之路提供了极大的帮助。
同时,我深深地意识到在AI领域,只有持续学习和不断提升自己才能保持竞争力和适应快速变化的行业需求。因此,我将一直保持对AI领域的热情和激情,并努力学习和掌握新的技术和方法,为AI的发展和应用做出自己的贡献。
5. 作业所有代码如下
链接: https://pan.baidu.com/s/10-XHSDflKE14qxd0QApquA 提取码: mujb

 浙公网安备 33010602011771号