Android单元测试
参考
https://blog.csdn.net/qq_17766199/column/info/18260
https://blog.csdn.net/chaoyangsun/article/details/80095249
https://developer.android.com/studio/test
https://developer.android.com/training/testing/index.html
简介
用Android Studio创建工程的时候,
会自动加入测试依赖:
dependencies {
    testImplementation 'junit:junit:4.12'
    androidTestImplementation 'com.android.support.test:runner:1.0.2'
    androidTestImplementation 'com.android.support.test.espresso:espresso-core:3.0.2'
}
同时在src文件夹下会同时生成三个文件夹main、test、androidTest,
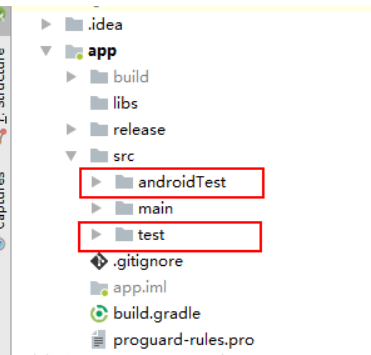
test和androidTest是专门针对源码级别的白盒测试的。
-
test
文件夹用于写不依赖设备环境的单元测试,即可在PC上直接运行;
该目录下的代码运行在本地JVM上,其优点是速度快,不需要设备或模拟器的支持,但是无法直接运行含有android系统API引用的测试代码。
-
androidTest
文件夹用于写需要在设备上才能运行的测试。
该目录下的测试代码需要运行在android设备或模拟器下面,因此可以使用android系统的API,速度较慢。
分类
在android测试框架中,常用的有以下几个框架和工具类:
-
JUnit4:Java最常用的单元测试框架
-
AndroidJUnitRunner:适用于 Android 且与 JUnit 4 兼容的测试运行器
-
Mockito:Mock测试框架
-
Espresso:UI 测试框架;适合应用中的功能性 UI 测试
-
UI Automator:UI 测试框架;适合跨系统和已安装应用的跨应用功能性 UI 测试
功能测试:和UI无关,测试IO操作、算法、流程等;
UI测试:测试UI交互逻辑,比如点击、登陆等。
Java单元测试框架:JUnit、Mockito等;
Android:AndroidJUnitRunner、Espresso等。
junit
就是上边自动导入的一个依赖:
testImplementation 'junit:junit:4.12'
它是运行在本地JVM上,其优点是速度快,不需要设备或模拟器的支持,但是无法直接运行含有android系统API引用的测试代码。
JUnit 中的常用注解
|
注解名 |
含义 |
|
@Test |
表示此方法为测试方法 |
|
@Before |
在每个测试方法前执行,可做初始化操作 |
|
@After |
在每个测试方法后执行,可做释放资源操作 |
|
@Ignore |
忽略的测试方法 |
|
@BeforeClass |
在类中所有方法前运行。此注解修饰的方法必须是static void |
|
@AfterClass |
在类中最后运行。此注解修饰的方法必须是static void |
|
@RunWith |
指定该测试类使用某个运行器 |
|
@Parameters |
指定测试类的测试数据集合 |
|
@Rule |
重新制定测试类中方法的行为 |
|
@FixMethodOrder |
指定测试类中方法的执行顺序 |
执行顺序:@BeforeClass –> @Before –> @Test –> @After –> @AfterClass
Assert类
在JUnit 中核心类是Assert,Assert类中主要方法如下:
|
方法名 |
方法描述 |
|
assertEquals(String message, expected, actual) |
断言传入的预期值与实际值是相等的 |
|
assertNotEquals(String message, unexpected, actual) |
断言传入的预期值与实际值是不相等的 |
|
assertArrayEquals(String message, expecteds, actuals) |
断言传入的预期数组与实际数组是相等的 |
|
assertNull(String message, Object object) |
断言传入的对象是为空 |
|
assertNotNull(String message, Object object) |
断言传入的对象是不为空 |
|
assertTrue(String message, boolean condition) |
断言条件为真 |
|
assertFalse(String message, boolean condition) |
断言条件为假 |
|
assertSame(String message, Object expected, Object actual) |
断言两个对象引用同一个对象,相当于"==" |
|
assertNotSame(String message, Object unexpected, Object actual) |
断言两个对象引用不同的对象,相当于"!=" |
|
assertThat(String reason, T actual, Matcher<? super T> matcher) |
断言实际值是否满足指定的条件 |
注:如果期望值和实际值和设置的断言相符,那么就表示测试通过,否则就会抛出一个断言异常。
基本用法
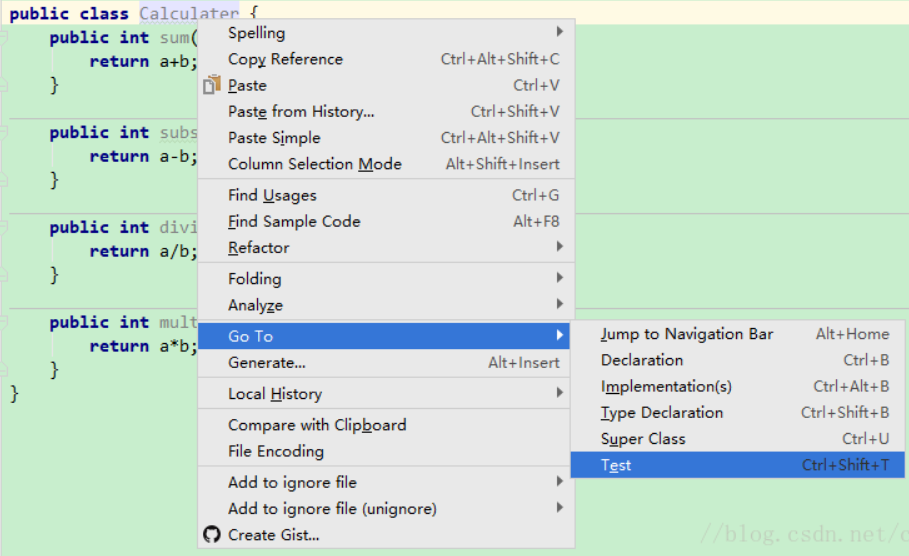
首先就是在test文件夹的某个包下创建一个测试类,
1.创建测试类
-
可以直接创建,
-
也可以在项目的某个类名上右键创建,如下图:
1选择要测试的方法 2点击确定 3选择测试类生成位置
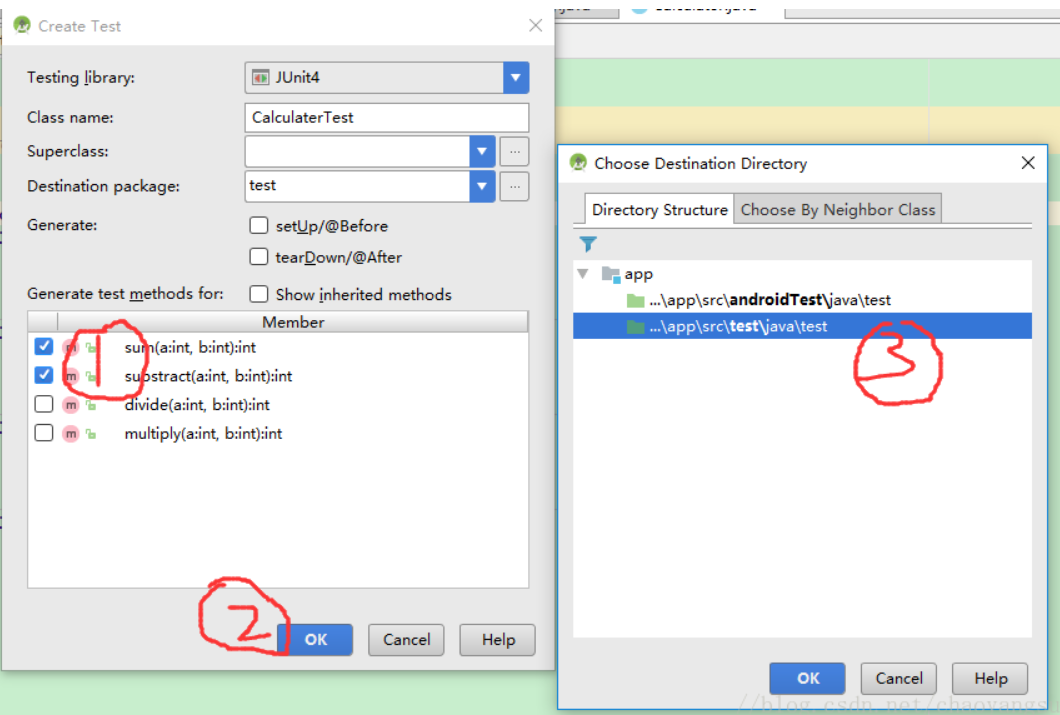
最终生成的测试类:
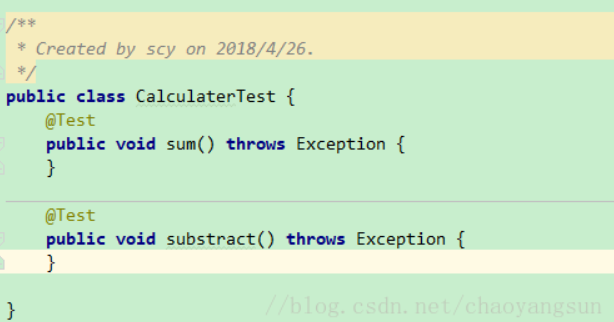
注意:在方法上加入@Test注解,此方法才能被执行。
2.在对应方法中写入某个断言
比如:
assertEquals(4, 2 + 2);
assertNull(null);
直接写assertEquals等Assert中的方法,会自动把Assert静态导入到此测试类。
import static org.junit.Assert.*;
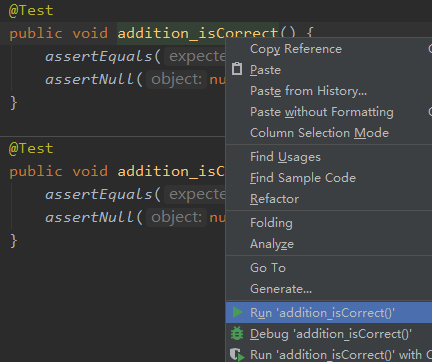
3.运行
右键,run,表示运行此测试类的所有被@Test注解的方法。
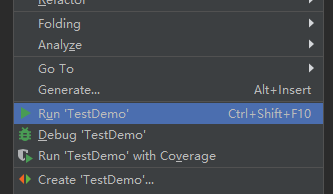
如果只想运行某个方法,则可以在某个方法上右键,run。
4.运行结果

-
如果某个方法测试通过则在运行界面显示绿色对勾。
-
如果测试不通过,则会有个x,并在右侧显示未通过原因/异常。
其他用法
@Test
@Retention(RetentionPolicy.RUNTIME)
@Target({ElementType.METHOD})
public @interface Test {

    /**
     * Default empty exception
     */
    static class None extends Throwable {
        private static final long serialVersionUID = 1L;

        private None() {
        }
    }

    /**
     * Optionally specify <code>expected</code>, a Throwable, to cause a test method to succeed if
     * and only if an exception of the specified class is thrown by the method. If the Throwable's
     * message or one of its properties should be verified, the
     * {@link org.junit.rules.ExpectedException ExpectedException} rule can be used instead.
     */
    Class<? extends Throwable> expected() default None.class;

    /**
     * Optionally specify <code>timeout</code> in milliseconds to cause a test method to fail if it
     * takes longer than that number of milliseconds.
     * <p>
     * <b>THREAD SAFETY WARNING:</b> Test methods with a timeout parameter are run in a thread other than the
     * thread which runs the fixture's @Before and @After methods. This may yield different behavior for
     * code that is not thread safe when compared to the same test method without a timeout parameter.
     * <b>Consider using the {@link org.junit.rules.Timeout} rule instead</b>, which ensures a test method is run on the
     * same thread as the fixture's @Before and @After methods.
     * </p>
     */
    long timeout() default 0L;
}
此注解是核心注解,可以不用参数直接用。
-
如果想要测试是否抛出期望的异常,可以用expected这个参数,

-
如果想要测试某个方法运行时间是否超时,可以用timeout参数。
期望和实际有误差
// 第一个参数:"sum(a, b)" 打印的tag信息 (可省略)
// 第二个参数: 3 期望得到的结果
// 第三个参数 result:实际返回的结果
// 第四个参数 0 误差范围(可省略)
assertEquals("sum(a, b)",3,result,0);
批量运行测试类
涉及注解@RunWith @Suite
CalculaterTest.class,
CalculaterTest2.class
这两个类里边都写入了一些测试,
@RunWith(Suite.class)
@Suite.SuiteClasses( { CalculaterTest.class, CalculaterTest2.class } )//被测试类
public class SuiteTest {
...
}
那么运行SuiteTest 就可以让CalculaterTest和CalculaterTest2一起运行。
参数化测试
Junit 4 引入了一个新的功能参数化测试。参数化测试允许开发人员使用不同的值反复运行同一个测试。
它要满足下列要求:
-
用 @RunWith(Parameterized.class) 来注释 test 类
-
创建一个静态方法生成并返回测试数据,并注明@Parameters注解
-
创建一个公共的构造函数,接受存储上一条的测试数据
- 使用上述测试数据进行测试
@RunWith(Parameterized.class)
public class CalculaterTest3 {
    private int expected;
    private int a;
    private int b;

    @Parameters//创建并返回测试数据
    public static Collection params() {
        return Arrays.asList(new Integer[][] { { 3, 1, 2 }, { 5, 2, 3 } });
}

    //接收并存储(实例化)测试数据
    public CalculaterTest3(int expected, int a, int b) {
        this.expected = expected;
        this.a = a;
        this.b = b;
    }

    @Test
    public void sum() throws Exception {
        Calculater calculater = new Calculater();
        System.out.println("parameters : " + a + " + " + b);
        int result = calculater.sum(a, b);
        assertEquals(expected, result);
    }
}
@Rule用法
还记得一开始我们在@Before与@After注解的方法中加入"测试开始"的提示信息吗?
假如我们一直需要这样的提示,那是不是需要每次在测试类中去实现它。这样就会比较麻烦。
这时你就可以使用@Rule来解决这个问题,它甚至比@Before与@After还要强大。
自定义@Rule很简单,就是实现TestRule 接口,实现apply方法。
代码如下:
public class MyRule implements TestRule {

    @Override
    public Statement apply(final Statement base, final Description description) {

        return new Statement() {
            @Override
            public void evaluate() throws Throwable {
                // evaluate前执行方法相当于@Before
                String methodName = description.getMethodName(); // 获取测试方法的名字
                System.out.println(methodName + "测试开始!");

                base.evaluate();  // 运行的测试方法

                // evaluate后执行方法相当于@After
                System.out.println(methodName + "测试结束!");
            }
        };
    }
}
Assert.assertThat用法
上面我们所用到的一些基本的断言,如果我们没有设置失败时的输出信息,那么在断言失败时只会抛出AssertionError,无法知道到底是哪一部分出错。
而assertThat就帮我们解决了这一点。它的可读性更好。
assertThat(String reason, T actual, Matcher<? super T> matcher)
JUnit内置了很多Matcher实现,常用的匹配器:
|
匹配器 |
说明 |
例子 |
|
is |
断言参数等于后面给出的匹配表达式 |
assertThat(5, is (5)); 前边5是实际值,后边的是期望值。 |
|
not |
断言参数不等于后面给出的匹配表达式 |
assertThat(5, not(6)); |
|
equalTo |
断言参数相等 |
assertThat(30, equalTo(30)); |
|
equalToIgnoringCase |
断言字符串相等忽略大小写 |
assertThat("Ab", equalToIgnoringCase("ab")); |
|
containsString |
断言字符串包含某字符串 |
assertThat("abc", containsString("bc")); |
|
startsWith |
断言字符串以某字符串开始 |
assertThat("abc", startsWith("a")); |
|
endsWith |
断言字符串以某字符串结束 |
assertThat("abc", endsWith("c")); |
|
nullValue |
断言参数的值为null |
assertThat(null, nullValue()); |
|
notNullValue |
断言参数的值不为null |
assertThat("abc", notNullValue()); |
|
greaterThan |
断言参数大于 |
assertThat(4, greaterThan(3)); |
|
lessThan |
断言参数小于 |
assertThat(4, lessThan(6)); |
|
greaterThanOrEqualTo |
断言参数大于等于 |
assertThat(4, greaterThanOrEqualTo(3)); |
|
lessThanOrEqualTo |
断言参数小于等于 |
assertThat(4, lessThanOrEqualTo(6)); |
|
closeTo |
断言浮点型数在某一范围内 |
assertThat(4.0, closeTo(2.6, 4.3)); |
|
allOf |
断言符合所有条件,相当于&& |
assertThat(4,allOf(greaterThan(3), lessThan(6))); |
|
anyOf |
断言符合某一条件,相当于或 |
assertThat(4,anyOf(greaterThan(9), lessThan(6))); |
|
hasKey |
断言Map集合含有此键 |
assertThat(map, hasKey("key")); |
|
hasValue |
断言Map集合含有此值 |
assertThat(map, hasValue(value)); |
|
hasItem |
断言迭代对象含有此元素 |
assertThat(list, hasItem(element)); |
注:在导入时,导入 org.hamcrest.core包下边的Matcher实现。
自定义Matcher
这里我自定义一个字符串是否是手机号码的匹配器来演示一下。
只需要继承BaseMatcher抽象类,实现matches与describeTo方法。
代码如下:
public class IsMobilePhoneMatcher extends BaseMatcher<String> {

    /**
     * 进行断言判定,返回true则断言成功,否则断言失败
     */
    @Override
    public boolean matches(Object item) {
        if (item == null) {
            return false;
        }

        Pattern pattern = Pattern.compile("(1|861)(3|5|7|8)\\d{9}$*");
        Matcher matcher = pattern.matcher((String) item);

        return matcher.find();
    }

    /**
     * 给期待断言成功的对象增加描述
     */
    @Override
    public void describeTo(Description description) {
        description.appendText("预计此字符串是手机号码!");
    }

    /**
     * 给断言失败的对象增加描述
     */
    @Override
    public void describeMismatch(Object item, Description description) {
        description.appendText(item.toString() + "不是手机号码!");
    }
}
AndroidJUnitRunner
https://blog.csdn.net/chaoyangsun/article/details/80163872
AndroidJUnitRunner,Google官方的android单元测试框架之一,适用于 Android 且与 JUnit 4 兼容的测试运行器!
AndroidJUnitRunner本质上不算是个测试工具,它只是Google基于JUnit 针对Anroid封装的一个测试用例运行器而已。至于它用来运行Espesso还是Uiautomator的用例都是可以的。
测试运行器可以将测试软件包和要测试的应用加载到设备、运行测试并报告测试结果。
此测试运行器的主要功能包括:
-
JUnit 支持
-
访问仪器信息
-
测试筛选
-
测试分片
要求 Android 2.2(API 级别 8)或更高版本。
JUnit 支持
-
测试运行器与 JUnit 3 和 JUnit 4(最高版本为 JUnit 4.10)测试兼容。
-
使用时不要混用JUnit 3 和 JUnit 4 测试代码。
-
如果要创建一个 JUnit 4 仪器测试类以在设备或模拟器上运行,则测试类必须以 @RunWith(AndroidJUnit4.class) 注解作为前缀。
如下是一个验证包名的JUnit 4 仪器:
@RunWith(AndroidJUnit4.class)
public class ExampleInstrumentedTest {
    @Test
    public void useAppContext() throws Exception {
        // Context of the app under test.
        Context appContext = InstrumentationRegistry.getTargetContext();

        assertEquals("com.yangge.myapplication", appContext.getPackageName());
    }
}
访问仪器信息Instrumentation
可以使用 InstrumentationRegistry 类访问与测试运行相关的信息。
如 Instrumentation 对象:
    /**
     * Returns the instrumentation currently running. Use this to get an {@link Instrumentation}
     * into your test.
     *
     * @throws IllegalStateException if instrumentation hasn't been registered
     */
    public static Instrumentation getInstrumentation() {
        Instrumentation instance = sInstrumentationRef.get();
        if (null == instance) {
            throw new IllegalStateException("No instrumentation registered! "
                    + "Must run under a registering instrumentation.");
        }
        return instance;
    }
//使用时直接调用该静态方法即可:InstrumentationRegistry.getInstrumentation()
目标应用 Context 对象:
    /**
     * Return a Context for the target application being instrumented. Use this to get a
     * {@link Context} representing {@link Instrumentation#getTargetContext()} into your test.
     */
    public static Context getTargetContext() {
        return getInstrumentation().getTargetContext();
    }
测试应用 Context 对象InstrumentationRegistry.getContext()、传递到测试中的命令行参数InstrumentationRegistry.getArguments() 等。
使用 UI Automator 框架编写测试或编写依赖于 Instrumentation 或 Context 对象的测试时,此数据非常有用。
测试筛选
在 JUnit 4.x 测试中,您可以使用注解对测试运行进行配置。此功能可将向测试中添加样板文件和条件代码的需求降至最低。
除了 JUnit 4 支持的标准注解外,测试运行器还支持 Android 特定的注解,包括:
-
@RequiresDevice:指定测试仅在物理设备而不在模拟器上运行。
-
@SdkSupress:禁止在低于给定级别的 Android API 级别上运行测试。例如,要禁止在低于 18 的所有 API 级别上运行测试,请使用注解 @SDKSupress(minSdkVersion=18)。
-
@SmallTest、@MediumTest 和 @LargeTest:指定测试的运行时长以及运行频率。
下面是一个测试样例:
@RunWith(AndroidJUnit4.class)
public class ExampleInstrumentedTest {
    @Before
    public void testBefore() throws Exception {
        LogUtil.e("JUnit","testBefore");
    }

    @Test
    public void useAppContext() throws Exception {
        // Context of the app under test.
        Context appContext = InstrumentationRegistry.getTargetContext();
        LogUtil.e("JUnit","testTest");
        assertEquals("com.yangge.myapplication", appContext.getPackageName());
    }

    @Test
    public void testTest() throws Exception {
        LogUtil.e("JUnit","testTest");
    }

    @Test
    @SmallTest
    public void testTestSmallTest() throws Exception {
        LogUtil.e("JUnit","testTestSmallTest");
    }

    @SmallTest
    public void testSmallTest() throws Exception {
        LogUtil.e("JUnit","testSmallTest");
    }

    @MediumTest
    public void testMediumTest() throws Exception {
        LogUtil.e("JUnit","testMediumTest");
    }

    @LargeTest
    public void testLargeTest() throws Exception {
        LogUtil.e("JUnit","testLargeTest");
    }

    @RequiresDevice
    public void testRequiresDevice() throws Exception {
        LogUtil.e("JUnit","testRequiresDevice");
    }

    @SdkSuppress(minSdkVersion = 19)
    public void testSdkSuppress() throws Exception {
        LogUtil.e("JUnit","testSdkSuppress");
    }

    @After
    public void testAfter() throws Exception {
        LogUtil.e("JUnit","testAfter");
    }
}
