

Map/Reduce个人实战--生成数据测试集
背景:
在大数据领域, 由于各方面的原因. 有时需要自己来生成测试数据集, 由于测试数据集较大, 因此采用Map/Reduce的方式去生成. 在这小编(mumuxinfei)结合自身的一些实战经历, 具体阐述下生成测试数据集的Map/Reduce程序该如何写?
场景构造:
假设某移动电信行业的某具体业务, 其记录了通话信息(包括拨打方/接听方/通话时间点/基站 等要素). 产商是不可能提供真实的用户数据用于测试的, 但提供了基本的数据格式. 具体针对该业务场景, 我们简单规划如下:
1 2 3 4 | num1 varchar(13) -- 手机号码(130 xxxx xxxx ~ 139 xxxx xxxx) num2 varchar(13) -- 手机号码(130 xxxx xxxx ~ 139 xxxx xxxx)lac varchar(16) -- 基站信息 timestamp varchar(128) -- yyyyMMdd hh:mm:ss格式 |
评注: 数据的分布在时间纬度上, 相对还是容易编造, 在其他纬度上, 要模拟真实的用户行为数据, 还是有一定的难度的.
Map/Reduce理论基础:
1). Map/Reduce的原理架构图

评注: Map/Reduce的运行和流程基本如图所示(来源于网络), 这边我们对原理不再详细阐述.
2). Map/Reduce的类体系架构
详见如下关于Map/reduce的类系统架构的基础文章
方案分析:
在回顾完Map/Reduce的基础架构后, 针对数据生成, 我们提供如下的两种方案.
1). 传统的Map/Reduce的数据生成方案
2). 只有Map/没有Reduce的数据生成方案.
这两者有何区别呢? 如何在Job中控制和设置?
1). Map阶段的产出结果经过sort/shuffle到reduce的, 由此Reduce阶段后的数据是有一定的顺序性的. 而止于Map阶段的数据是呈现一定随机性. 聪明的你是否猜着了? bingo, 如果生成的数据需要一定的排序组合, 则需要传统方案. 而如果生成的数据随机即可, 则采用2方案就好.
2). Job的任务配置, 只需要配置numReduceTasks即可
1 | job.setNumReduceTasks(0); |
评注: 是不是很简单, 不好意思让你大跌眼镜了....^_^!
综合实际的案例分析, 我们的测试数据是随机分布的, 由此我们选用方案2.
解决方案:
我们选定的方案大致如下:
通过Map阶段来生成测试数据, 自定义InputFormat规则.
我们的目标是, 运行MapReduce程序, 生成CSV格式的数据文件, 内容组织如下:
1 2 3 | #num1,num2,lac,timestamp1380001234,13800005678,1,2014-08-27 10:30:001380002058,13800005678,1,2014-08-28 11:30:00 |
1). 自定义InputForamt, 以及内部的InputSplit和RecordReader
MyInputSplit的类定义如下:
1 2 3 4 5 6 7 8 9 10 11 12 13 14 15 16 17 18 19 20 21 22 23 24 25 26 27 28 29 30 31 32 33 34 35 36 37 38 39 | // *) 继承与InputSplit, 通过实现Writable接口 public static class MyInputSplit extends InputSplit implements Writable { private int number; // 需要一个无参构造函数 public MyInputSplit() { } public MyInputSplit(int number) { this.number = number; } @Override public long getLength() throws IOException, InterruptedException { return 0; } @Override public String[] getLocations() throws IOException, InterruptedException { return new String[]{}; } public int getNumber() { return number; } // *) 反序列化 public void readFields(DataInput in) throws IOException { number = WritableUtils.readVInt(in); } // *) 序列化 public void write(DataOutput out) throws IOException { WritableUtils.writeVInt(out, number); }} |
评注: MyInputSplit必须实现Writable接口, 因为InputSplit在map/reduce过程中需要序列化/反序列化, 同时InputSplit的实现类需要提供一个无参构造函数, 因为需要反射来实例化该对象. 请不要问我为何知道的这么多, 我只想说: "请叫我活雷锋!".
MyRecordReader的定义如下所示:
1 2 3 4 5 6 7 8 9 10 11 12 13 14 15 16 17 18 19 20 21 22 23 24 25 26 27 28 29 30 31 32 33 34 35 36 37 38 39 40 | public static class MyRecordReader extends RecordReader<NullWritable, Text> { private int current = 0; private int number = 0; private Text valueText = new Text(); // *) 初始化工作 @Override public void initialize(InputSplit split, TaskAttemptContext context) throws IOException, InterruptedException { this.number = ((MyInputSplit)split).getNumber(); } @Override public boolean nextKeyValue() throws IOException, InterruptedException { if ( current++ < number ) { valueText.set(DataGeneratorUtility.genetateData()); return true; } return false; } @Override public NullWritable getCurrentKey() throws IOException, InterruptedException { return NullWritable.get(); } @Override public Text getCurrentValue() throws IOException, InterruptedException { return valueText; } // *) 汇报进度 @Override public float getProgress() throws IOException, InterruptedException { return current * 1.0f / number; } @Override public void close() throws IOException { }} |
评注: MyRecordReader相对就简单了, 由于map默认是单线程执行, 因此采用带状态的函数nextKeyValue(), getCurrentKey(), getCurrentValue(). 不合理阿, 老师!!!
最后来展示下MyInputFormat的实现, 其整合了之上的InputSplit和RecordReader.
1 2 3 4 5 6 7 8 9 10 11 12 13 14 15 16 17 18 19 20 21 22 23 | public class MyInputFormat extends InputFormat<NullWritable, Text> { @Override public List<InputSplit> getSplits(JobContext context) throws IOException, InterruptedException { int splitNumber = Integer.parseInt( context.getConfiguration().get("data.split_number")); int dataNumber = Integer.parseInt( context.getConfiguration().get("data.data_number")); List<InputSplit> results = new ArrayList<InputSplit>(); for ( int i = 0; i < splitNumber; i++ ) { results.add(new MyInputSplit(dataNumber)); } return results; } @Override public RecordReader<NullWritable, Text> createRecordReader( InputSplit split, TaskAttemptContext context) throws IOException, InterruptedException { return new MyRecordReader(); } } |
评注: MyInputFormat的实现, 就是获取分片信息, 以及提供对应的RecordReader, 对于Map/Reduce程序而言, 起到一个桥梁的作用.
2). Map的定义处理
1 2 3 4 5 6 7 8 9 | public class MyMap extends Mapper<NullWritable, Text, NullWritable, Text> { @Override protected void map(NullWritable key, Text value, Context context) throws IOException, InterruptedException { context.write(key, value); }} |
评注: MyMap的工作非常的简单, 就是单纯的write key/value对
3). Job配置选项
1 2 3 4 5 6 7 8 9 10 11 12 13 14 15 16 17 18 19 20 21 22 23 24 25 26 27 28 29 30 31 | public class MyJob extends Configured implements Tool { @Override public int run(String[] args) throws Exception { Job job = Job.getInstance(getConf()); Path outputDir = new Path(args[0]); FileOutputFormat.setOutputPath(job, outputDir); job.setJobName("MyJob"); job.setJarByClass(MyJob.class); job.setMapperClass(MyMap.class); // *) 设置reducer task 为0 job.setNumReduceTasks(0); job.setOutputKeyClass(NullWritable.class); job.setOutputValueClass(Text.class); // *) 设置MyInputFormat job.setInputFormatClass(MyInputFormat.class); // *) 传入相关参数 job.getConfiguration().set("data.split_number", args[1]); job.getConfiguration().set("data.data_number", args[2]); return job.waitForCompletion(true) ? 0 : 1; } public static void main(String[] args) throws Exception { int res = ToolRunner.run(new Configuration(), new MyJob(), args); System.exit(res); }} |
评注: 这边省略了部分参数的校验. 大致要点就是设置 NumReduceTasks(0), 然后设置InputFormatClass类MyInputFormat. Ok Let it go!!!
测试:
编译成jar之后, 在mapreduce跑
结果: mapreduce运行成功, 总共2个map, 每个map生成10行记录
验证map的文件个数
评注: part-m-00000, part-m-00001表明是map阶段生成的输出文件
对文件内容进行验证: 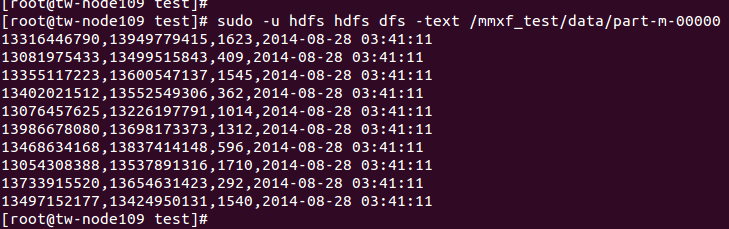
评注: 数据结果符合预期
总结:
这边讲述了利用map/reduce生成测试集的一个流程, 同时也是写给自己, 希望自己对mapreduced的内部机制,有个更清晰的理解.

posted on 2014-08-27 20:03 mumuxinfei 阅读(1574) 评论(0) 编辑 收藏 举报


【推荐】国内首个AI IDE,深度理解中文开发场景,立即下载体验Trae
【推荐】编程新体验,更懂你的AI,立即体验豆包MarsCode编程助手
【推荐】抖音旗下AI助手豆包,你的智能百科全书,全免费不限次数
【推荐】轻量又高性能的 SSH 工具 IShell:AI 加持,快人一步
· .NET Core 中如何实现缓存的预热?
· 从 HTTP 原因短语缺失研究 HTTP/2 和 HTTP/3 的设计差异
· AI与.NET技术实操系列:向量存储与相似性搜索在 .NET 中的实现
· 基于Microsoft.Extensions.AI核心库实现RAG应用
· Linux系列:如何用heaptrack跟踪.NET程序的非托管内存泄露
· TypeScript + Deepseek 打造卜卦网站:技术与玄学的结合
· 阿里巴巴 QwQ-32B真的超越了 DeepSeek R-1吗?
· 【译】Visual Studio 中新的强大生产力特性
· 10年+ .NET Coder 心语 ── 封装的思维:从隐藏、稳定开始理解其本质意义
· 【设计模式】告别冗长if-else语句:使用策略模式优化代码结构