

python之钩子函数及起始函数作用范围【后置固件yield和终结函数addfinalizer区别】
1 2 3 4 5 6 7 8 9 10 11 12 13 14 15 16 17 18 19 20 21 22 23 24 25 26 27 28 29 30 31 32 33 34 35 36 37 38 39 40 41 42 43 44 45 46 47 48 49 50 51 52 53 54 55 56 57 58 59 60 61 62 63 64 65 66 67 68 69 70 | # coding:utf-8import pytest# 类和方法def setup_module(): print("setup_module:整个.py模块只执行一次") print("比如:所有用例开始前只打开一次浏览器")def teardown_module(): print("teardown_module:整个.py模块只执行一次") print("比如:所有用例结束只最后关闭浏览器")def setup_function(): print("setup_function:每个用例开始前都会执行")def teardown_function(): print("teardown_function:每个用例结束前都会执行") # 只是每个函数,非类def test_one(): print("正在执行----test_one") x = "this" assert ('h' in x)def test_two(): print("正在执行----test_two") x = "hello" assert ('h' in x)class TestCase(): def setup_class(self): print("setup_class:所有用例执行之前") def teardown_class(self): print("teardown_class:所有用例执行结束后执行") def test_three(self): print("正在执行----test_three") x = "this" assert 'h' in x def test_four(self): print("正在执行----test_four") x = "hello" assert 'h' in x@pytest.fixture(autouse=True)def show_request(request): print("\n=======================request start=================================") print("request.module==", request.module) print("request.function==", request.function) print("request.cls==", request.cls) print("request.fspath==", request.fspath) print("request.fixturenames==",request.fixturenames ) print("request.fixturename==", request.fixturename) print("request.scope==", request.scope) print("\n=======================request end=================================")if __name__ == "__main__": pytest.main(["-s", "12.py"]) |
二、【后置固件yield和终结函数addfinalizer区别】
1 2 3 4 5 6 7 8 9 10 11 12 13 14 15 16 17 18 19 20 21 22 23 24 25 26 27 28 29 | # 文件名是test_firstFile.py# coding=utf-8import pytest@pytest.fixture()def myfixture(): print("执行myfixture前半部分") yield print("执行myfixture的后半部分")class Test_firstFile(): def test_one(self, myfixture): print("执行test_one") assert 1 + 2 == 3 def test_two(self): print("执行test_two") assert 1 == 1 def test_three(self): print("执行test_three") assert 1 + 1 == 2if __name__ == "__main__": pytest.main(["-s", "12.py"]) |
结果:测试代码的执行顺序是 固件中yield前的代码–测试用例中的代码–固件中yield后的;如果测试用例中的代码出现异常或者断言失败,并不会影响他的固件中yield后的代码执行;但是如果固件中的yield之前的代码也就是相当于setup部分的带代码,出现错误或断言失败,那么yield后的代码将不会再执行,当然测试用例中的代码也不会执行。 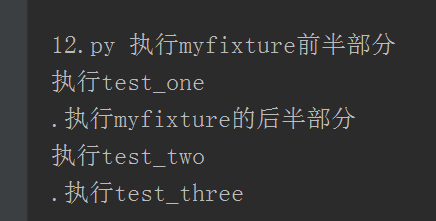
1 2 3 4 5 6 7 8 9 10 11 12 13 14 15 16 17 18 19 20 21 22 23 24 25 26 27 28 29 30 31 32 33 | # test_Pytest.py文件# coding=utf-8import pytest@pytest.fixture()def myfixture(request): print("执行固件myfixture的前半部分") def myteardown(): print("执行固件myfture的后半部分") request.addfinalizer(myteardown)class Test_Pytest(): def test_one(self, myfixture): print("test_one方法执行") assert 1 == 1 def test_two(self): print("test_two方法执行") assert "o" in "love" def test_three(self): print("test_three方法执行") assert 3 - 2 == 1if __name__ == "__main__": pytest.main(["-s", "12.py"]) |
结果:
1 2 3 4 5 | 12.py 执行固件myfixture的前半部分test_one方法执行.执行固件myfture的后半部分test_two方法执行.test_three方法执行 |
注意:注释掉request.addfinalizer(myteardown)后myteardown()函数便不会执行;
1 |


【推荐】国内首个AI IDE,深度理解中文开发场景,立即下载体验Trae
【推荐】编程新体验,更懂你的AI,立即体验豆包MarsCode编程助手
【推荐】抖音旗下AI助手豆包,你的智能百科全书,全免费不限次数
【推荐】轻量又高性能的 SSH 工具 IShell:AI 加持,快人一步
· winform 绘制太阳,地球,月球 运作规律
· AI与.NET技术实操系列(五):向量存储与相似性搜索在 .NET 中的实现
· 超详细:普通电脑也行Windows部署deepseek R1训练数据并当服务器共享给他人
· 上周热点回顾(3.3-3.9)
· AI 智能体引爆开源社区「GitHub 热点速览」