Linux之pxe
一、PXE高效批量网络装机
1.1 PXE概述
-
pxe(preboot execute environment):可以批量安装系统
-
pe:小型的操作系统,在有操作系统的情况下才能再装
pxe是通过网卡引导启动,网卡自带IP地址和tftp
实现的硬件条件
- BIOS支持
- 网卡支持PXE
- 需要在bios中开启开关,服务器一般没打开(bmc界面里打开)
- 网络中有一台DHCP服务器以便为客户机自动分配地址、指定引导文件位置,网卡自带DHCP功能,dhcp指明分配的IP地址
- 服务器通过tftp服务(简单文件传输协议)来提供系统内核和引导镜像的下载
1.2 PXE批量部署的优点
- 规模化:同时装配多台服务器
- 自动化:安装系统、配置各种服务
- 远程实现:不需要光盘、U盘等安装介质
启动操作系统三种方式
- 硬盘
- 光驱(u盘)
- 网络启动 (pxe)
四大文件
-
pxelinux.cfg
-
isolinux.cfg:启动菜单的配置文件,当光盘启动后(即运行isolinux.bin),会自动去找isolinux.cfg文件
-
vmlinuz:是内核映像
-
initrd.img:ramfs文件(精简版的linux系统,文件系统驱动等)
1.3 实现PXE启动过程
- 网卡需要查找相关的dhcp服务器(获取地址时间)
- 找到后dhcp服务器提供ip地址,和引导程序(boot loader)的地址 还提供给客户机TFTPserver地址(dhcp本身不提供tftp服务)
- 网卡使用tftp客户端吧引导程序加载到内存中来
- bios执行引导程序
- 引导程序会去TFTP去查找配置文件
- 根据配置文件去引导安装系统
- 系统安装过程
1.4 搭建过程中服务详解
- TFTP服务
TFTP(简单文件传输协议):内核和引导文件
基于UDP实现的用于在客户机和服务器之间进行简单文件传输的协议,适合于小型文件传输的应用场合,使用UDP69端口
- vsftp服务
可以使用http、ftp等方式共享文件安装
- syslinux
syslinux是一个功能强大的引导加载程序,兼容各种介质
- DHCP
1.5 kickstart 无人值守安装
- kickstart无人值守技术
- 创建应答文件,预先定义好
kickstart文件主要包括三个部分:
- 命令段:指明各种安装前配置,如键盘类型等
- 程序包段:指明要安装的程序包组或程序包,不安装的程序包等
- 脚本段:
- %pre: 安装前脚本
- %post: 安装后脚本
二、操作
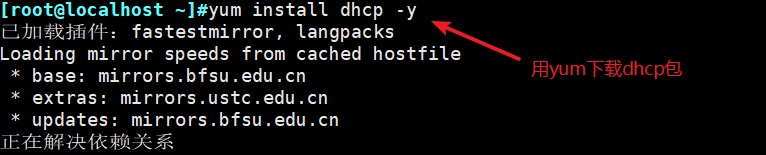
[root@localhost ~]#systemctl stop firewalld
[root@localhost ~]#setenforce 0
[root@localhost ~]#yum install dhcp -y
[root@localhost ~]#cp /usr/share/doc/dhcp-4.2.5/dhcpd.conf.example /etc/dhcp/dhcpd.conf
cp:是否覆盖"/etc/dhcp/dhcpd.conf"? y
[root@localhost ~]#cd /etc/dhcp/
[root@localhost dhcp]#ls
dhclient.d dhclient-exit-hooks.d dhcpd6.conf dhcpd.conf scripts
[root@localhost dhcp]#vim dhcpd.conf
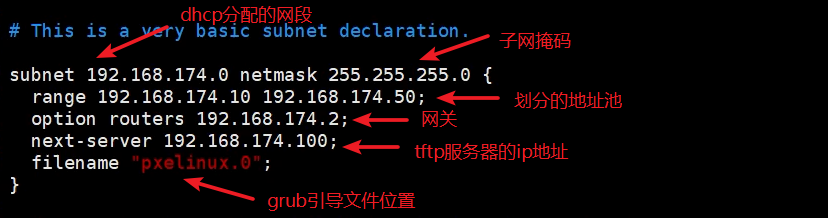
32 subnet 192.168.174.0 netmask 255.255.255.0 {
33 range 192.168.174.10 192.168.174.50;
34 option routers 192.168.174.2;
35 next-server 192.168.174.100;
36 filename "pxelinux.0";
37 }
[root@localhost dhcp]#systemctl start dhcpd
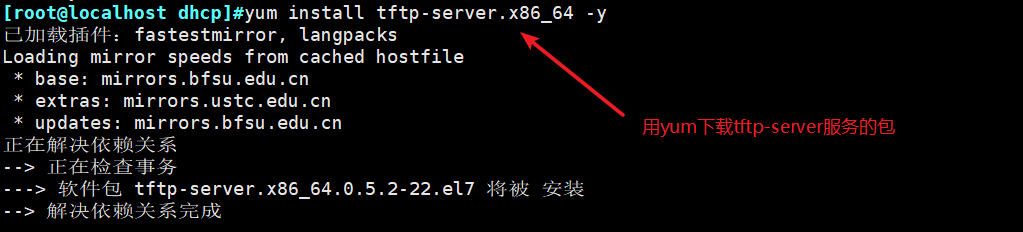
[root@localhost dhcp]#yum install tftp-server.x86_64 -y
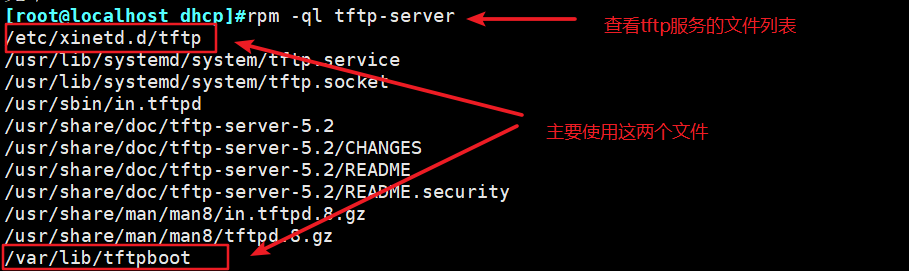
[root@localhost dhcp]#rpm -ql tftp-server
/etc/xinetd.d/tftp
/usr/lib/systemd/system/tftp.service
/usr/lib/systemd/system/tftp.socket
/usr/sbin/in.tftpd
/usr/share/doc/tftp-server-5.2
/usr/share/doc/tftp-server-5.2/CHANGES
/usr/share/doc/tftp-server-5.2/README
/usr/share/doc/tftp-server-5.2/README.security
/usr/share/man/man8/in.tftpd.8.gz
/usr/share/man/man8/tftpd.8.gz
/var/lib/tftpboot
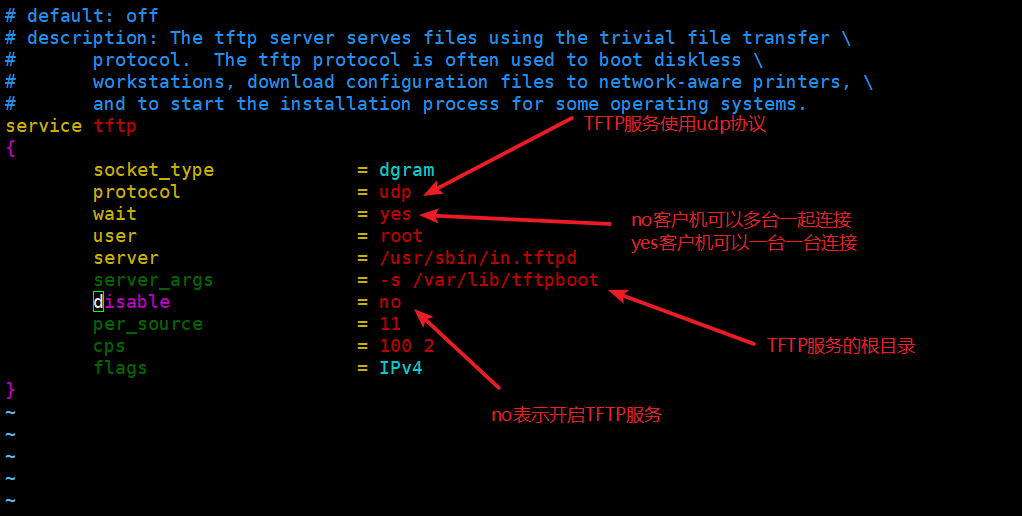
[root@localhost dhcp]#vim /etc/xinetd.d/tftp
# default: off
# description: The tftp server serves files using the trivial file transfer \
# protocol. The tftp protocol is often used to boot diskless \
# workstations, download configuration files to network-aware printers, \
# and to start the installation process for some operating systems.
service tftp
{
socket_type = dgram
protocol = udp
wait = yes
user = root
server = /usr/sbin/in.tftpd
server_args = -s /var/lib/tftpboot
disable = no
per_source = 11
cps = 100 2
flags = IPv4
}
[root@localhost dhcp]#systemctl start tftp
[root@localhost dhcp]#cd /var/lib/tftpboot
[root@localhost tftpboot]#pwd
/var/lib/tftpboot
[root@localhost tftpboot]#mount /dev/sr0 /mnt
mount: /dev/sr0 写保护,将以只读方式挂载
[root@localhost tftpboot]#ls /mnt
CentOS_BuildTag EFI EULA GPL images isolinux LiveOS Packages repodata RPM-GPG-KEY-CentOS-7 RPM-GPG-KEY-CentOS-Testing-7 TRANS.TBL
[root@localhost tftpboot]#cd /mnt/isolinux
[root@localhost isolinux]#ls
boot.cat boot.msg grub.conf initrd.img isolinux.bin isolinux.cfg memtest splash.png TRANS.TBL vesamenu.c32 vmlinuz
[root@localhost /]#cd /var/lib/tftpboot
[root@localhost tftpboot]#cp /mnt/isolinux/vmlinuz /var/lib/tftpboot
[root@localhost tftpboot]#cp /mnt/isolinux/initrd.img /var/lib/tftpboot
[root@localhost tftpboot]#ls
initrd.img vmlinuz
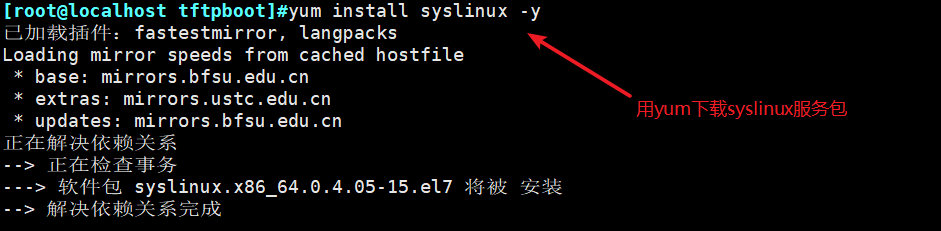
[root@localhost tftpboot]#yum install syslinux -y
[root@localhost tftpboot]#rpm -ql syslinux | grep pxelinux
/usr/share/doc/syslinux-4.05/pxelinux.txt
/usr/share/syslinux/gpxelinux.0
/usr/share/syslinux/gpxelinuxk.0
/usr/share/syslinux/pxelinux.0
[root@localhost tftpboot]#cp /usr/share/syslinux/pxelinux.0 .
[root@localhost tftpboot]#ls
initrd.img pxelinux.0 vmlinuz
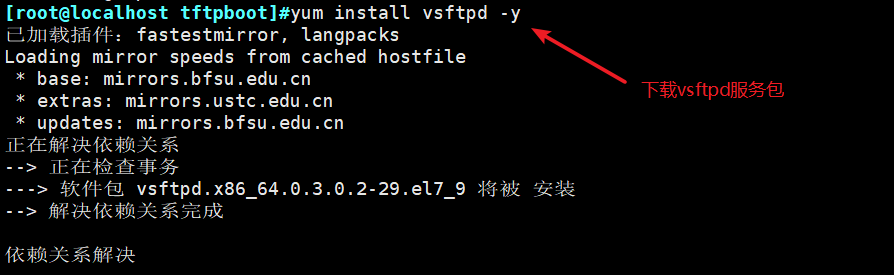
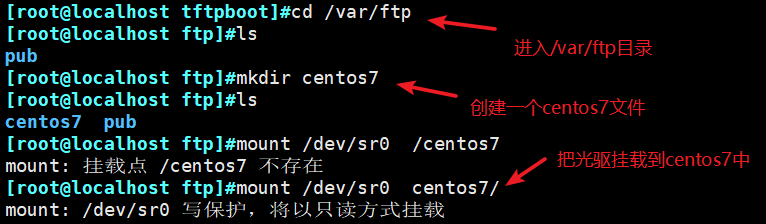
[root@localhost tftpboot]#yum install vsftpd -y
[root@localhost tftpboot]#cd /var/ftp
[root@localhost ftp]#ls
pub
[root@localhost ftp]#mkdir centos7
[root@localhost ftp]#ls
centos7 pub
[root@localhost ftp]#mount /dev/sr0 centos7/
mount: /dev/sr0 写保护,将以只读方式挂载
[root@localhost ftp]#ls centos7/
CentOS_BuildTag EFI EULA GPL images isolinux LiveOS Packages repodata RPM-GPG-KEY-CentOS-7 RPM-GPG-KEY-CentOS-Testing-7 TRANS.TBL
[root@localhost ftp]#cd -
/var/lib/tftpboot
[root@localhost tftpboot]#mkdir pxelinux.cfg
[root@localhost tftpboot]#ls
initrd.img pxelinux.0 pxelinux.cfg vmlinuz
[root@localhost tftpboot]#cd pxelinux.cfg
[root@localhost pxelinux.cfg]#ls
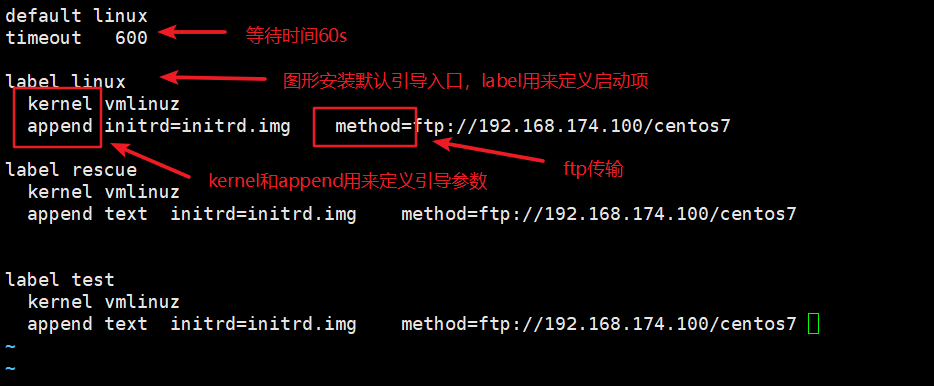
[root@localhost pxelinux.cfg]#vim default
default linux
timeout 600
label linux
kernel vmlinuz
append initrd=initrd.img method=ftp://192.168.174.100/centos7 ks=ftp://192.168.174.100/ks.cfg
label rescue
kernel vmlinuz
append text initrd=initrd.img method=ftp://192.168.174.100/centos7 ks=ftp://192.168.174.100/ks.cfg
label test
kernel vmlinuz
append text initrd=initrd.img method=ftp://192.168.174.100/centos7 ks=ftp://192.168.174.100/ks.cfg
[root@localhost pxelinux.cfg]#systemctl start vsftpd
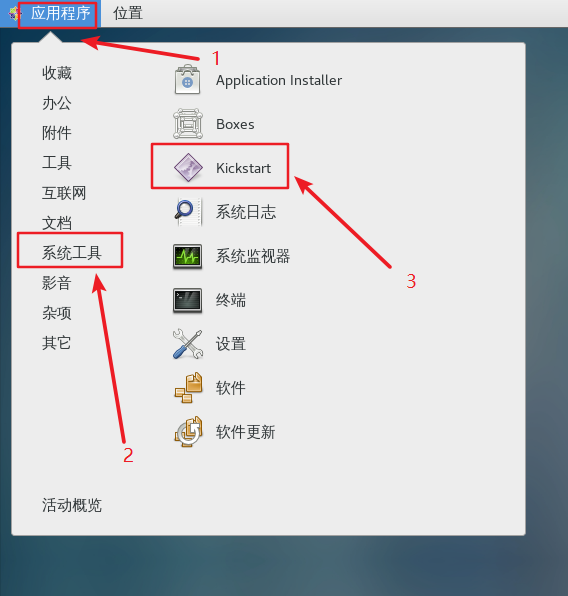
[root@localhost pxelinux.cfg]#yum install system-config-kickstart -y
-
首先关闭服务器的防火墙和selinux

-
用yum下载dhcp包
-
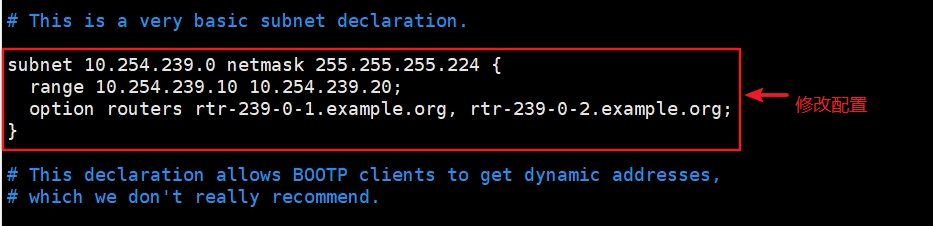
打开dhcp的主配置文件

-
修改配置
-
dhcp主配置文件修改成功
-
启动dhcp服务

-
下载tftp服务包
-
查看tftp文件列表
-
进入文件

-
配置tftp配置文件
-
启动tftp服务

-
显示tftp的根目录

-
挂载

-
进入isolinux

-
复制文件打根目录

-
下载syslinux包
-
复制文件到根目录

-
下载vsftpd包
-
把光驱挂载到varftp
-
创建default

-
default配置
-
启动vsftpd服务

-
下载kickstart图形化

-
打开kick
-
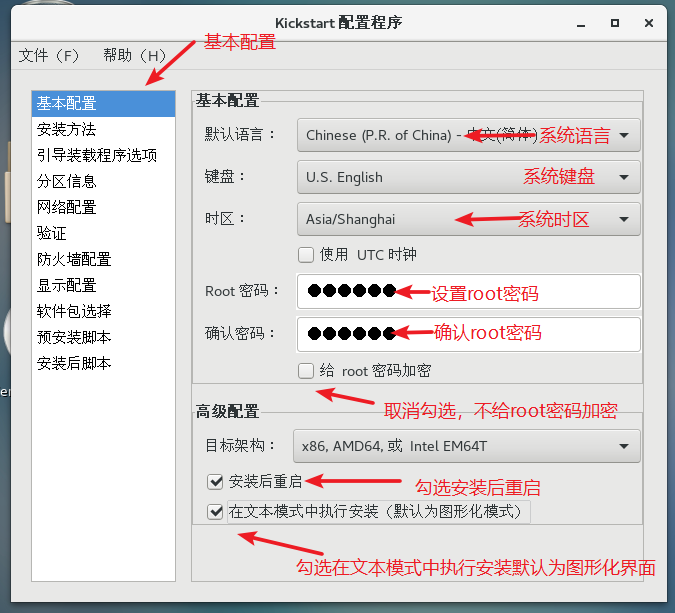
基本配置
-
安装方法
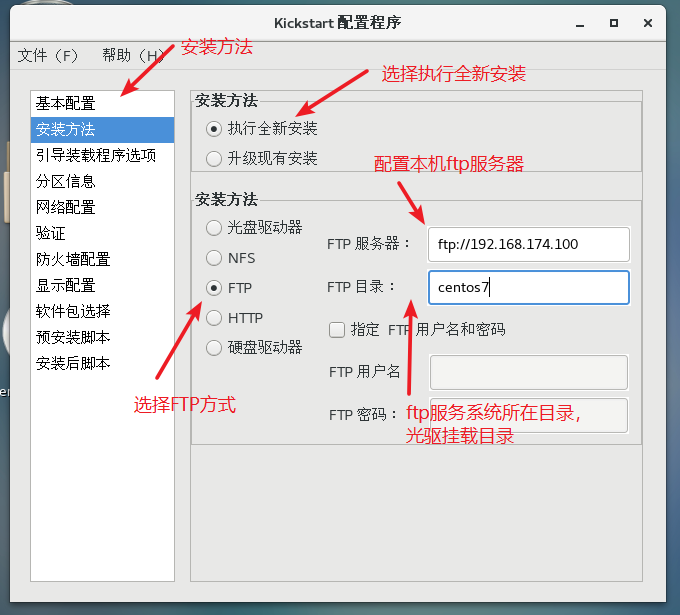
-
引导装载程序选项
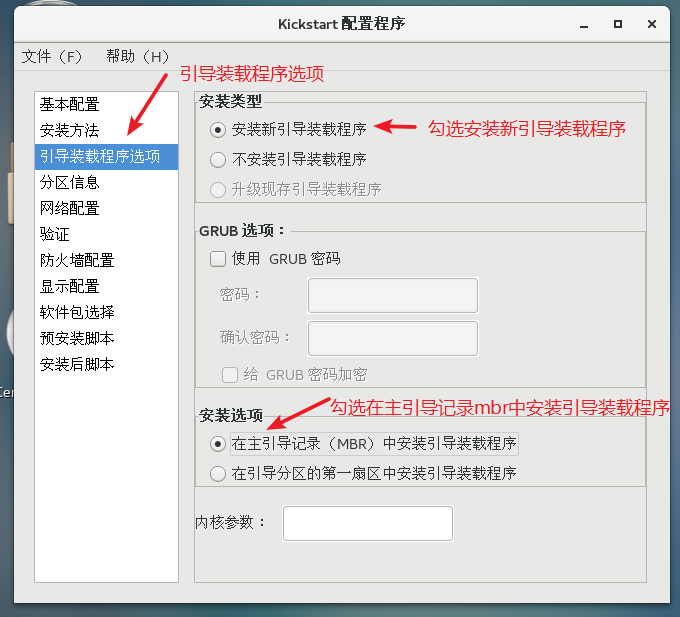
-
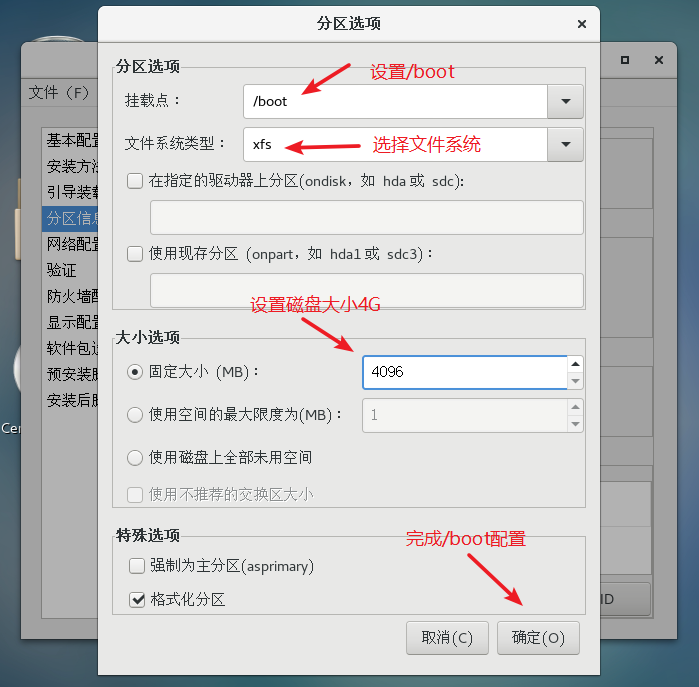
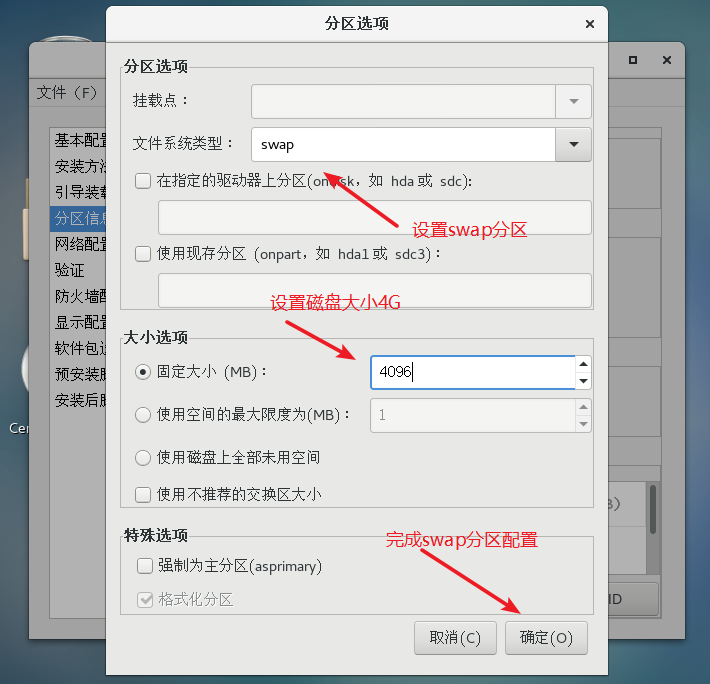
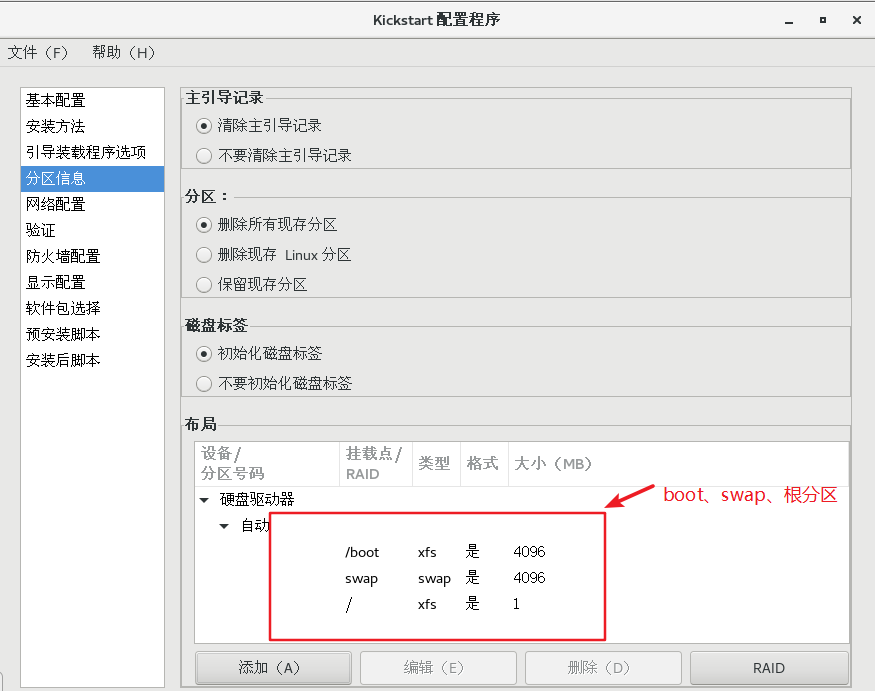
分区信息

-
boot
-
swap
-
根

-
分区
-
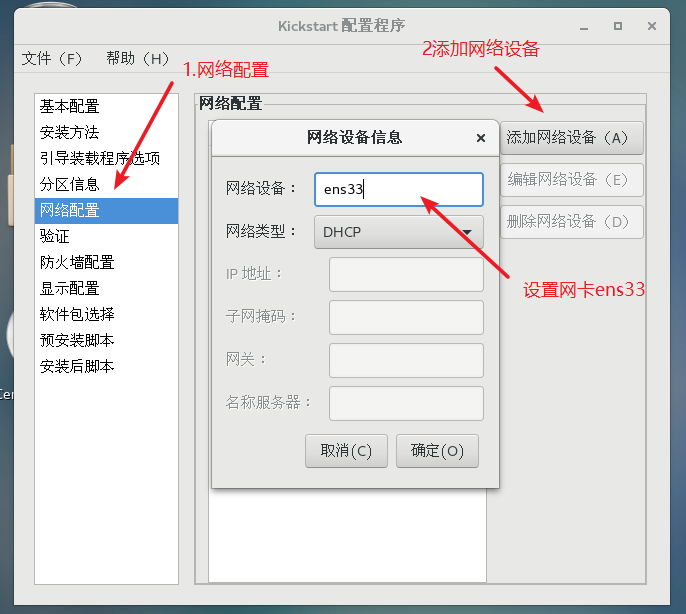
添加网络配置
-
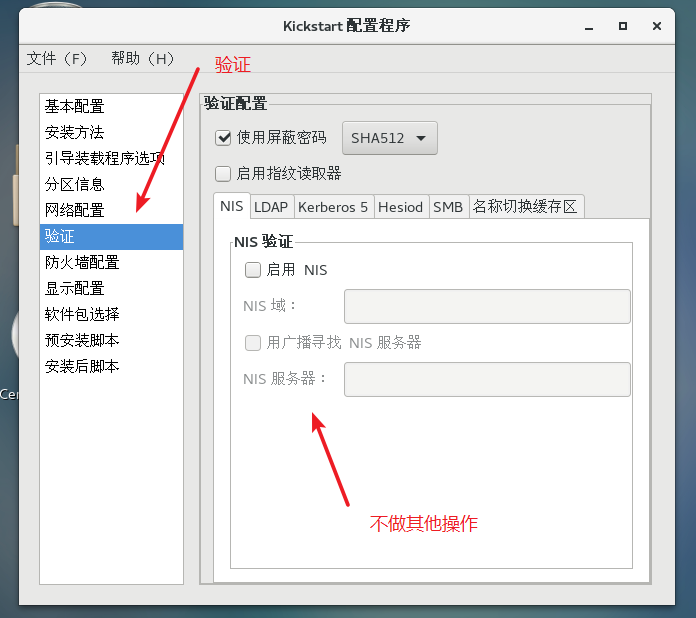
验证
-
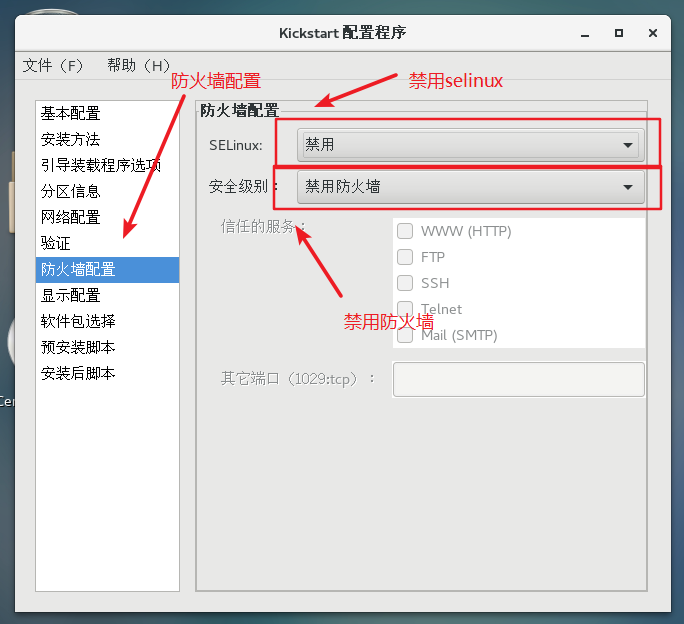
防火墙
-
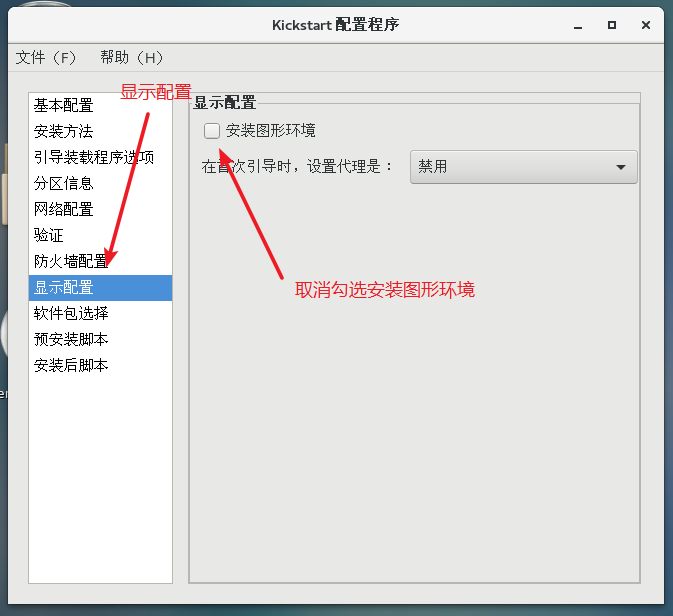
显示配置
-
预装和脚本

-
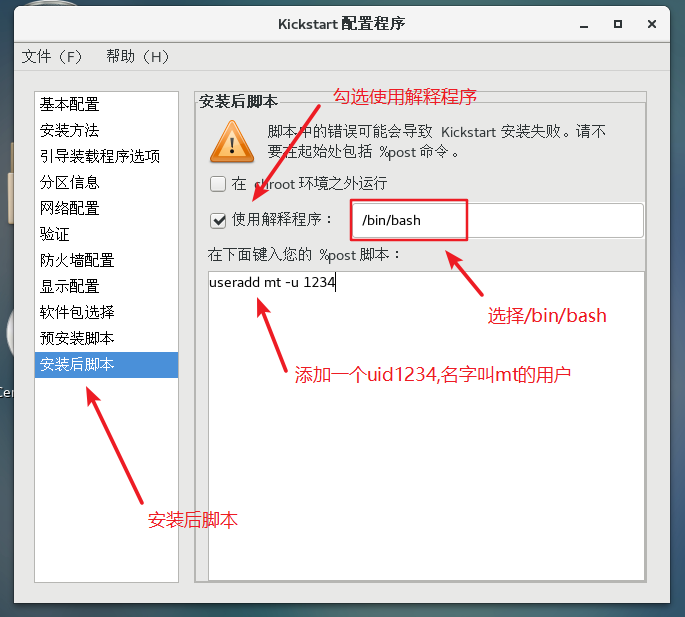
安装后脚本
-
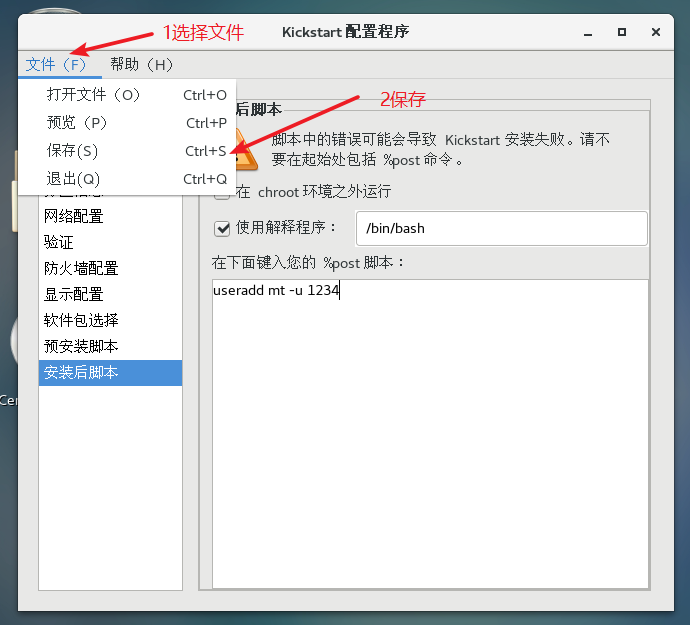
保存
-
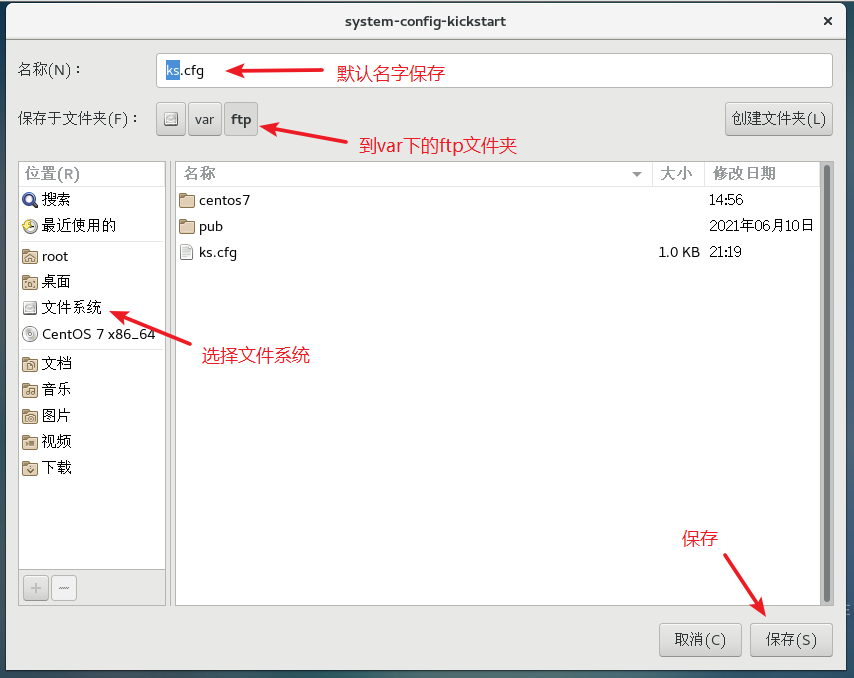
ks.cfg
-
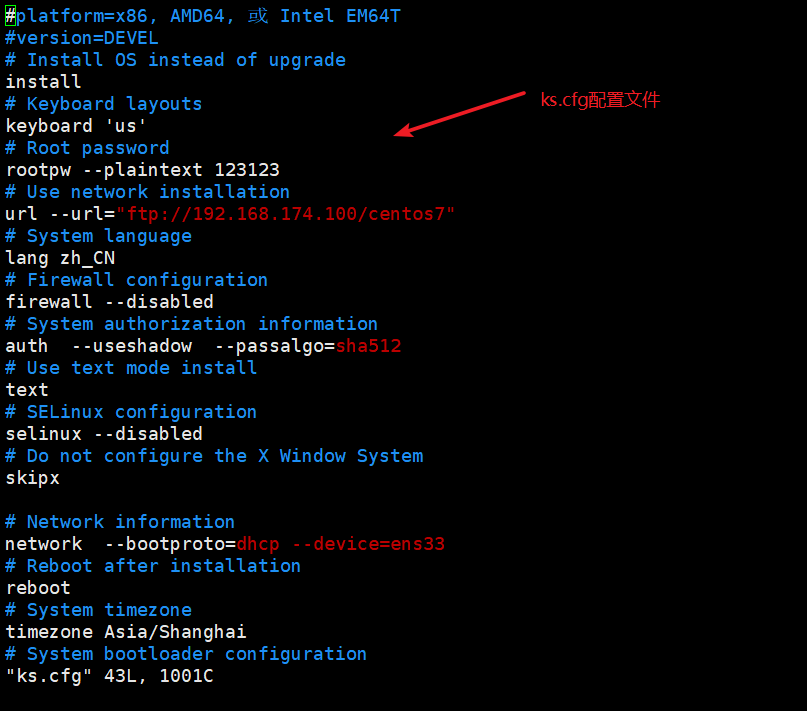
查看ks.cfg

-
ks.cfg配置文件
-
把ks.cfg添加到default中

-
添加

-
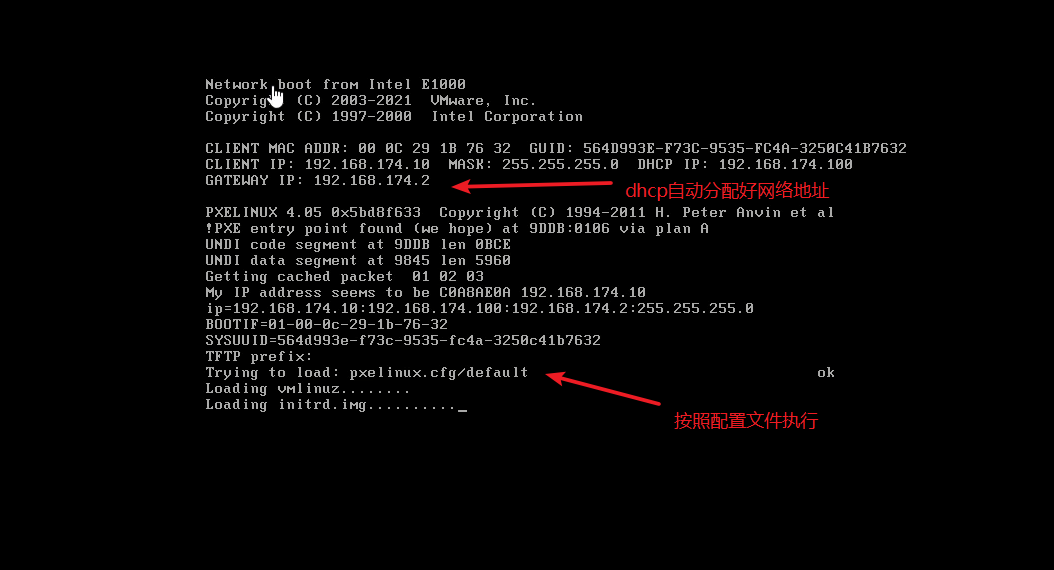
加载
-
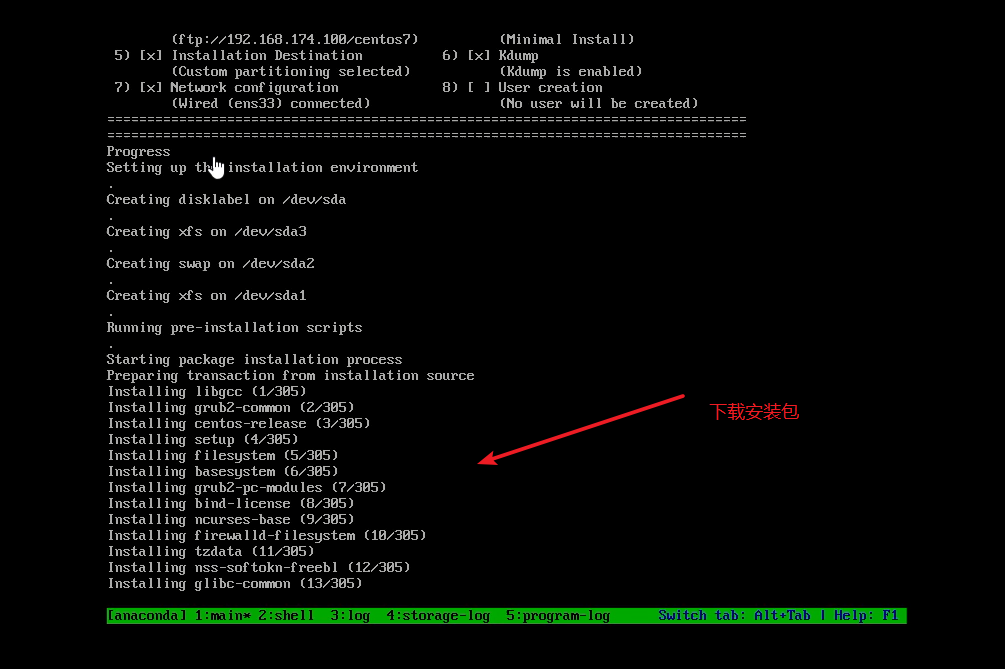
下载包
-
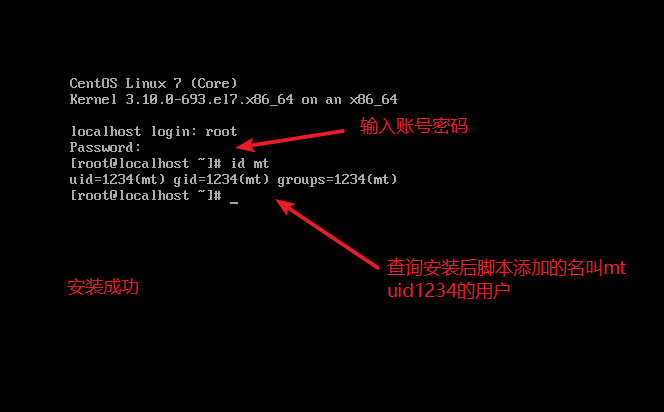
安装成功

 浙公网安备 33010602011771号